Manage tickets
Tickets can be also managed from the backend area as in the frontend area.
The Manage Tickets tab is accessible via the following path: backend > Components > RSTickets!Pro > Manage Tickets.
Listing
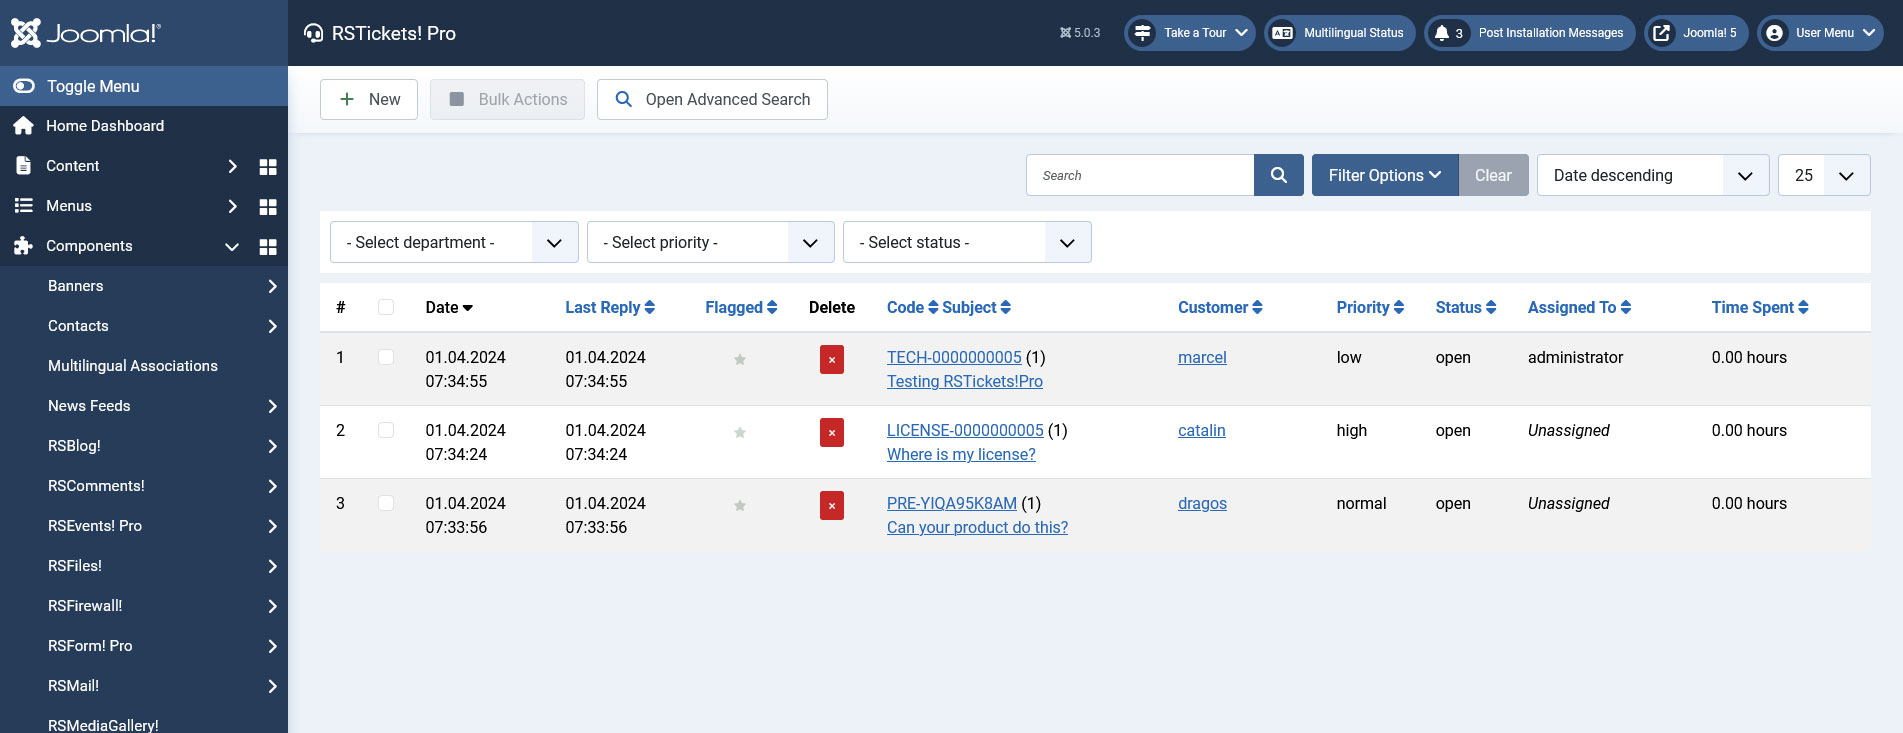
The tab, first displays a list of current tickets with the following basing information: Date, Last reply, Flagged, Delete, Ticket code and Subject, Customer, Priority, Status, who is assigned to and the Time spent to resolve the ticket (if this is enabled in the Configuration area). Next will provide a description of each listing column:
- Date: the date on which the ticket was submitted. Note that the global Joomla! time settings are taken into consideration when recording the date: Site >> Global Configuration >> Server: Time zone
- Last reply: when the last reply was added
- Flagged: assigns a certain semantic value to that particular ticket, for example: VIP or urgent. Other then this, flagged tickets can be filtered out separately within your display filters.
- Delete: button to delete the ticket
- Ticket code and Subject: the ticket unique code and its subject
- Customer: the customer who has submitted the ticket
- Priority: the priority of the ticket
- Status: status of the ticket. By default: open/on-hold/closed
- Assigned to: what staff member is handling the ticket in question
- Time spent: the total time spent to resolve the ticket
Tickets can also be exported in a CSV format file. The export does not include ticket custom fields information.
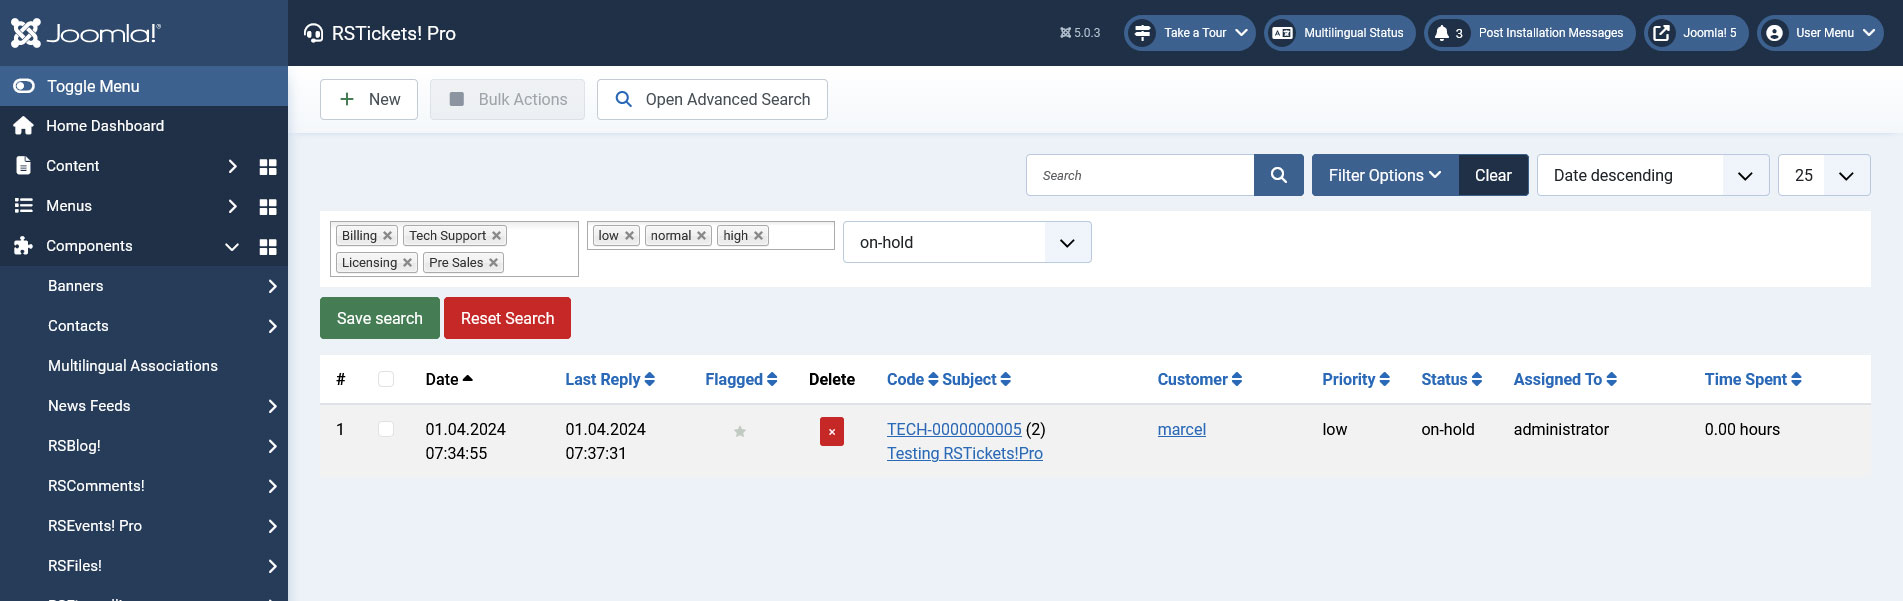
Ticket Filtering Options
The ticket listing also incorporates quick filters. You can filter the tickets based on the Departments, Priorities, Statuses, From Date and To Date (this allows you to search in a date interval).
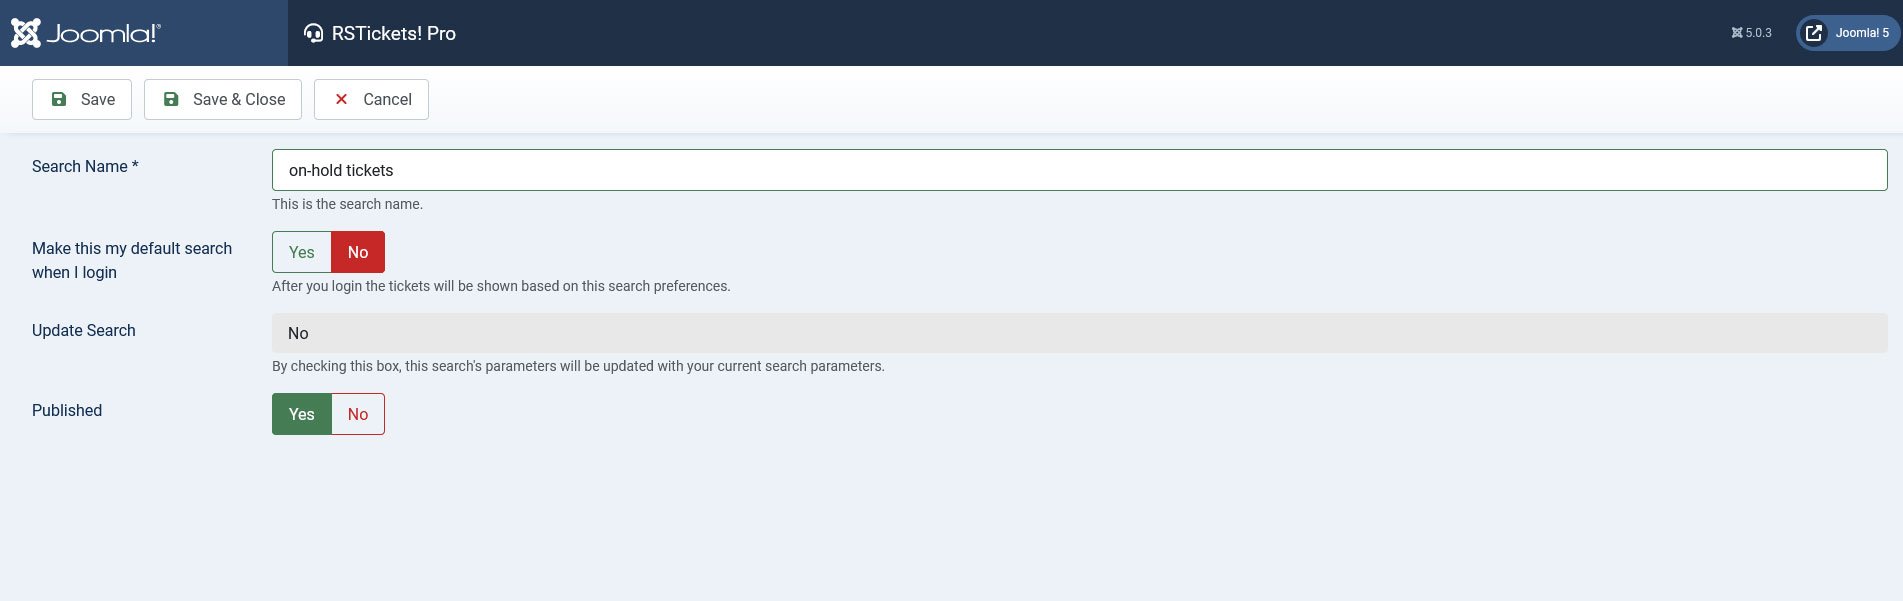
A new and interesting feature is the possibility to save search filters. Whenever you filter out the tickets you can save it along possibility to make it default. This will imply that every time you load the listing tickets page it will apply the filter. All other saved filters can be applied by simply clicking on them.

Clicking on the Customer name will open the default Joomla! edt user area. This is particularity useful since, RSTickets! is automatically creating users.
Edit a Ticket
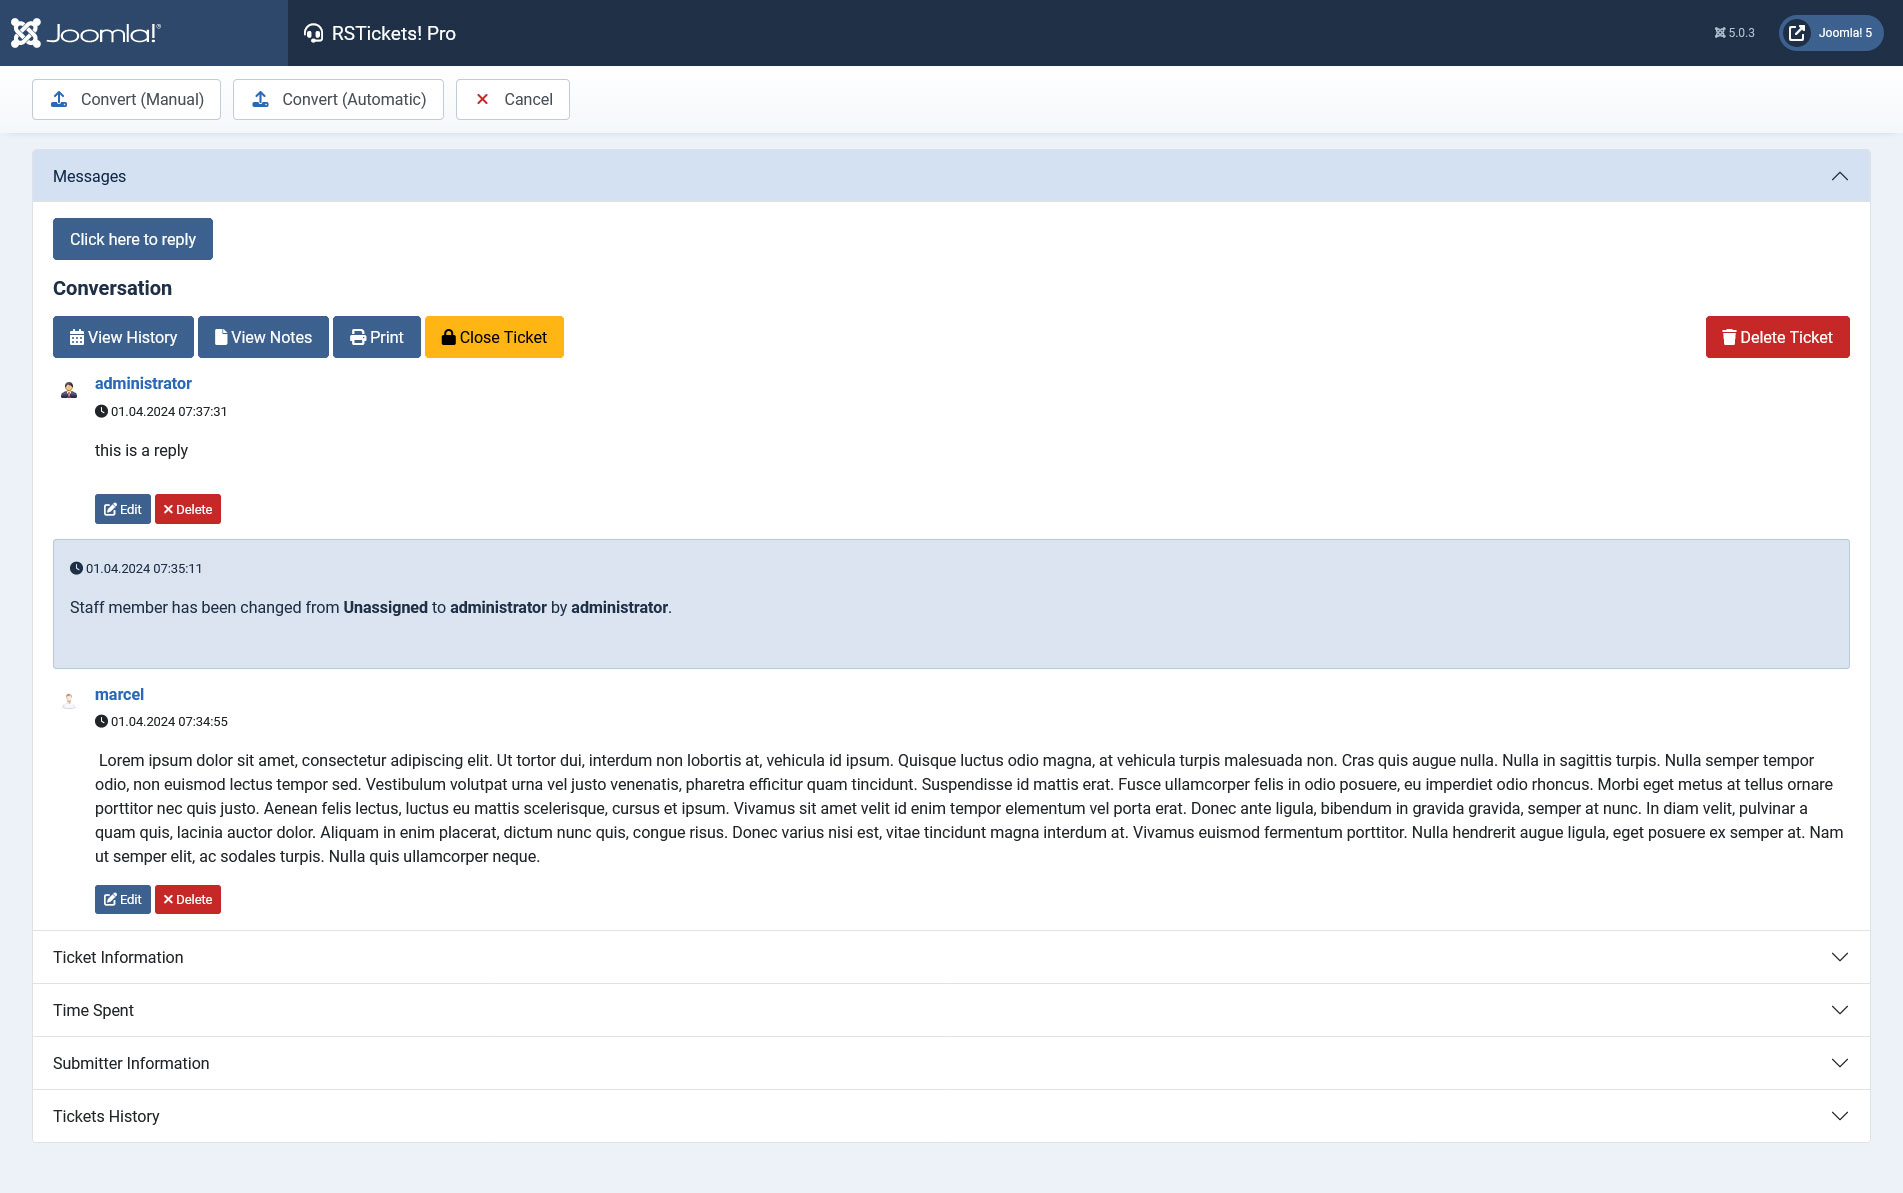
Last, but not least, clicking on the Ticket subject or Ticket code will open the actual ticket. All kinds of operations can be performed here, but it is to be noted that the staff group permissions will be applied here too. Here you can: delete a reply, edit edit, add a reply, view ticket history, view ticket notes, print, ticket information and custom fields information. The ticket view is divided into four tabs: Messages, Ticket Information, Submitter Information and Tickets History.
Messages tab
Here you can add a reply, remove a reply, view notes, print and close ticket.
The View notes feature has just been introduced and provides a helper function to the staff member. Basically the staff can leave special notes for the ticket that will not be viewed by the user.
Clicking on the Print icon will allow the user to print the current ticket. This represent a stripped view of all the ticket details.
The Click here to add a reply will display the an area as can be seen below. Clicking and typing inside the Knowledgebase field will trigger a search function, that will provide articles that related to typed in words. The attachment field will only appear if this option is enabled on the department configuration (Components > RSTickets!Pro > Departments > Uploads). The staff member can also enable or disable the signature. This will be added to the ticket reply if enabled.
Clicking on the View notes link will open a modal window that will display the following information: Who viewed this ticket, Date and IP Address. This basically provides a logging utility to each ticket.
CSS classes are added for the customer and staff message reply containers, com-rsticketspro-msg-customer and com-rsticketspro-msg-staff. Customize these classes in your template's default CSS file to better differentiate between the two containers.
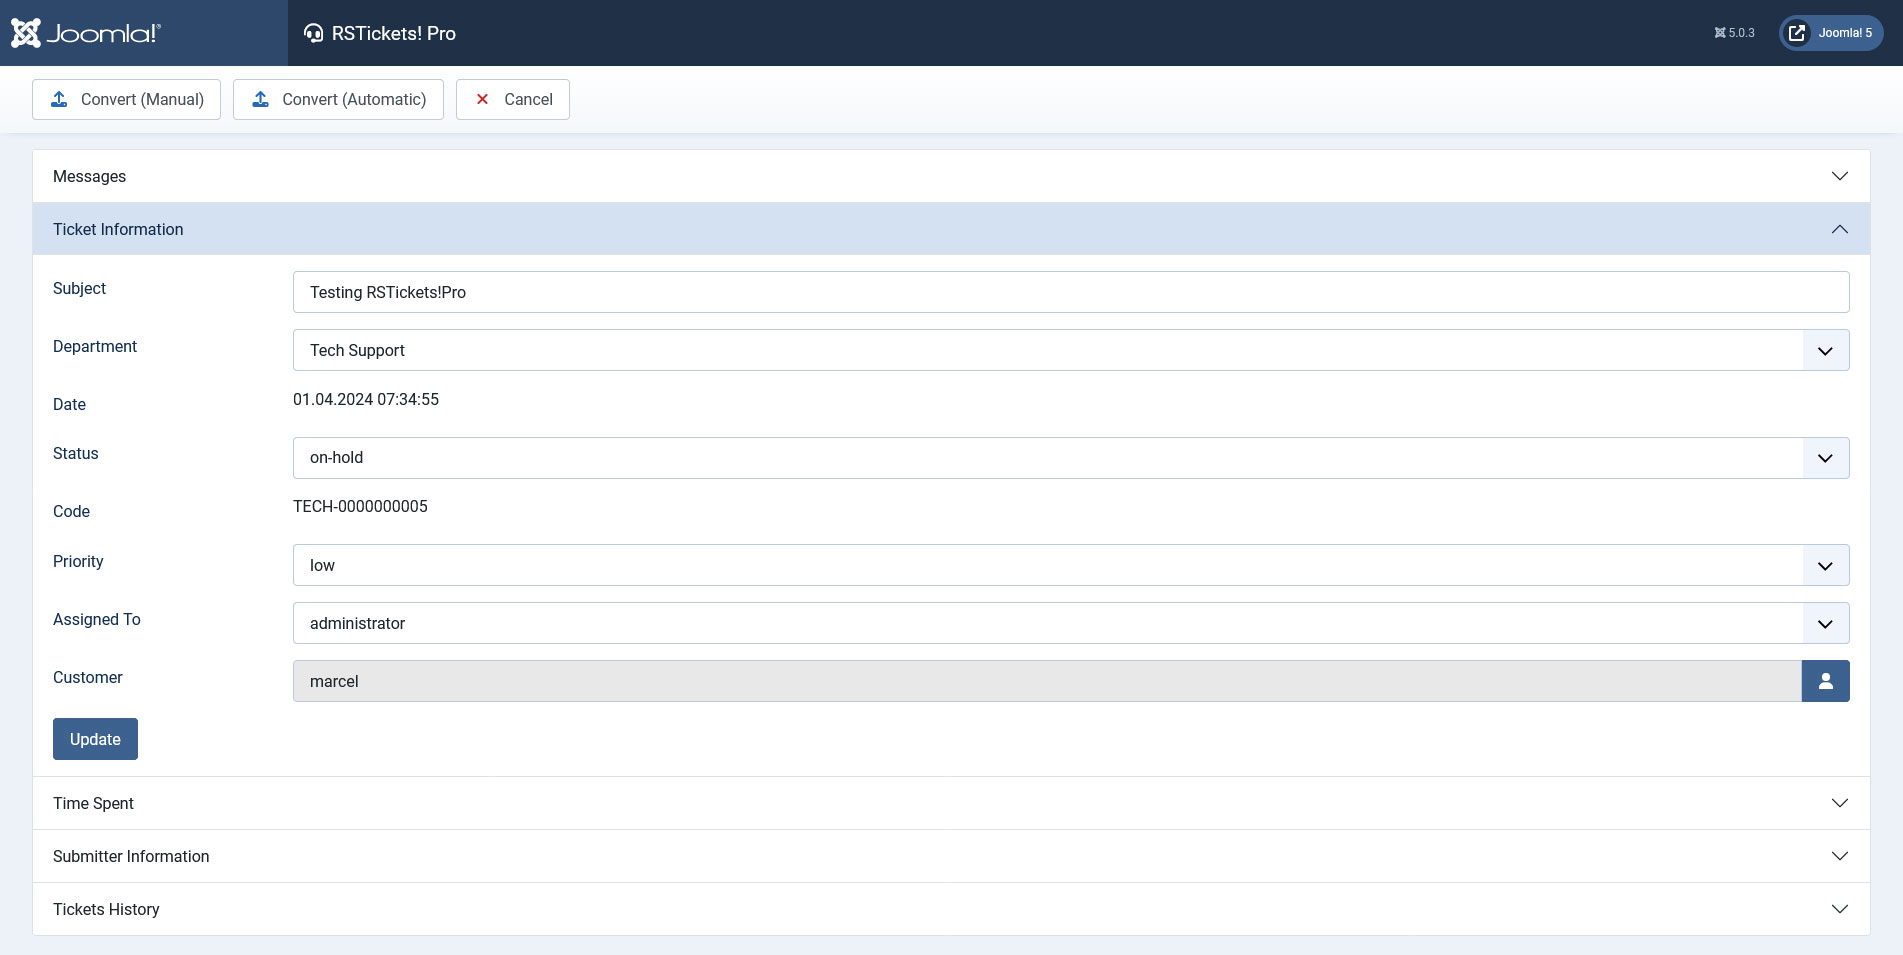
Ticket Information tab
- Subject: the ticket subject
- Department: the name of the department
- Date: the date of the ticket submission
- Status: the status of the ticket
- Code: the unique code of the ticket
- Priority: the current priority of the ticket
- Assigned To: what staff member handles the ticket
- Customer: the name of the customer
- Alternative email: if enabled, the added alternative email will be prompted here.
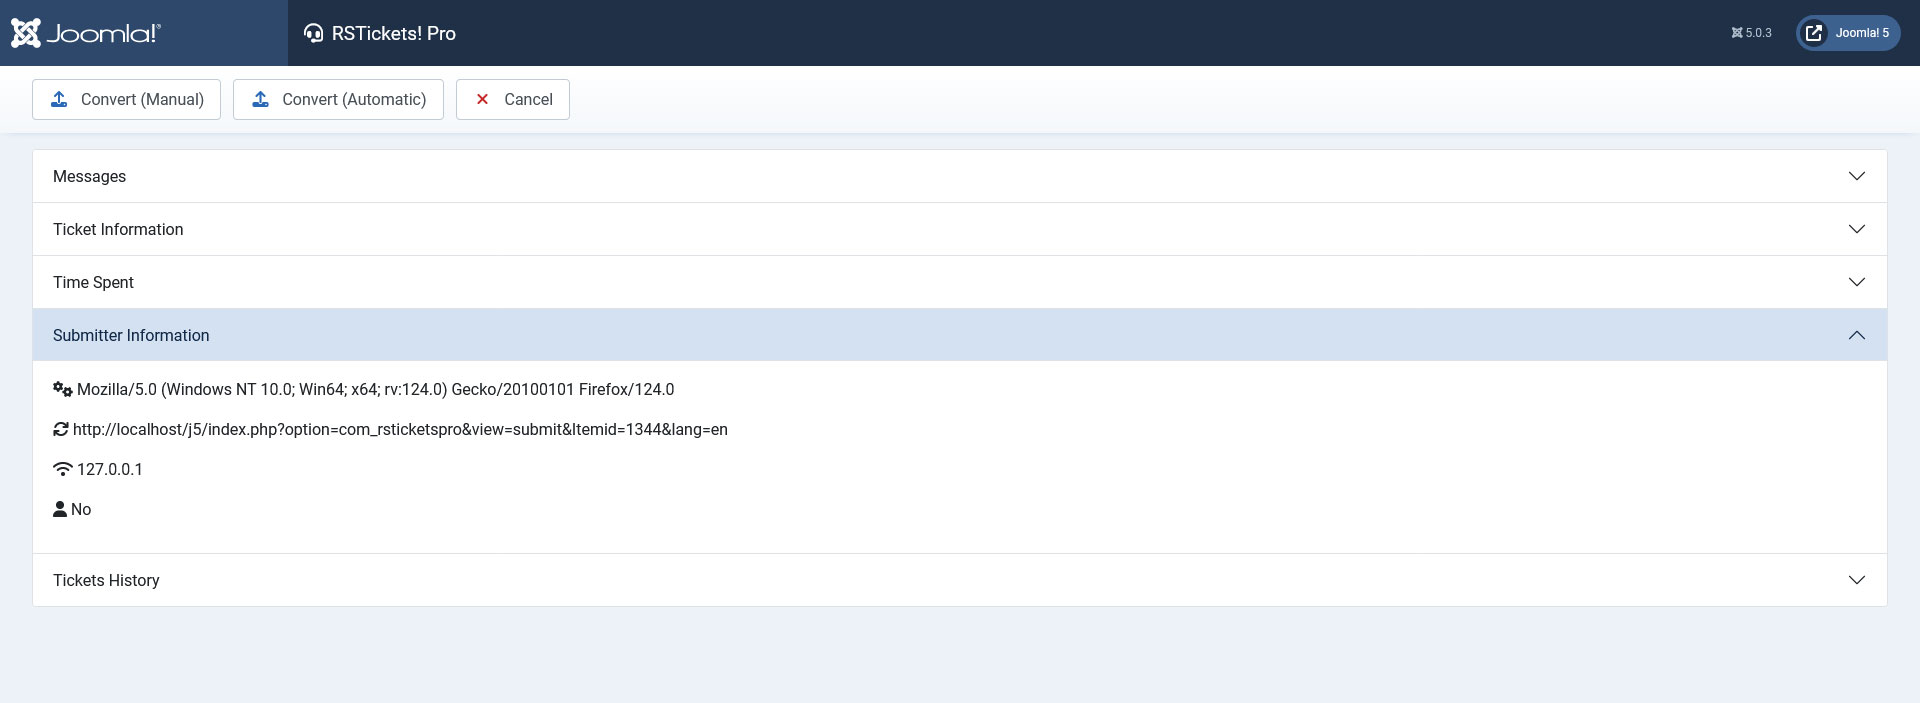
Submitter Information tab
- User Agent: PHP user agent
- HTTP Referrer: the page that customer last visited before submitting the ticket
- IP Address: the IP address of the ticket submitter
- Was logged in: Yes / No
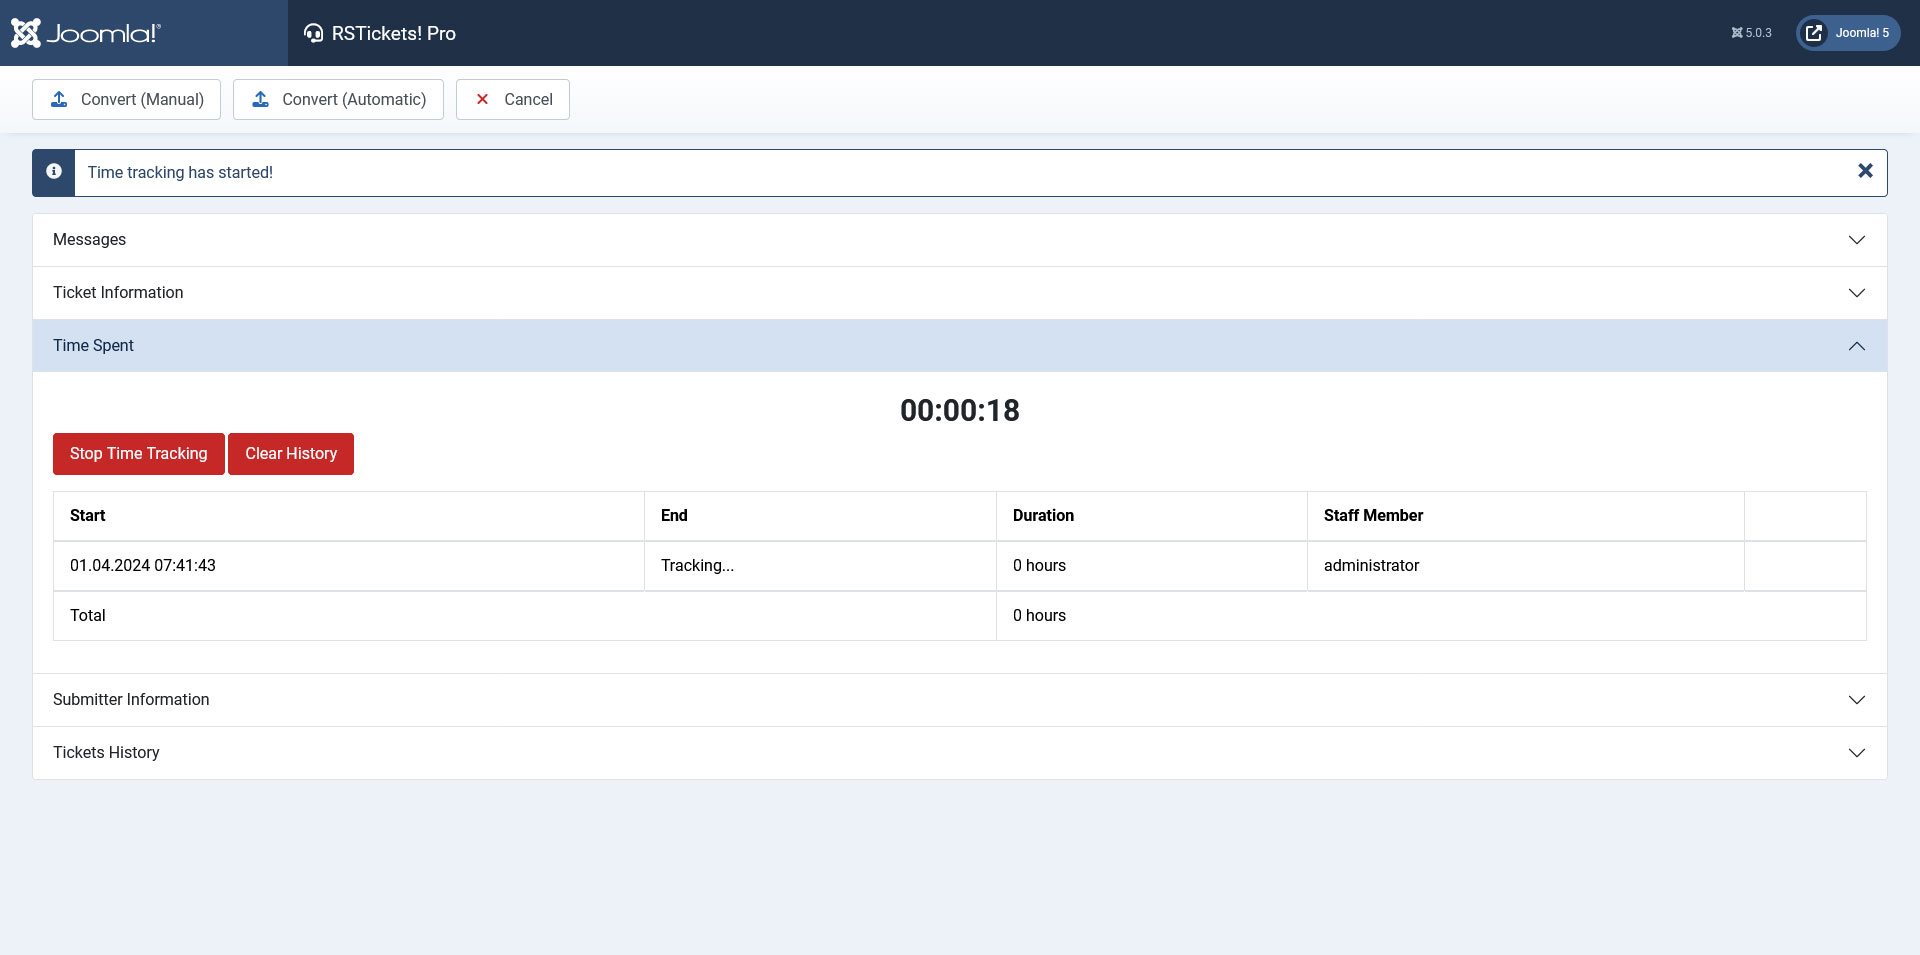
Time spent tab
The time spent area displays the amount of time until the ticket has been resolved. For this tab to be available, you will need to enable it from Configurationa area > Tickets tab > Time spent area.
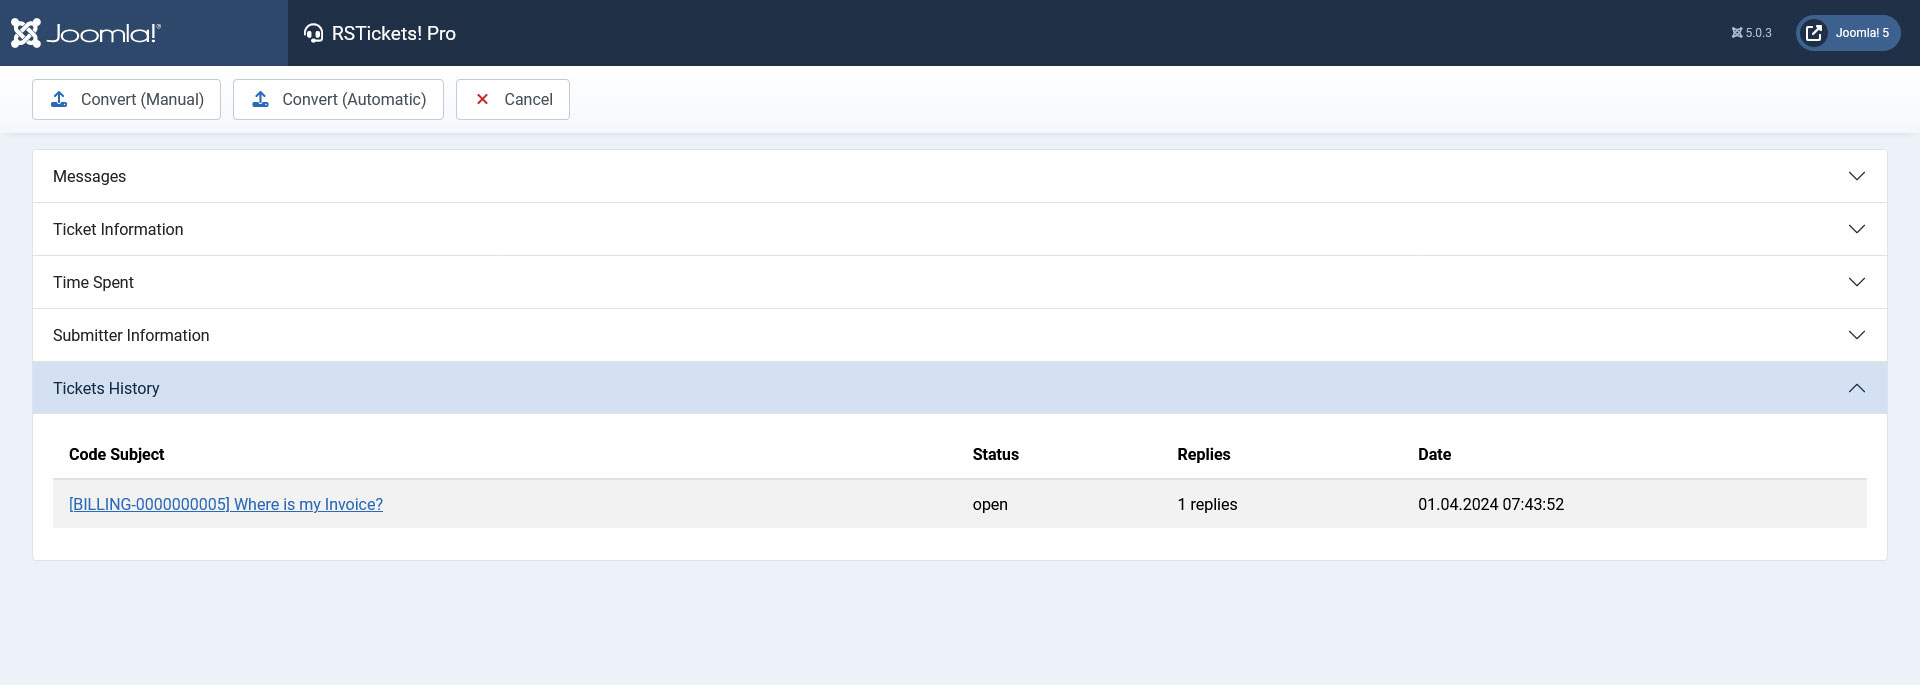
Tickets history
The tickets history area provides a listing of all tickets for that particular user (all statuses). The listing includes a link to the ticket, status, number of replies, date and ticket subject, who viewed, closed / opened the ticket, when it was notified and auto-closed.
11 persons found this article helpful.
You Should Also Read
Configuration HOT |
Departments HOT |
Email Messages HOT |
RSTickets!Pro Menu Items HOT |
What is RSTickets!Pro ? HOT |