How to get Google Analytics API Keys
In this tutorial we will explain how you can enable Google Analytics within RSSeo! and how to get your keys required for authentication.
You'll need at least RSSeo! version 1.18.19 (changelog), otherwise, updating your extension can be done as instructed here.
Steps you need to take:
-
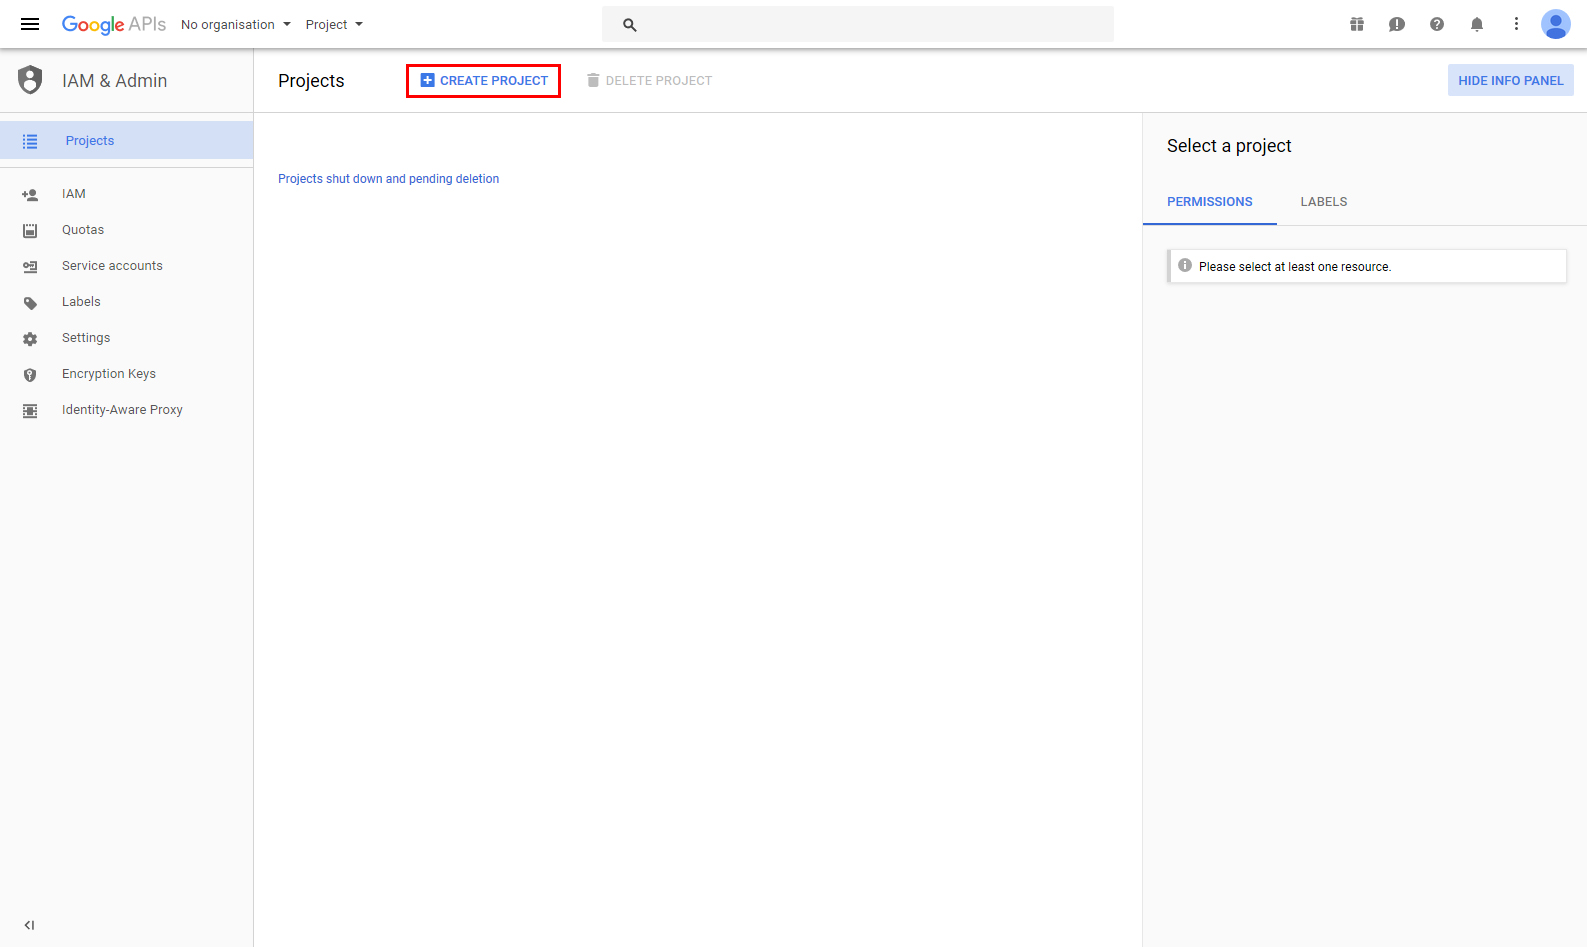
Access Google APIs Console.
-
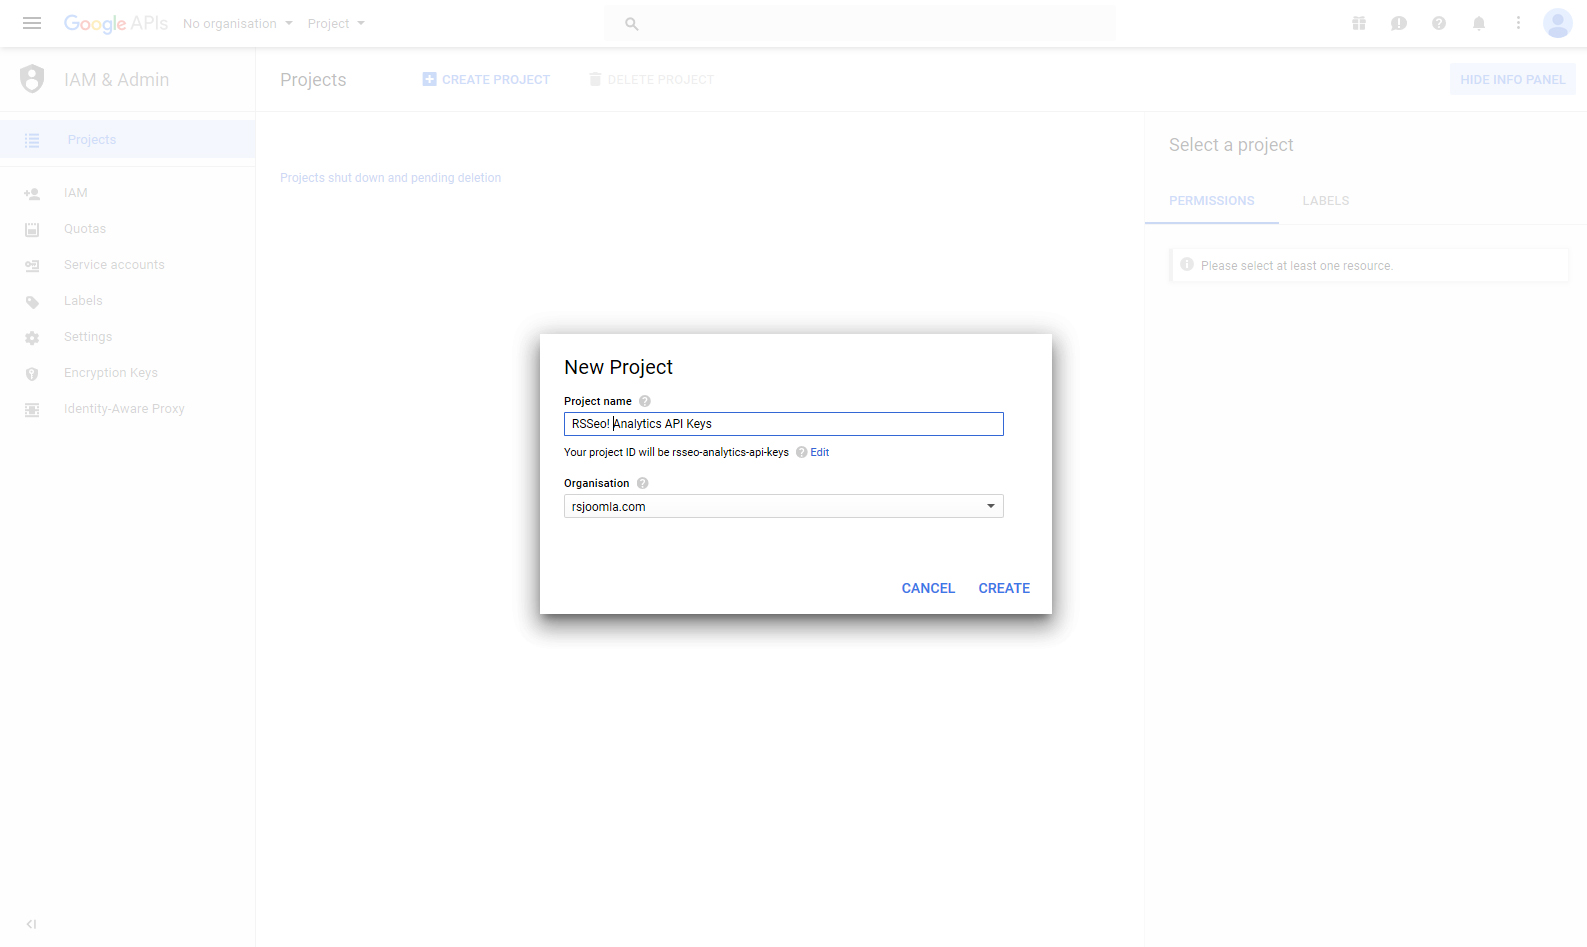
Login using your Google account and Create a new Project.
-
Add a project name and click on the "Create" button (wait a few moments after you click the create button to load your project, otherwise you can manually select it).
-
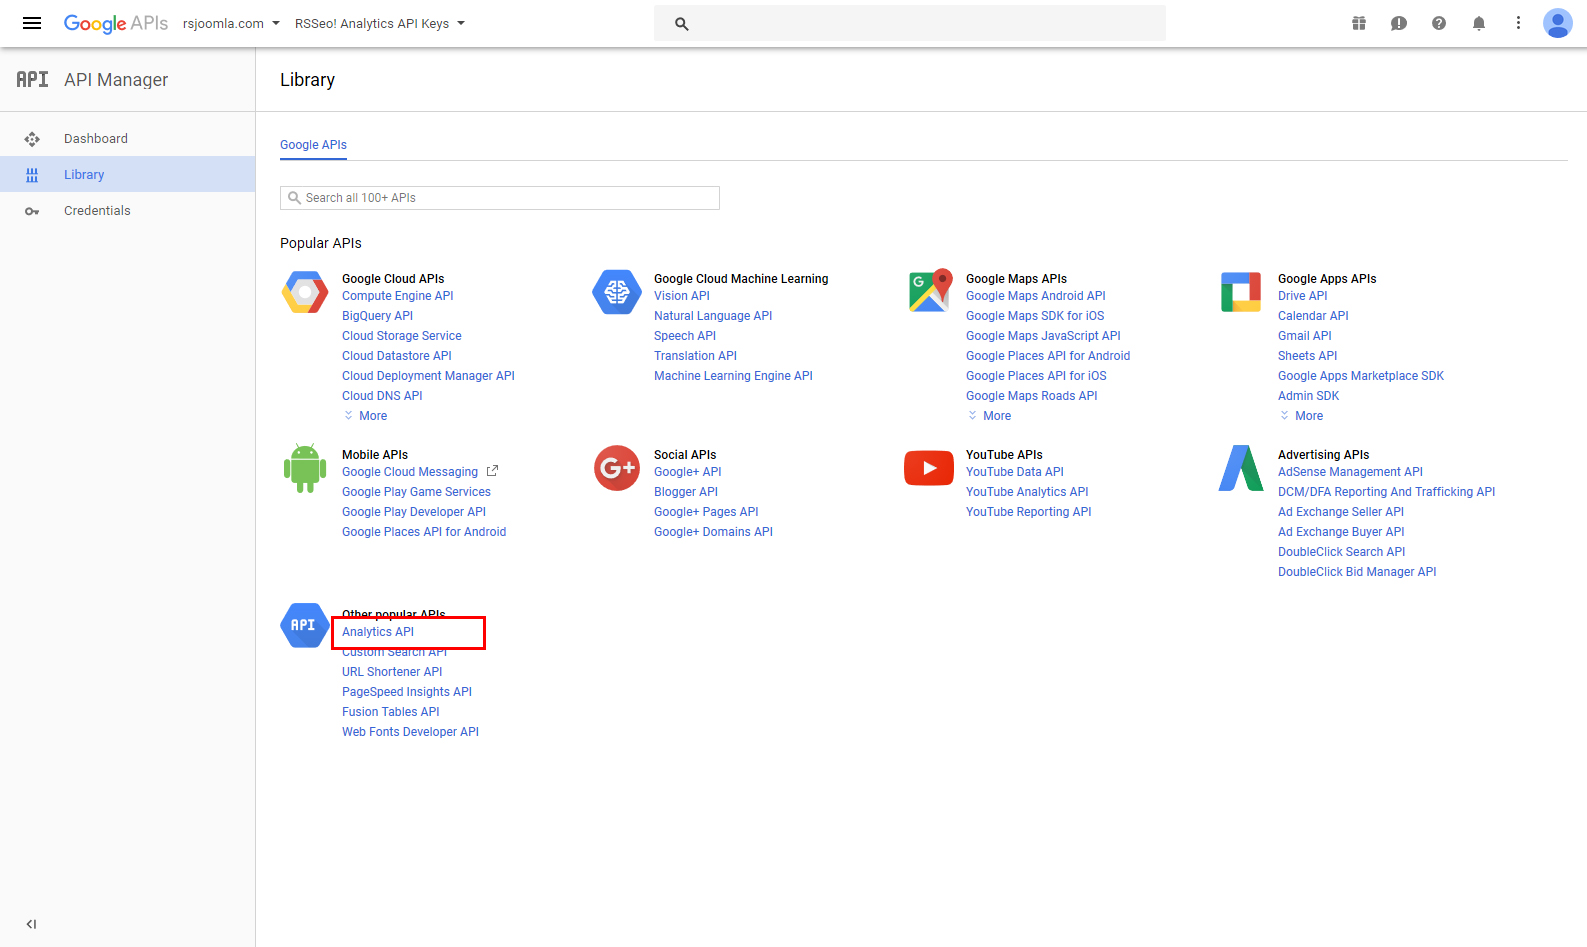
In the Dashboard view, click on ENABLE APIS AND SERVICES button and then search for the Analytics API.
-
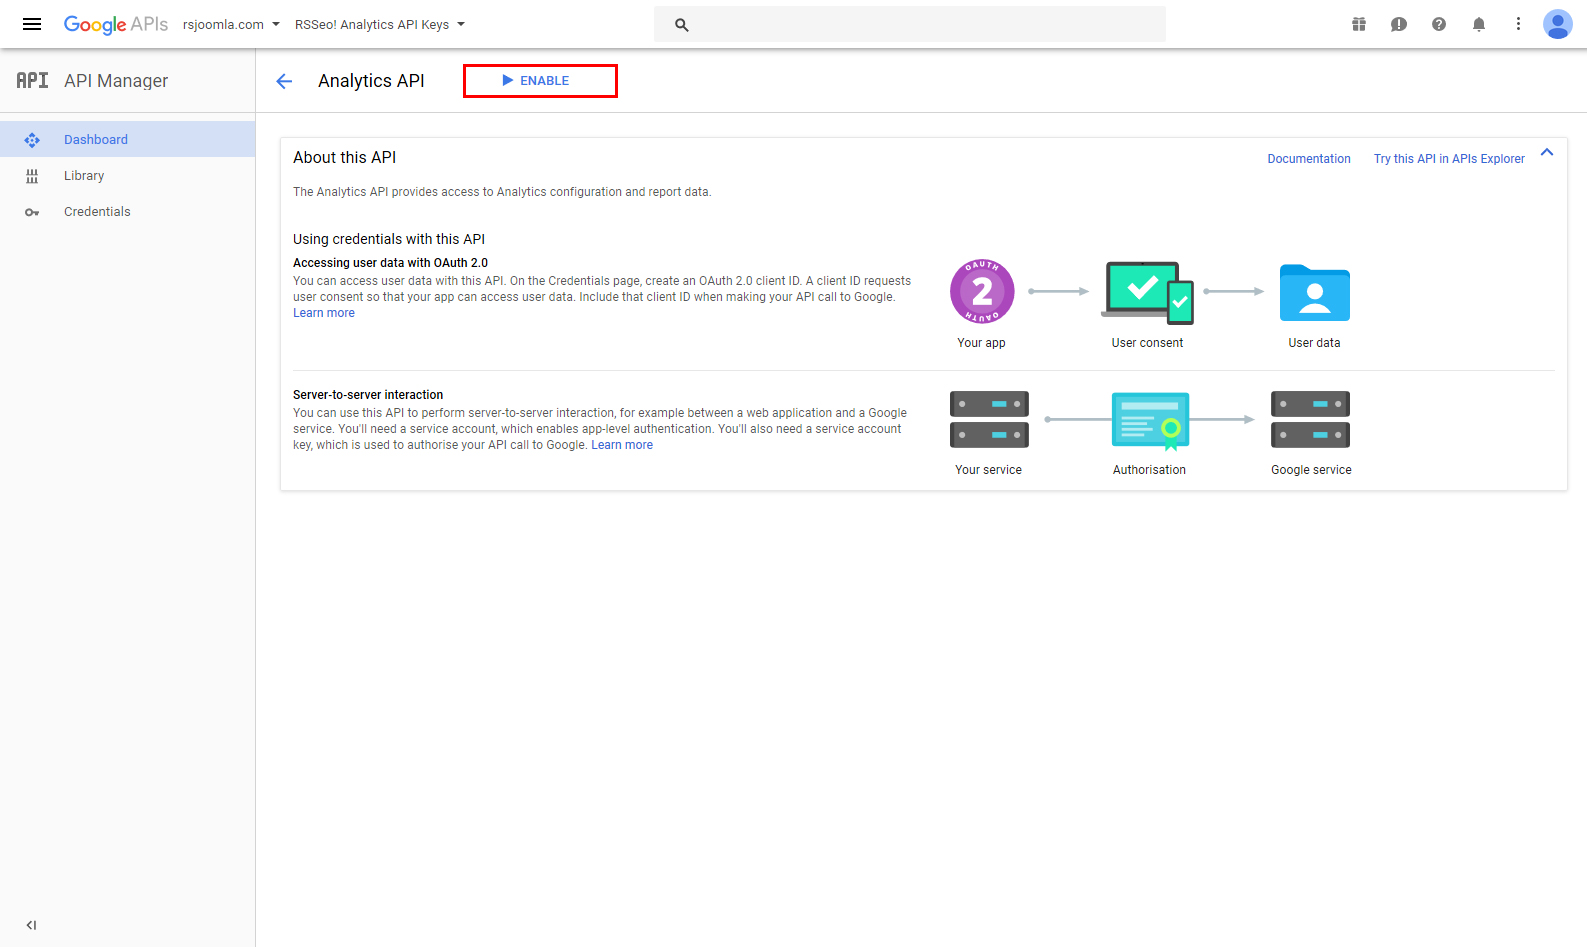
Enable the "Analytics API" by clicking on the "Enable" button at the top.
-
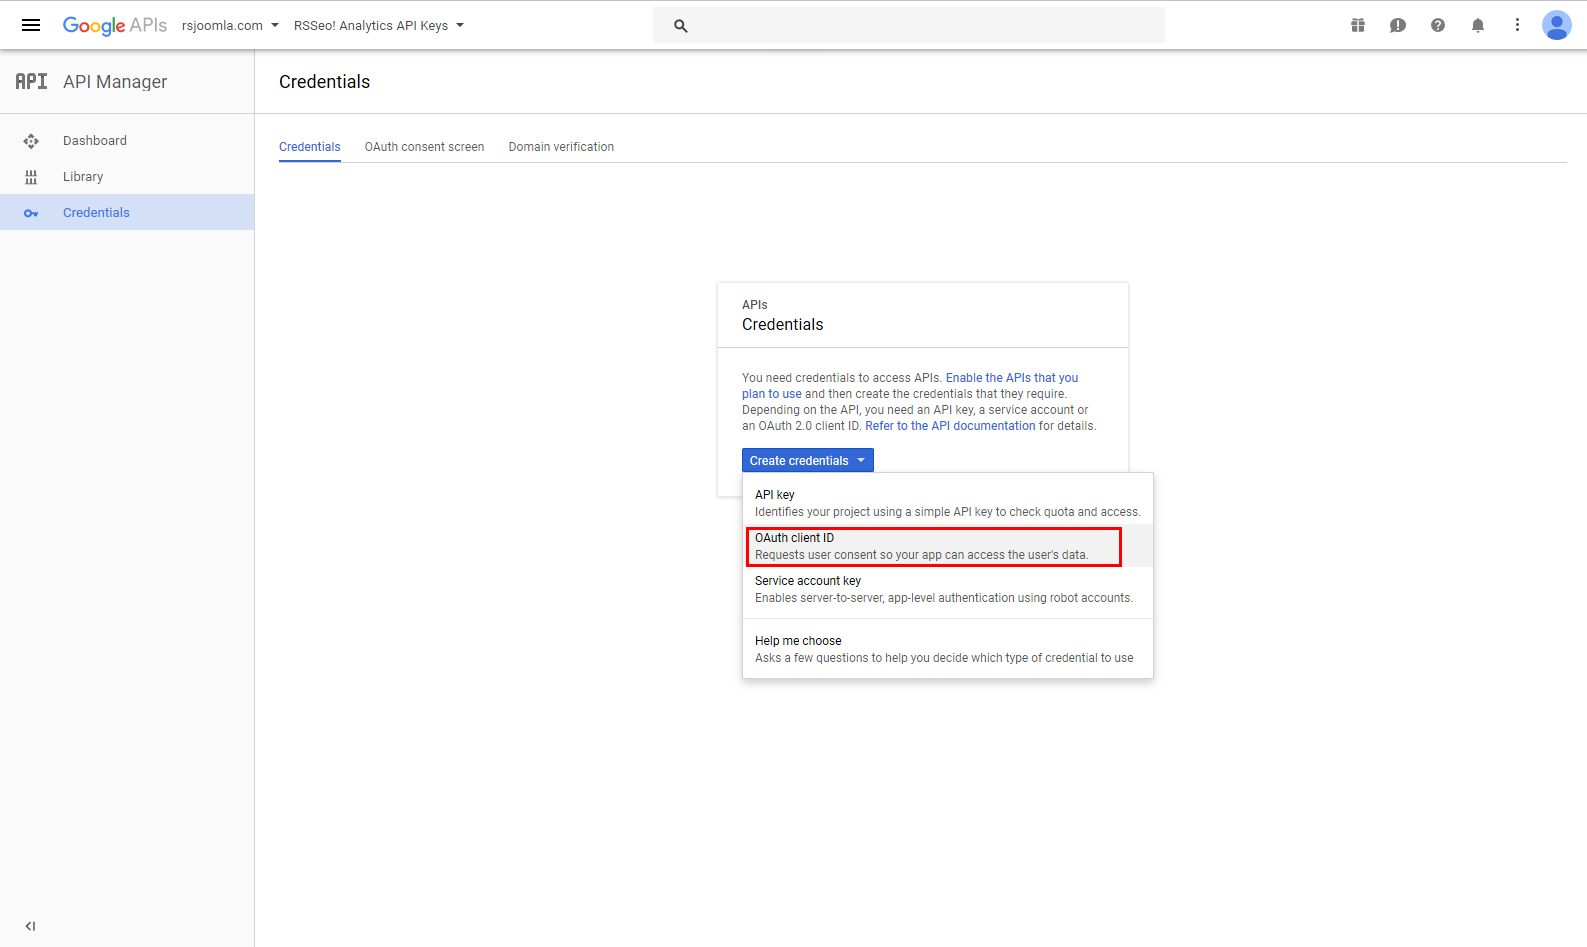
Next click on the Credentials, then click the Create Credentials button and select OAuth client ID option.
-
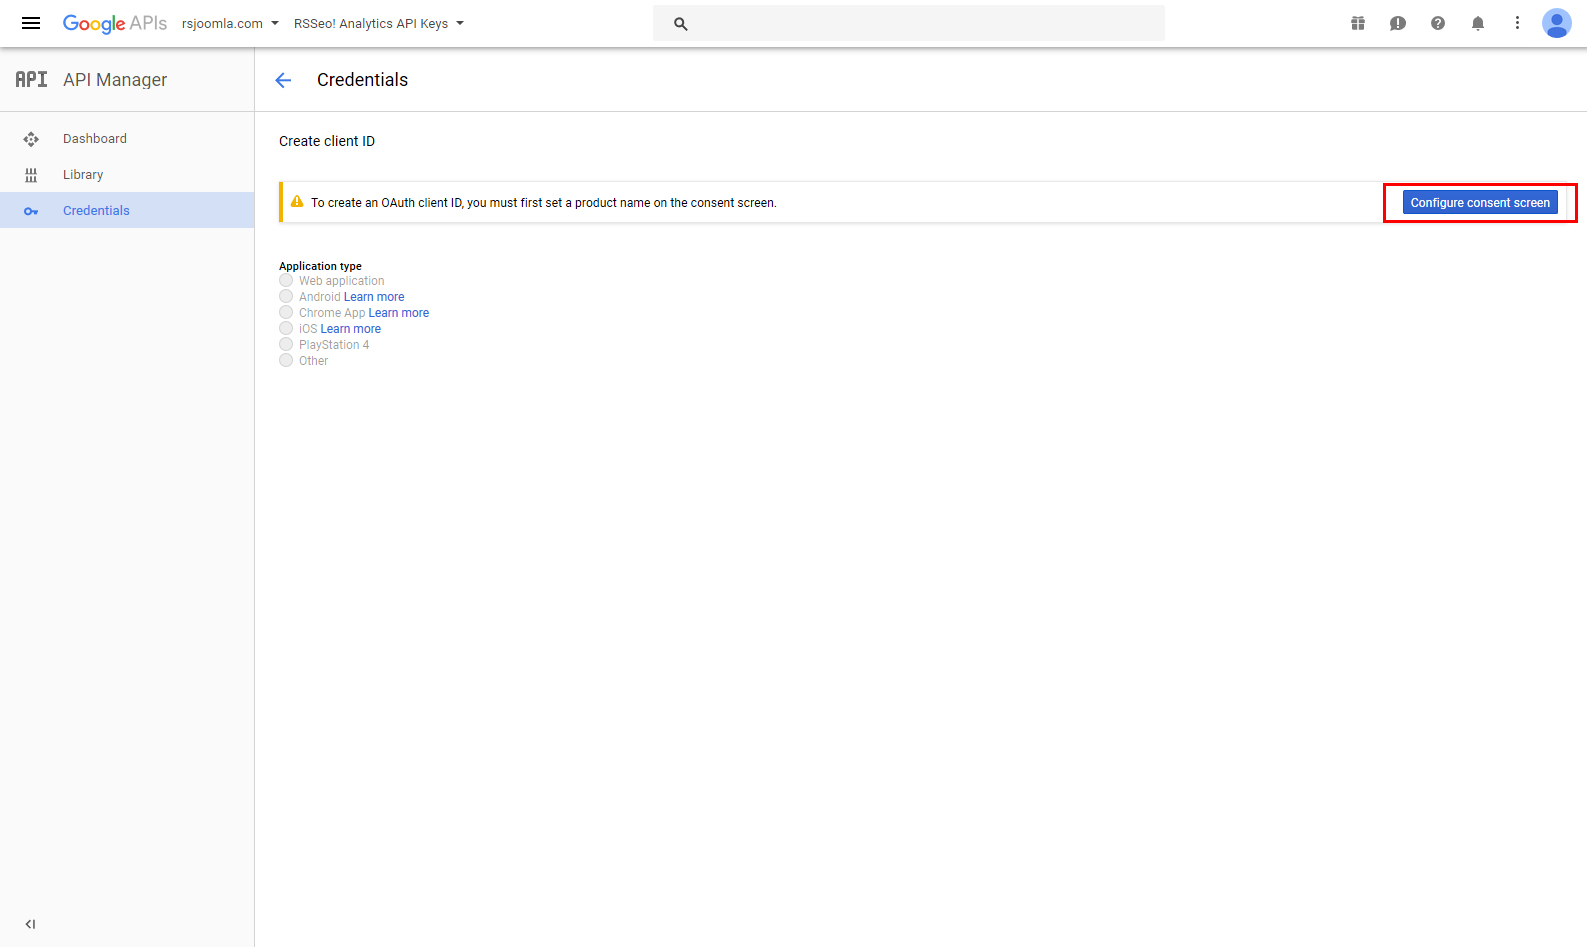
Click on the "Configure consent screen" button.
-
Select "Internal" and click Create button.
-
Add an 'App name' (this can be anything, for example RSSeo! - Analytics), select a User support email and include a developer email address (near the end) before clicking the Save and Continue button.
-
You can skip the Scopes section by clicking the Save and Continue button. Then click the Back to Dashboard button.
-
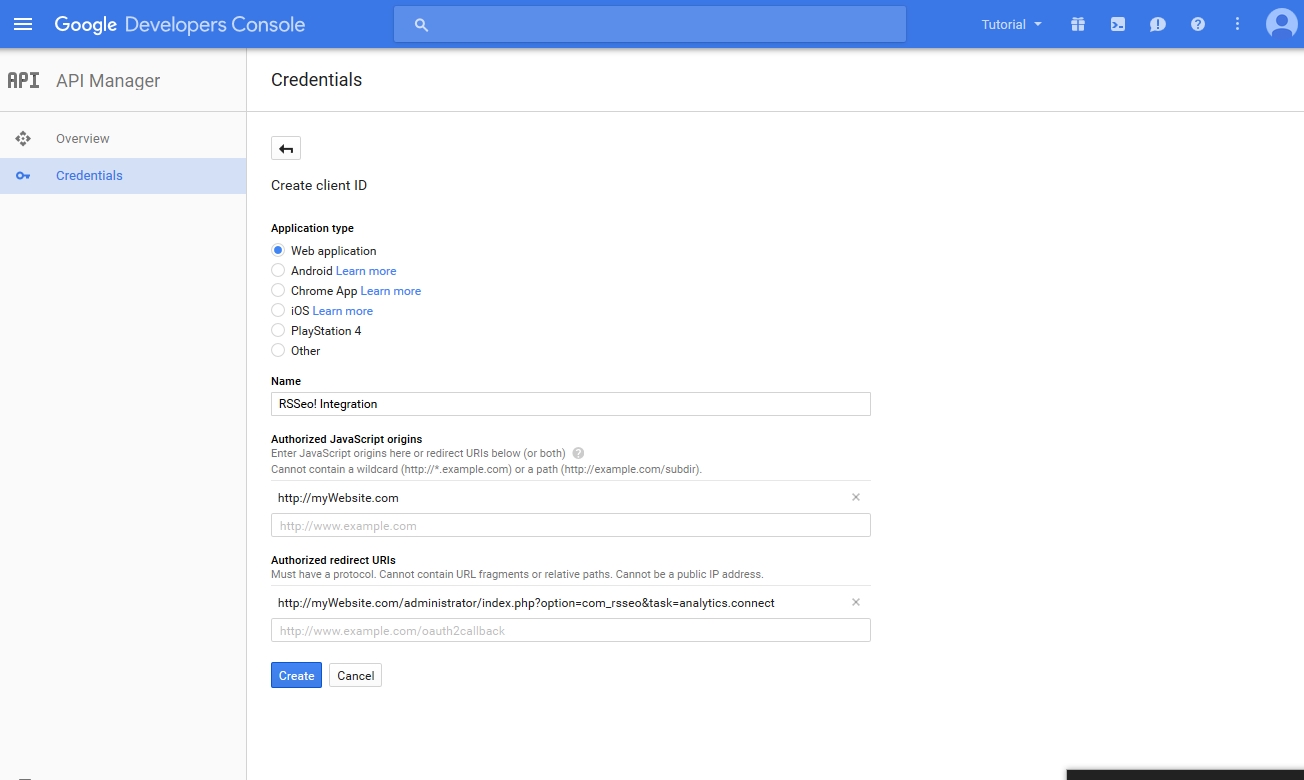
Select Credentials, then click the Create Credentials button and select OAuth client ID option.
-
Select the 'Web Application' option on the next page. Within 'Authorized redirect URIs' add the following (examples, use https:// if you're using a secure connection):
http://myWebsite.com/administrator/index.php?option=com_rsseo&task=analytics.connect
Important: The links themselves have to be precisely added. For example, if you're accessing the website using www. or without www., you'll have to specify this as well. Examples:
http://www.myWebsite.com/administrator/index.php?option=com_rsseo&task=analytics.connect
http://myWebsite.com/administrator/index.php?option=com_rsseo&task=analytics.connect
-
Click on the "Create" button.
-
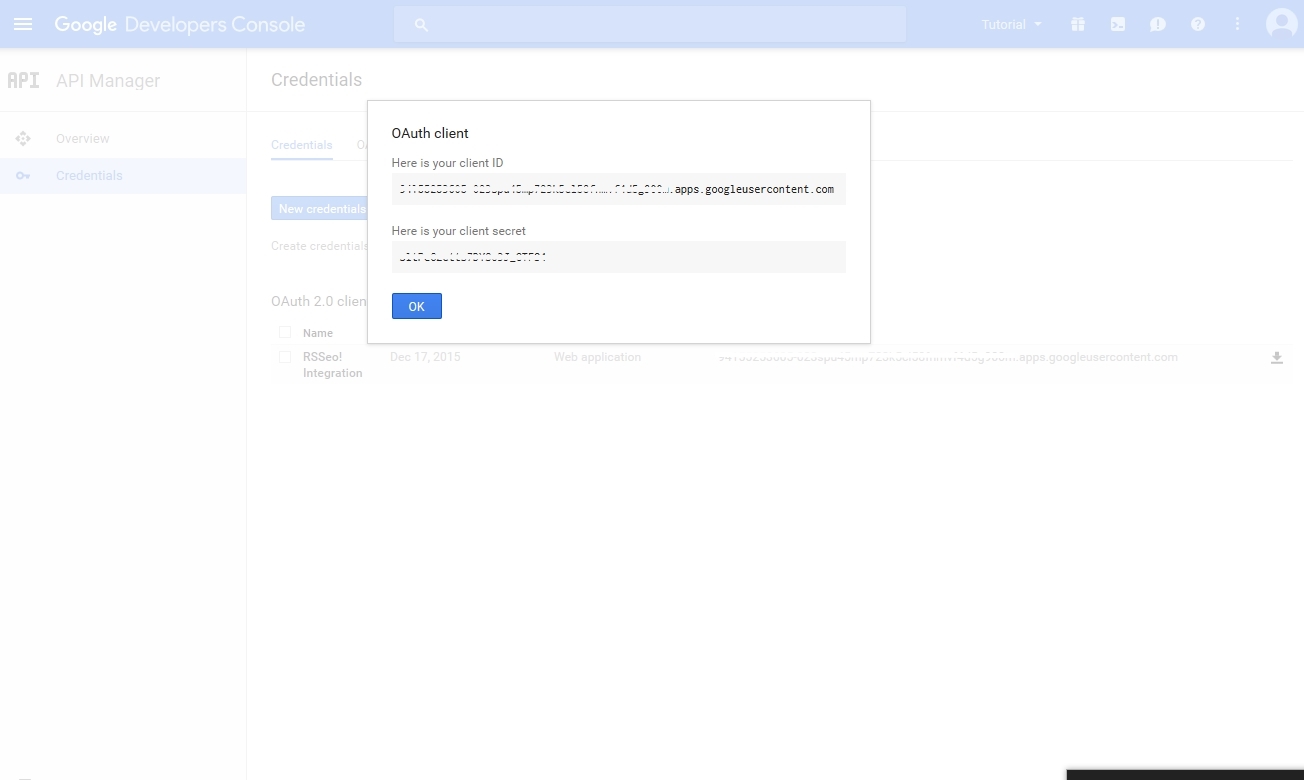
Your "Client ID" and the "Client secret" keys will be generated (these will be used within your RSSeo! configuration).
-
Navigate to backend > Components > RSSeo! > here, click on the "Options" button, then Google Analytics.
-
Setup your Google Analytics configuration:
- Enable Google Analytics reports: enables the report functionality.
- Google Client ID: this would be the Client ID key you've just generated (notice above picture).
- Google Secret: your Google generated secret key (notice above picture).
-
Save your configuration using the top button (your settings have to be saved first).
-
Navigate to backend > Components > RSSeo! > Google Analytics.
-
Press the "Authentificate" button.
-
You will be redirected to Google which requests permissions to allow this data. Click on the "Accept" button.
-
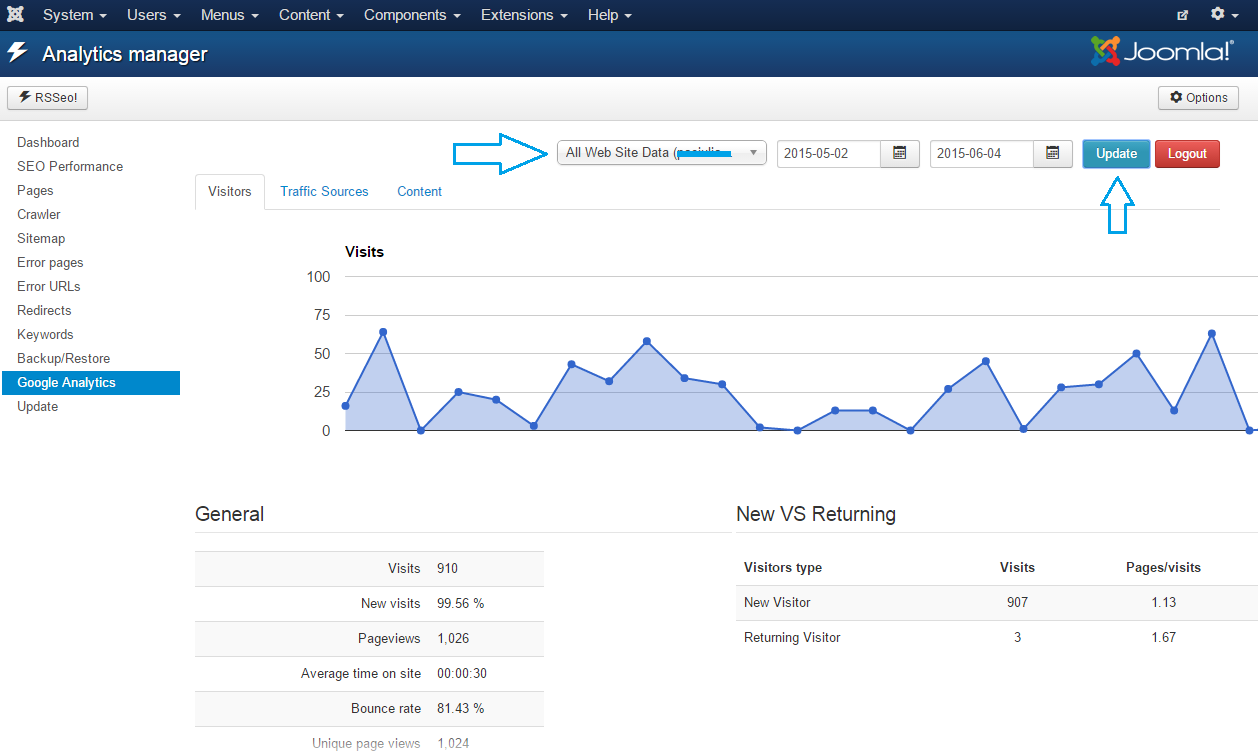
After being redirect back to your website, you'll have to select your account and click on the "Update" button (if you're using multiple accounts, you can use the logout button to switch between accounts).
If everything is setup correctly your Google Analytics data will be displayed.
RSSeo! - Google Analytics tab, uses a session based functionality which lasts 1 hour. After 1 hour, you'll have to authenticate once again in order to view your Analytics data.
108 persons found this article helpful.
You Should Also Read
Analytics Manager |
Google Keywords |
Rich snippets |
Visitors |