Custom fields
Adding custom fields to your membership subscription form.
The subscription process still relies on some core fields that can't be removed: name and email. This information is a key part in creating a user to a assign the membership if required.
Besides the above mentioned fields you can now add as many fields you like, using the Custom fields tab. Adding or editing the already existing fields is an easy process - just click New or Edit and the field configuration will be displayed.
Available options:
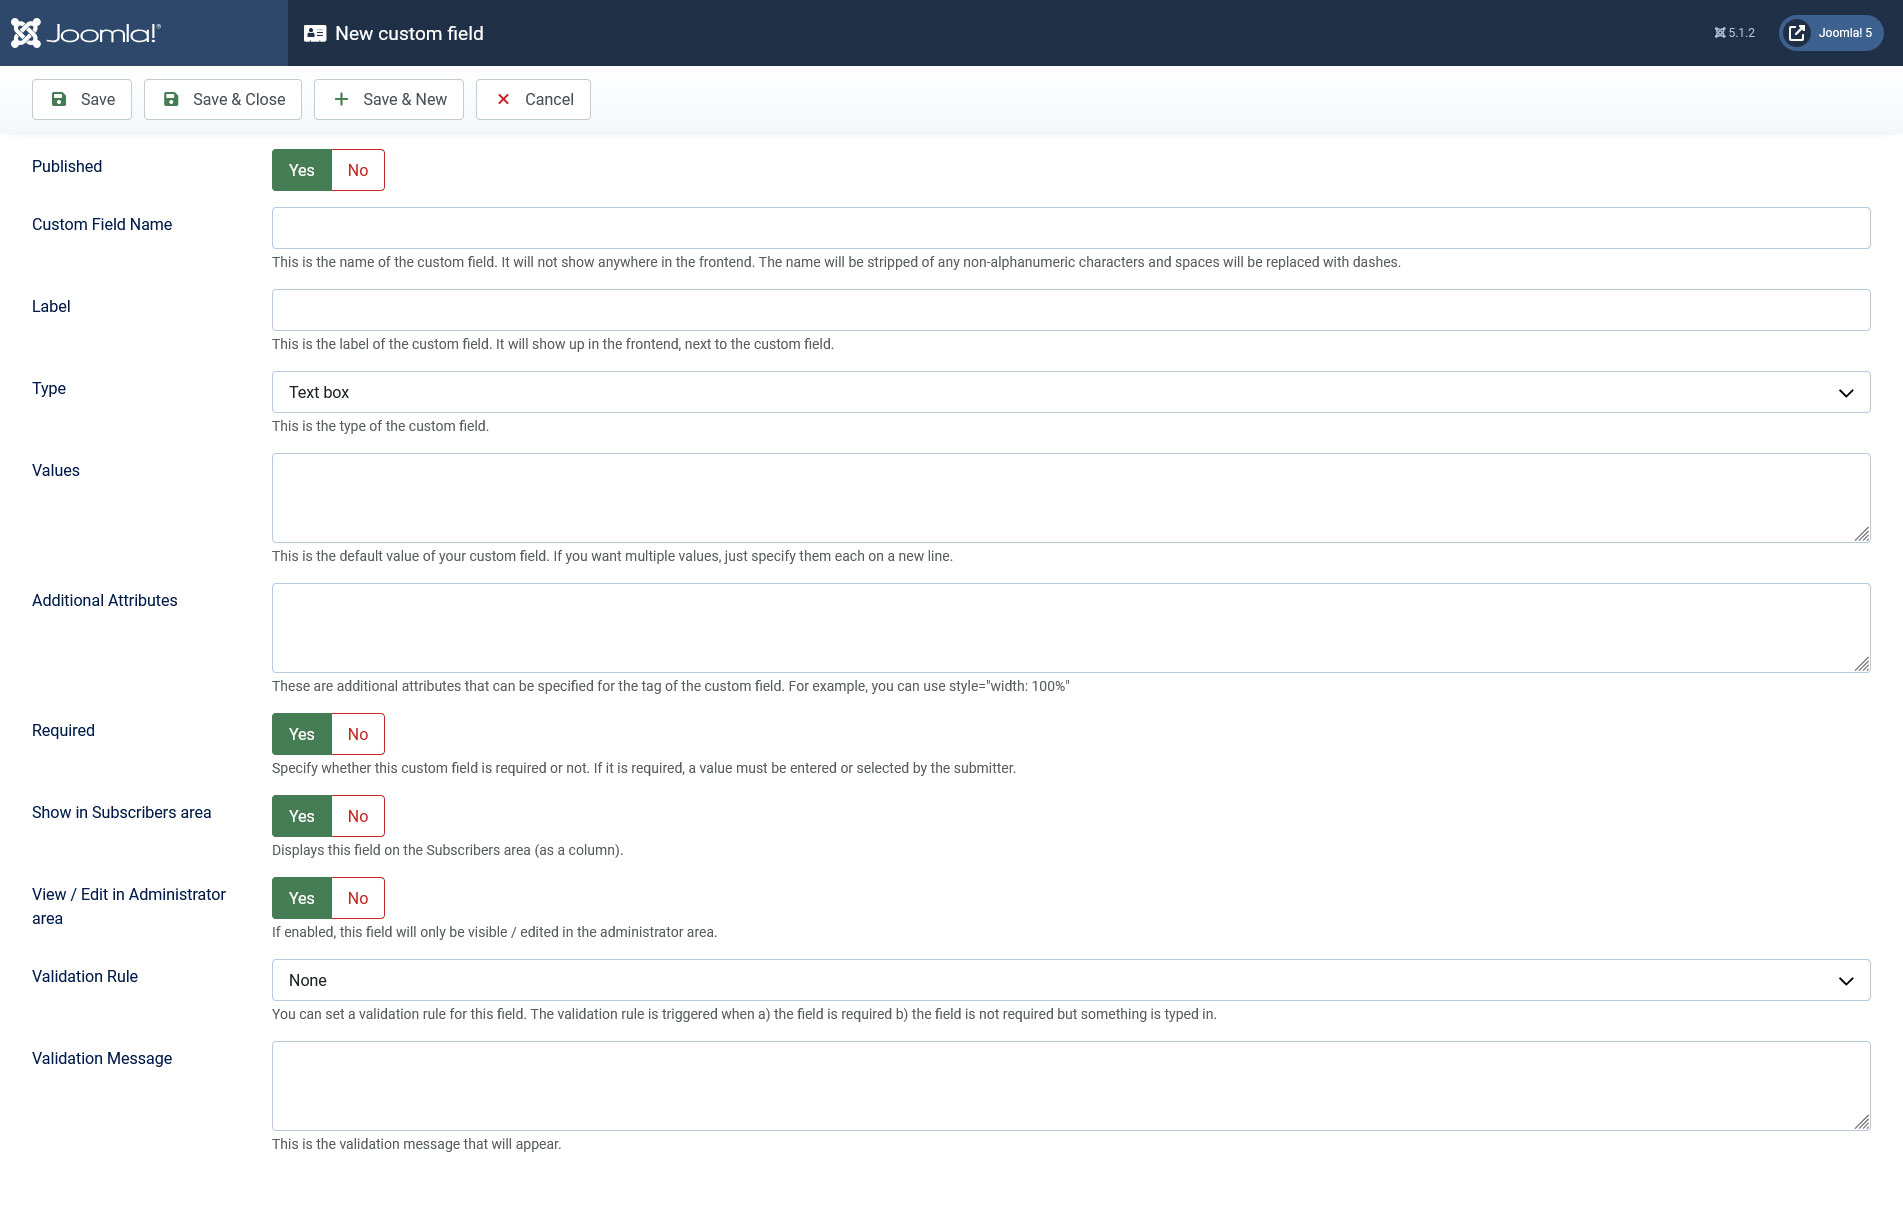
- Custom Field Name: the name of the actual field. This is used for internal reference only and it will not be displayed in the front-end.
- Label: the label/caption of the field - this value will be displayed on the front-end.
- Type: Custom HTML (can be used add text or any HTML) / Text box / Text area / Filter by type / Select List / Multiple Select List / Checkbox Group / Radio Group / Calendar / Hidden field.
- Values (*): setting this area, in the case of text box, text area, custom HTML and calendar, will display a value by default in the frontend subscription form. In the case of select list, multiple select list, checkbox group and radio group, this area will actually define the items - each item on a new line.
- Additional Attributes: here you can add CSS properties or Javascripts.
- Required: Yes / No.
- Show in Subscribers area: Yes / No - set to Yes in order to show the current field in the Subscribers' tab listing.
- View / Edit in Administrator area Yes / No - If enabled, this field will be visible and editable only in the administrator area.
- Availability All times / When subscribing / After subscribing. - Choose where this field is available. If set to 'When subscribing', the field will be available only when subscribing to a membership. If set to 'After subscribing' the field will not be available when subcribing, but can be afterwards filled by the user through the 'Show Subscriber's Account' menu item. This option is available when the View / Edit in Administrator area is set to 'No'.
- Validation rule: none / alphanumeric / numeric / email / website / Custom Event - onRsmembershipValidateField($string, $field, &$result).
- Validation Message: this message will be displayed if the field validation will fail.
- Published: yes / no.
The value of these fields can be used by using the placeholders. If, for example, you have a field named test, the correct placeholder would be: {test}.
The field placeholders can be used on the following areas: Messages, Subscriber Emails and Administrator Email.

- After upgrading from a previous version, the previous fields will be transformed in custom fields - these can be removed at any time: address, city, state, zip and country.
- (*) In the Values area custom PHP coding can be used, enclosed in between the following tags: //<code>,//</code>. Example (will add the current server date) - make sure to add a proper date format:
//<code>
return date('d.m.Y');
//</code> - If you want to translate these custom fields in another language, just open the RSMembership! language file from /languages/ and add the custom field's label in uppercase. For example: GENDER=Gender translation.
- To pre-select an item within select lists, radio / checkbox groups, simply add [c] to it. Example:
item 1
item 2[c]
Watch the video tutorial:
Ep. 56: How to customize the RSMembership! subscription form
6 persons found this article helpful.