Configuration
All RSDirectory! configuration options are gathered in the Configuration tab, where they have been grouped based on their relevance. To access this tab, please head to Components > RSDirectory! > Configuration.
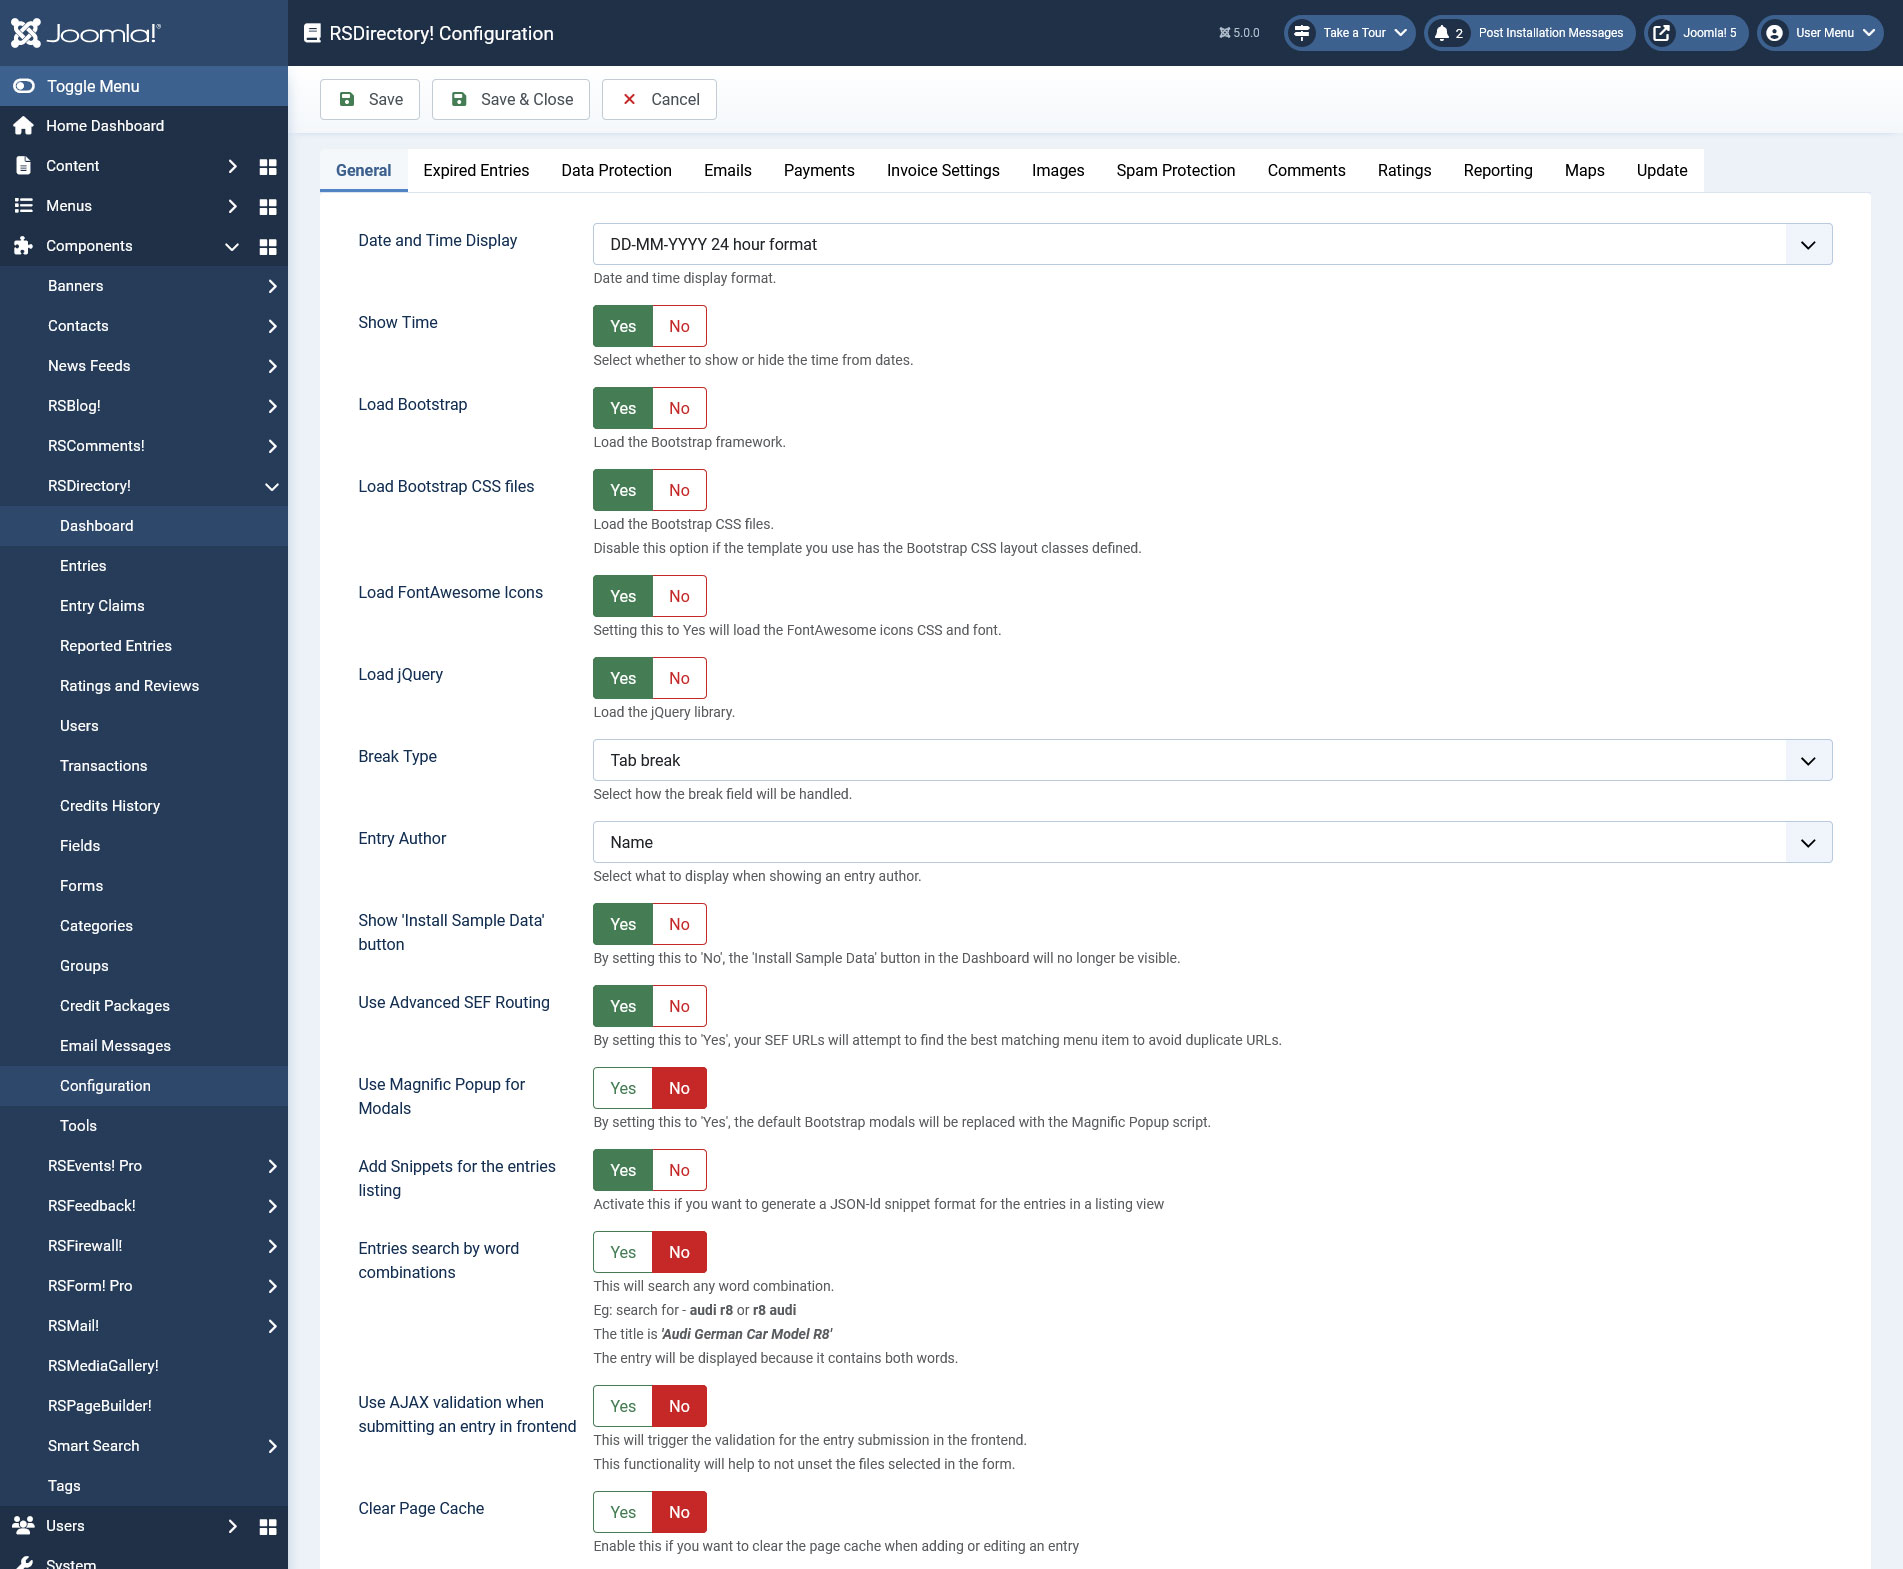
General
- Date and Time Display: Set the date and time format that will be used by the component
- Show Time: Yes / No - Set to No in order to hide the time from dates
- Load Bootstrap: You can switch Bootstrap off if you are encountering any issues with it, or turn it on if your template does not include such capabilities
- Load Bootstrap CSS files: Load the Bootstrap CSS files. Disable this option if the template you use has the Bootstrap CSS layout classes defined
- Load FontAwesome Icons: Set this to YES if you want to load the FontAwesome CSS and Font
- Load jQuery: You can switch jQuery off if you are encountering any issues with it, or turn it on if your template does not include such capabilities
-
Break type: Select how the tab / column break / section field will be handled:
Column Break: Use this option to have the entry submission form separated in columns. (left to right)
Tab Break: Use this option to have the entry submission form separated in tabs (left to right)
Section Break: Use this option to have the entry submission form separated in sections (top to bottom)
- Entry Author: Name / Username / Email - Select what to display when showing an entry author.
- Show 'Install Sample Data' button Yes / No - By setting this to 'No', the 'Install Sample Data' button in the Dashboard will no longer be visible
- Use Advanced SEF Routing Yes / No - By setting this to 'Yes', RSDirectory! will attempt to find the best menu item matching to avoid duplicate URLs
- Use Magnific Popup for the modals Yes / No - By setting this to 'Yes', the default bootstrap modals will be replaced with the Magnific Popup
- Add Snippets for the entries listing Yes / No - Activate this if you want to generate a JSON-ld snippet format for the entries in a listing view.
- Entries search by word combinations Yes / No - This will search any word combination.
Eg: search for - audi r8 or r8 audi. The title is 'Audi German Car Model R8'. The entry will be displayed because it contains both words. - Use AJAX validation when submitting an entry in frontend Yes / No - This will trigger the validation for the entry submission in the frontend. This functionallity will help to not unset the files selected in the form.
- Clear Page Cache Yes / No - Enable this if you want to clear the page cache when adding or editing an entry
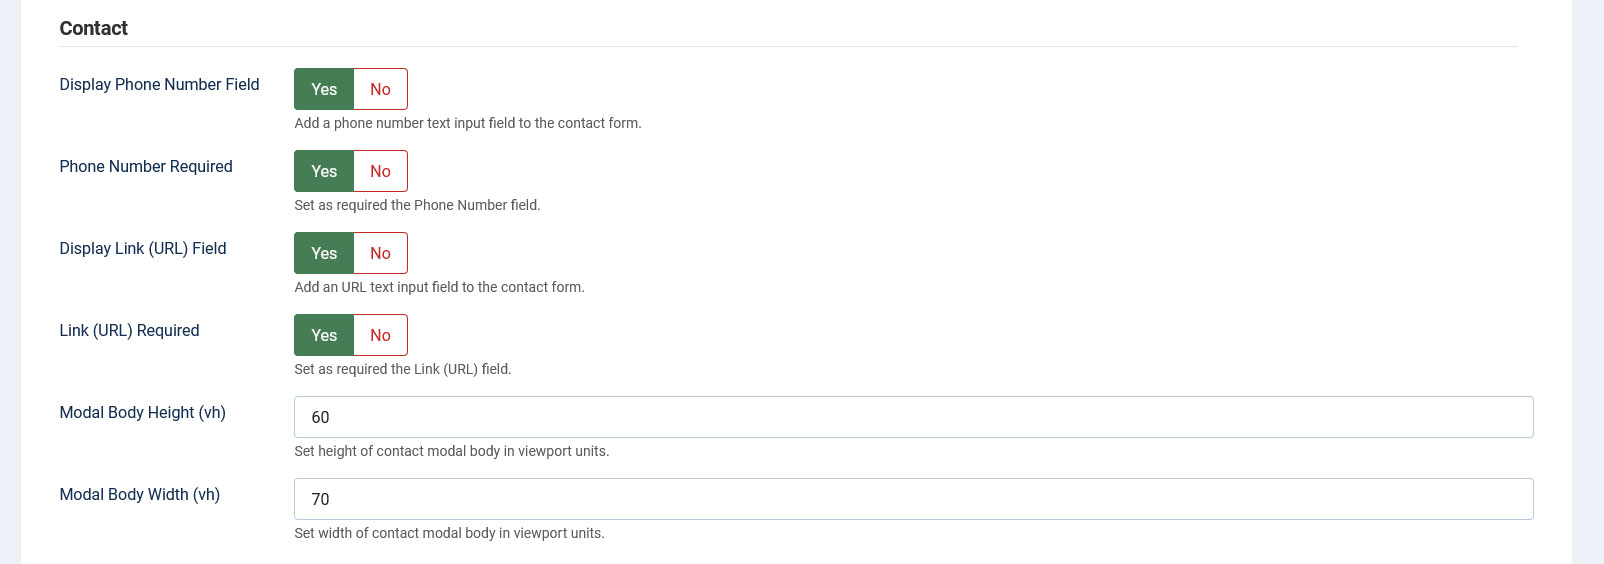
Contact
These settings regard the contact entry author form's modal:
- Display Phone Number Field:Yes / No - Add the phone number text input to the contact form.
- Phone Number Required:Yes / No - Set as required the Phone Number Input.
- Display Link (URL) field:Yes / No - Add the link text input to the contact form.
- Link (URL) Required:Yes / No - Set as required the Link Input.
- Modal body height(px): The height of the contact modal (in pixels).
- Modal body width(px): The width of the contact modal (in pixels).
Claim listing
These settings regard the claim listing form:
- Auto deny claims after days: - After how many days the unapproved claims should be automatically denied.
Use 0 if you do not want to auto deny them. - Create User: Yes / No - Allow user creation for the users that do not have a Joomla User Account.
This will take effect only on the claim forms of the entires that do not have Claim Credits cost assigned. - Display email error:Yes / No - Show the error for the email that is sent to the owner regarding the claim, if any.
- Display Phone Number Field:Yes / No - Add a phone number text input field to the claim entry form. Only for non-authenticated users.
- Phone Number Required:Yes / No - Set as required the Phone Number Input.
- Modal body height(vh): The height of the contact modal (in viewport units).
- Modal body width(vh): The width of the contact modal (in viewport units).

Export
- Export limit How many entries to export on a single AJAX call.
- Use Date and Time Display: Yes / No - Use the Date and Time Display you choosed above for the date fields.

Expired Entries
Here you can use different redirects for the expired entries.
- Not Found Redirect: Yes / No. After the entries have expired if the direct URL is accessed it will output a 404 page.
- Use Redirect (302/301): Yes / No. When an entry is expired it will Redirect Temporary (302) to the specified location below. After the days for the 302 redirect have passed it will Redirect Permanently (301).
- Days to Redirect Temporary (302). Enter here how many days you want to Redirect Temporary the expired entries.
- Where to redirect: Choose between the entry category or the homepage.
- Enter custom link: Enter a custom link to redirect. If this is used, than the above option will not be taken in consideration.
- Renew entries every (minutes): Set a buffer time (in minutes) between checks - such as 15 minutes, so you don't overload your website with renewal checks.
- Number of entries to renew per cycle:You can setup how many entries will be renewed per cycle. You should contact your hosting provider regarding this limit - some providers will flag you for spamming if a large number of emails is sent.
- Number of emails to be sent per cycle: You can setup how many notifications emails (expiry/renew) will be sent per cycle. You should contact your hosting provider regarding this limit - some providers will flag you for spamming if a large number of emails is sent.
- Check for 'On entry expiration' emails to be sent every: Set a buffer time (in minutes) between checks - such as 10 minutes, so you don't overload your website with notification checks.
- Check for 'Entry expiration notice' emails to be sent every: Set a buffer time (in minutes) between checks - such as 10 minutes, so you don't overload your website with notification checks.
- Check for 'Entry expiration notice due to insufficient credits (requires system plugin)' emails to be sent every: Set a buffer time (in minutes) between checks - such as 10 minutes, so you don't overload your website with notification checks..

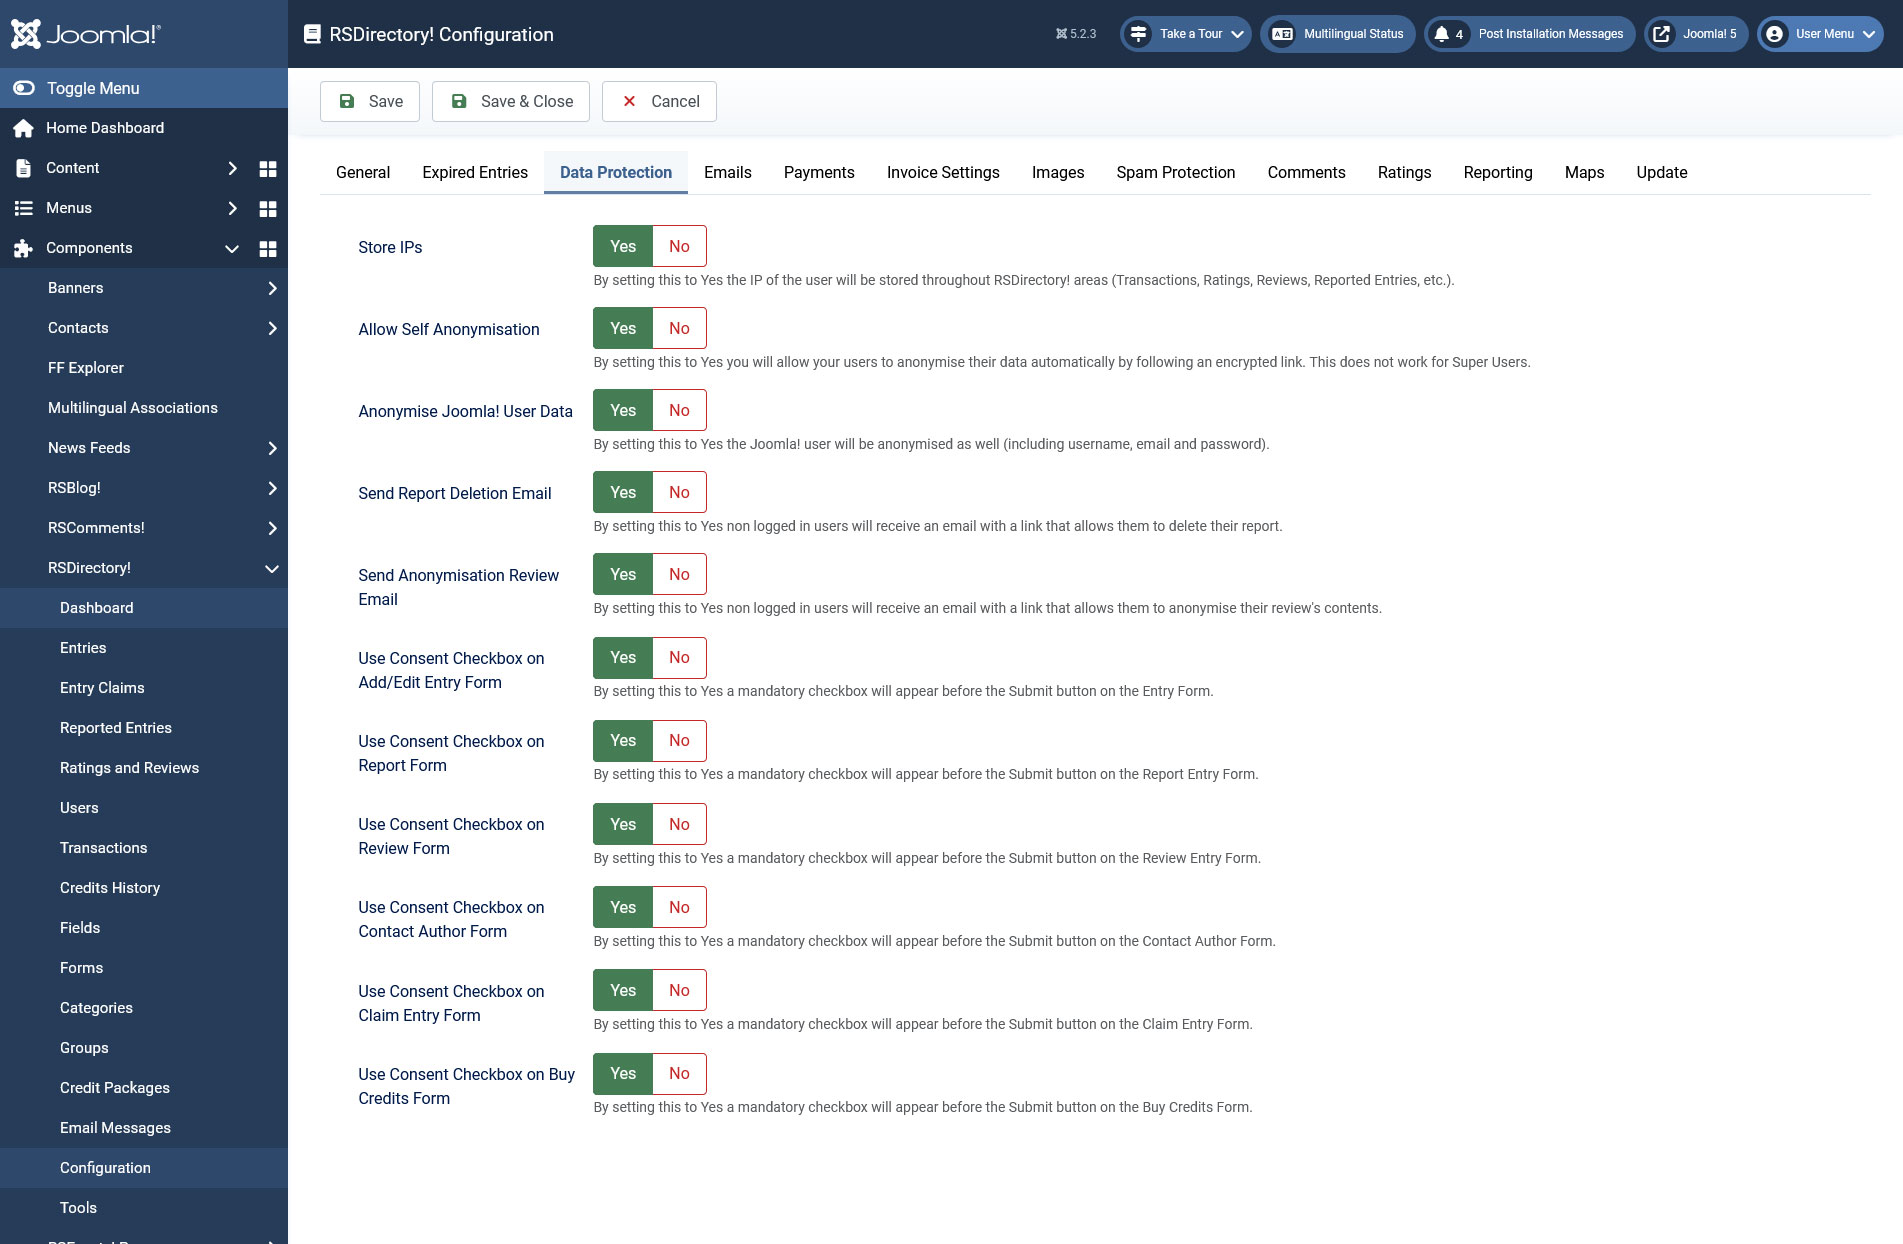
Data Protection
Here you can choose which mailing settings the component should use.
- Store IPs: Yes / No. The IP of the user will be stored throughout RSDirectory! areas (Transactions, Ratings, Reviews, Reported Entries, etc.).
- Allow Self Anonymisation: Yes / No. Allow your users to anonymise their data automatically by following an encrypted link. This does not work for Super Users.
- Anonymise Joomla! User Data: Yes / No. By setting this to Yes the Joomla! user will be anonymised as well (including username, email and password).
- Send Report Deletion Email: Yes / No. An email containing a deletion link will be sent to the visitor when he makes a report on an entry! Only for non logged in users.
- Send Anonymisation Review Email: Yes / No. By setting this to Yes an email, containing an anonymisation link, will be sent to the visitor when he makes a review on an entry! Only for non logged in users!
- Use Consent Checkbox on Add/Edit Entry From: Yes / No. A mandatory checkbox with the Consent will appear before the Submit button on the Entry Form
- Use Consent Checkbox on Report From: Yes / No. A mandatory checkbox with the Consent will appear on the Report Entry Form. Only for non logged in users!
- Use Consent Checkbox on Review From: Yes / No. A mandatory checkbox with the Consent will appear on the Review Entry Form. Only for non logged in users!
- Use Consent Checkbox on Contact Author Form: Yes / No. By setting this to Yes a mandatory checkbox will appear before the Submit button on the Contact Author Form.
- Use Consent Checkbox on Claim Entry Form: Yes / No. By setting this to Yes a mandatory checkbox will appear before the Submit button on the Claim Entry Form.
- Use Consent Checkbox on Buy Credits Form: Yes / No. By setting this to Yes a mandatory checkbox will appear before the Submit button on the Buy Credits Form.
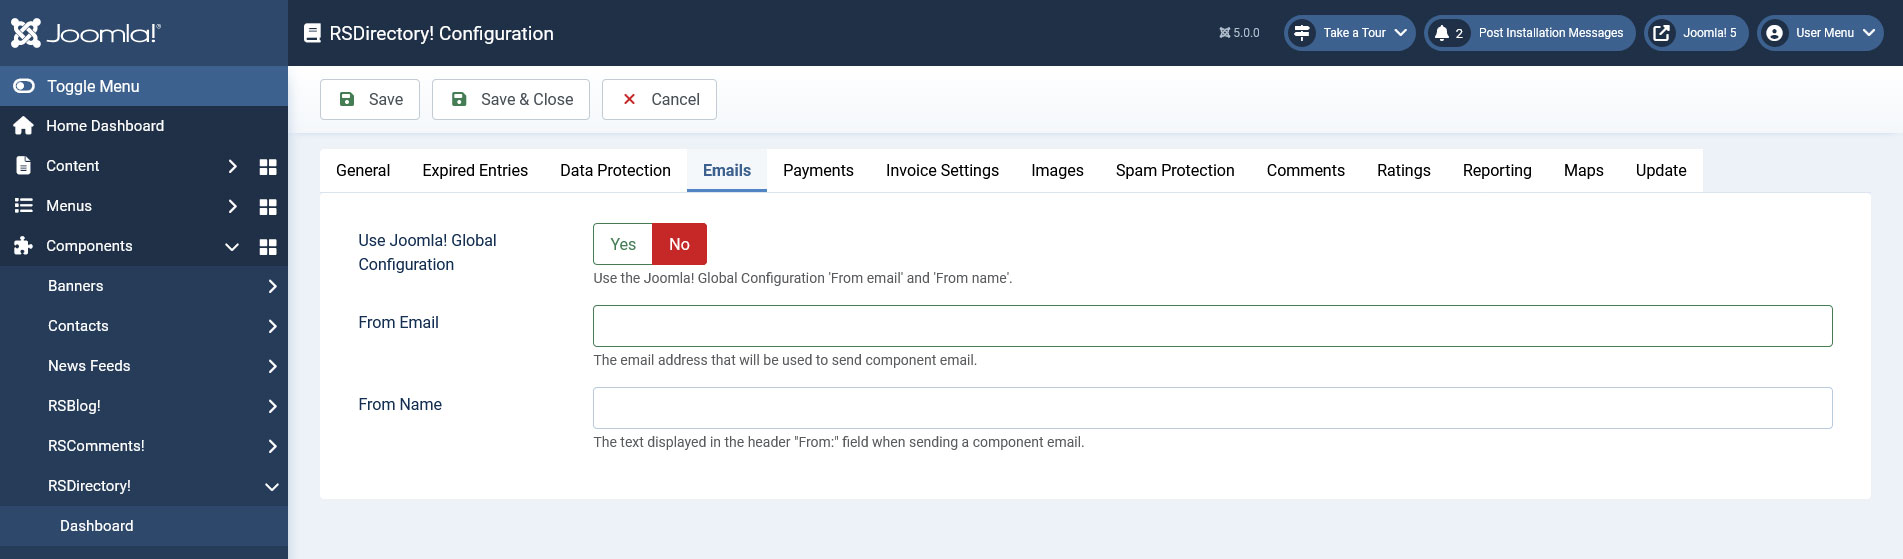
Emails
Here you can choose which mailing settings the component should use.
- Use Joomla! Global Configuration: Yes / No - choose whether to use the Joomla! mailing settings (configured in System >> Global Configuration >> Server >> Mail Settings area) or your own, set up below:
- From email: Set the address from which the email was sent (not applicable if Use Joomla! Global Configuration is set to Yes)
- From name: Set the sender's name (not applicable if Use Joomla! Global Configuration is set to Yes)
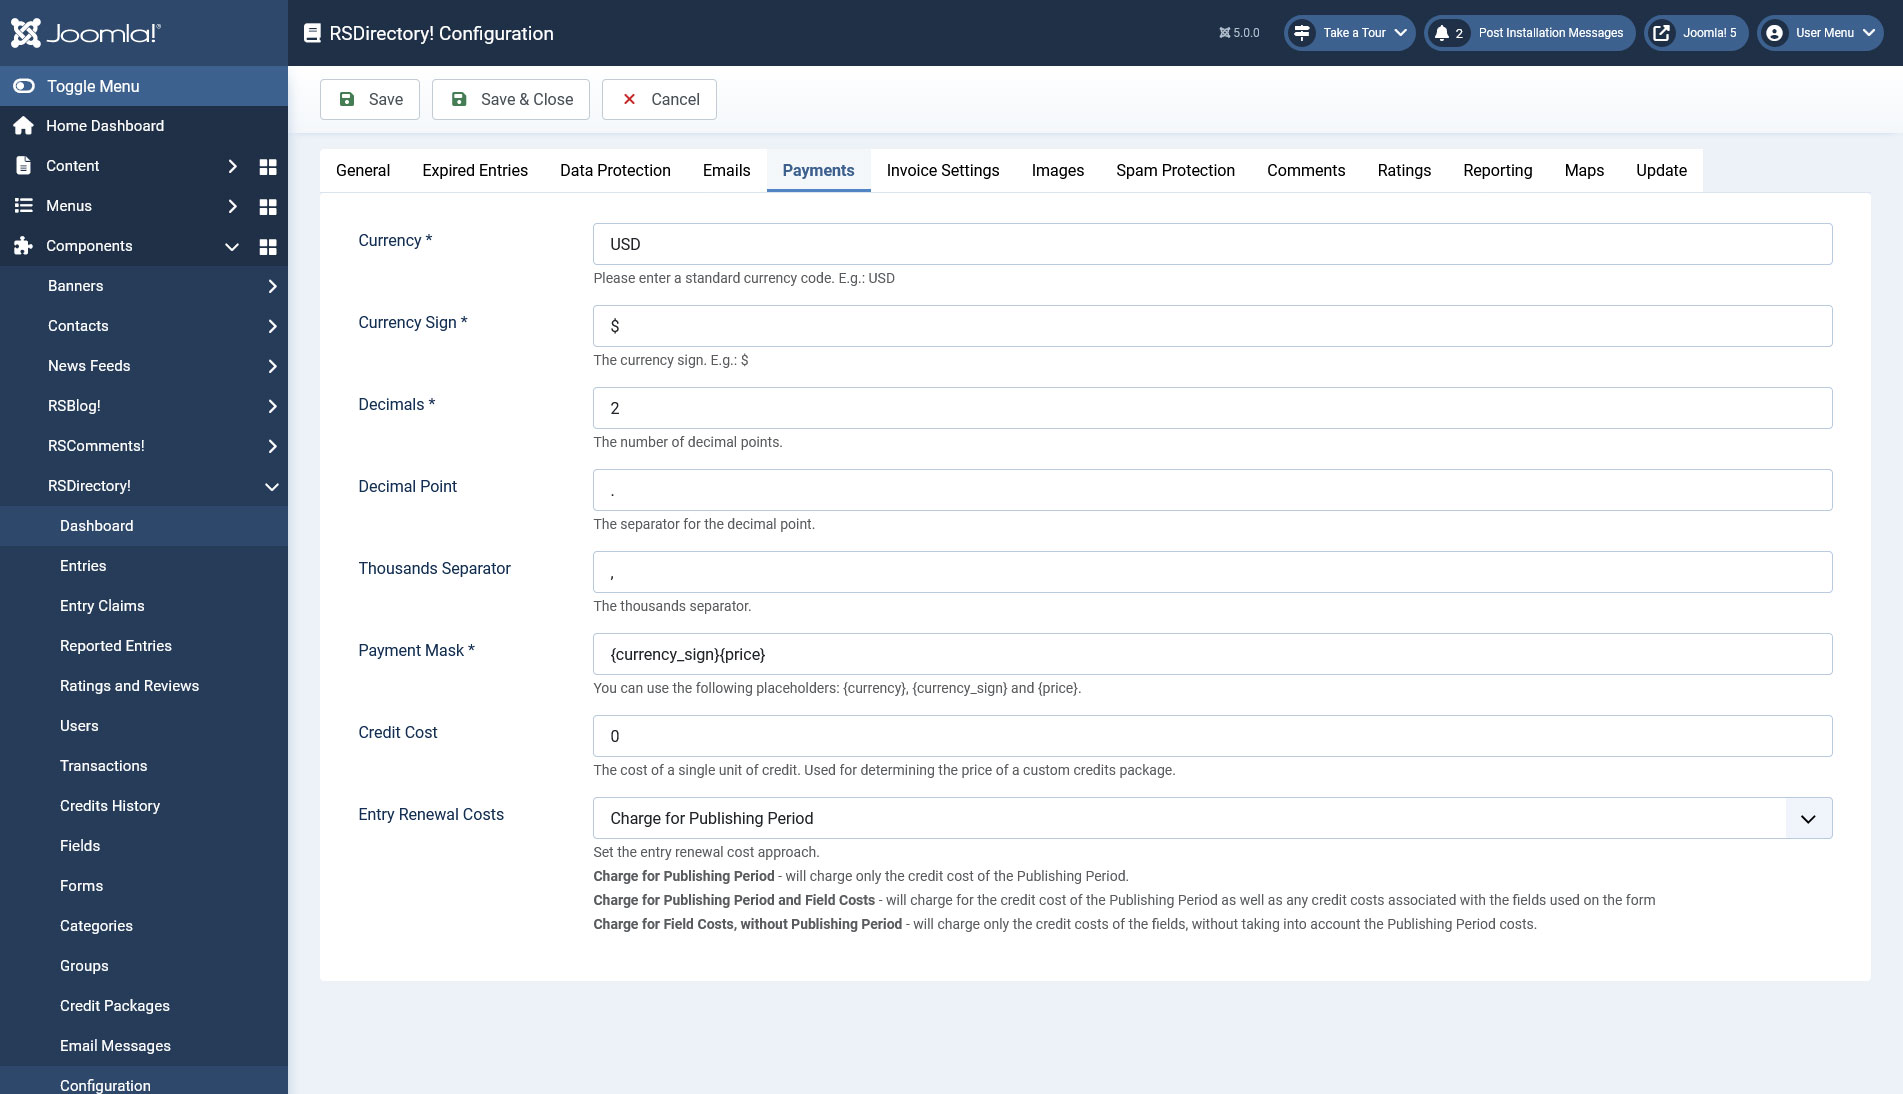
Payments
Configure your payment settings.
- Currency: Set a currency that will be used in transactions. Please use standard currency codes (e.g. USD), you can find a list here.
- Currency sign: Set the character that will be used as a currency sign (e.g. $, €)
- Decimals: Set the number of decimals that will follow the decimal point. Most commonly, 2 decimals are being used to list prices
- Decimal point: Set the character that will separate decimals from the integer value (e.g. . or ,)
- Thousands separator: Set the character that will be used as the thousands separator (e.g. . or ,)
- Payment mask: Set the order in which the currency code, currency sign and price are being displayed. You can use the {currency}, {currency_sign} and {price} placeholders.
- Credit Cost: The cost of a single unit of credit, determining the price of a custom credits package (the users have the possibility to submit an entry without having purchased a credit package, and can purchase a custom number of credits required for submitting that entry alone).
- Entry Renewal Costs: Set the entry renewal cost approach - Charge for publishing period, Charge for publishing period and fields cost or Charge for fields cost, without publishing period.
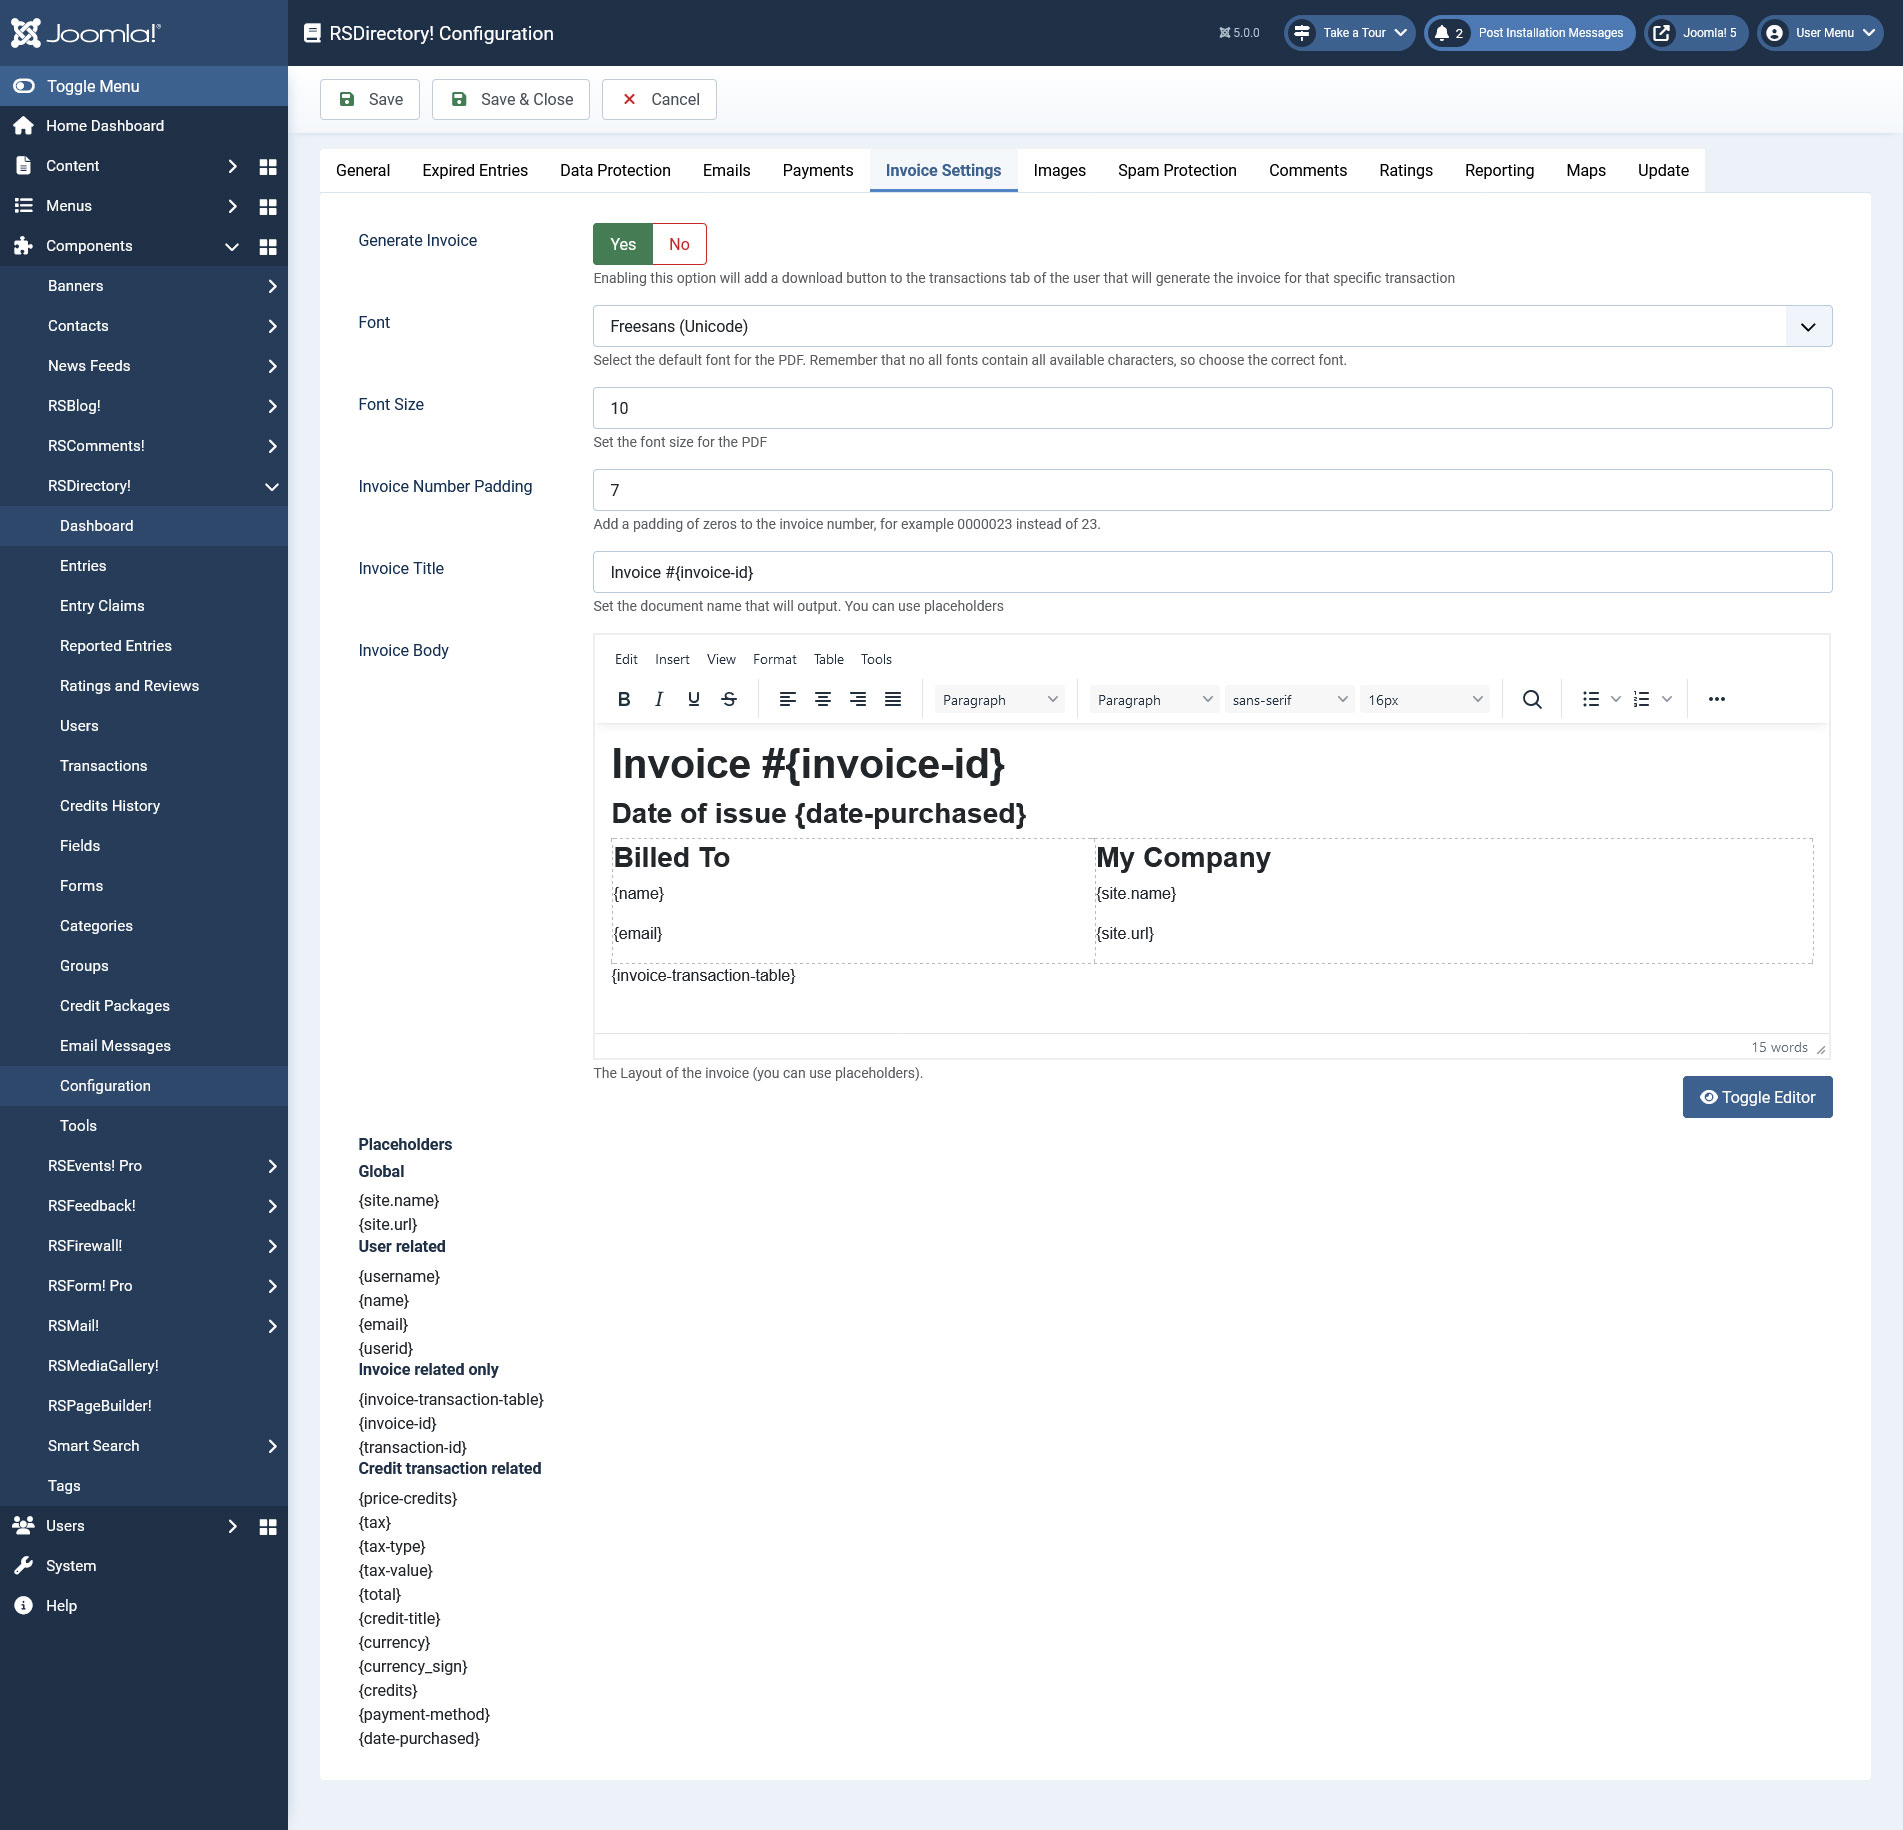
Invoice Settings
The latest version offer the possibility of creating an invoice for every transaction
- Use Invoice: Yes / No.Enabling this option will add a download button to the transactions tab of the user that will generate the invoice for that specific transaction.
- Font: Select the default font for the PDF. Remember that no all fonts contain all available characters, so choose the correct font. Available options: Freesans (Unicode) / DejaVu Sans (Unicode) / Courier / Helvetica / Times.
- Font Size: Set the font size for the PDF invoice.
- Invoice Number Padding: Add a padding of zeros to the invoice number, for example 0000023 instead of 23.
- Invoice Title: Set the document name that will output. You can also use available placeholders.
- Invoice: The Layout of the invoice where you can use the following placeholders:
- Global: {site.name}, {site.url}
- User related: {username}, {name}, {email}, {userid}
- Invoice related only: {invoice-transaction-table},{invoice-id}, {transaction-id}
- Credit transaction related: {price-credits}, {tax}, {tax-type}, {tax-value}, {total}, {credit-title}, {currency}, {currency_sign}, {credits}, {payment-method}, {date-purchased}
If the Invoice is enabled and configured, under 'My accounts' section a new column will be displayed into the 'Transactions' tab where users can download invoices for every transaction.
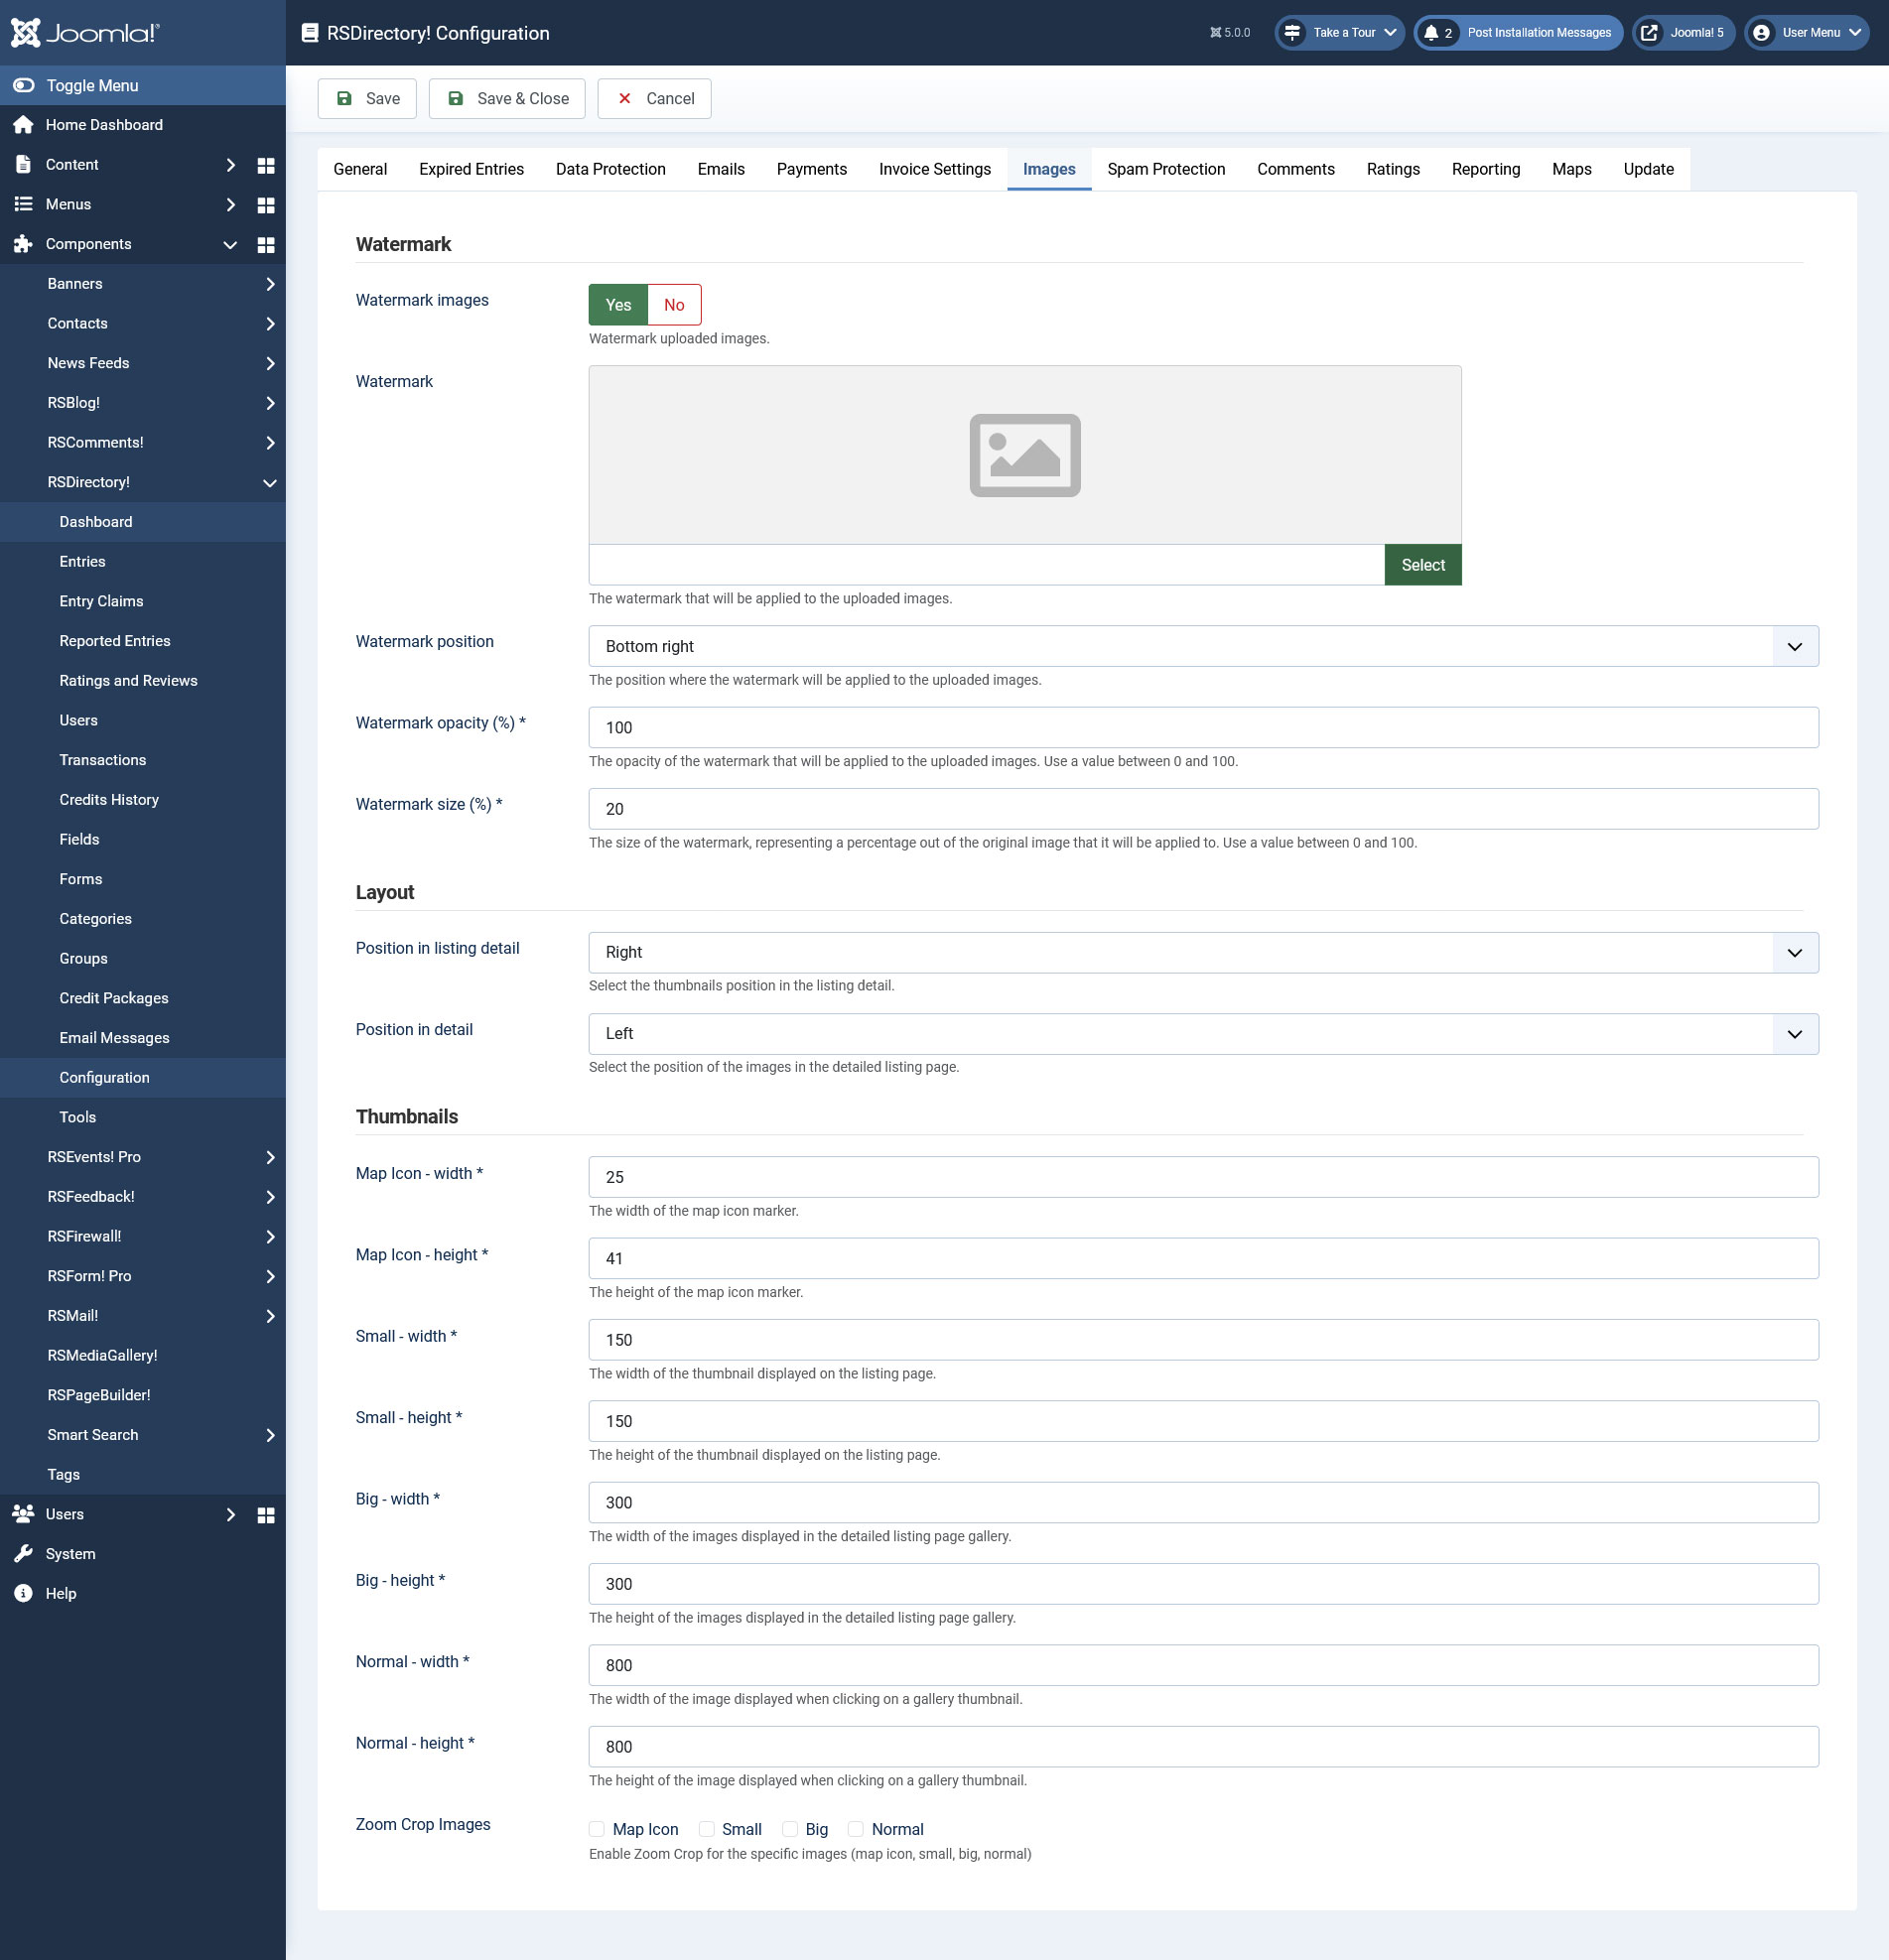
Images
This tab is split into 3 sub-tabs. The settings provided here are designed to control the entry images:
Watermark
- Watermark images: Choose whether to watermark the uploaded images or not
- Watermark: Provide the path to the watermark that will be applied
- Watermark position: Select the position where the watermark will be applied
- Watermark opacity (%): Select the watermark's opacity (please use a percentage)
- Watermark size (%): Select the watermark's size (please use a percentage)
Layout
- Position in listing detail: Select the thumbnails position in the listing detail
- Position in detail: Select the position of the images in the detailed listing page
Thumbnails
- Map Icon - width: The width of the map icon marker
- Map Icon - height: The height of the map icon marker
- Small - width: The width of the thumbnail displayed on the listing page
- Small - height: The height of the thumbnail displayed on the listing page
- Big - width: The width of the images displayed in the detailed listing page gallery
- Big - height: The height of the images displayed in the detailed listing page gallery
- Normal - width: The width of the image displayed when clicking on a gallery thumbnail
- Normal - height: The height of the image displayed when clicking on a gallery thumbnail
- Zoom Crop Images: Small / Big / Normal - Enable zoom crop for small / big / normal images. Images of the selected types will be cropped to fit within the provided width / height dimensions.
Note: Every time you enable / disable Zoom Crop Images, make sure to also empty the folders containing cached images found in /components/com_rsdirectory/files/cache/.
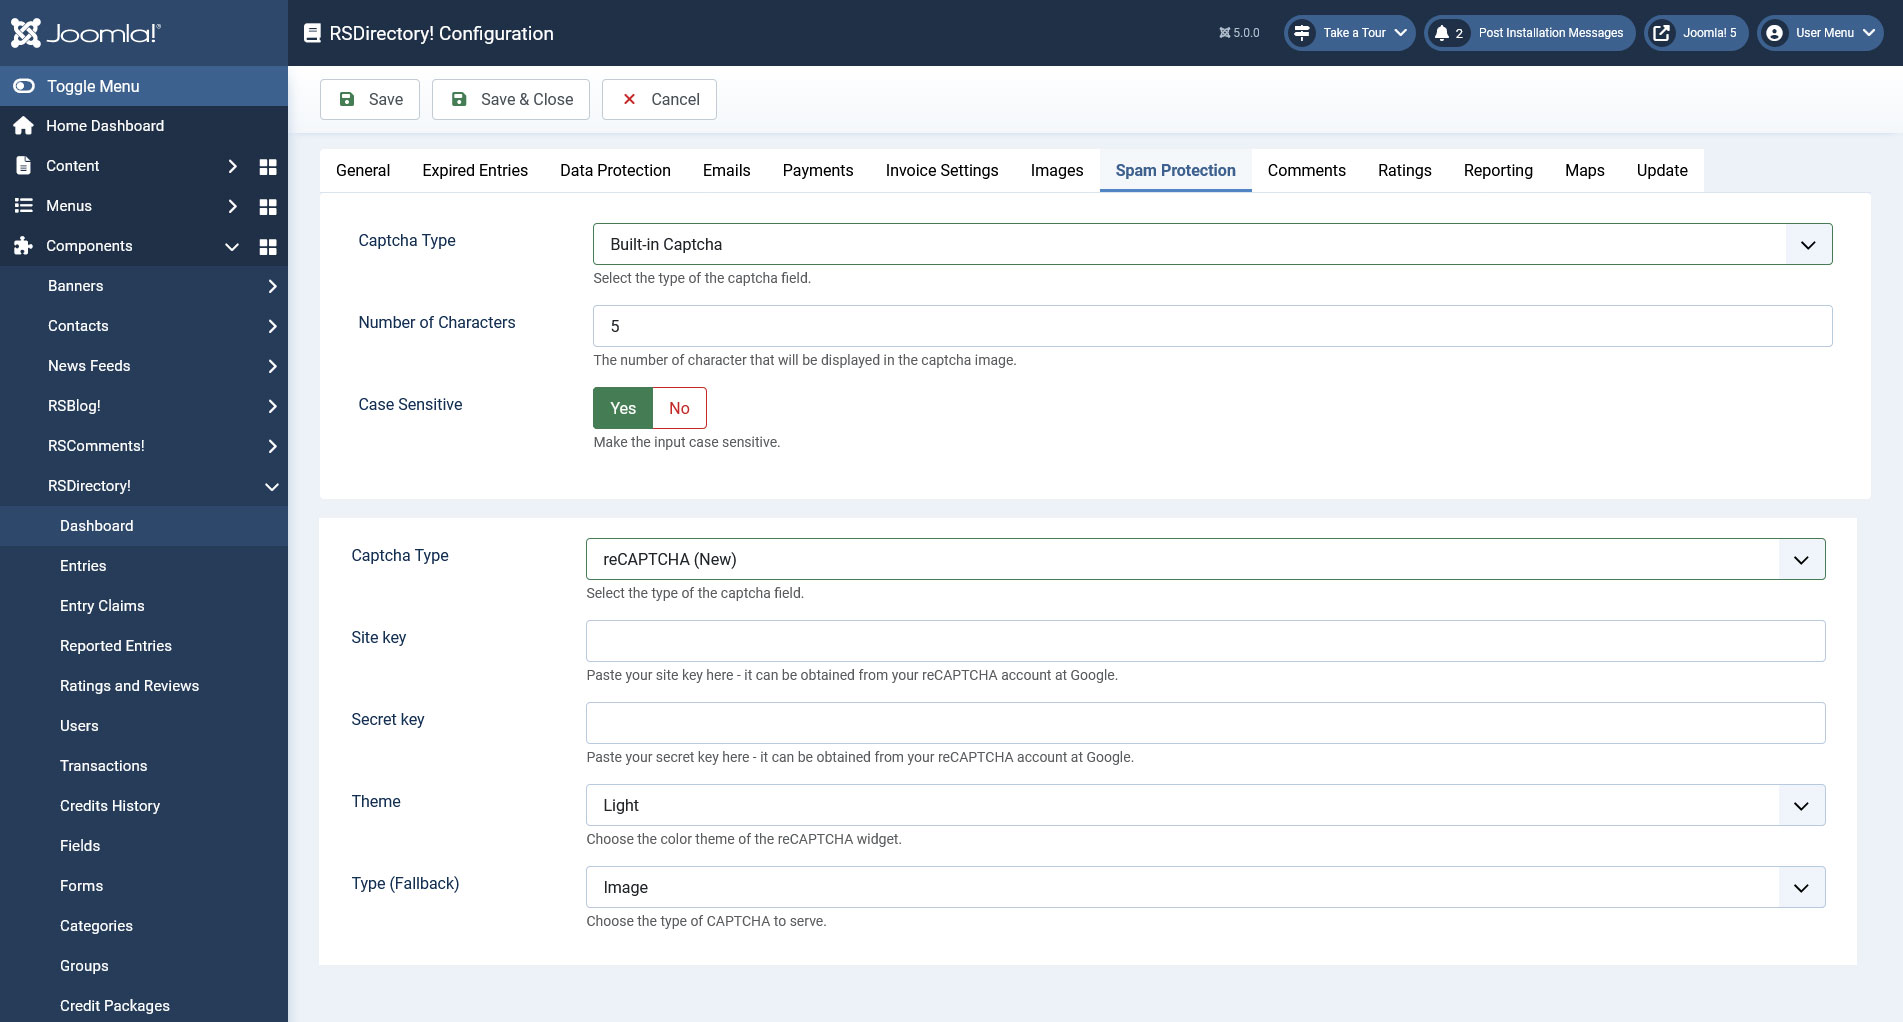
Spam protection
You can configure the CAPTCHA, reCAPTCHA and No CAPTCHA reCAPTCHA anti-spam methods in this tab.
- Captcha type: Select the Captcha type you wish to use (built-in Captcha and reCAPTCHA (New))
- Number of characters: The number of character that will be displayed in the captcha image
- Generate lines: Generate lines for higher security
- Case sensitive: Make the input case sensitive
reCAPTCHA (New) settings
- Site Key: The reCAPTCHA site key;
- Secret Key: The reCAPTCHA secret key;
- Theme: Select the desired reCAPTCHA theme - Light or Dark;
- Type (Fallback): Can be Image or Audio;
To get a reCAPTCHA account, head to Google's dedicated website >> click on USE reCAPTCHA ON YOUR SITE >> click on Sign up Now! >> log in with your Google account (you must get one if you don't already have one) >> specify your domain (e.g website.com) >> click on Create Key.
You will then be provided with the Public Key and Private Key which you need to enter in their corresponding fields mentioned above.
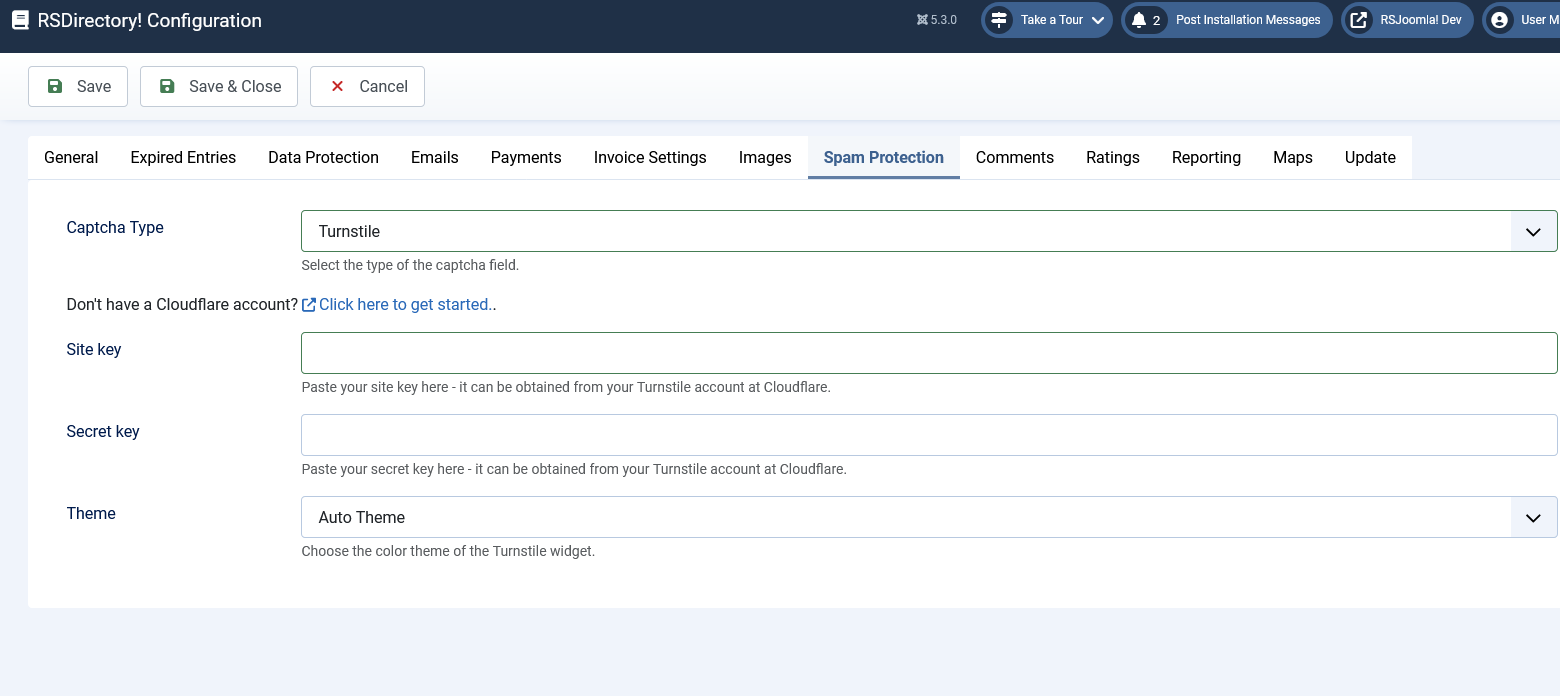
Turnstile
- Site Key: Paste your site key here - it can be obtained from your Turnstile account at Cloudflare.
- Secret Key: Paste your secret key here - it can be obtained from your Turnstile account at Cloudflare;
- Theme: Choose the color theme of the Turnstile widget. - Auto, Light or Dark;
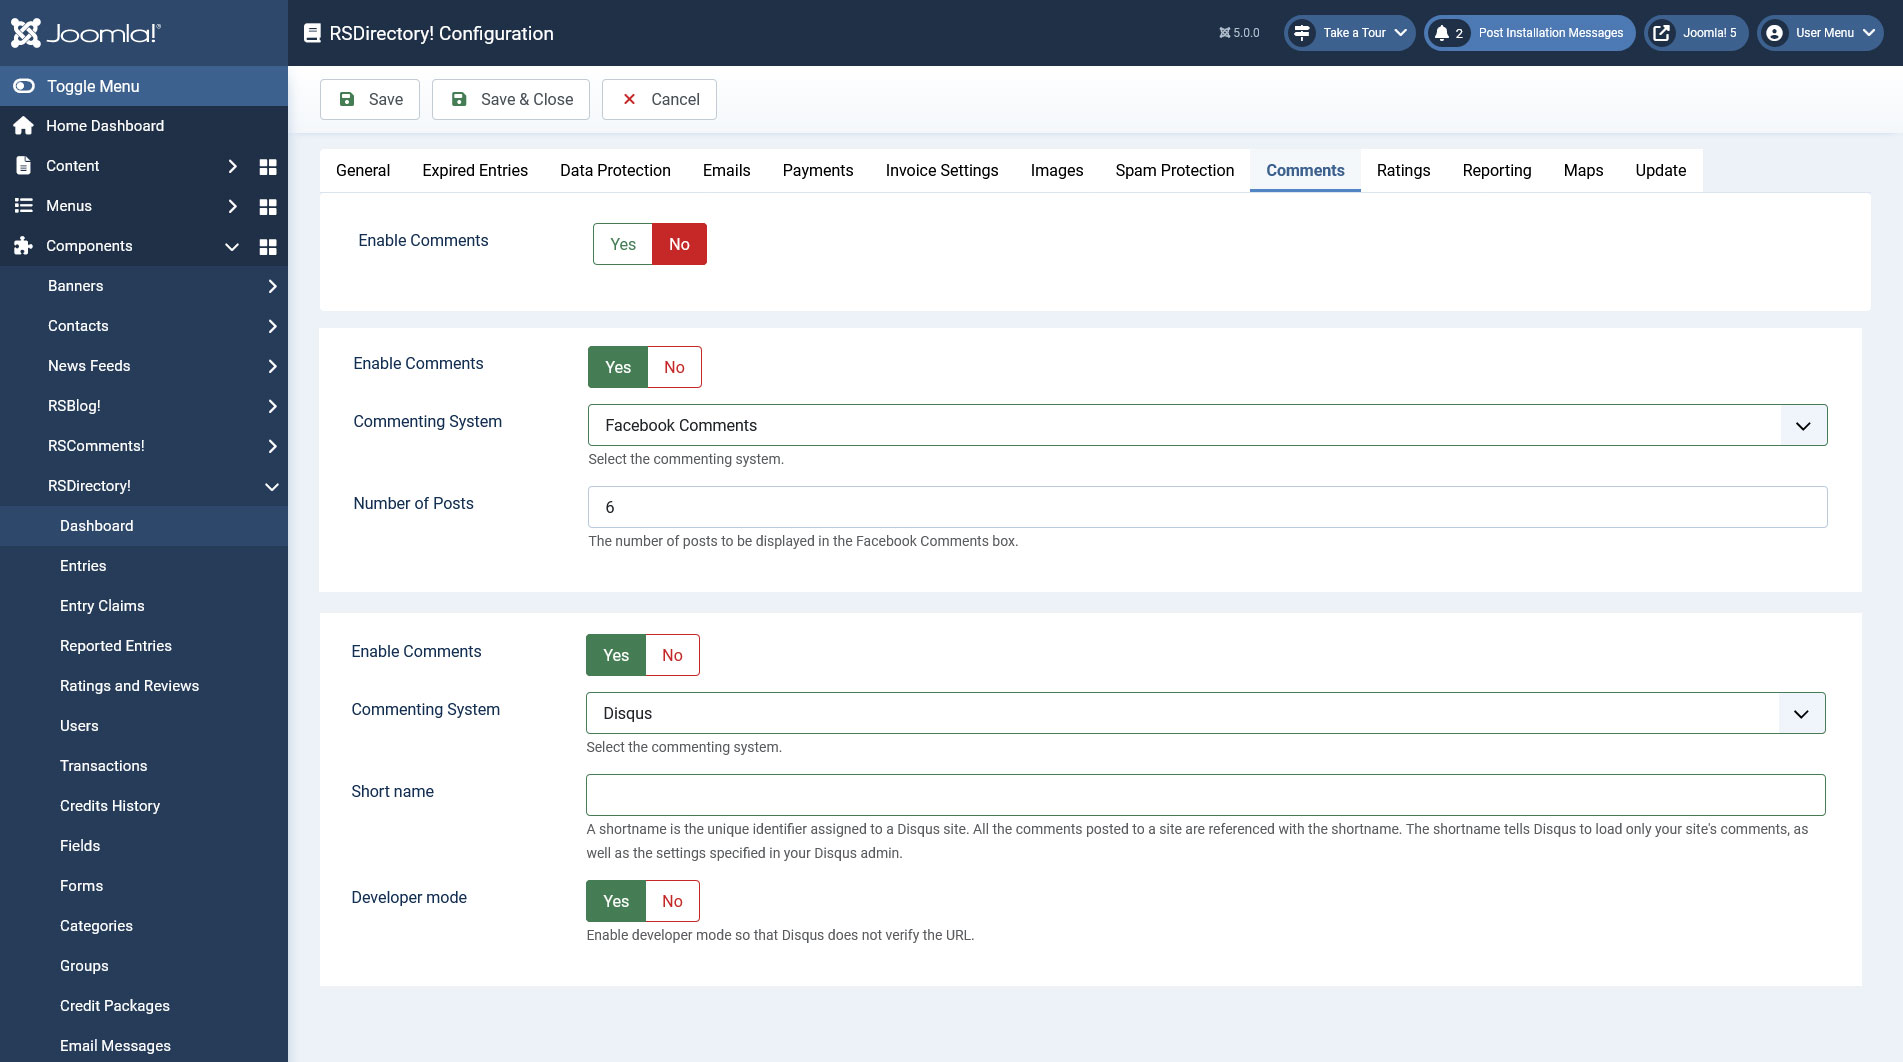
Comments
Configure your commenting systems.
- Enable comments: Choose whether to enable comments or not;
- Commenting system: Select the commenting system you wish to use;
Facebook Comments Settings
- Number of posts: The number of posts to be displayed in the Facebook Comments box
Disqus settings
- Short name: The Disqus short name
- Developer mode: Enable developer mode so that Disqus does not verify the URL
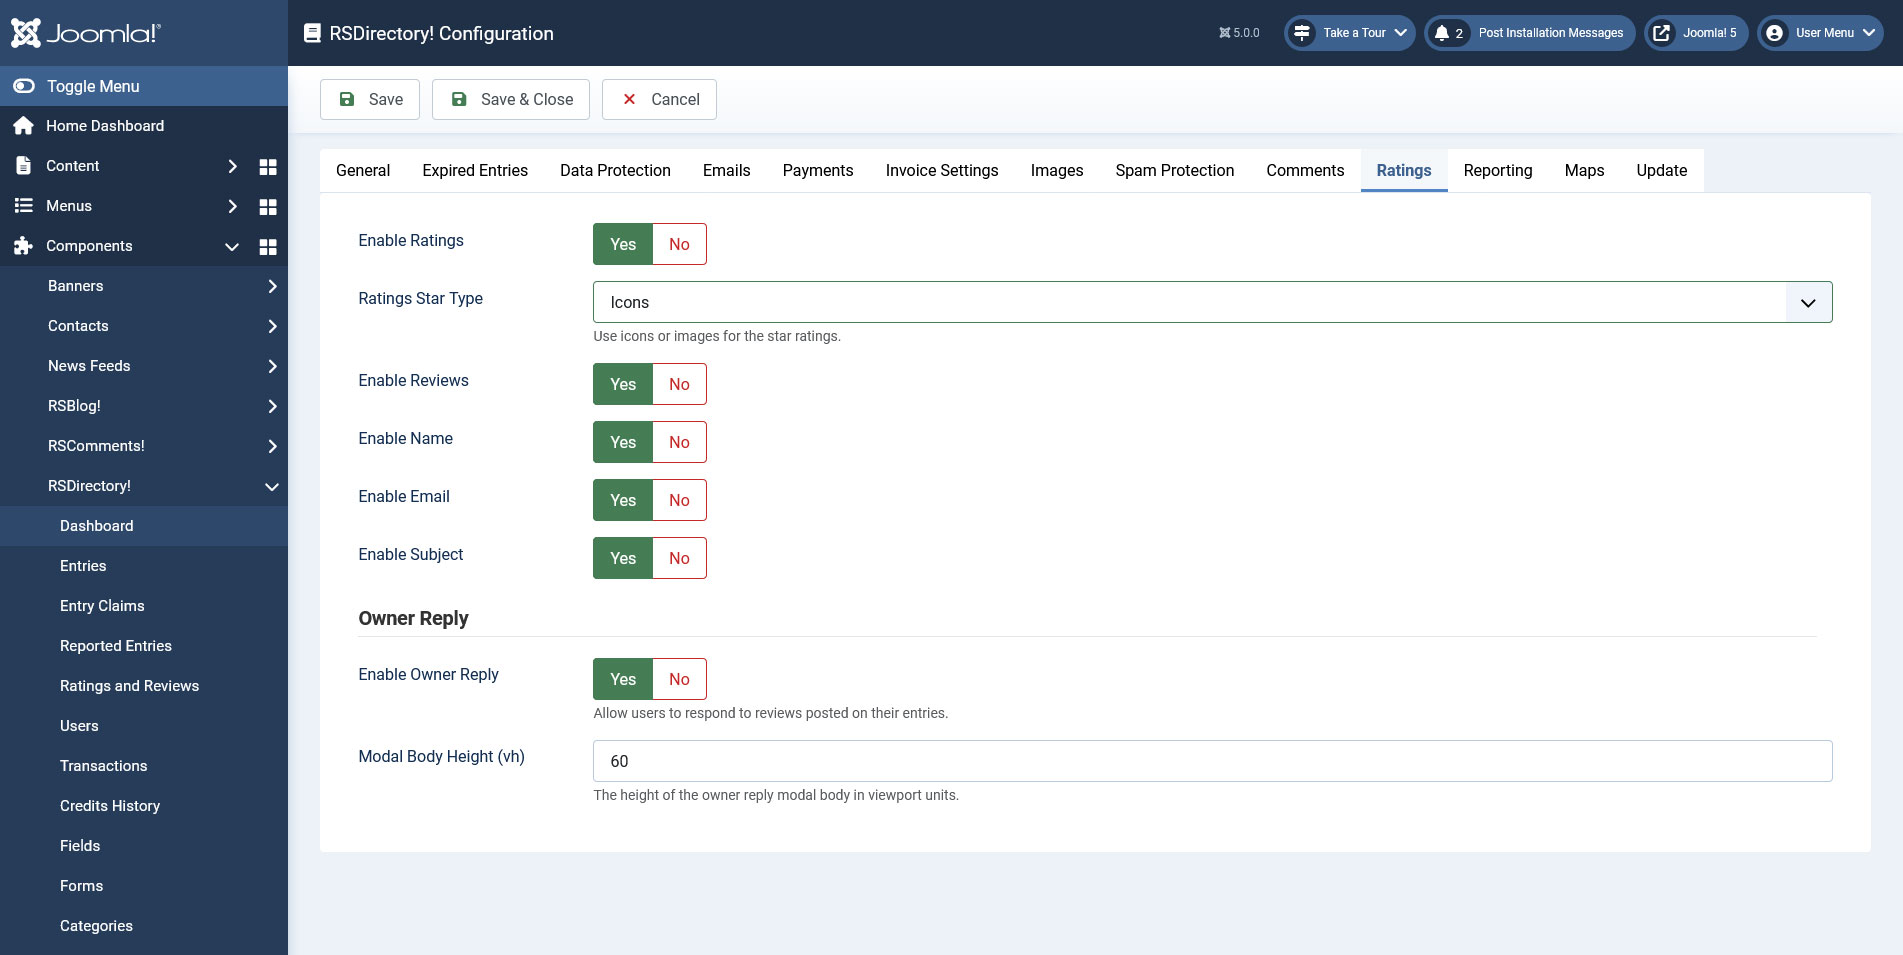
Ratings
Enable / disable ratings and reviews.
- Enable ratings: Choose whether to enable ratings or not
- Ratings star type: Icons / Images : Choose to display the rating system with images or icons
- Enable reviews: Choose whether to enable reviews or not
- Enable name: enable/disable the name field on the review form
- Enable email: enable/disable the email field on the review form
- Enable subject: enable/disable the subject field on the review form
Owner reply
- Enable owner reply: Allows users to respond to reviews poested on their entries.
- Modal body height: Set the height of the owner reply modal body.
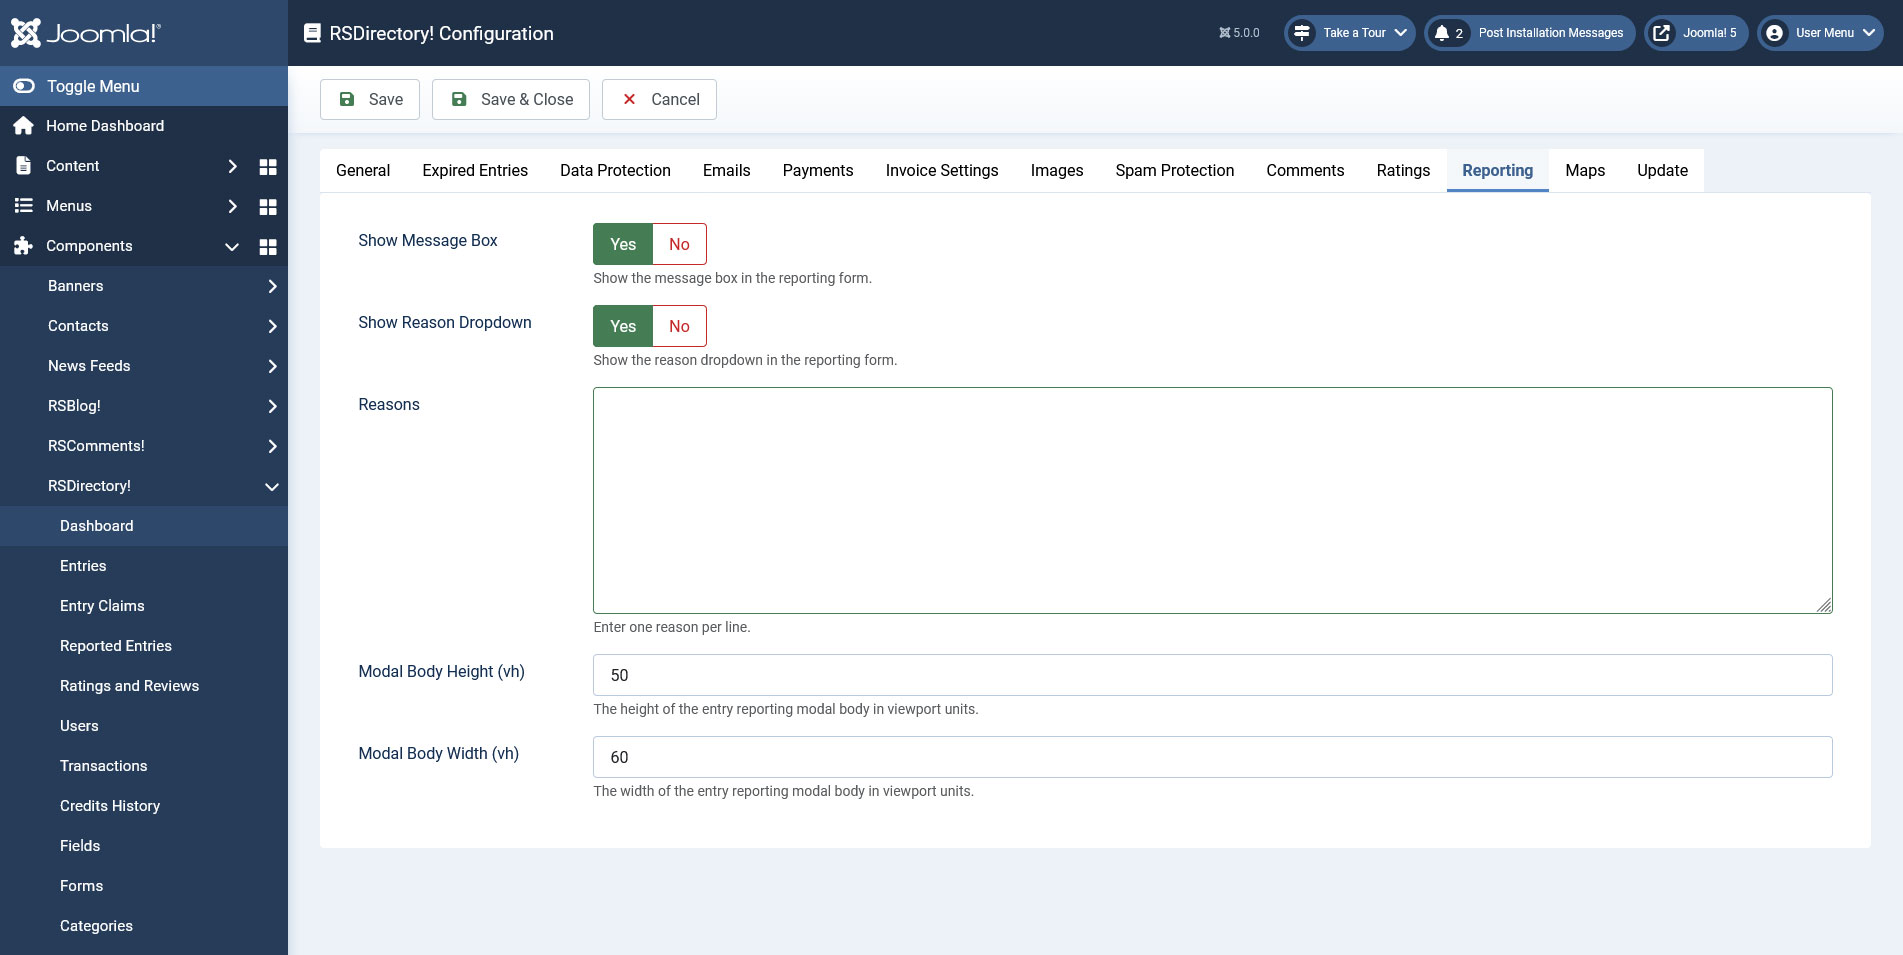
Reporting
RSDirectory! also offers a reporting feature, it's parameters can be configured in this tab.
- Show message box: Show the message box in the reporting form
- Show reason dropdown: Show the reason dropdown in the reporting form
- Reasons: Enter the reasons (one per each line)
- Modal width(px): The width of the entry reporting modal (in pixels)
- Modal height(px): The height of the entry reporting modal (in pixels)
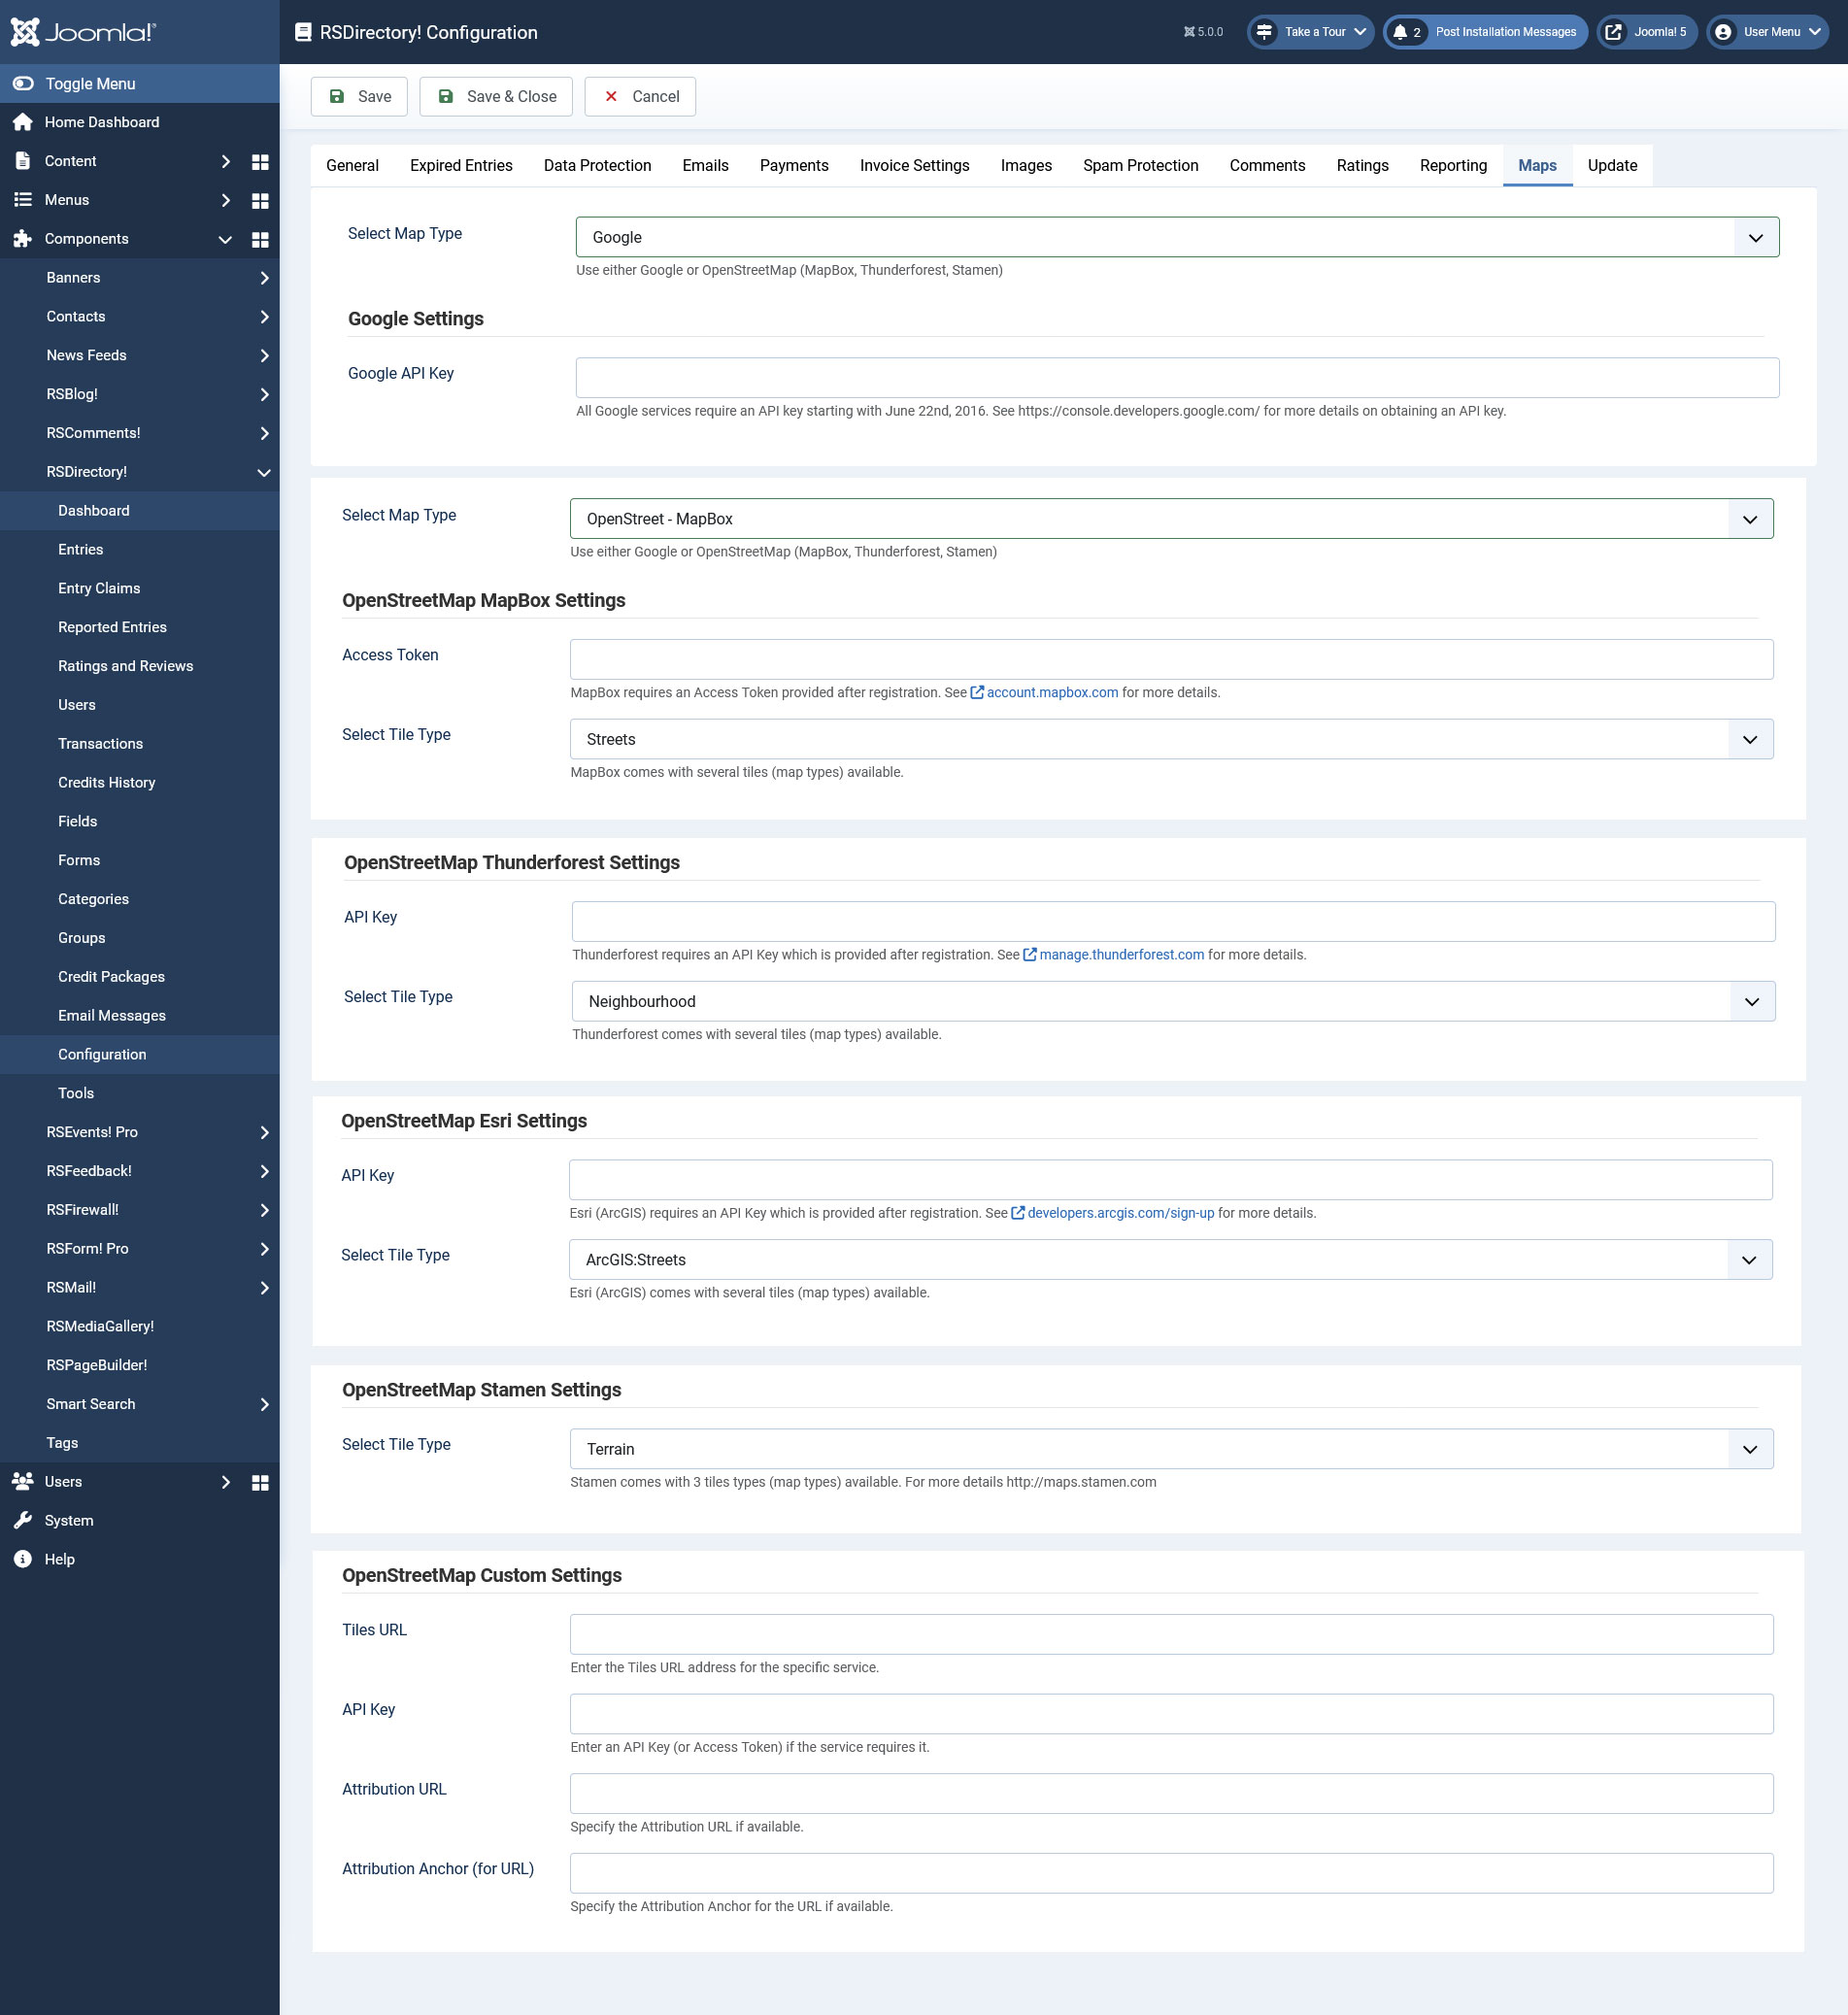
Maps
You can choose to select the map service from Google or OpenStreet:
- Google Settings
- Google APY KeyAdd your Google API key. All Google services require an API key starting with June 22nd, 2016. See Google Developers Console for more details on obtaining an API key.
- OpenStreetMap MapBox Settings
- Access Token: MapBox requires an Access Token provided after registration. See account.mapbox.com for more details.
- Select Tile Type: You can choose from these map types: Streets, Dark, Lite, Outdoors, Satellite.
- OpenStreetMap Thunderforest Settings
- API Key: Thunderforest requires an API Key which is provided after registration. See account.thundersforest.com for more details.
- Select Tile Type: You can choose from these map types: Neighbourhood, OpenCycleMap, Transport, Landscape, Outdoors, Transport Dark, Spinal Map, Pioneer, Mobile Atlas.
- OpenStreetMap Esri Settings
- Select Tile Type: The Following Map Types are available (no API Key required): World Street, World Imagery, World Topo Map.
- OpenStreetMap Stamen Settings
- Select Tile Type: Available map types (no API Key required): Terain, Tonner, Watercolor.
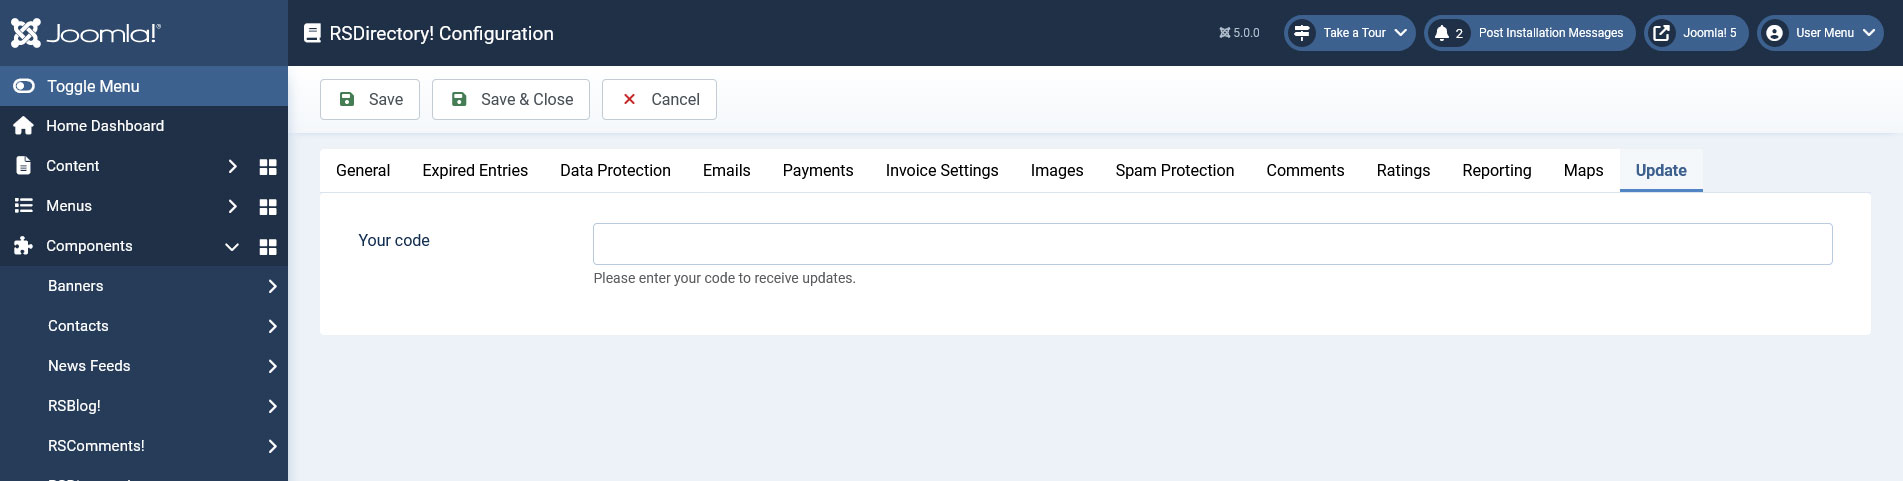
Update
Add your license code in this tab. You can read more on how to get a code in our documentation.
- Your code: Enter your license code here. You can get it on our website, in the Downloads >> My Memberships area by registering your domain
6 persons found this article helpful.