How to create a multi-page form
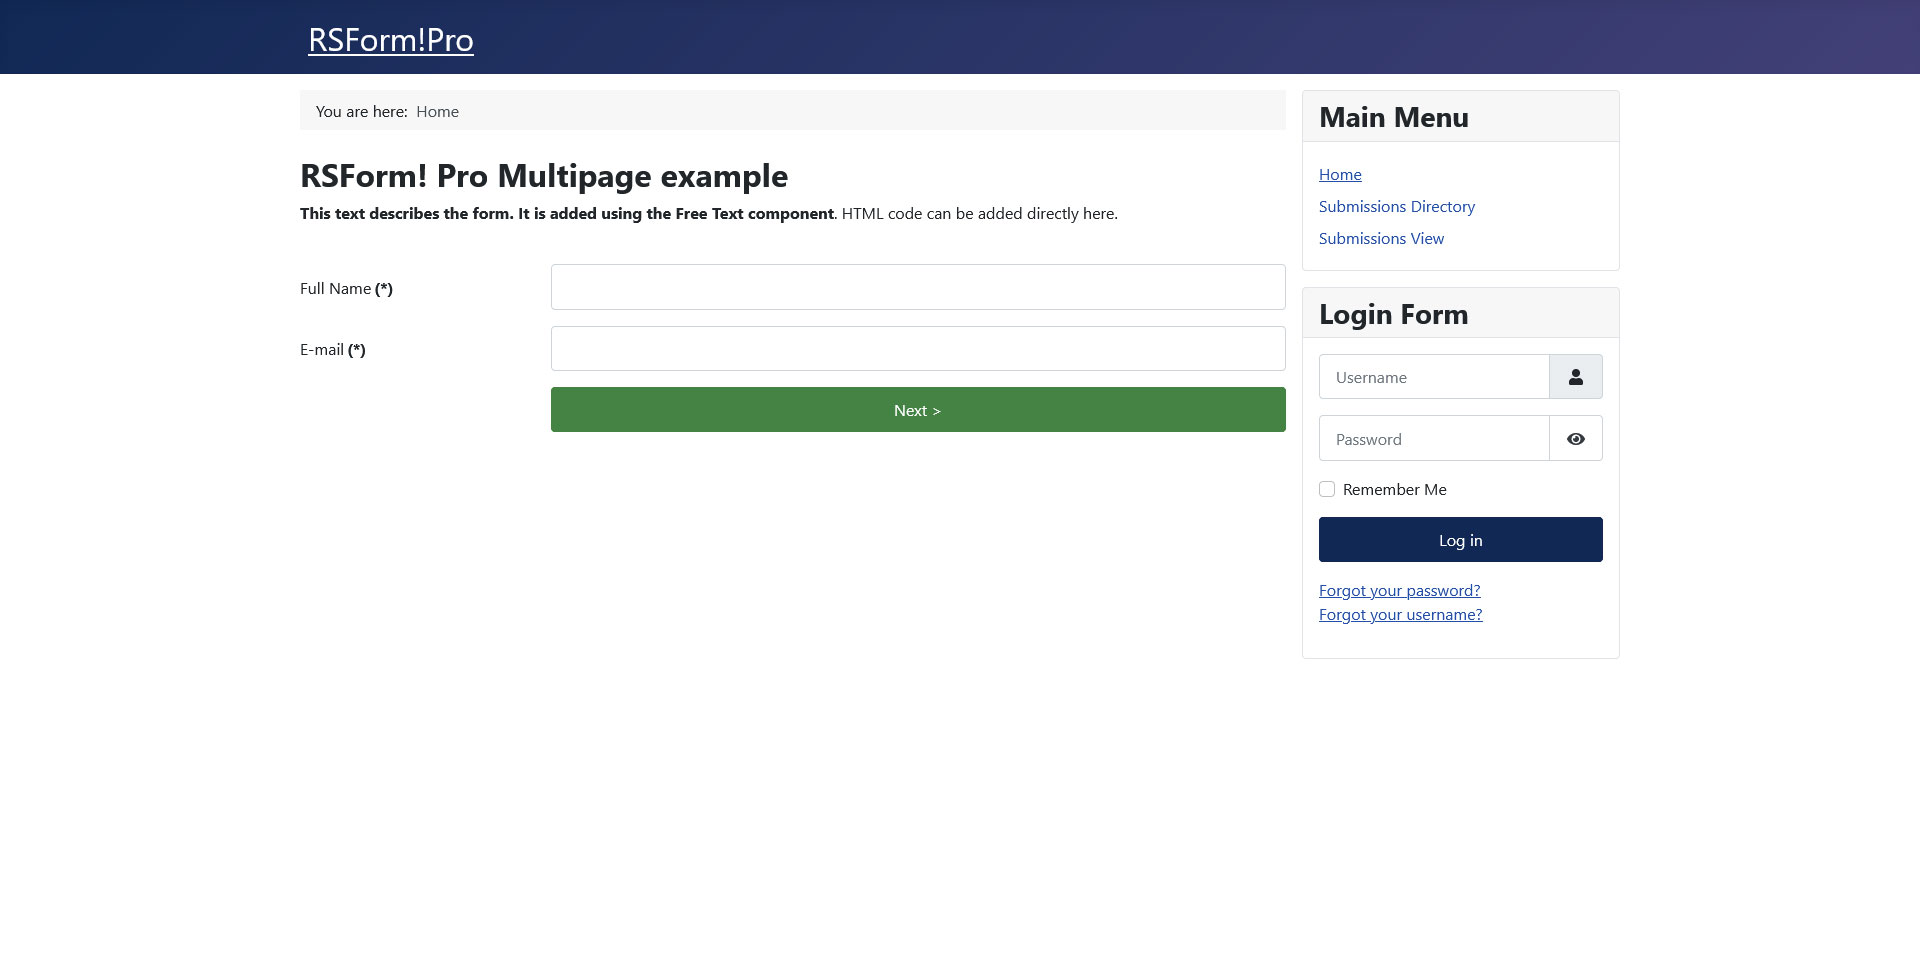
With RSform!Pro, you can create forms with an unlimited number of pages. No scripting knowledge is required. The multi-page functionality is actually provided by a Javascript code, that shows or hides certain parts of the form. Form fields can be validated per page and a progress bar can also be displayed.
The form creation itself is just like any other RSform!Pro form, with the mention that you need to use the special Pagebreak elements.
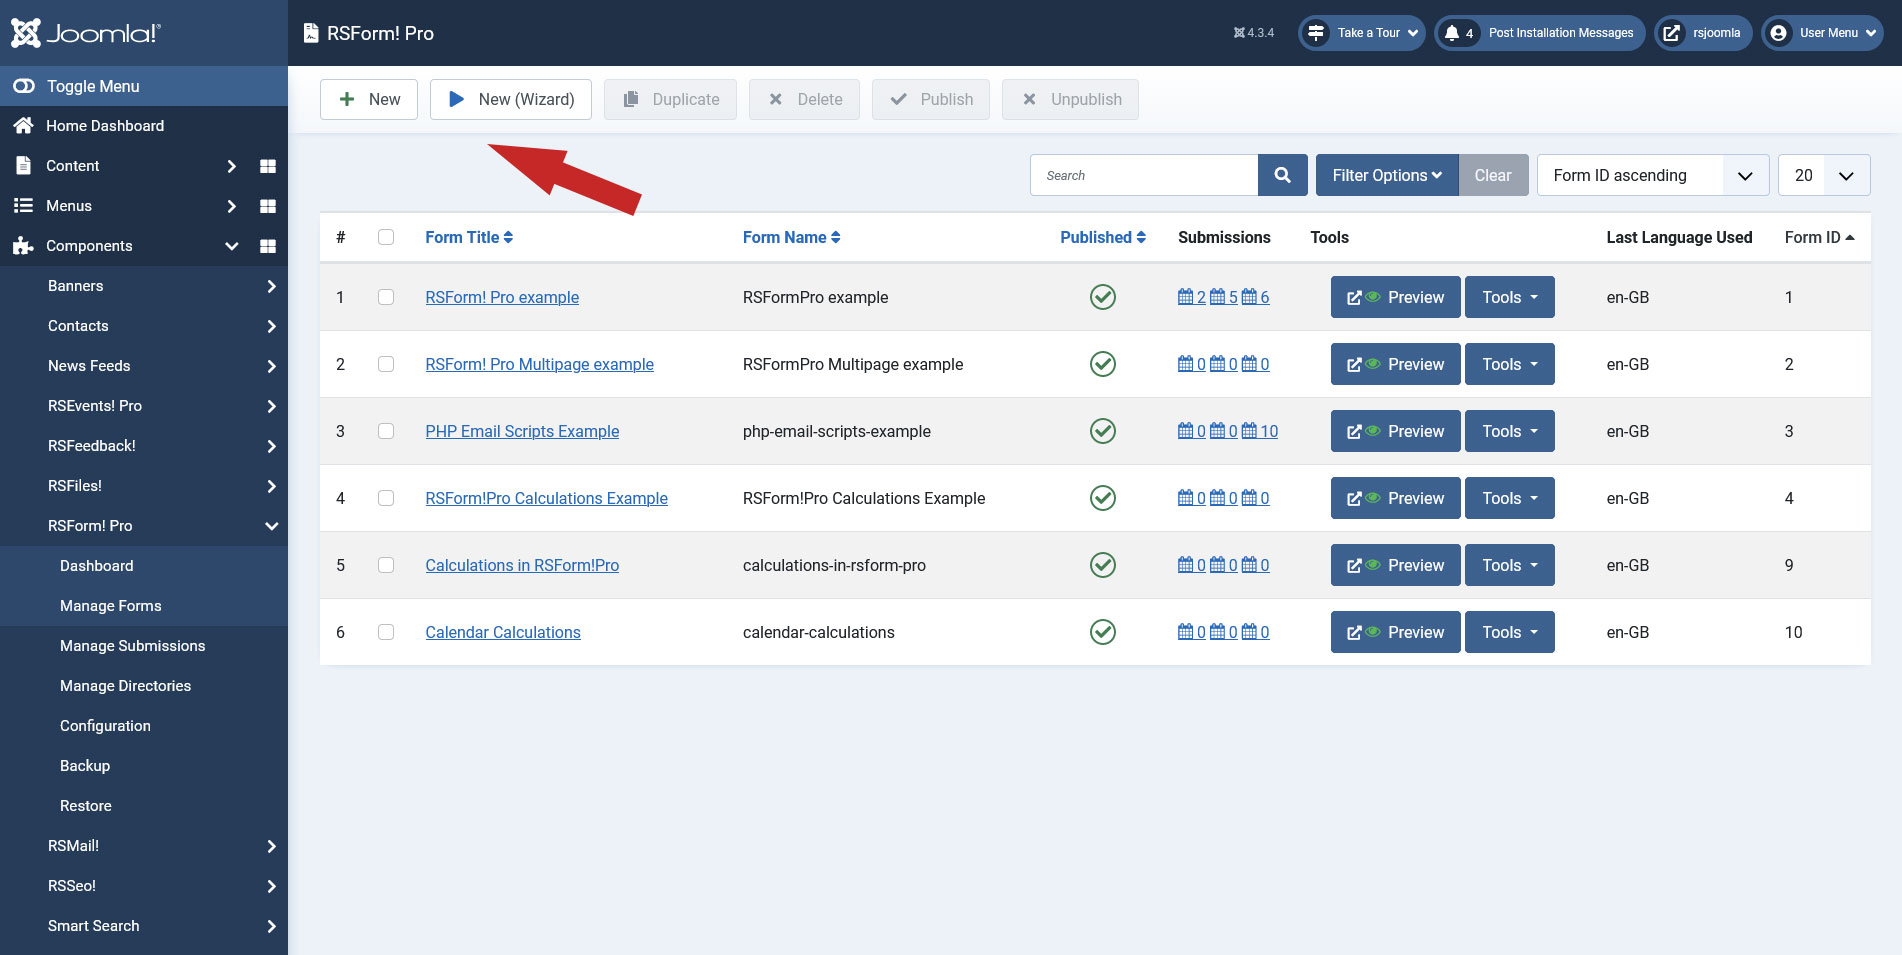
Step 1: Create a new form
Head to Components > RSform!Pro > Manage forms, and click on the New or New (Wizard) button, located on the top-left corner.
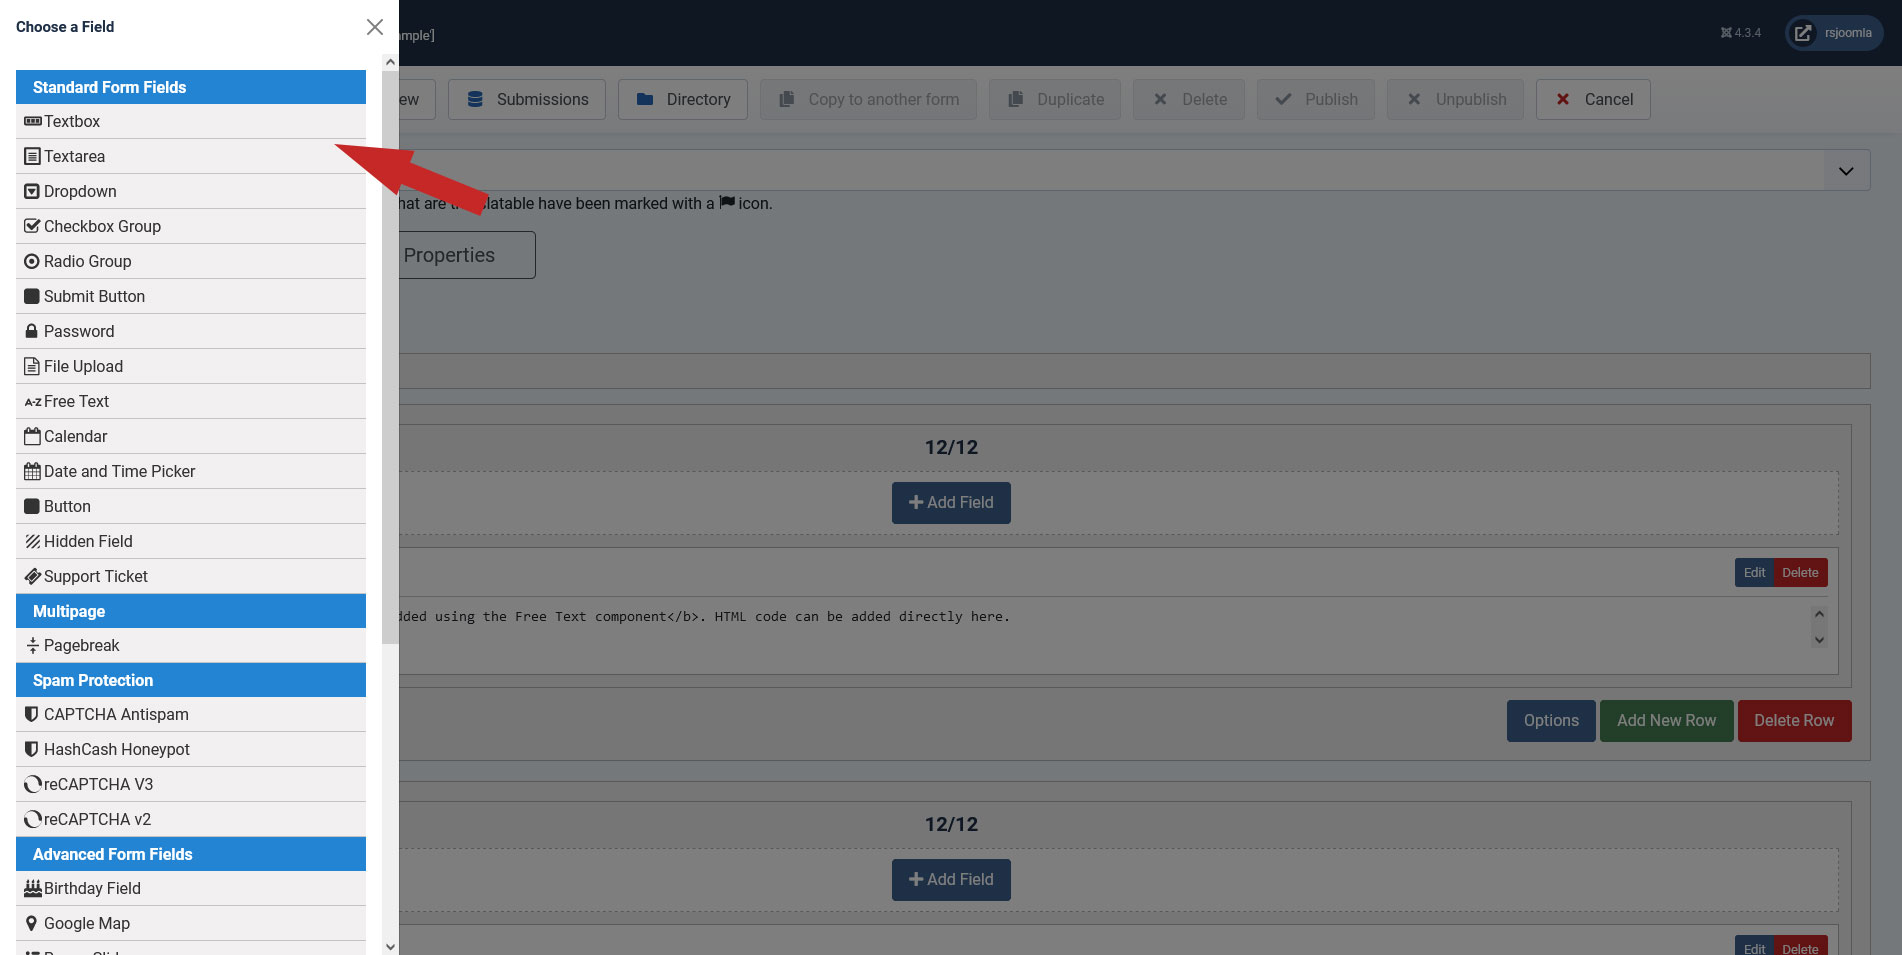
Step 2: Add form fields
RSform!Pro allows you to add a unlimited number of fields to your form. Once in the RSform!Pro Components area, click on the field type, located on the left.
Once you click on a form field type, you can specify the field name, caption, validation message and other form specific attributes. More details on this topic can be found here.
Step 3: Add Pagebreak elements
This is the element that will add the separation between form pages. This will automatically add Next and Previous buttons. A nice feature is that it will automatically detect if a next or previous button is required. For example, on the first page of a form, you do not need a previous button. The same goes for the last page (you don't need a next button).
Furthermore, another useful feature, is that you can validate fields that reside on a specific page when clicking the next button. An AJAX validation rule is specifically used for this, so the user will not be redirected to a different page.
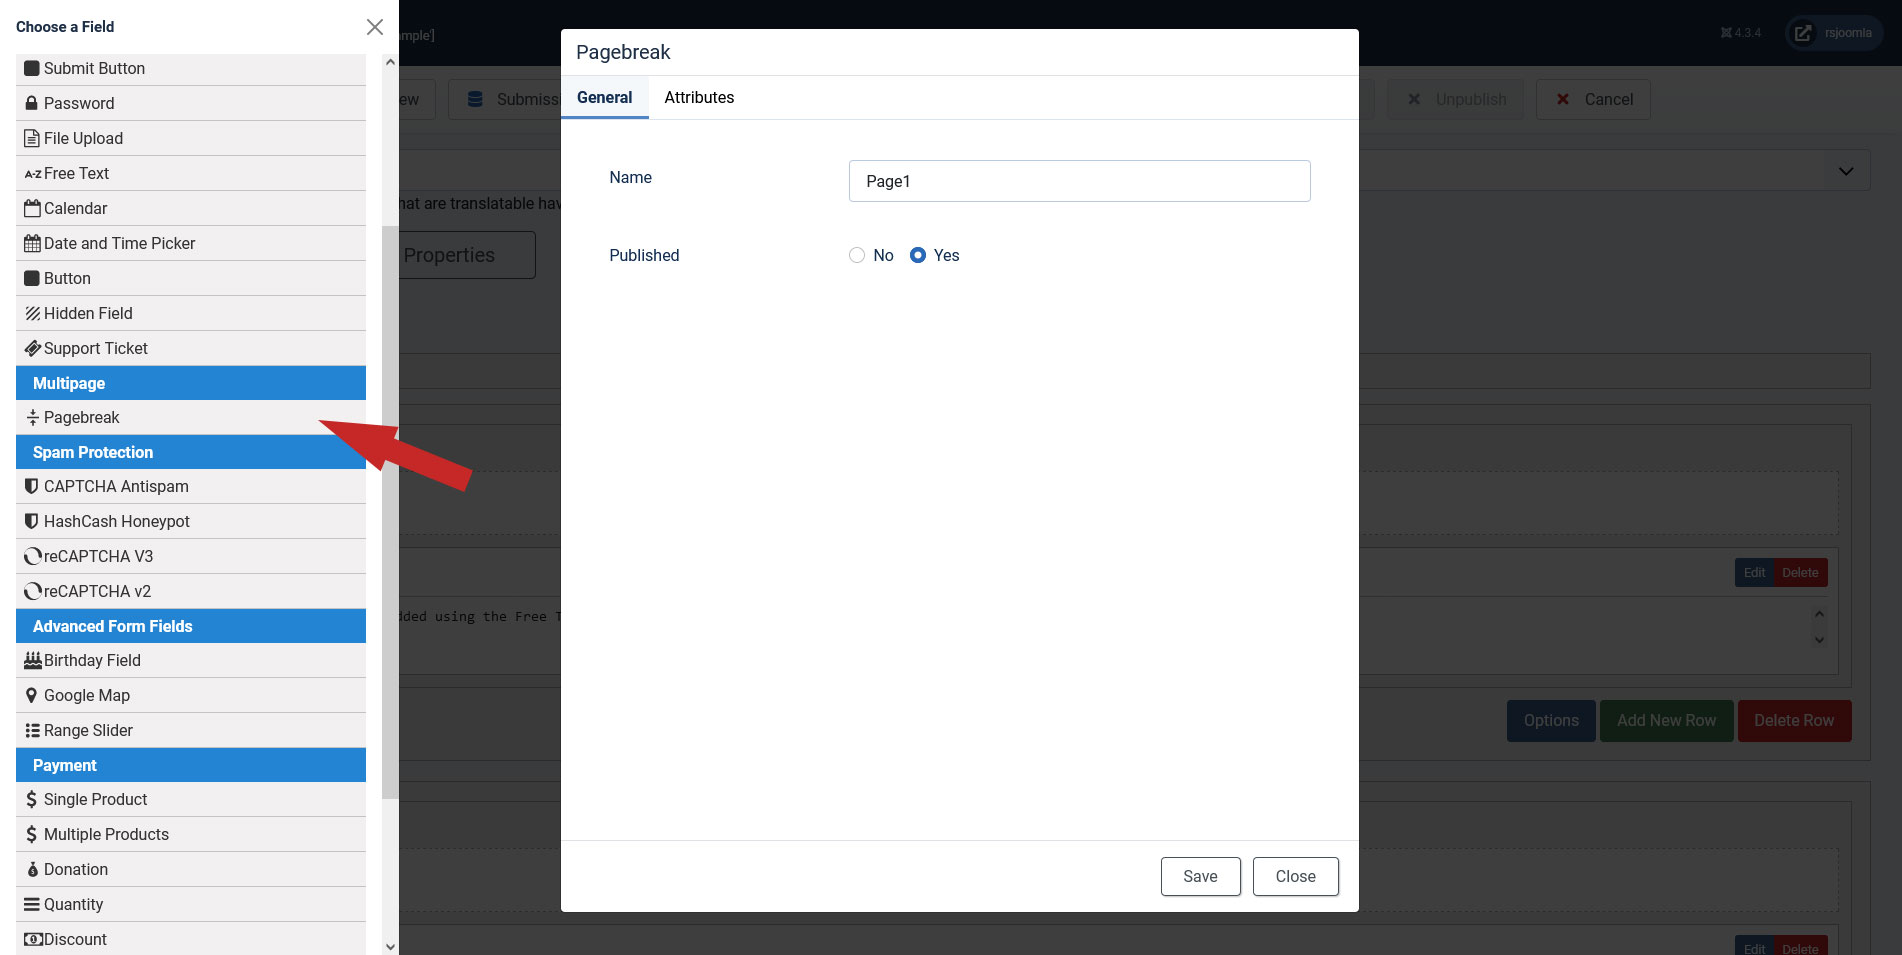
In the Additional Attributes area of the Pagebreak element, you can add triggers for Javacript functions (or actual code), but a return element should never be used. This can interrupt the page change or validation process.
Step 4: Add a page progress bar
Within the Pagebreak Attributes area, you will find the progress bar. This is rather useful from a user related point of view, as it will know how much of the form has been filled in.
This is basically a HTML block, that is displayed along with the page. This is fully customizable, meaning that you can add your own HTML and CSS classes. You can also use some specific placeholders. Example:
<div>
 <p><em>Page <strong>{page}</strong> of {total}</em></p>
 <div class="rsformProgressContainer">
  <div class="rsformProgressBar" style="width: {percent}%;"></div>
 </div>
</div>
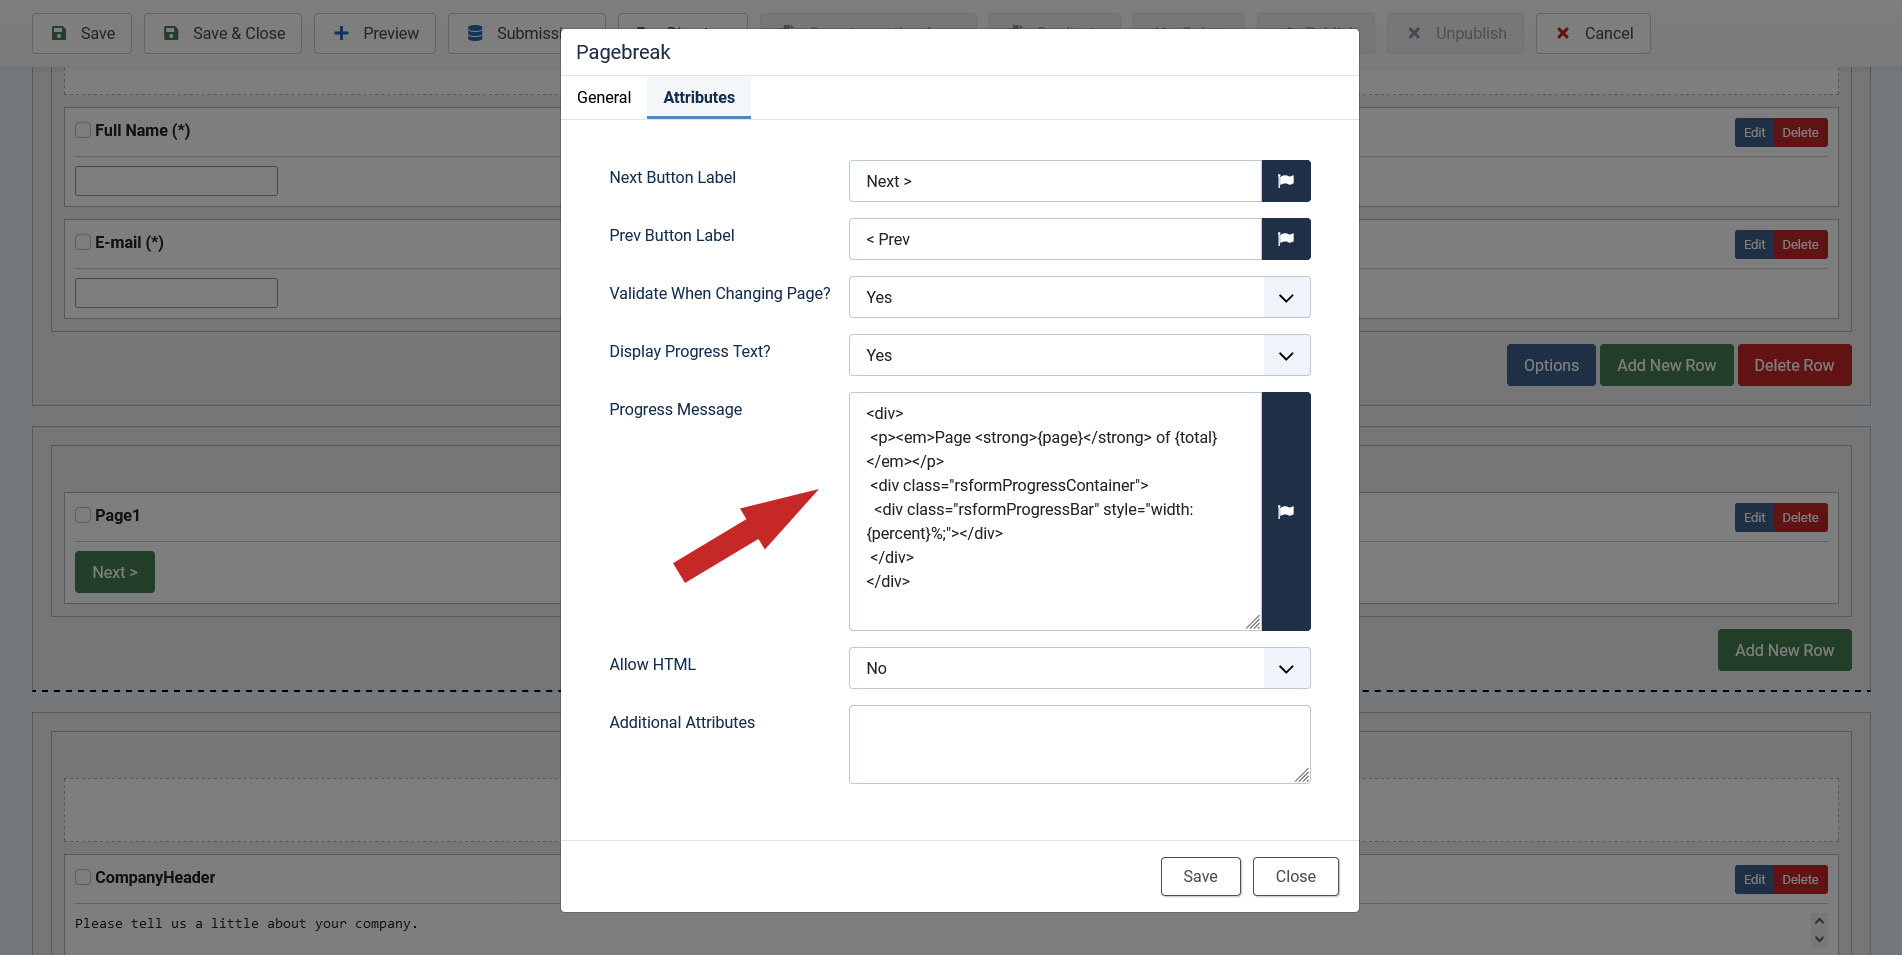
The configuration of the progress bar for the last form page is displayed within the submit button properties(Attributes tab).
- {page} - displays the current page
- {total} - the number of total pages of your form
- {percent} - how much of the form has been filled in
31 persons found this article helpful.
You Should Also Read
Dynamic Drop-down change form example HOT |
Create Tabbed Forms HOT |
How to override front.css file in RSForm!Pro HOT |
Creating a Send me a copy scenario HOT |