Restrict access to certain parts of your webpages
These restrictions can be enforced using a simple syntax which includes a starting and an ending tag. Optionally, you can also use a conditional tag in order to display a message to users who don't have access to the restricted content. There are 2 possible usages for the syntax:
- Published: Set whether the upgrade is published or not.
- From membership: The membership that will be upgraded.
- To membership: The target membership.
- Price difference: Specify a price difference between the two memberships.
Individual memberships restrictions
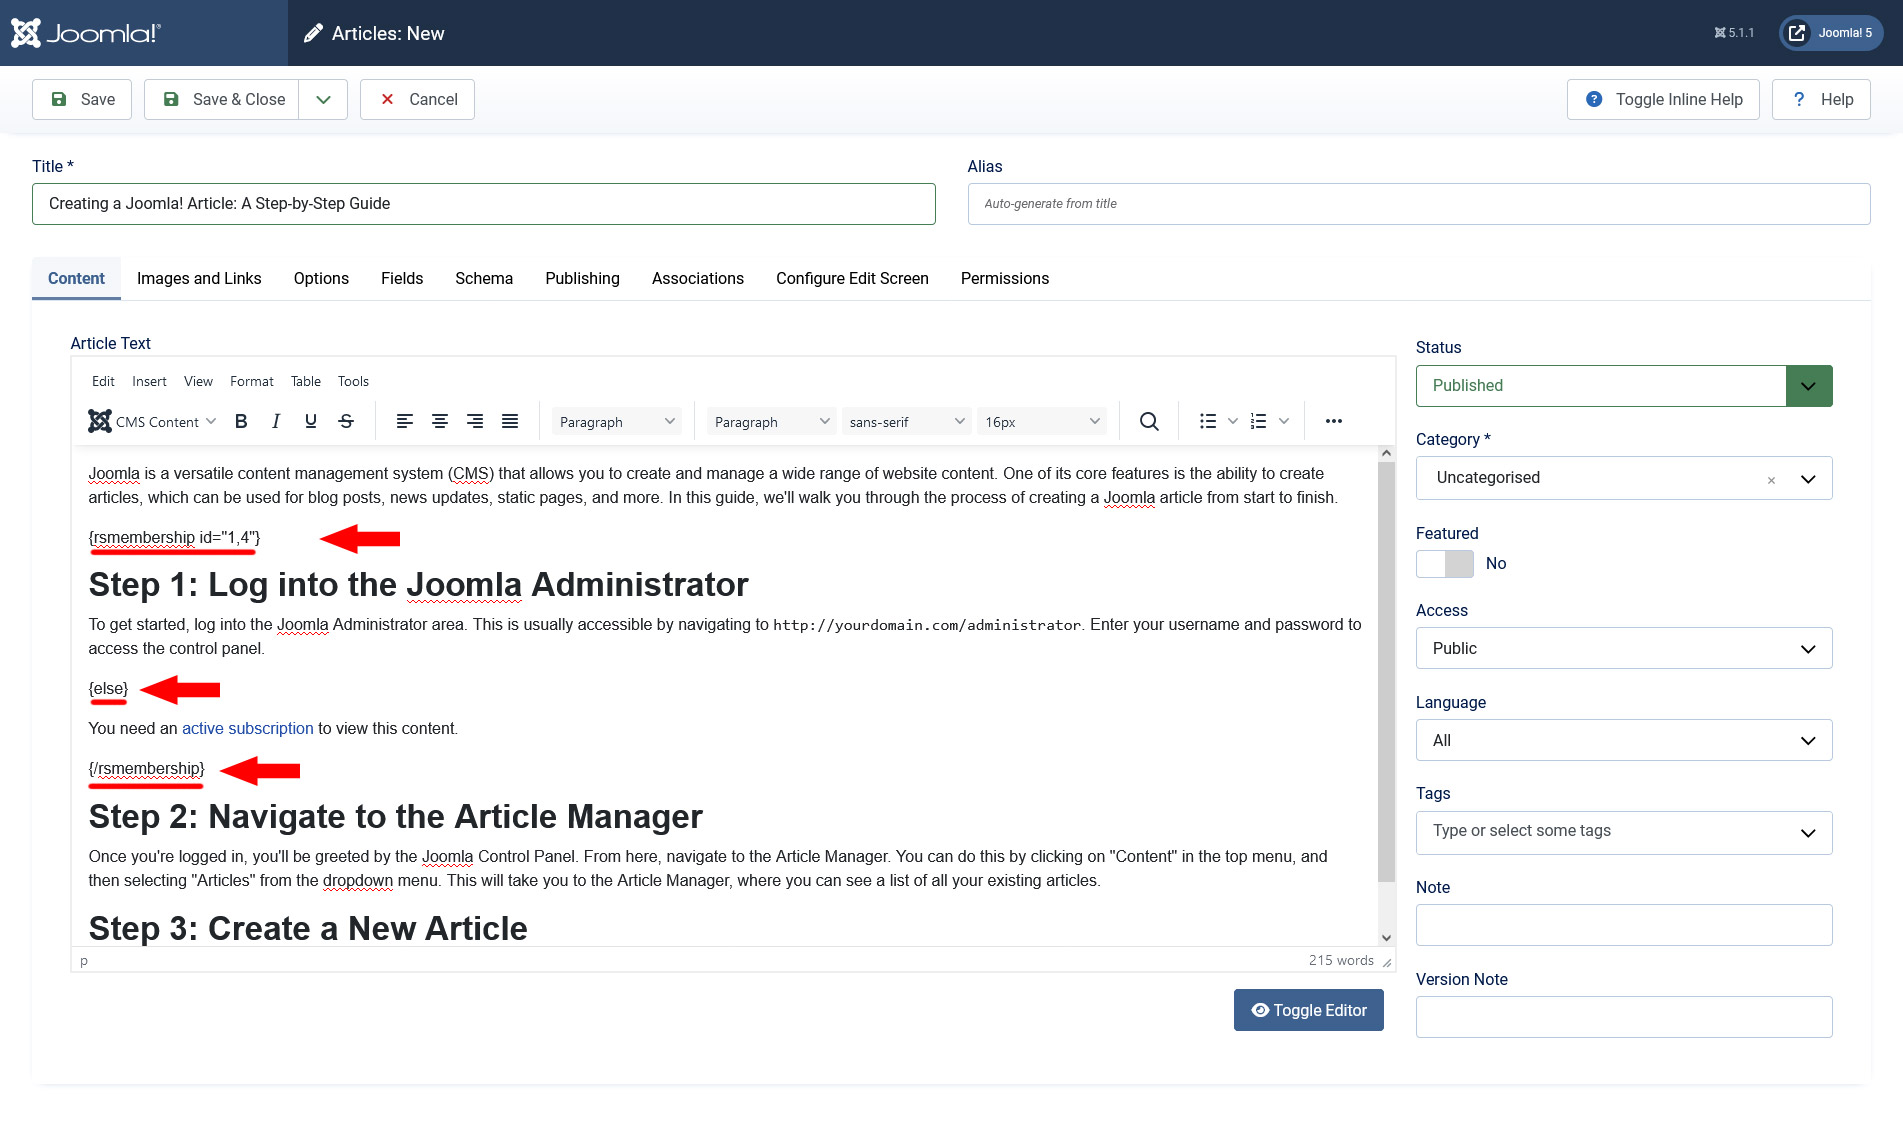
You can associate the restriction with individual memberships, as in the following example:
{rsmembership id="1,3"} - starting tag
Restricted content
{else} - conditional tag
This is shown to NON-subscribers
{/rsmembership} - ending tag
In this example, access to the Restricted content will only be granted to users who own at least one of the memberships who's internal id's were specified in the starting tag - 1 and 3. The rest of the users will see the This is shown to NON-subscribers message.
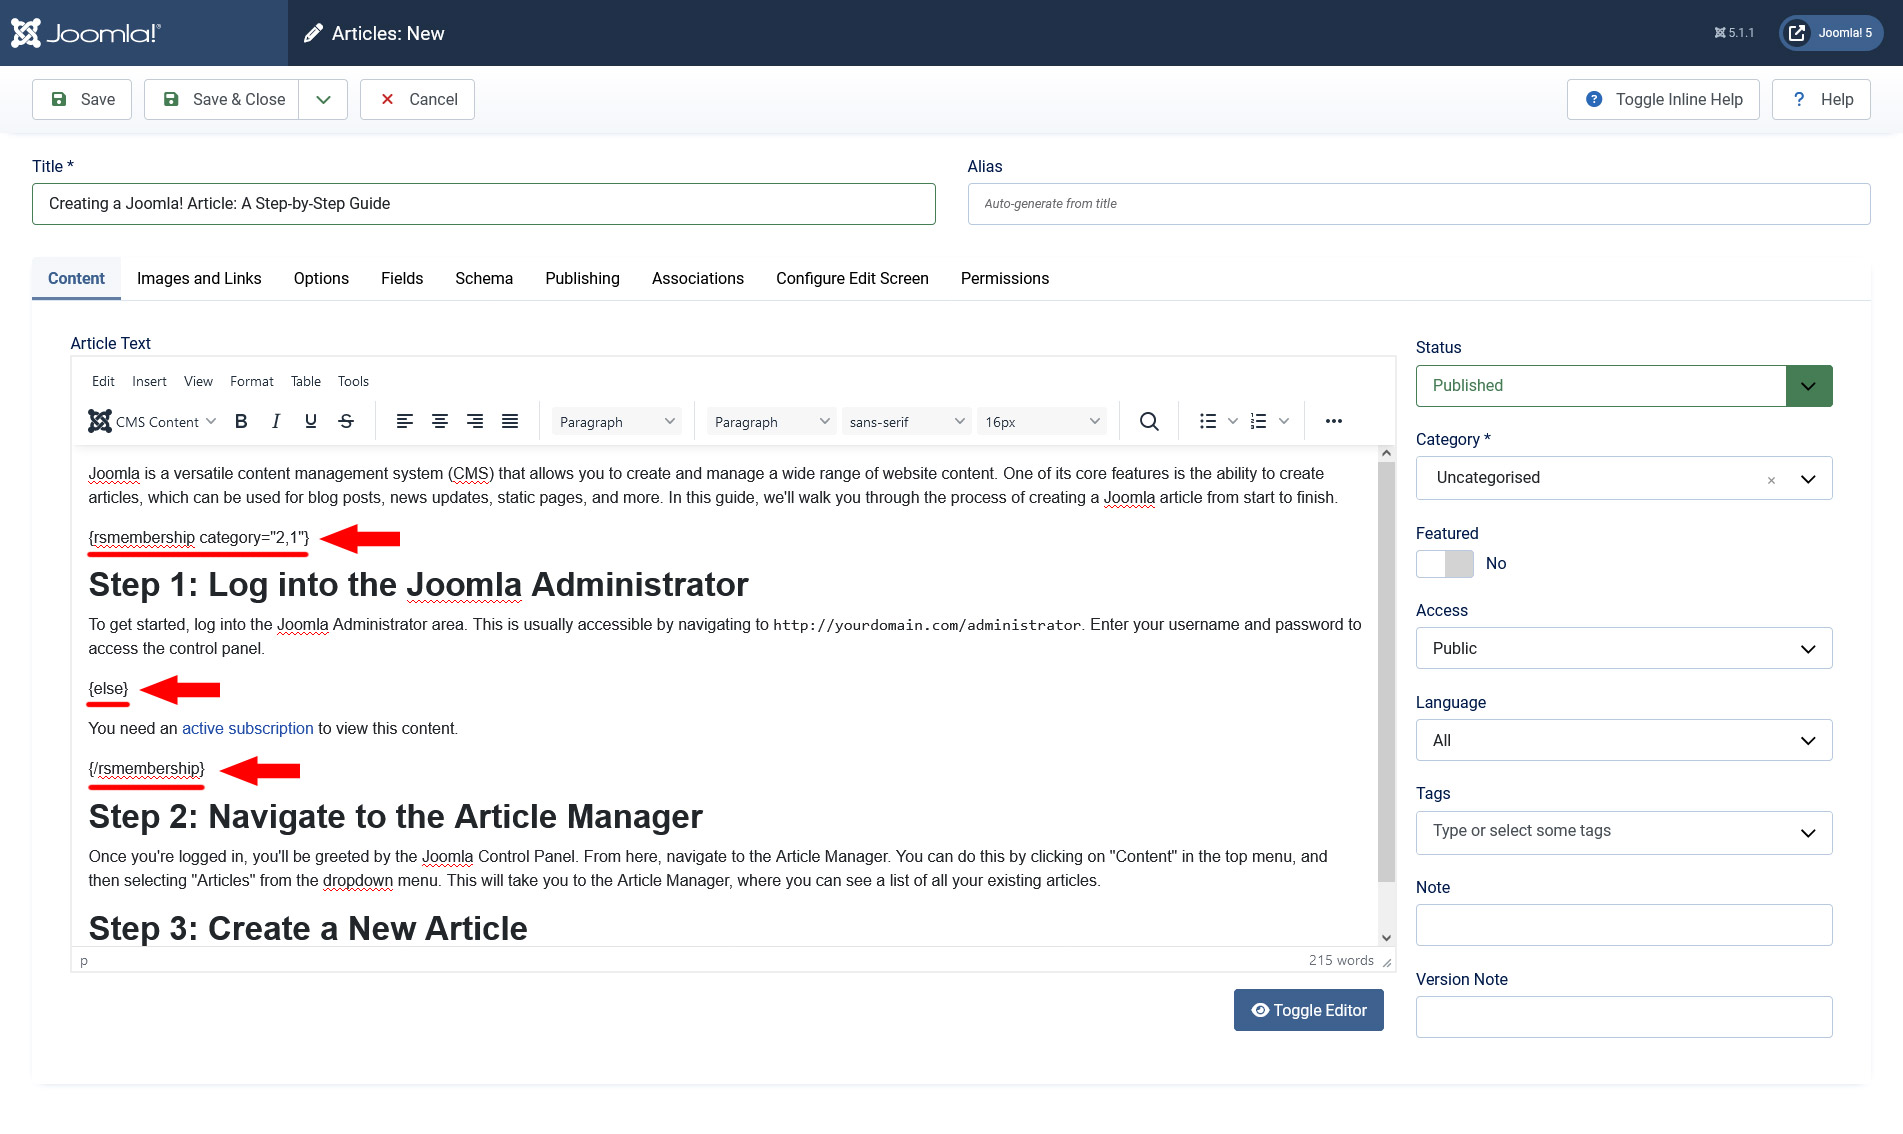
Membership categories restrictions
In a similar manner, you can grant access to the restricted content for entire membership categories. All you need to do is specify their internal ID's within the starting tag as in the following example:
{rsmembership category="2,4"}
Users who own at least one membership that is associated with one of the specified categories will be able to view the Restricted content.
You can use this syntax wherever you have text or HTML code on your website, in our own or any other 3rd party components.
10 persons found this article helpful.
You Should Also Read
Create a membership that provides access to a category of articles |
Create a membership that provides access to file resources |
Create a membership that provides access to modules |