Create membership custom fields
With RSMembership!, you can add custom fields per membership, allowing you to gather up other information that would be relevant to your memberships. In this article we will explain how that works.
Backend Set-up
Head to Components >> RSMembership! >> Memberships and click on the Custom Fields button associated with a membership.
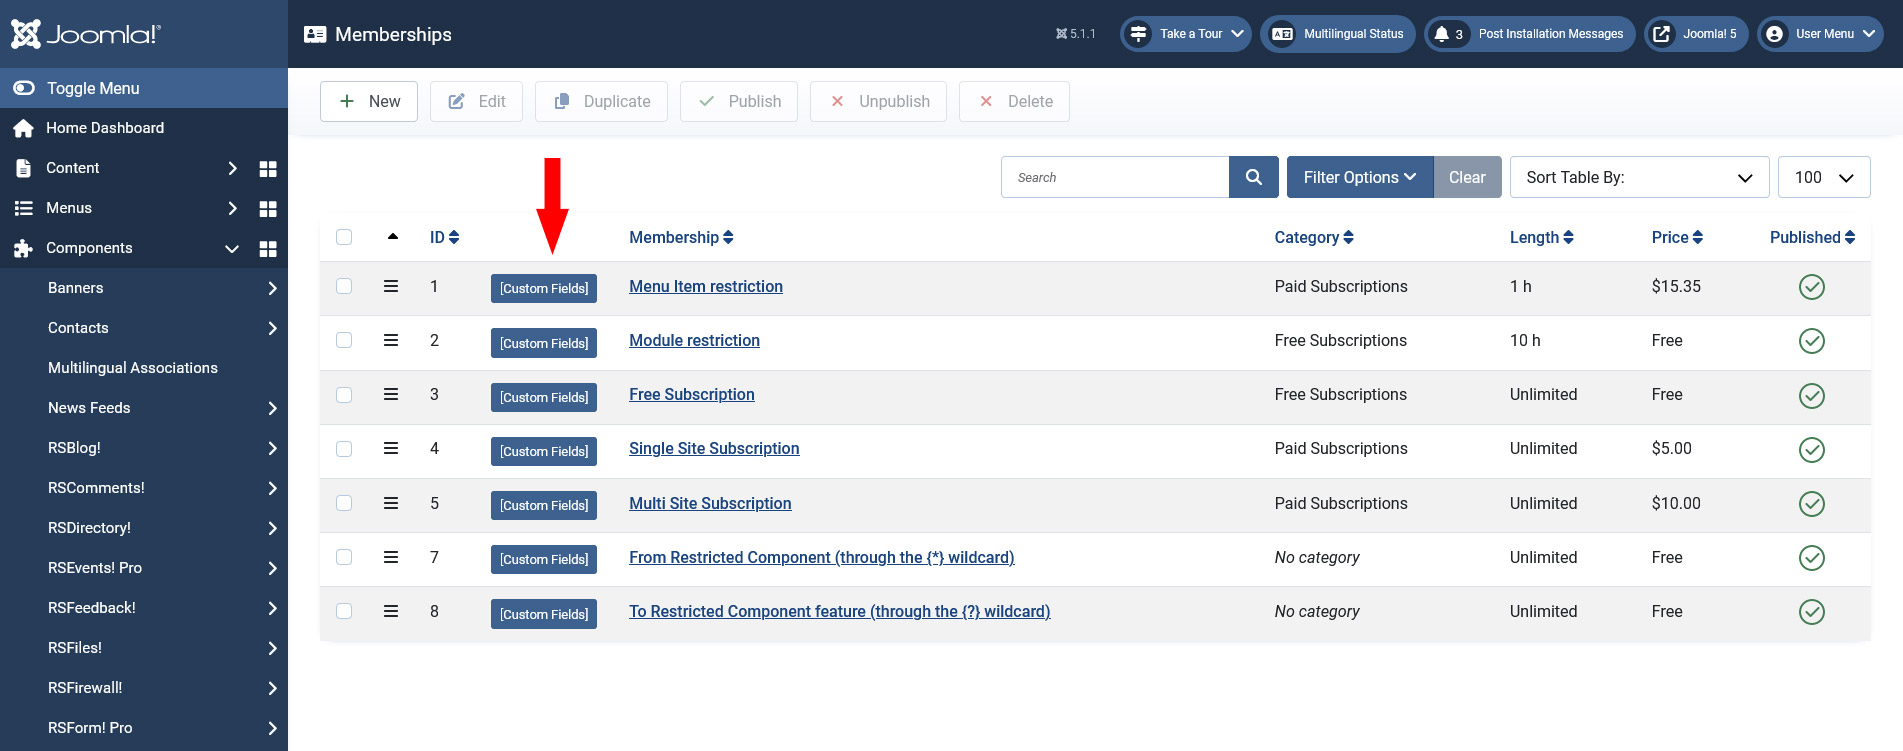
By doing so, you will be presented with the following layout:
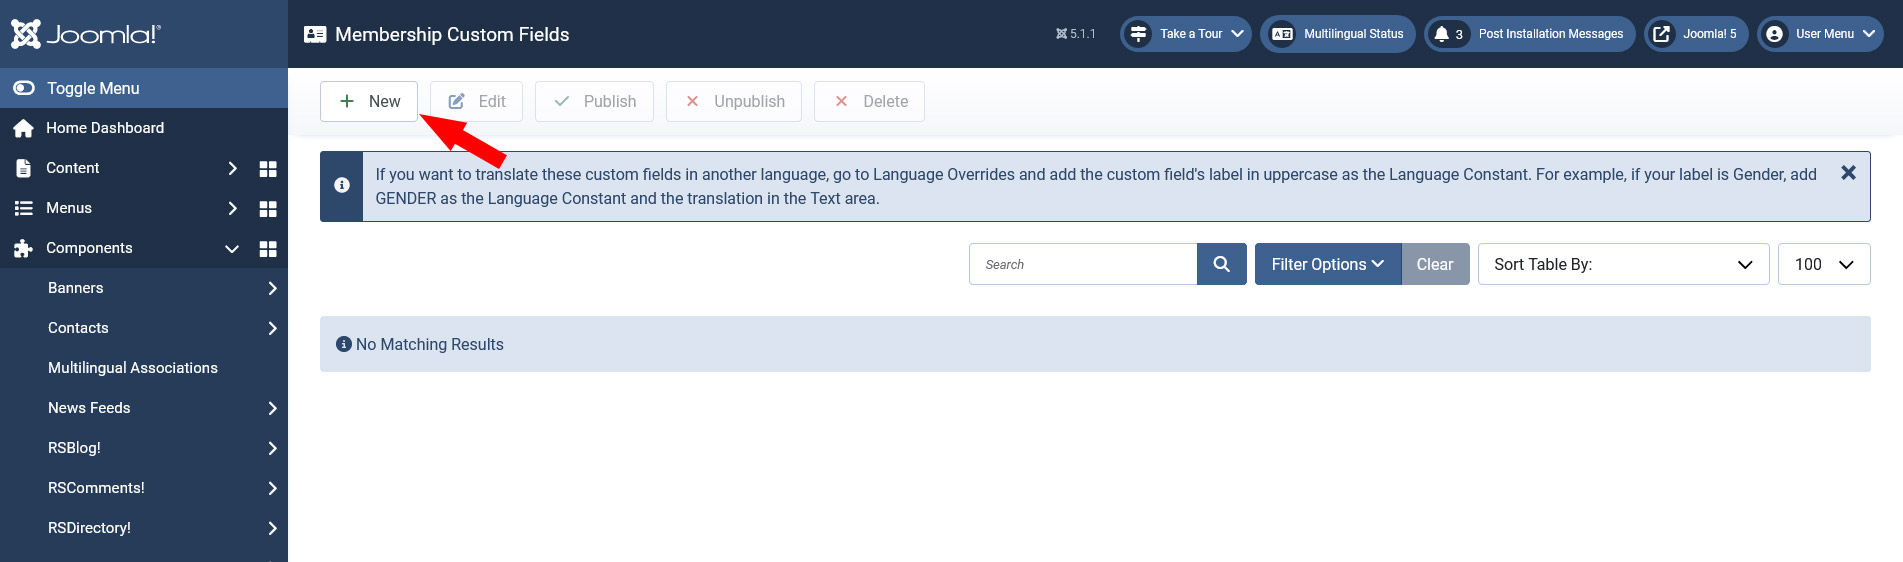
This is the membership custom fields listing. It can also be accessed by heading to Components >> RSMembership! >> Membership Custom Fields but, because you have done so by clicking the Custom Fields button that is associated with a certain membership, you will see the listing filtered and only showing the fields that correspond to that membership. As illustrated above, click on New to create a new custom field for that membership. This is what you'll see next:
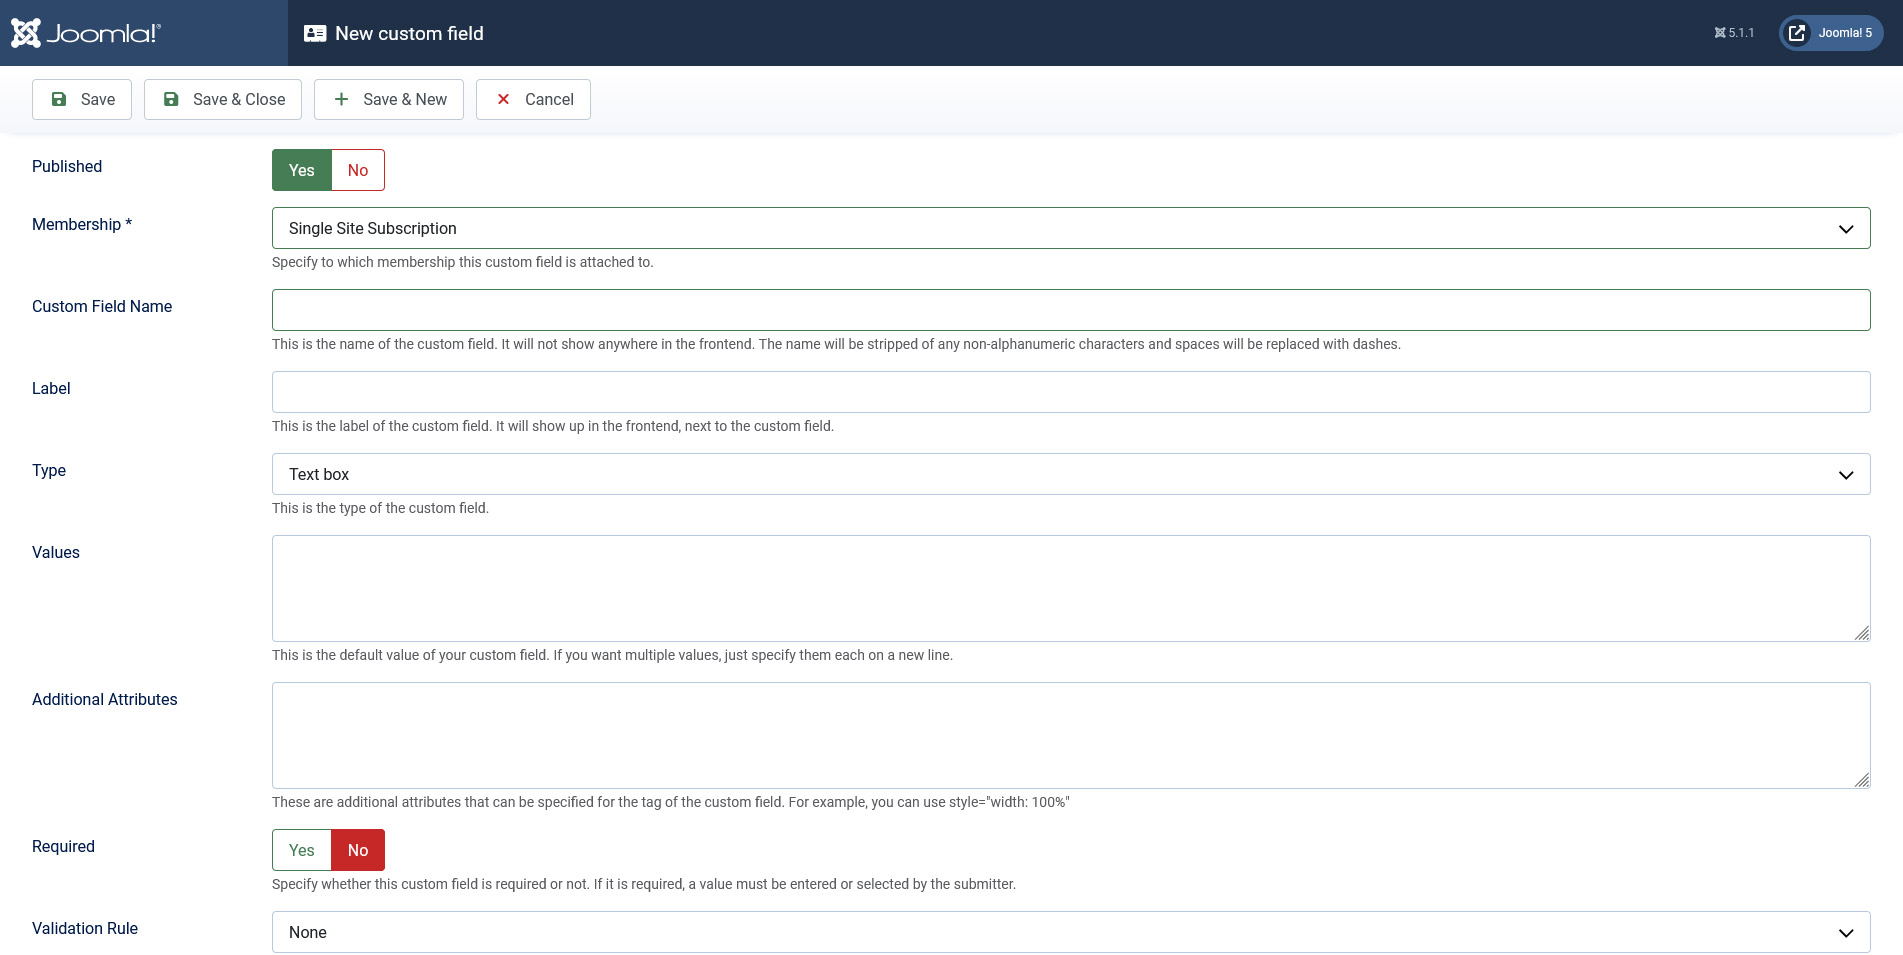
That's the new custom field addition layout. The following parameters can be configured for each field:
- Published: Yes / No - publish or unpublish the field.
- Membership: Choose the membership. If you access the layout as explained in this guide, the membership will be automatically selected.
- Custom Field Name: Set an internal name for the custom field.
- Label: Set a label (caption) for the custom field, that will be visible in the frontend.
- Type: Choose a field type - Custom HTML / Text box / Text Area / Select List / Multiple Select List / Checkbox Group / Radio Group / Calendar / Hidden Field.
- Values: The custom field's value. Multiple values (for dropdowns, checkboxes and radio groups) must be specified on separate lines.
- Additional Attributes: specify additional HTML attributes for the field (e.g. style="display:none;")
- Required: Yes / No - set to Yes in order to mark the field as Required
- Validation Rule: Choose a validation rule for the field - None / Alpha/ Alphanumeric / Numeric / Email / Website.
- Validation Message: Set the message that gets displayed if the field fails validation.
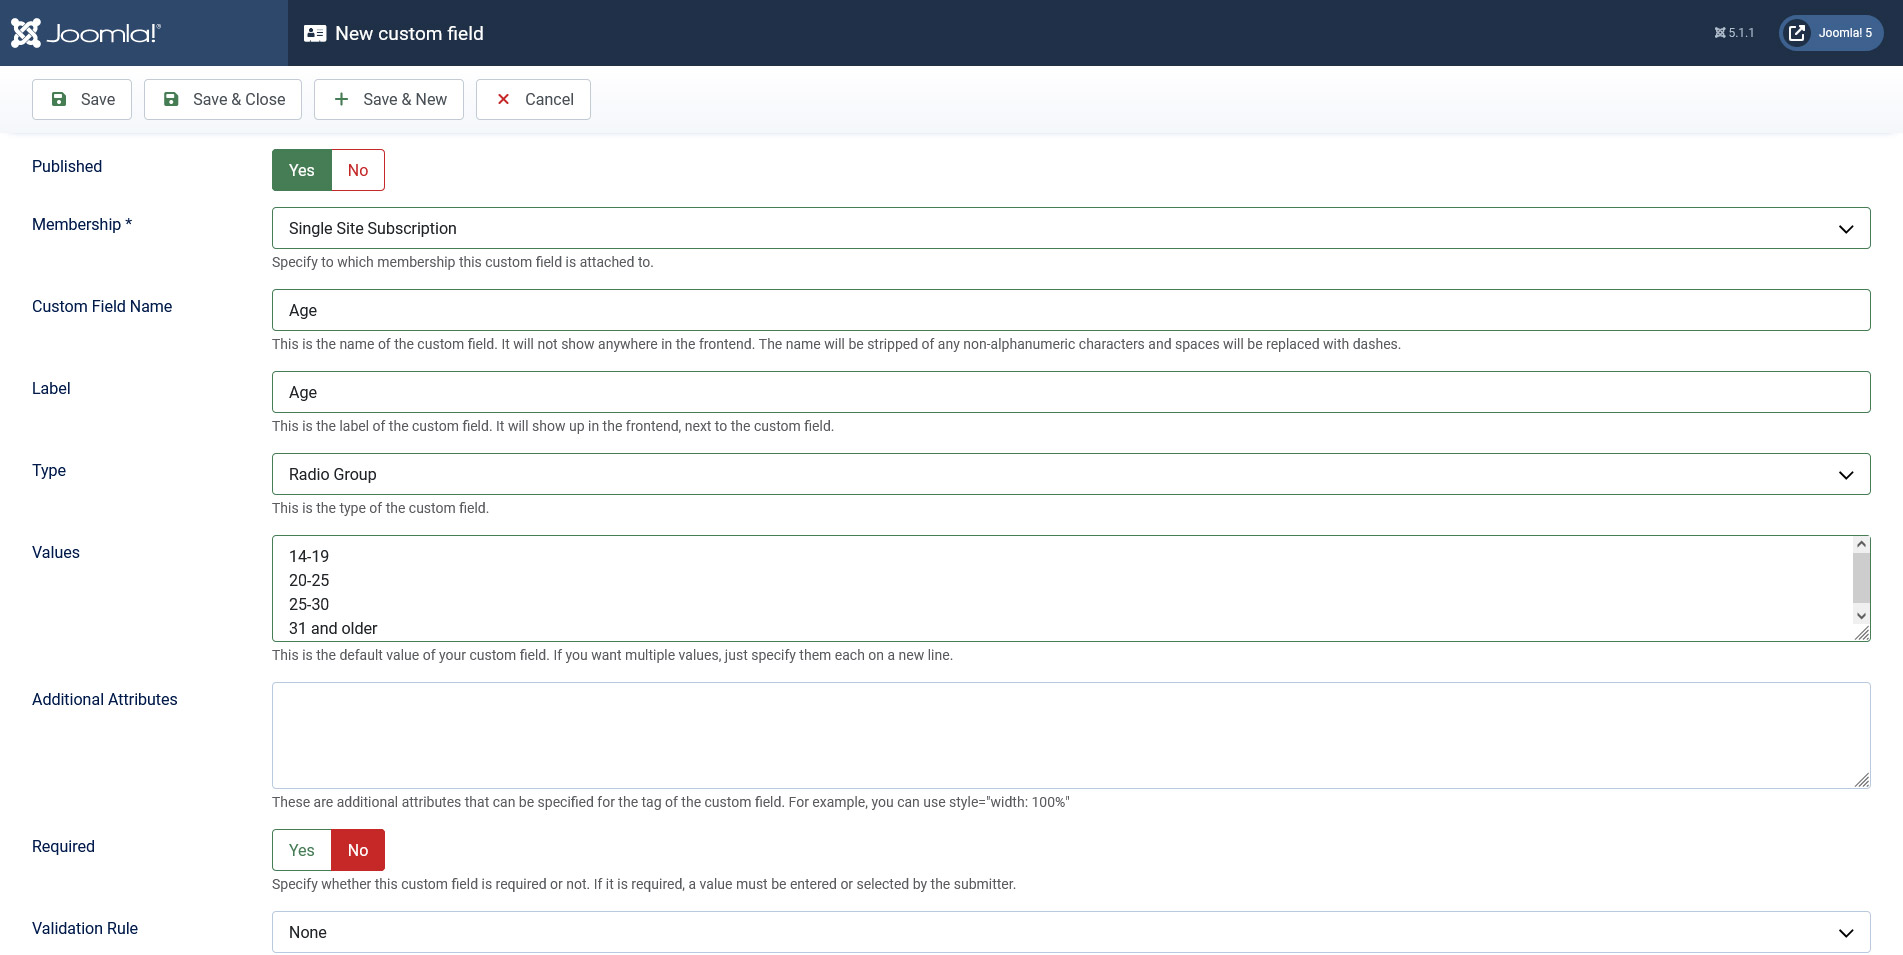
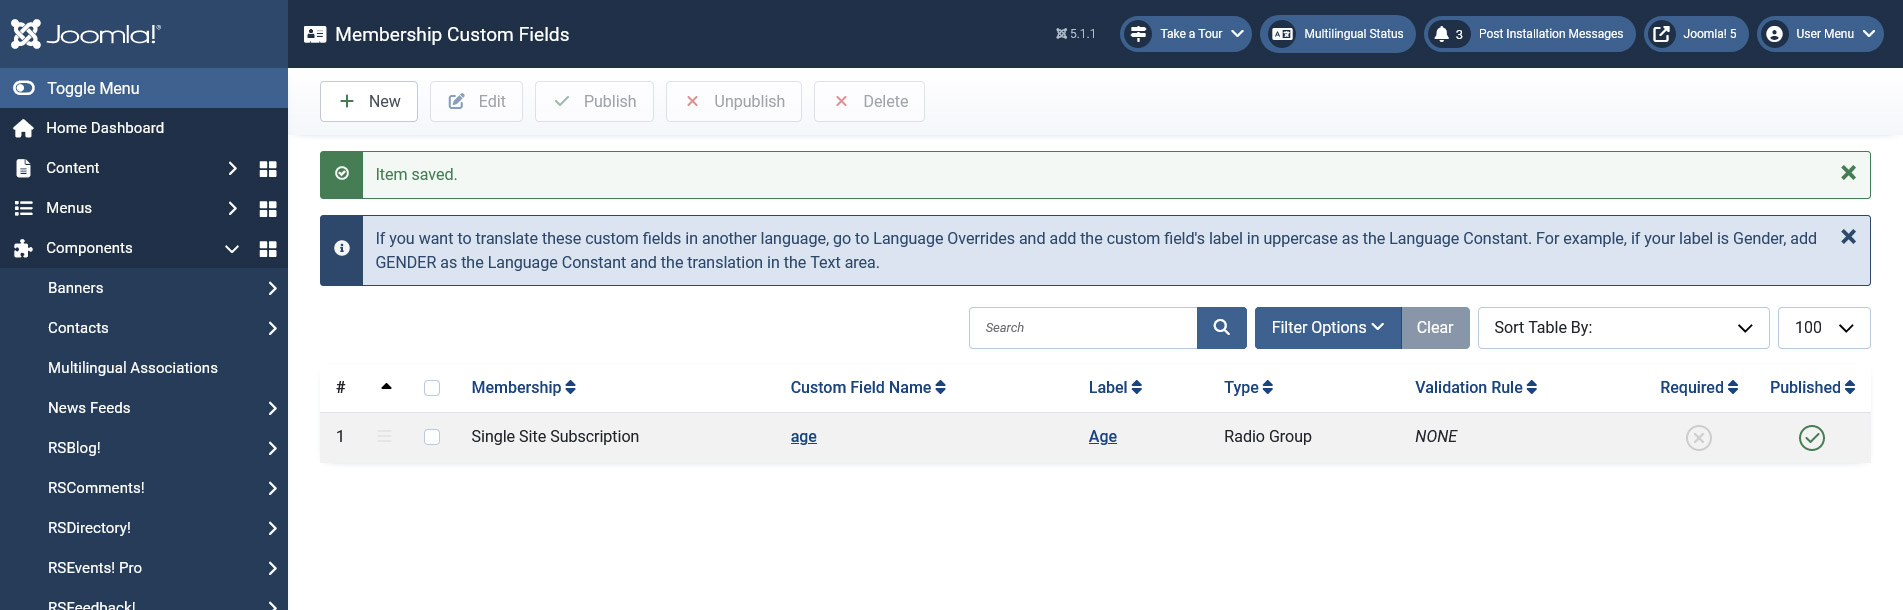
Considering the information above, we will create a radio group called age in which the users will select which of the 4 defined age groups (14-19 / 20-25 / 25-30 / 31 and older) they correspond to:
After adding the field, the listing of custom fields associated with our membership will look like this:
Reordering the membership custom fields requires firstly to select the membership from the filter options area.
Translating the Custom Field
If, let's say, you are also using French as a second frontend language and wish to have a French translation for the field, please follow these steps:
- Edit the /languages/fr-FR/fr-FR.com_rsmembership file.
- Add, anywhere within the file, AGE="Âge" and save the changes.
Note that you will need to replace AGE with the capitalized version of your custom field's internal name.
Frontend Appearance
There are 2 places in the frontend where this field will show up:
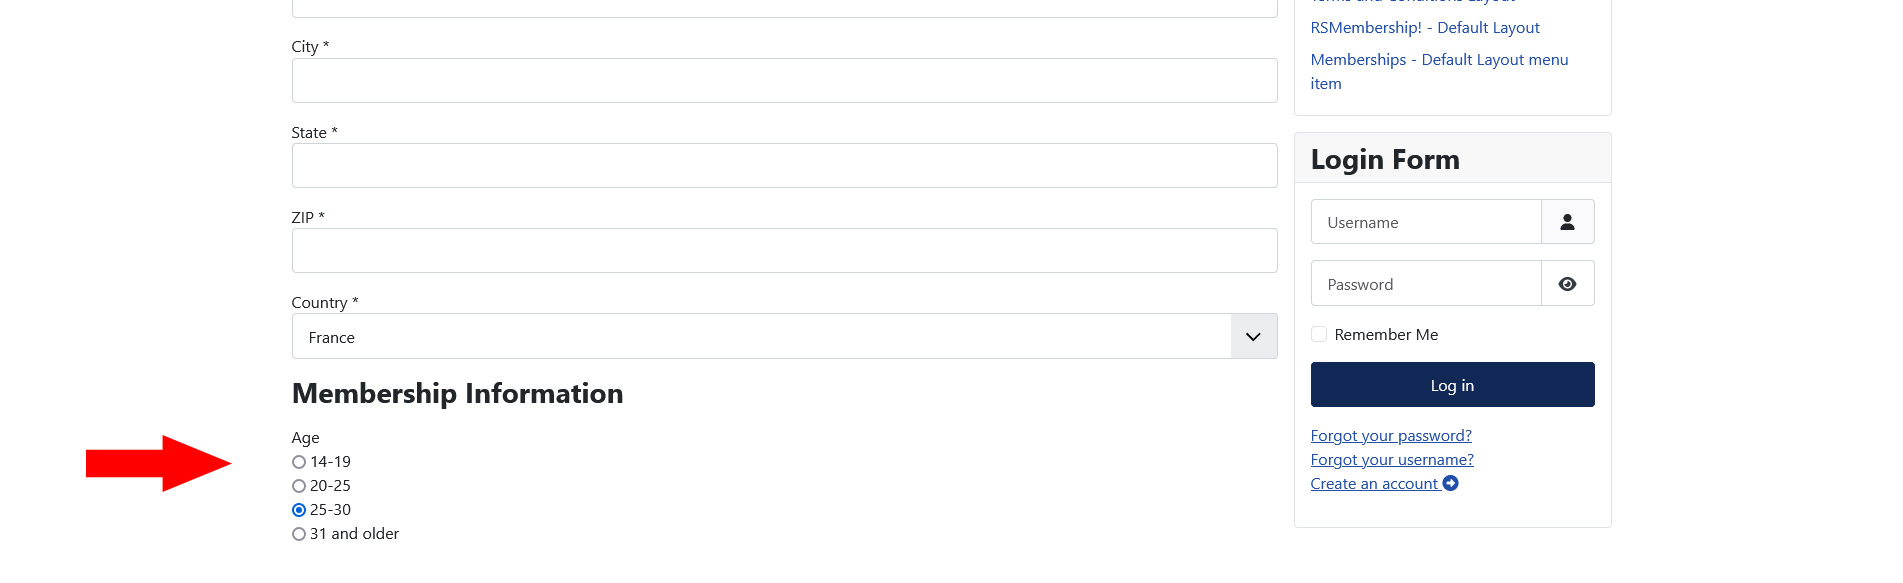
Membership Subscription Form
When subscribing to the membership that the field is associated with, the field will be present in the membership's subscription form, as shown below:
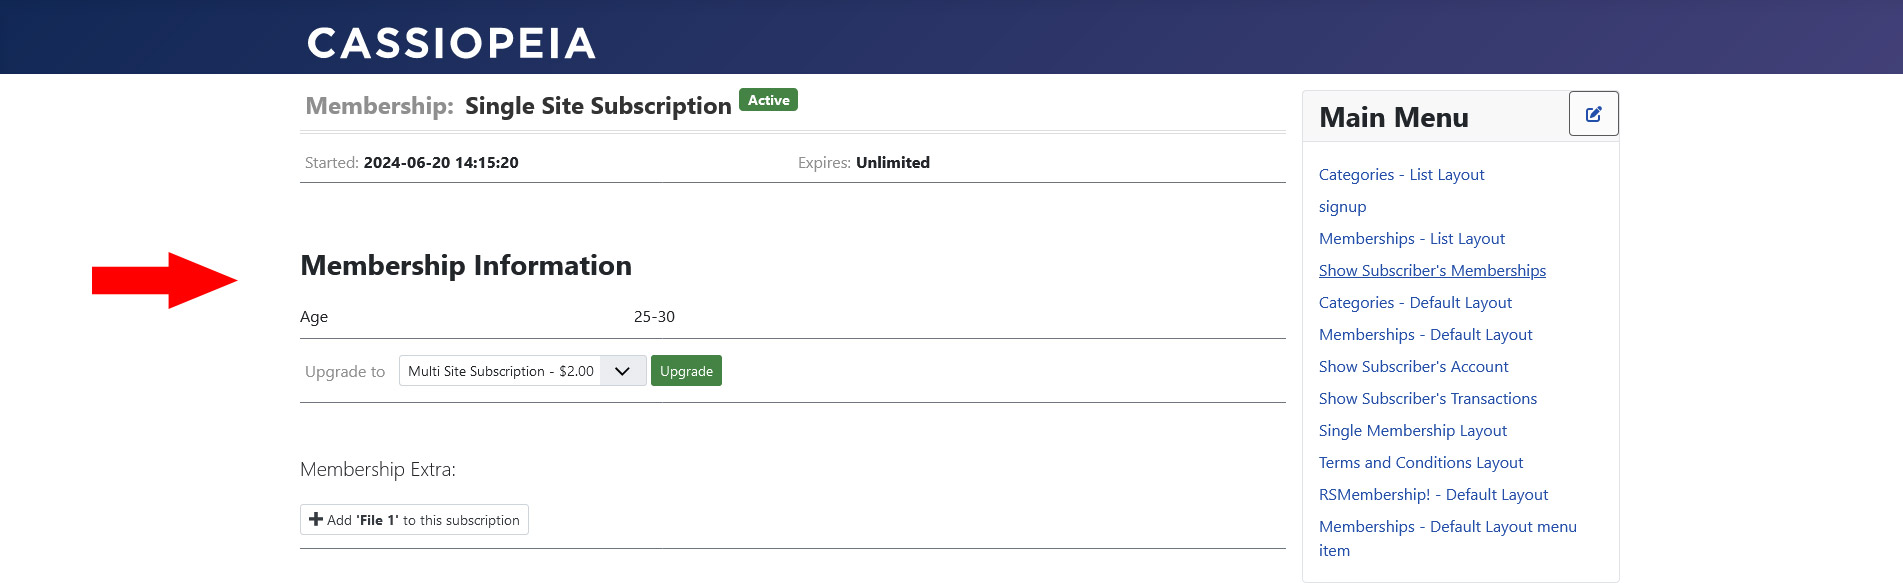
Show Subscriber's Memberships
This menu item lists all of the memberships that are associated with the logged-in user's account. Clicking on the newly added membership will list the following information:
As you can see, the custom field's label, along with the value you selected when subscribing to it, are being displayed here.
4 persons found this article helpful.
You Should Also Read
How can I set a country selected by default in the Country field? |
Can I auto-populate custom fields ? |