RSMail! - Sending the message
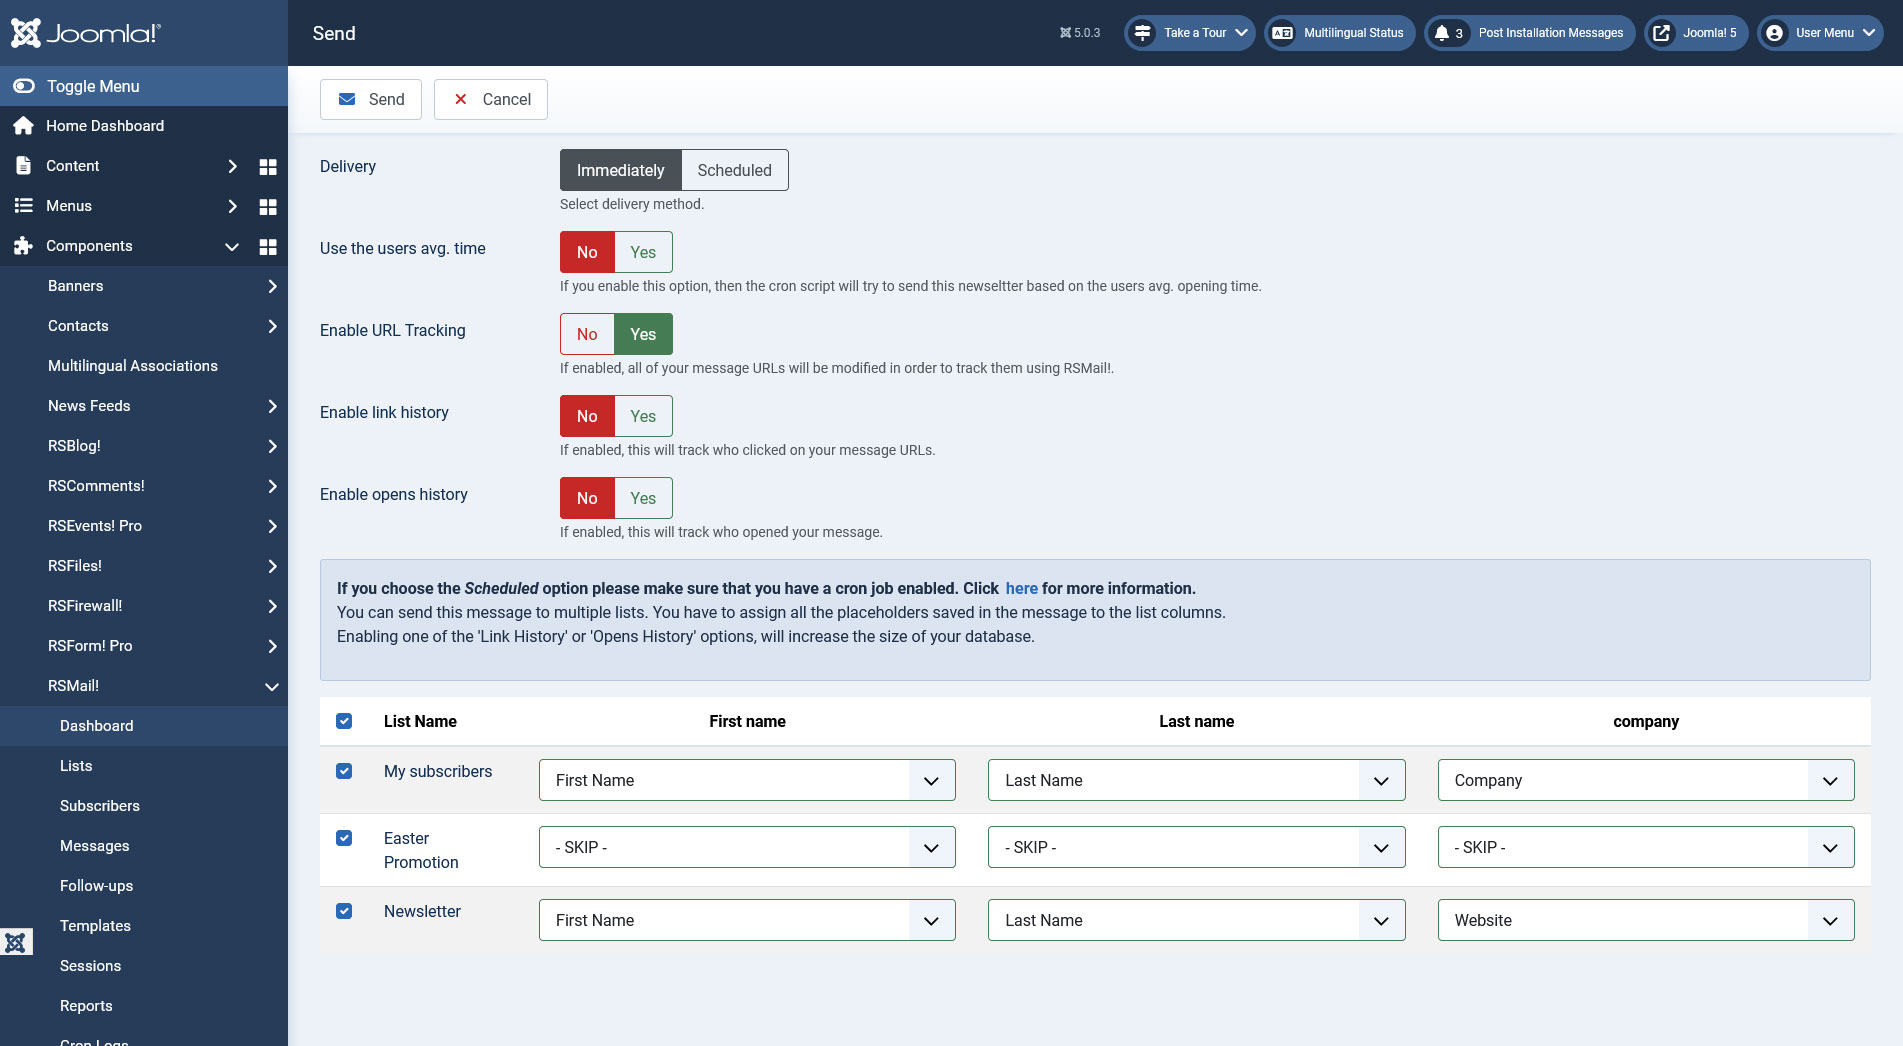
Sending the created message just requires a few clicks. In the Message tab just click on the "Send" button located on the upper right corner. This will open a window similar to this:
Upon sending a message you can use multiple lists in order to build up your campaign. Since your lists might have different fields gathering different types of information, this would pose a problem should you wish to add some of that information to your message. The solution came with the use of plceholders and a mapping feature. For example, if you have a message like this one:
Dear {firstname}{lastname}, You have been selected to work for the company named {company}.
... the component will identify all of the available placeholders (pulled from the email's HTML text, plain-text version and subject) and will prompt you to specify which column from the list will replace the placeholder, thus ensuring a high level of flexibility and efficiency, as illustrated in the image below:
Available actions
- - IGNORE - immediately removes the placeholder from the email's text, replacing it with a blank space
- - DO NOT REPLACE - leaves the placeholder in the email's text as is, without either replacing or removing it
- - SKIP - if the subscriber is found in more than one list, and the necessary information is not found within the first list, the component will then search within the other lists, until it finds it and replaces it. If no corresponding information is found in any of the lists, the field will be replaced by a blank space.
The possibility to Skip a placeholder was introduced along with ver. 1.19.0, it won't be available in earlier versions.
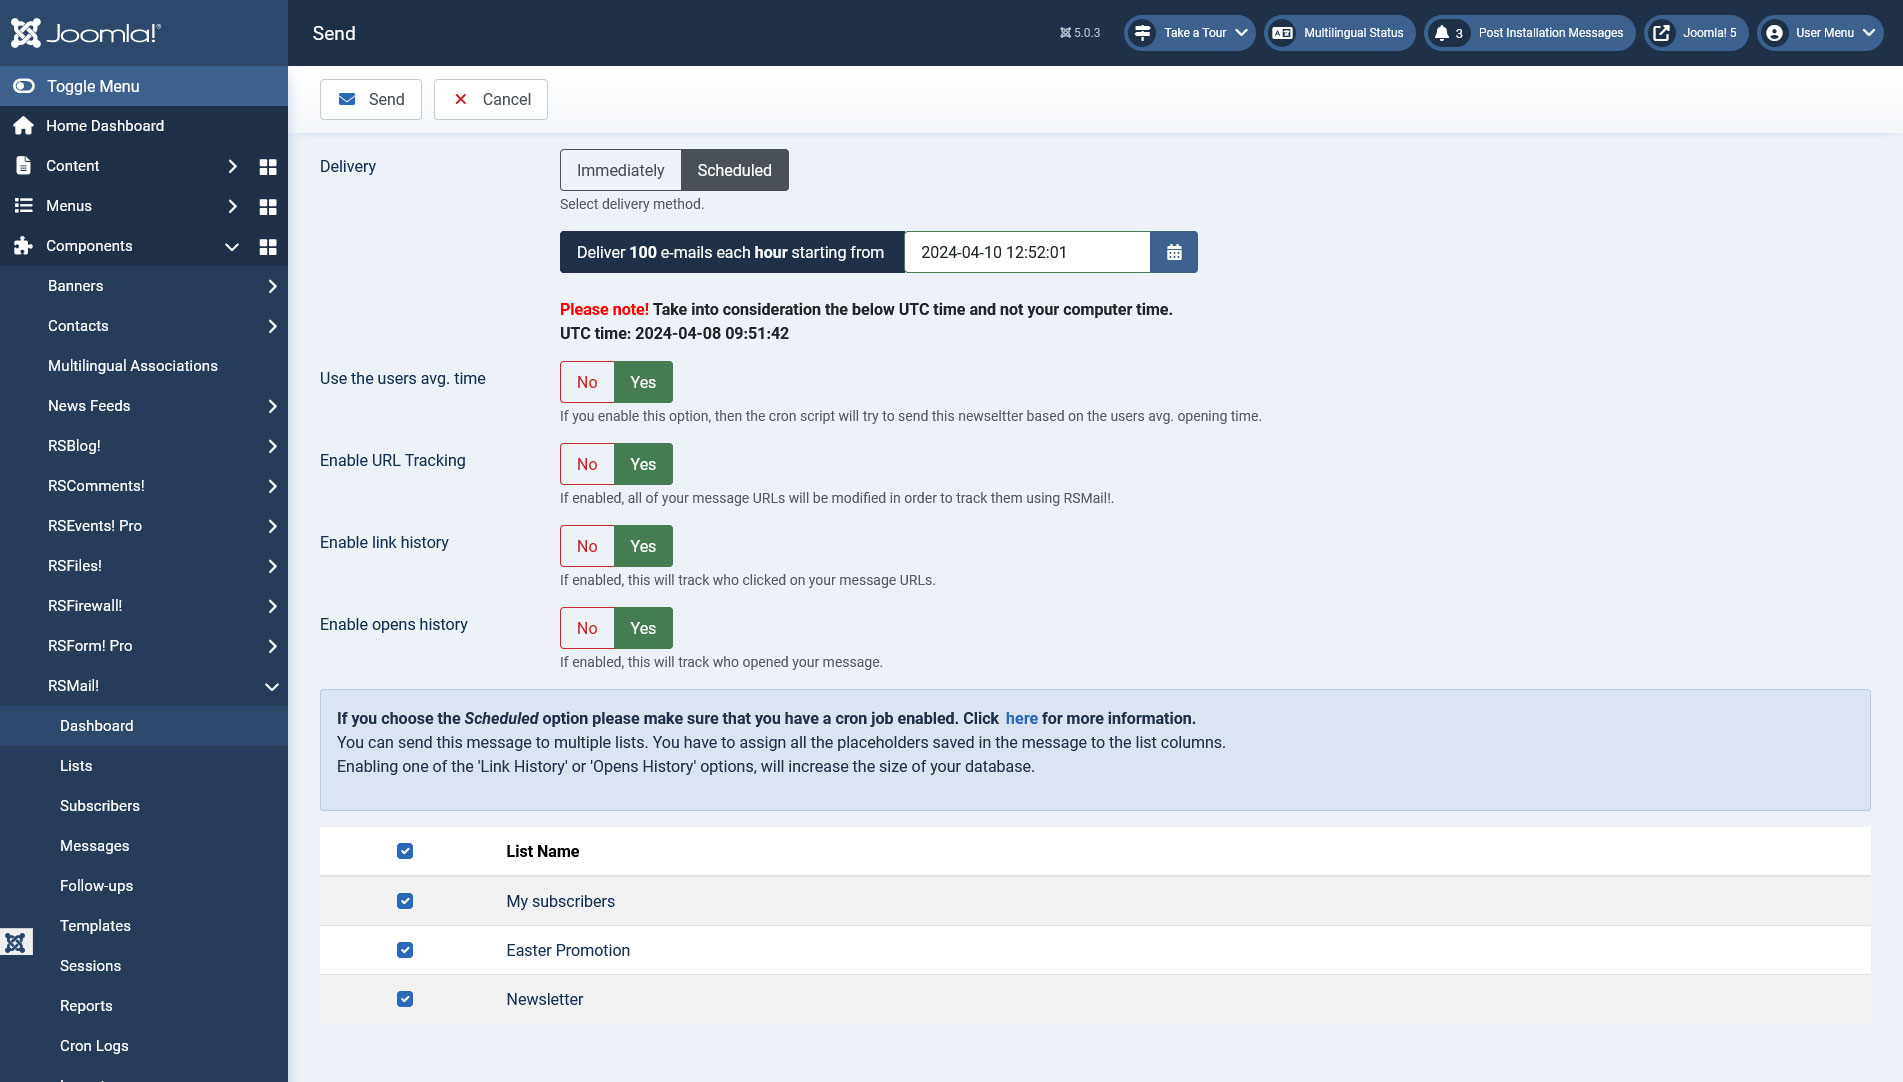
Creating a Scheduled session
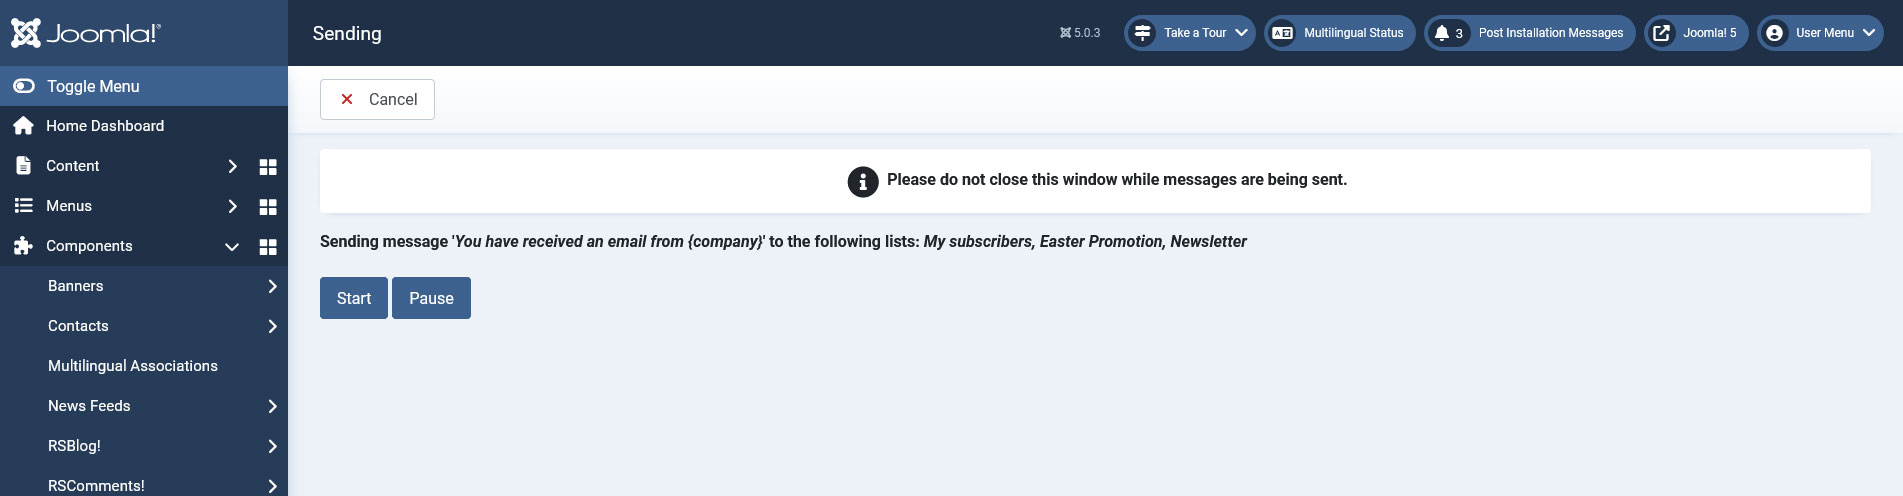
Clicking the "Send" button will redirect you to the Session tab.
You can select whether you want to send the message immediately or you can schedule it, particularly useful if you have a limited amount of emails per hour enabled by your hosting provider. By selecting the "Scheduled" option this will take into account the "Sending quota" you've set (backend > Components > RSMail! > Settings > General) and a message will state how many emails will be sent per cycle. Next, you'll have to enter the date when the email session will start.
Also, starting from v1.21.0 you can use the average opening time of the subscriber when creating scheduled emails sessions. This will allow you to trigger the sending of the newsletter based on your subscriber's actions in order to ensure that the newsletter message is delivered when the subscriber usually checks his email.
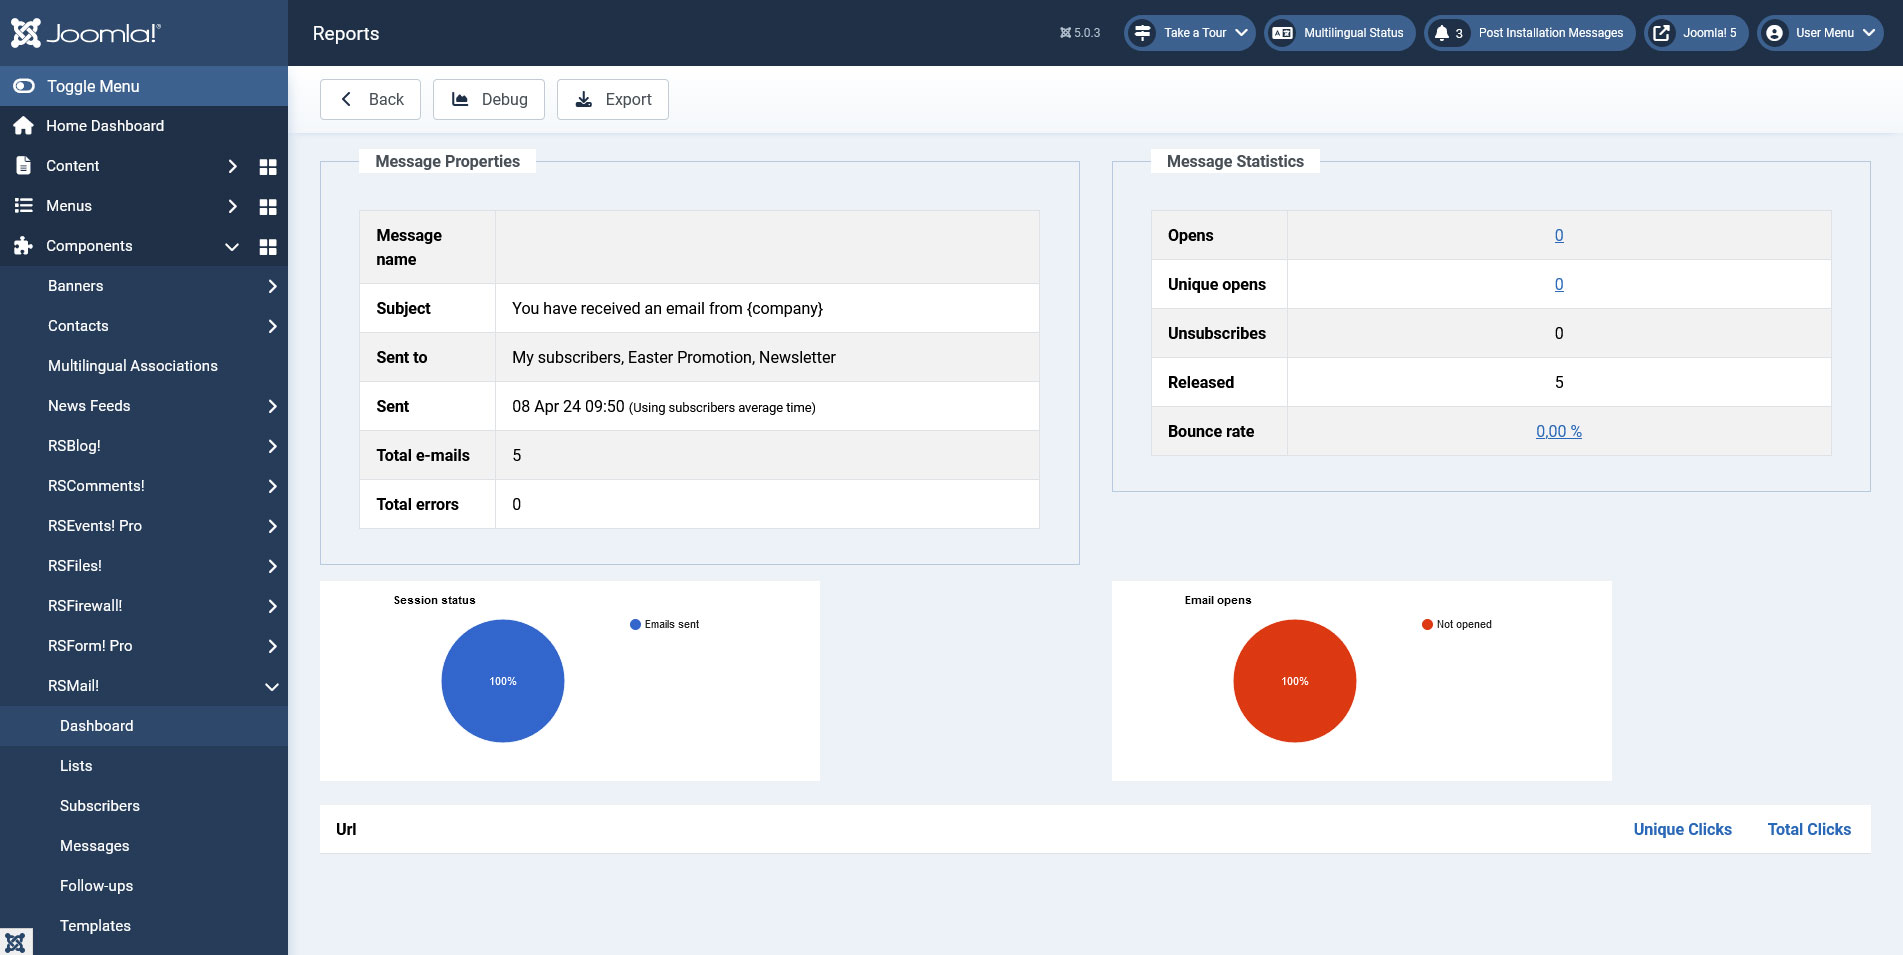
Tracking your links
If you used links in your newsletter message, you can track which users clicked each link by activating the "Enable link history" option. When accessing the Reports tab you will see a list of all your newsletter message's links and you will notice that the Total clicks column header will become a link, clicking it will redirect you to a page where you will see a list of subscribers and the links that they have clicked.
Creating the cron
Login to your server cPanel and add a new cron job with the following command:
wget -q "http://yoursite.com/index.php?option=com_rsmail&task=cron"
- Please note that the date and time is the server time and not your computer time. It`s better if you will use the server time.
- If you enable the link history option, the information regarding which user accessed your newsletter links will be stored in your database. Having a large number of subscribers, newlsetter messages and keeping the link history for all of them could decrease the component's performance.
5 persons found this article helpful.