Plugin - Cardlink (Create custom order forms)

The RSForm!Pro Cardlink Payment Integration Plugin allows you to add a new payment method to the existing Payment Package of RSForm!Pro.
Downloading and Installing the plugin
Download
You can download the plugin by logging with your purchase user, then head to Downloads > My Downloads > RSForm!Pro - view all plugins and modules > RSForm!Pro Files > Plugins > "Cardlink x.x Payment Plugin".
Install
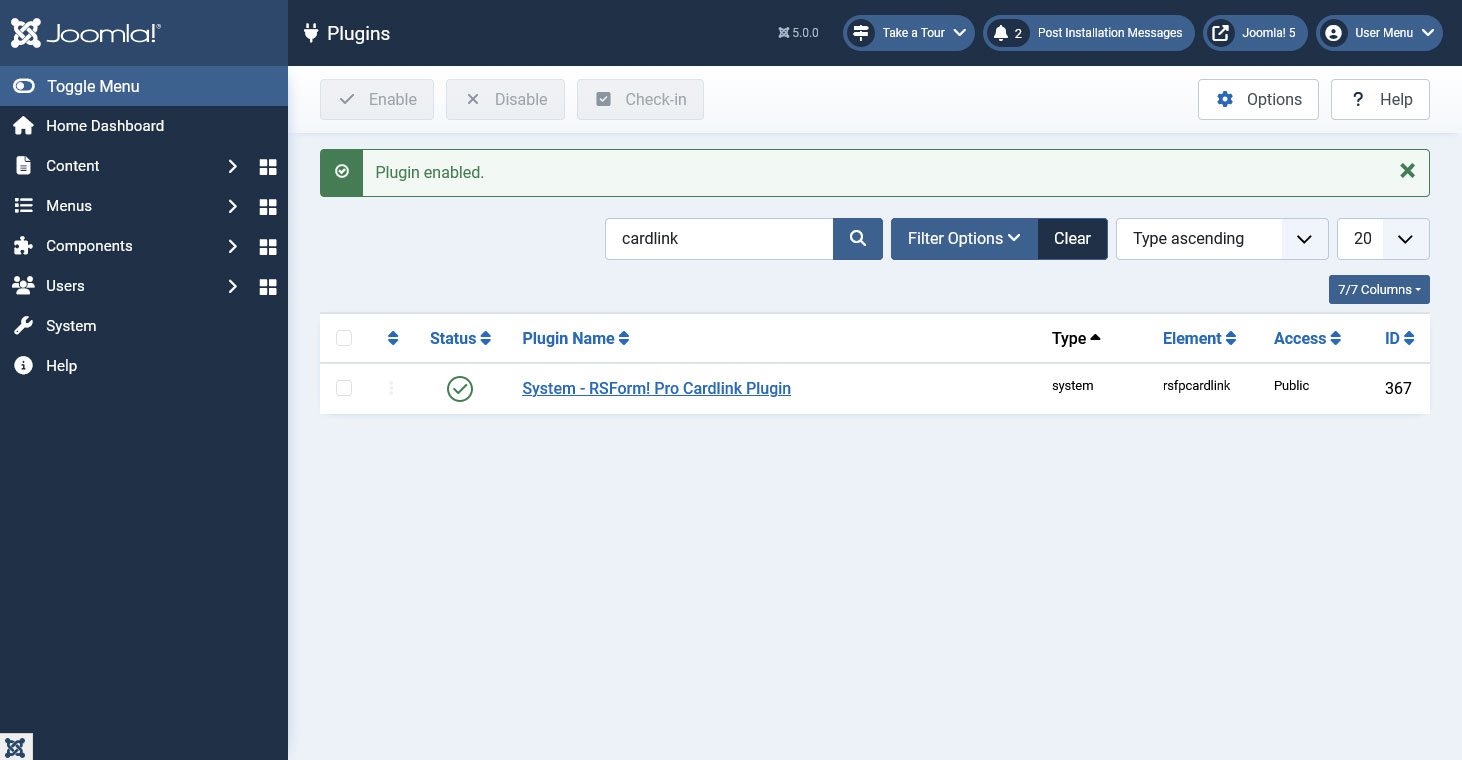
In the backend of your Joomla! installation go to the Extensions > Install/Uninstall page, and install the plugin. Next thing is to publish the plugin, to do this go to Extensions > Plug-in Manager, search for the "System - RSForm! Pro Cardlink Plugin" plugin and publish it.
Configuring the plugin
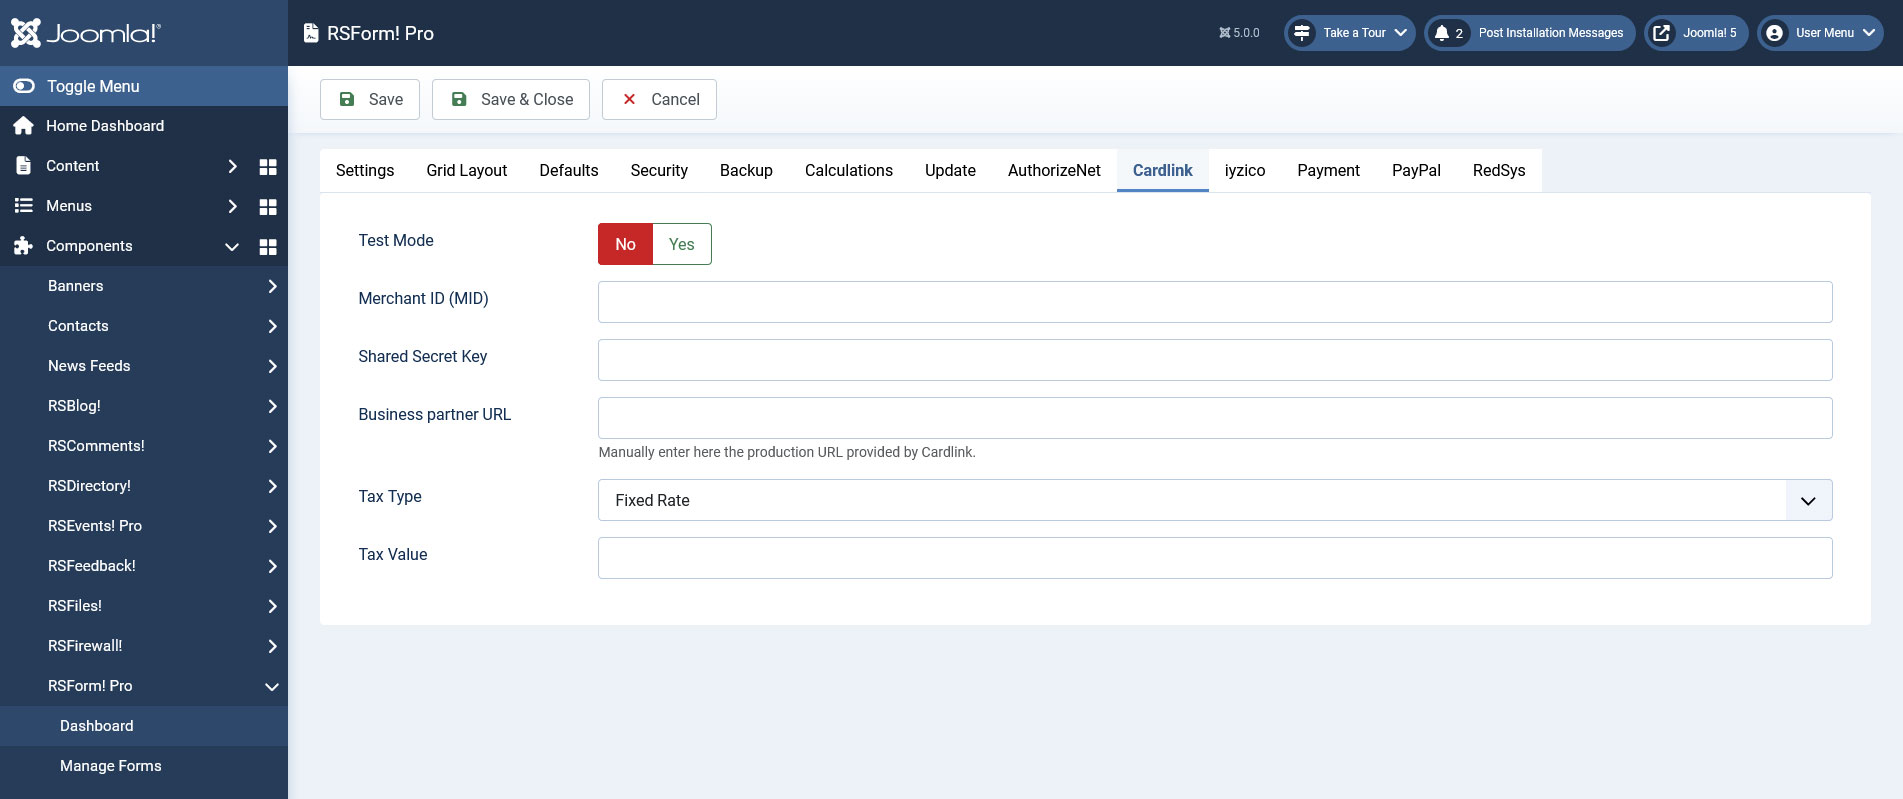
Configuring the cardlink payment gateway can be done from Components > RSForm!Pro > Configuration > Cardlink tab:
- Test Mode: Yes / No - Select if you want to use the cardlink sandbox or the live system;
- Merchant ID (MID): this can be found by logging into your developer cardlink account and clicking on the Apps page.
- Shared Secret Key: the Shared Secret key can be found by logging into your cardlink account and clicking on the Apps page
- Business partner Test: When in test mode, you can select from: Cardlink URL, Alpha Bank URL, Eurobank URL.
- Business partner URL: When in live mode, manually add here the production URL provided by Cardlink.
- Tax Type: Percent (%) / Fixed Rate
- Tax Value: Amount of tax. Total amount of the transaction must include this amount.
How to use the cardlink plugin
After configuring the cardlink parameters from Components > RSForm!Pro > Configuration > Cardlink tab, there are some additional steps that needs to be taken in order the payment process to work properly:
Mapping the fields required for submissions to be recorded within Cardlink
Buyer Fields
- Order payer email address
- Order payer phone number
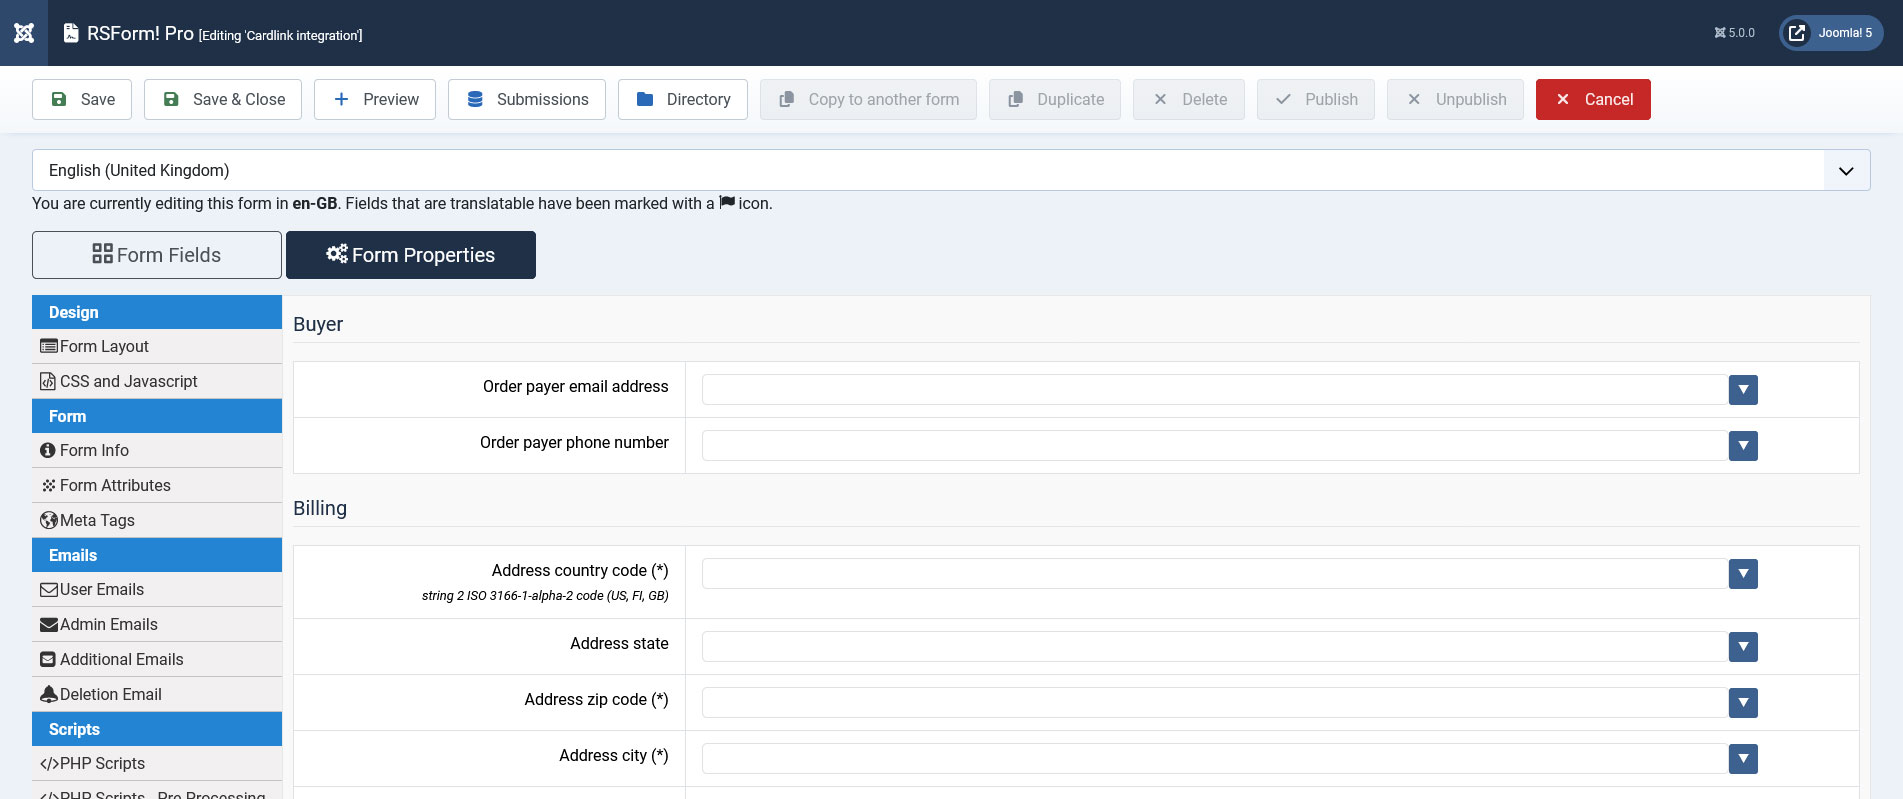
Billing Address Fields
- Address country code (*) - string 2 ISO 3166-1-alpha-2 code (US, FI, GB)
- Address state
- Address zip code (*)
- Address city (*)
- Adress street (*)

Shipping Address Fields
- Order shipping weight (kg)
- Order shipping dimensions (mm) - in format width:height:depth
- Address country code (must be filled if weight or dimensions are added)
- Address state (must be filled if weight or dimensions are added)
- Address zip code (must be filled if weight or dimensions are added)
- Address city (must be filled if weight or dimensions are added)
- Address street (must be filled if weight or dimensions are added)

Making sure the form is sent to the payment processor
The payment details will only be sent to the cardlink payment processor if the user selects cardlink from the "Choose Payment" field before submitting the form.
The "Choose Payment" field is used in order to allow the users to choose their payment method. It displays the payment methods added to the form in either a Dropdown or Radio Group. It can be shown on the form (allowing the user to select his preferred payment method) or not (forcing the user to pay using the default payment method).
If you are using a single payment method and you need to hide the Choose payment field, this can be achieved by editing the field and setting to "No" the "Show in front-end?" option within the "Attributes" tab.
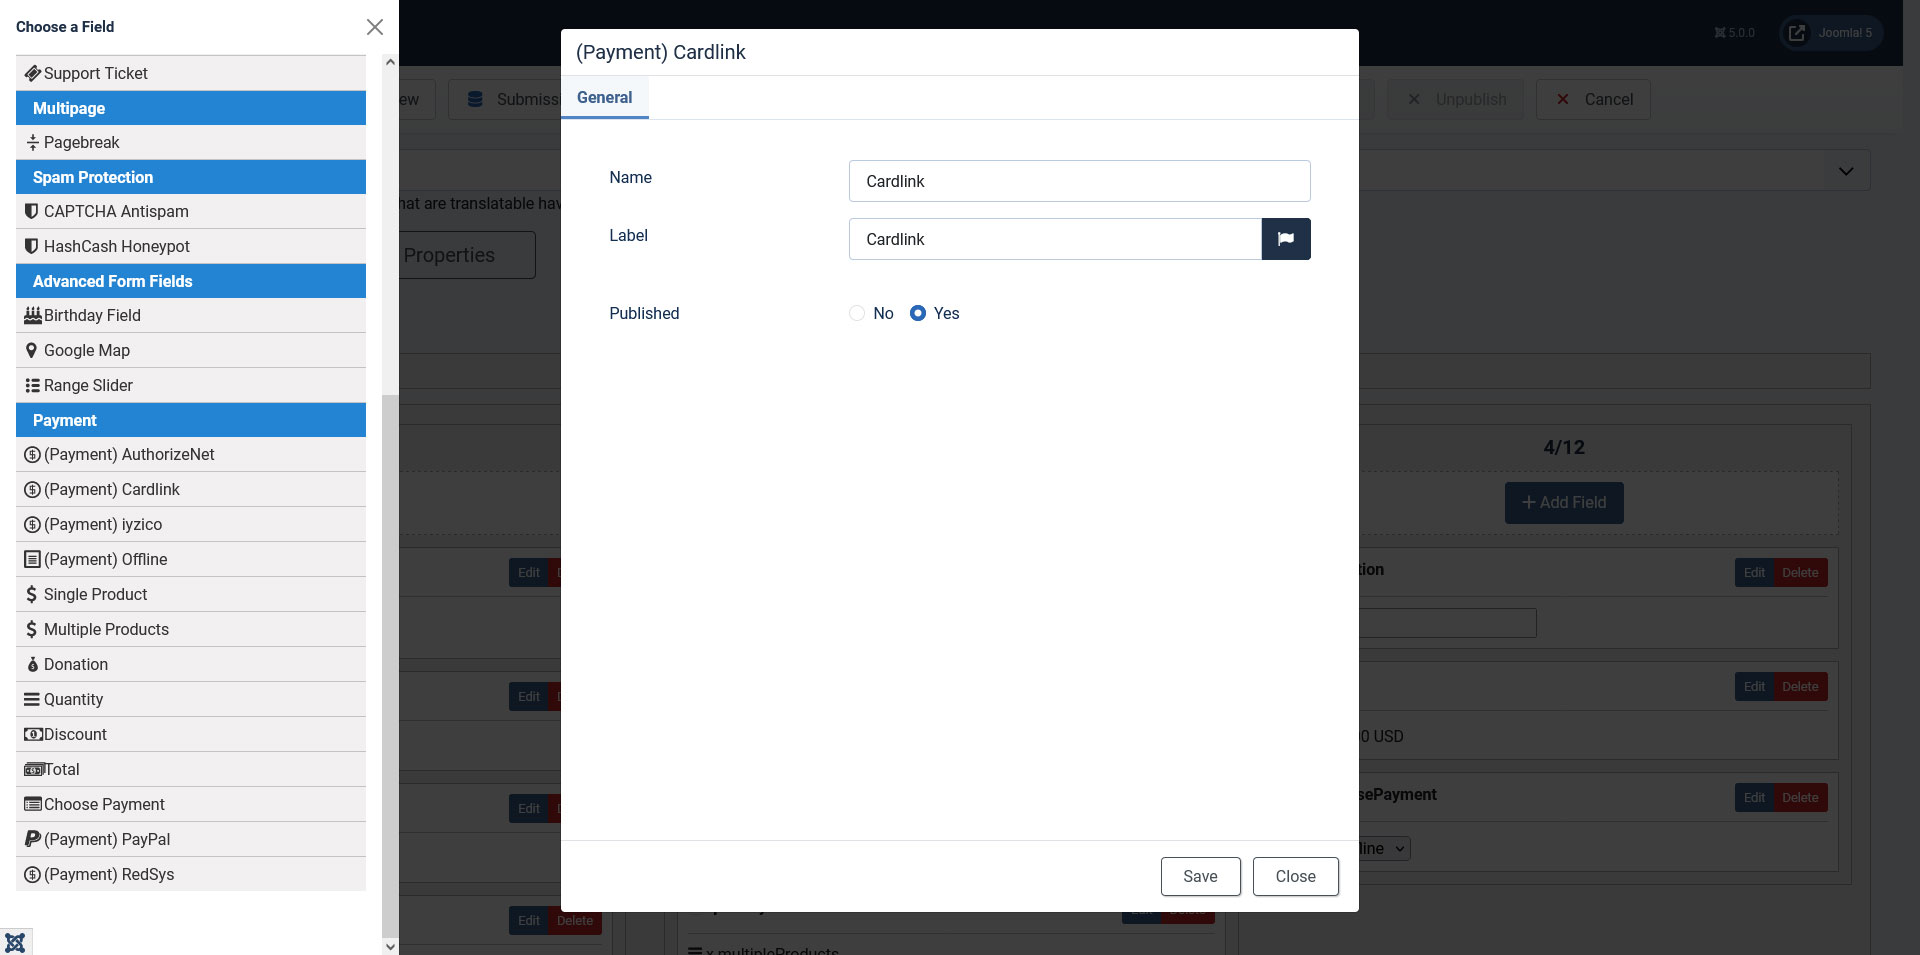
For the Cardlink payment method to be available within the Choose payment field, the Cardlink payment field needs to be added in form.
Adding costs
In order to receive funds using RSForm!Pro and cardlink payment plugin, your form needs to include a cost. In order to add costs to your form you can use any of the following fields:
- Single Product - Adds a single product to the form. For this type of field you can set up a caption, description and a price.
- Multiple Products - Adds the ability to display multiple products to be purchased either in a Dropdown or a Checkbox. Its items need to be specified in the following manner: price | label (ex: 15 | T-shirt)
- Quantity - Allows the user to choose the amount of products (simple or multiple).
- Donation - Allows the user to type in the amount to be paid inside a standard Textbox.
- Total - This field is used alongside the Donation, Single and Multiple Products fields. It calculates the total price to be paid.
Version 1.1.3
- Updated - Payments are now sorted in the 'Choose Payment' field according to the same order in the form.
Version 1.1.2
- Added - Joomla! 5 native compatibility - no longer needs the 'Behaviour - Backward Compatibility' plugin.
Version 1.1.1
- Fixed - Duplicating a form with Cardlink configured would throw an error.
- Fixed - Backing up a form with Cardlink configured would throw an error.
- Fixed - Unicode text was not properly encoded resulting in a 'Security error, invalid digest.' message from the gateway.
Version 1.1.0
- Updated - Payment fields will now be correctly placed in the 'Payment' group.
Initial Release
One person found this article helpful.