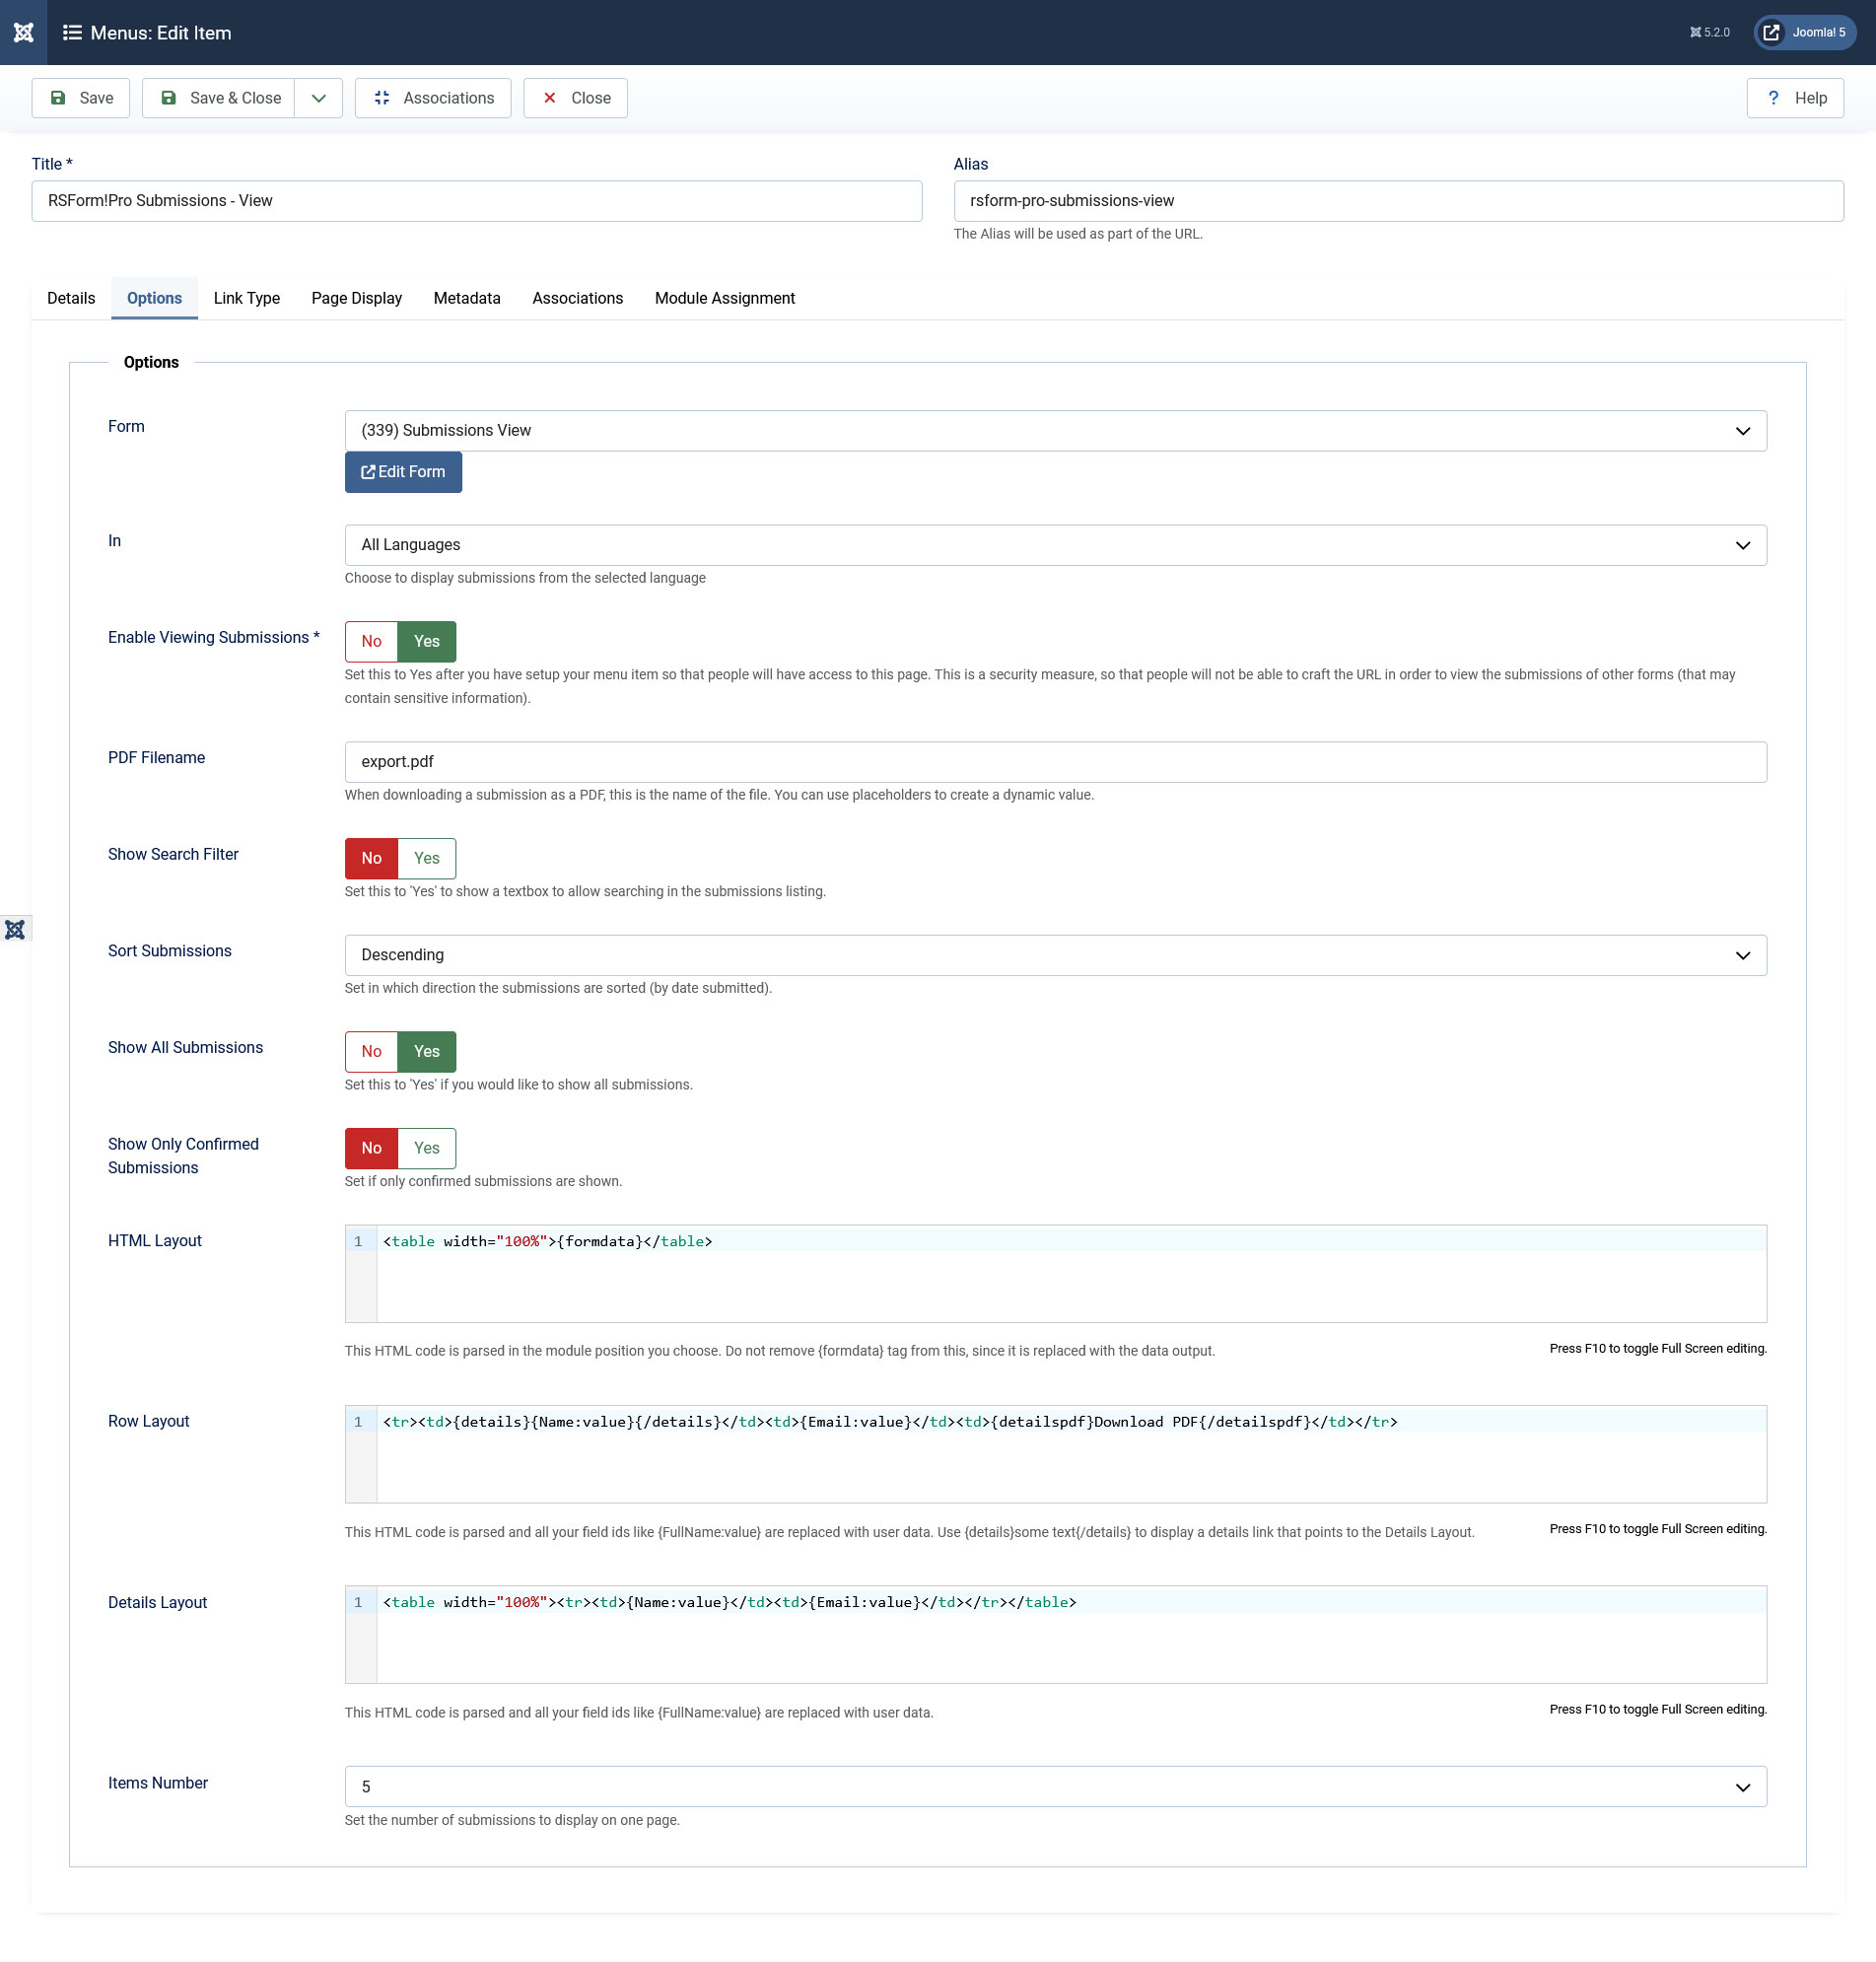
Submissions View Menu Item
The Submissions menu item permits you to display the submissions in the front-end for a form of your choice. The menu item can be added to your site from the Menu Manager section in the back-end, to any menu on your site. When creating the menu item you can edit the following options for it (besides the standard menu item default System Parameters):
- Form: The form which submissions you wish to display. (You can directly edit the chosen form by pressing the 'Edit Form' button.)
- Show Submissions In: A list of available front-end language pack. If a multilingual form is used, you can filter the displayed submissions by language.
- Enable Viewing Submissions: Set this to Yes after you have setup your menu item so that people will have access to this page. This is a security measure, so that people will not be able to craft the URL in order to view the submissions of other forms (that may contain sensitive information).
- PDF Filename: When downloading a submission as a PDF, this is the name of the file. You can use placeholders to create a dynamic value.
- Show search filter: No / Yes. If enabled, a simple search form will be displayed (the search radius includes all fields of the selected form).
- Search areas: Select in which areas to search for results. Available options are: Date submitted / Username / User IP / Field Values.
- Sort submissions:Descending / Ascending. The submissions will be sorted by the built-in submission time stamp.
- Show all submissions: Yes / No. Set this to 'Yes' if you would like to show all submissions.
- Show Loged in User's submissions: Yes / No. Set this to 'Yes' if you would like to show the submissions made by the current logged in user.
- Show submissions for user ID: Leave 0 to show all submissions. Specify multiple users by separating them with a comma (eg. 1,2,3). Type login to show only the logged in user's submissions.
- Show only confirmed submissions: Yes / No - set to Yes in order to only display submissions that have been confirmed by the submitter via the email confirmation link.
- HTML Layout: This HTML code is parsed in the module position you choose. Do not remove {formdata} tag from this, since it is replaced with the data output.
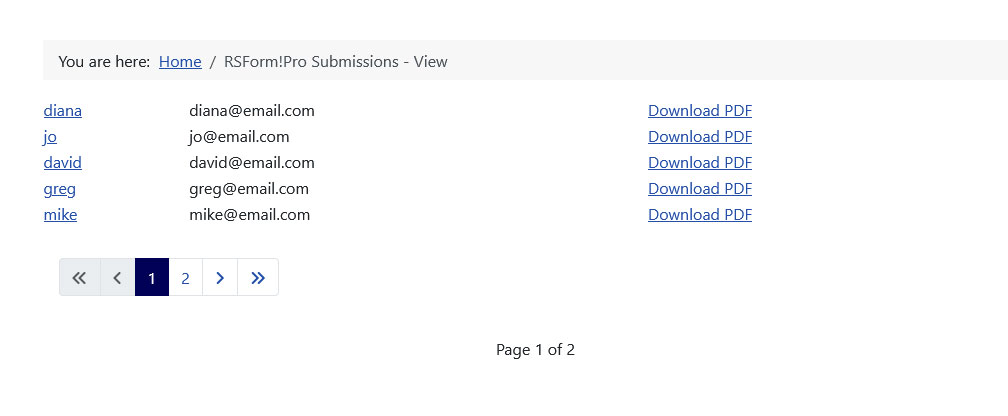
- Row Layout:This HTML code is parsed and all your field ids like {FullName:value} are replaced with user data(you can change the value "FullName" with the actual name of your field). Use {details}some text{/details} to display a details link that points to the Details Layout. Also you can add a link to the PDF view of the submission by using the following placeholders in order to set the link: {detailspdf}Download PDF{/detailspdf}.
- Details Layout:This HTML code is parsed and all your field ids like {FullName:value} are replaced with user data. If you wish to display the submission on multiple pages in the PDF file generated for it, you can use the HTML code line:
- Items Number: Set the number of submissions to display on one page.
<p style="page-break-before: always"></p>
in order to delimit the pages in the layout. For example you can use something similar to this in the Details Layout in order to show a 2 page PDF for the submission:
	  <p>Page 1</p>
	  <p style="page-break-before: always"></p>
	  <p>Page 2</p>
- A 403 error will be encountered when you're not allowed to view a submission;
- A 404 error will be encountered when trying to access a non-existing submission.
You can easily control the displayed results using "IF" statements (similar to how they are used in the component generated emails). The pseudocode is useful in cases where users would skip fields that are not required in the submission process, generating empty spaces in the listing page layout.This syntax can be used in Row Layout and Details Layout.
Example:
{if {name_of_field:value}}The submitted message is {name_of_field:value}.{/if} The string found within the {if} syntax will not show if the field has no value.
The {if} clause also accept the following operators:
<= , >=, <>, <, >, !=, =,==,===, <-, ->
Assuming that you have a checkbox and you need to compare its value with a specific string, you will use:
{if {Checkbox:value}<-Item1}This text will be displayed only if the Item1 value is selected{/if} If you want to display a text if the checkbox has one of your desired values, you will use the following syntax: {if {Checkbox:value}->Item1,Item2}This text will be displayed if one of the following values is selected: Item1 or Item2{/if}
After setting the Submission View menu item you will be able to access it in the front-end, from the menu item to which you have assign it. The Layout of the Menu item can be customized to any extent, displaying the submissions in the desired format.
- If you wish to display the submissions inside a module position, please refer to the mod_rsform_list tutorial.
- In order to be able to use multiple pages in the PDF file you will need to update the TCPDF library to the latest version as explained here.
Available global placeholders (can be used within the Row / Details layouts):
| Placeholder name | Description |
|---|---|
| {global:username} | If the user is registered to your Joomla website, his username will appear when using this placeholder |
| {global:userid} | If the user is registered to your Joomla website, his user id will appear when using this placeholder |
| {global:useremail} | If the user is registered to your Joomla website, his email will appear when using this placeholder |
| {global:fullname} | If the user is registered to your Joomla website, his fullname will appear when using this placeholder |
| {global:userip} | The IP of the user that submitted the form |
| {global:date_added} | The date the user submitted the form |
| {global:sitename} | The name of your site, as defined in your Joomla configuration |
| {global:siteurl} | The URL of your site |
| {global:confirmation} | The URL used to confirm the submission |
| {global:confirmed} | The IP of the confirmed submission |
| {global:submission} / {global:submission_id} | The id of the submission |
| {global:counter} | working only in the Row Layout area, will display a counter for the submissions |
| {global:naturalcounter} | working only in the Row Layout area, will display a counter for the submissions (based on your Sort submissions option, counting is done either ascending or descending) |
Using the Submission View Menu Item, you can display your Community Builder Profile upon clicking the submitted name.A step by step guide can be found in the How to display a Community Builder profile article.