RSEvents!Pro Facebook Integration - create your own Facebook application
Important Notice: Facebook synchronization has been discontinued in RSEvents!Pro. Recent changes to Facebook’s API and platform restrictions no longer allow reliable integration with Facebook Events.
Recently, Facebook has changed the way their API works. To keep up with these new changes, below you will find the necessary steps you need to take in order to connect RSEvents!Pro with your Facebook User or Page.
Step 1
Go to Facebook Developers Console and click on the 'My apps' button. You'll need to use the Create App button to start your app configuration, in the next window select Other > Next > Business > Next.
Now you will need to add the App Name, App Contact Email and Business Account(if you have one).
Once the App is created, you need to add the products and permissions for it. In the Add products to your app section add the Facebook Login for Business. Clicking the Set up button will move you to the next window, here you need to click Switch to Facebook Login. > Other > Switch to Facebook Login.
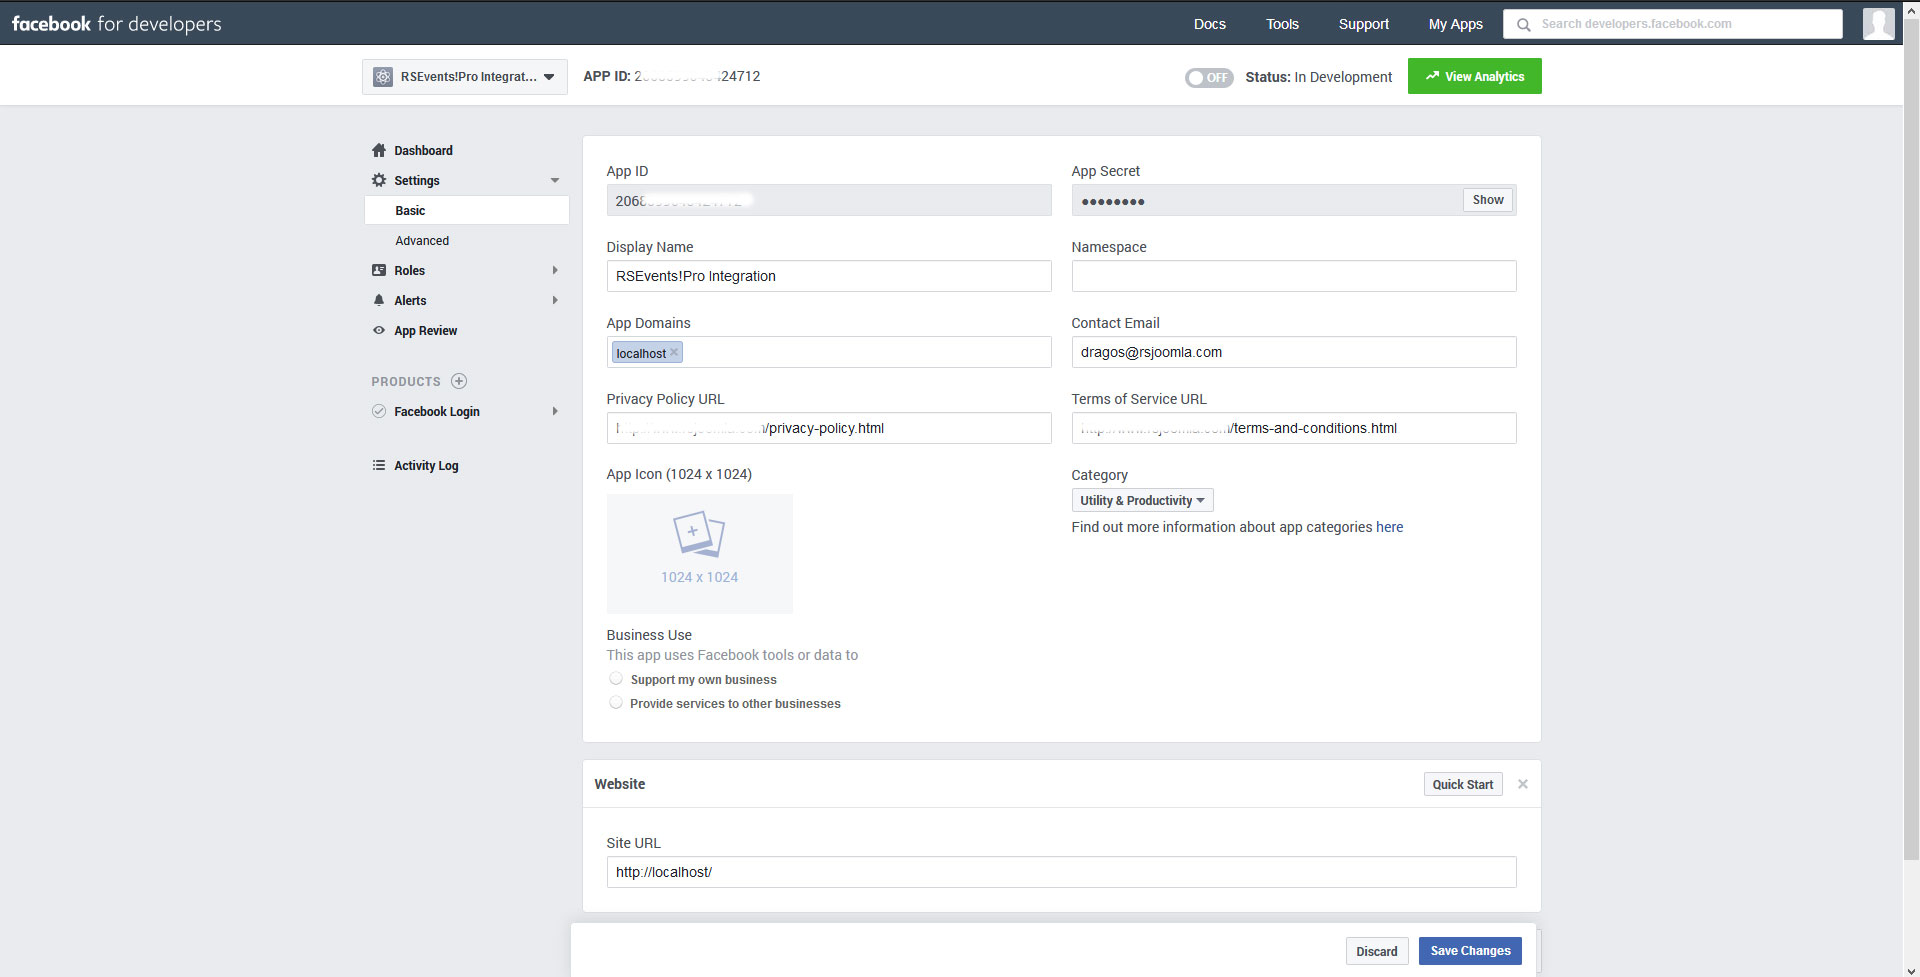
Step 2
Go to Settings > Basic and complete the following fields:
- - App Domains: This should be the domain where RSEvents!Pro is hosted (eg. domain.com - no https://www. needed)
- - Privacy Policy: you will need to add here you website's Privacy Policy full URL
- - Choose a Category
In the same area you will find the followings:
- - App ID
- - App Secret
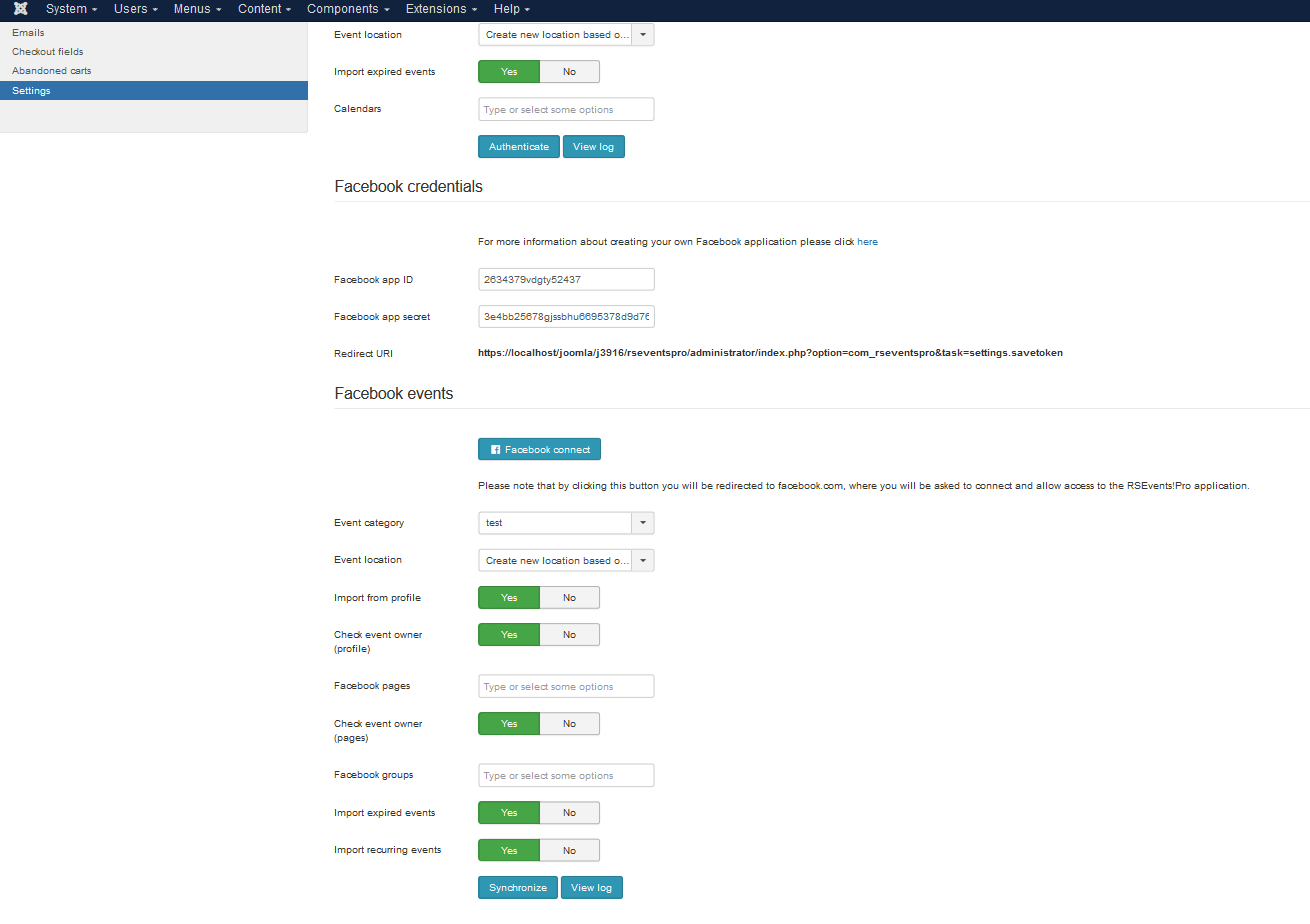
You will need to copy these options and input them under this path Components > RSEvents!Pro > Settings > Synchronization > Facebook credentials
- - Site URL: add your website URL (e.g. http(s)://myWebsite.com)
Step 3
Back to the Facebook developers area, go to Settings > Advanced and make sure the following option is enabled:
Allow API Access to App Settings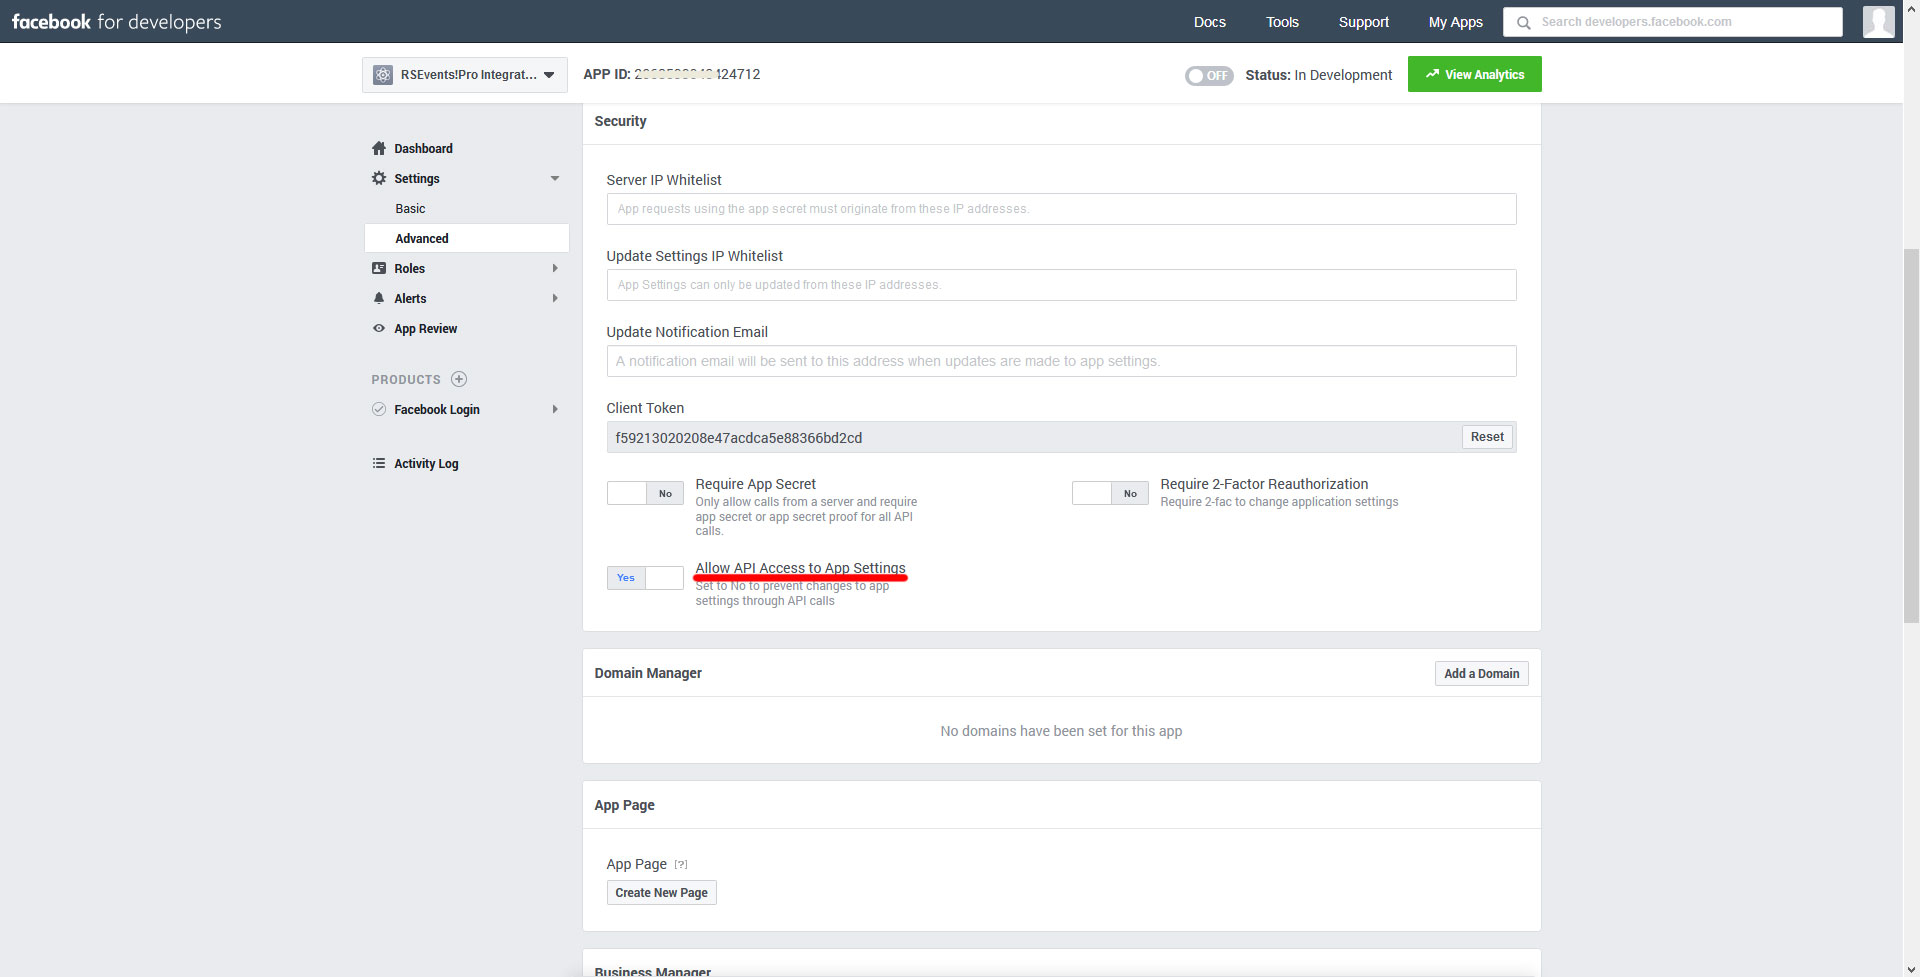
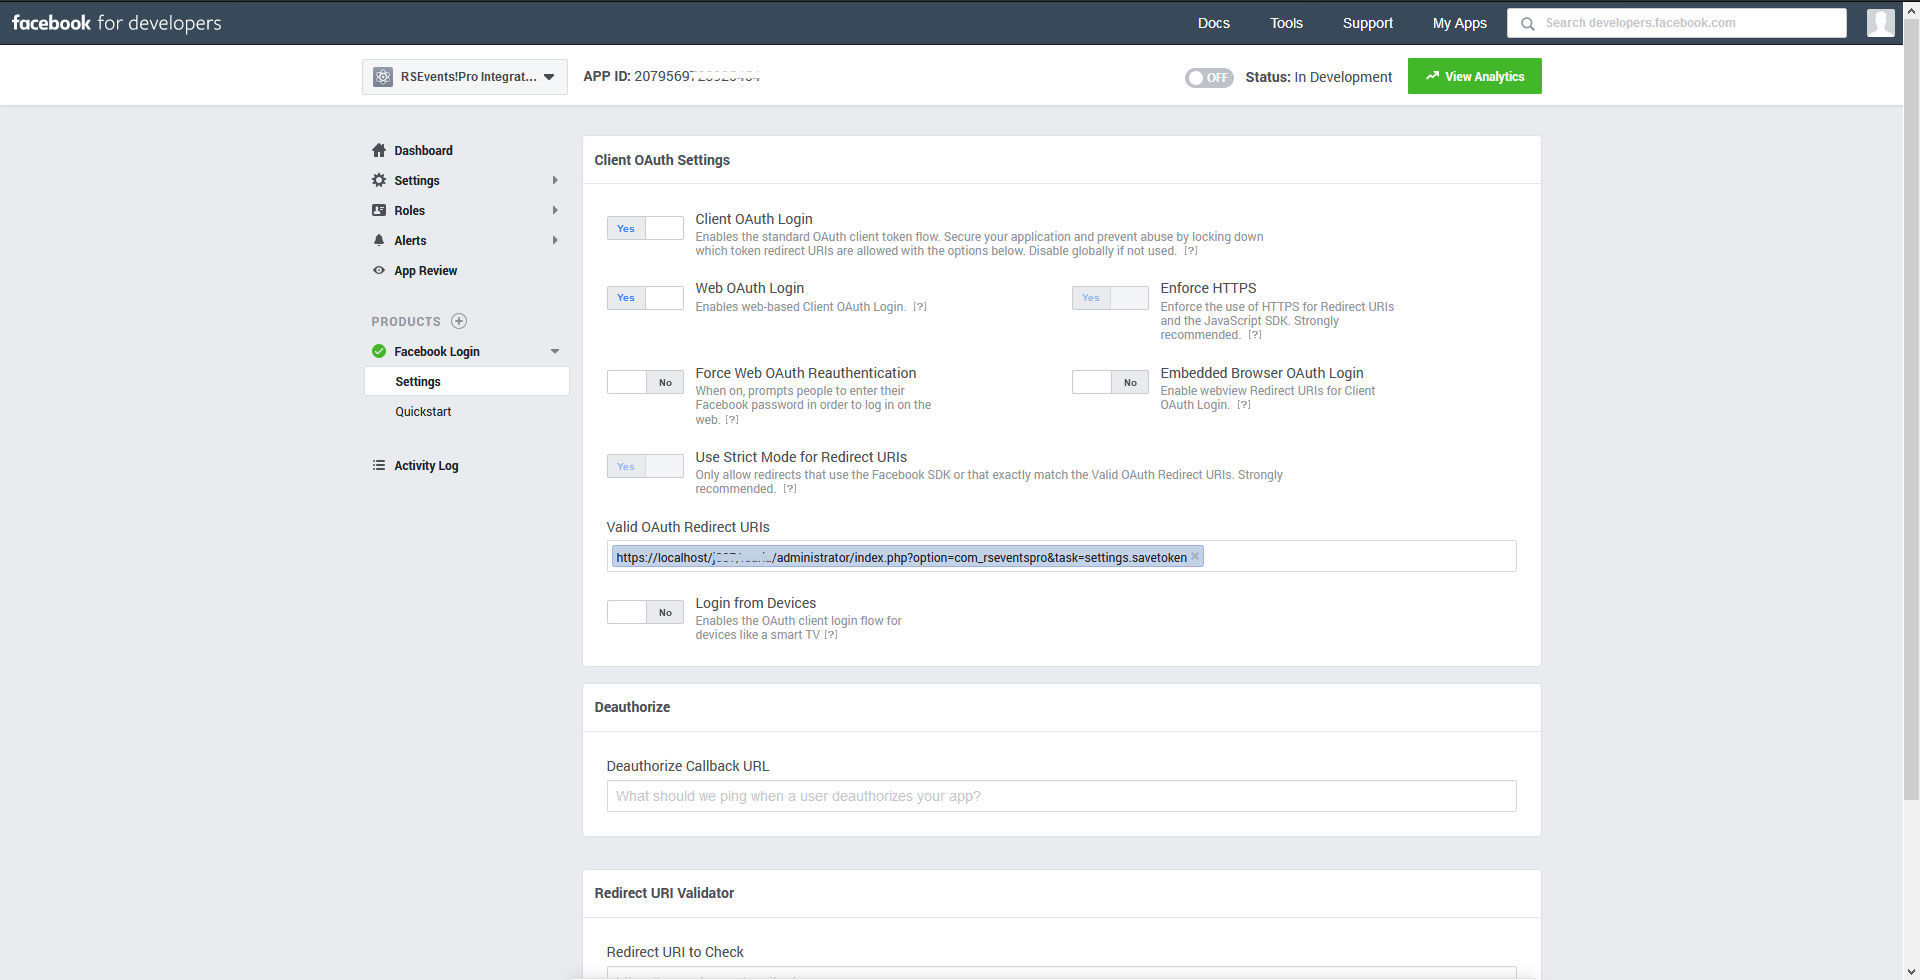
Step 4
Go to Products > Facebook Login > Settings > add the link below within the 'Valid OAuth Redirect URIs:' section and replace 'your_website_here' with your actual domain (https required) - you will find this path under 'Components > RSEvents!Pro > Settings > Synchronization > Facebook credentials' area:
https://your_website_here/administrator/index.php?option=com_rseventspro&task=settings.savetoken
Please note that the URL must have the https:// protocol
Step 5
After setting all the steps from the above, go to Components > Components > RSEvents!Pro > Settings > Synchronization > Facebook events section and hit Facebook Connect. If your setup is correct, extra fields will be displayed where you can choose the event page / groups from where you want to import.
Limitations
This Facebook Application will only import the events created by the logged in user to which the connection was established with.
9 persons found this article helpful.