Entry Claims
The Entry Claims tab provides a listing of all entries claimed, as well as filtering them based on their status.
To access this tab, please head to Components >> RSDirectory >> Entry Claims.
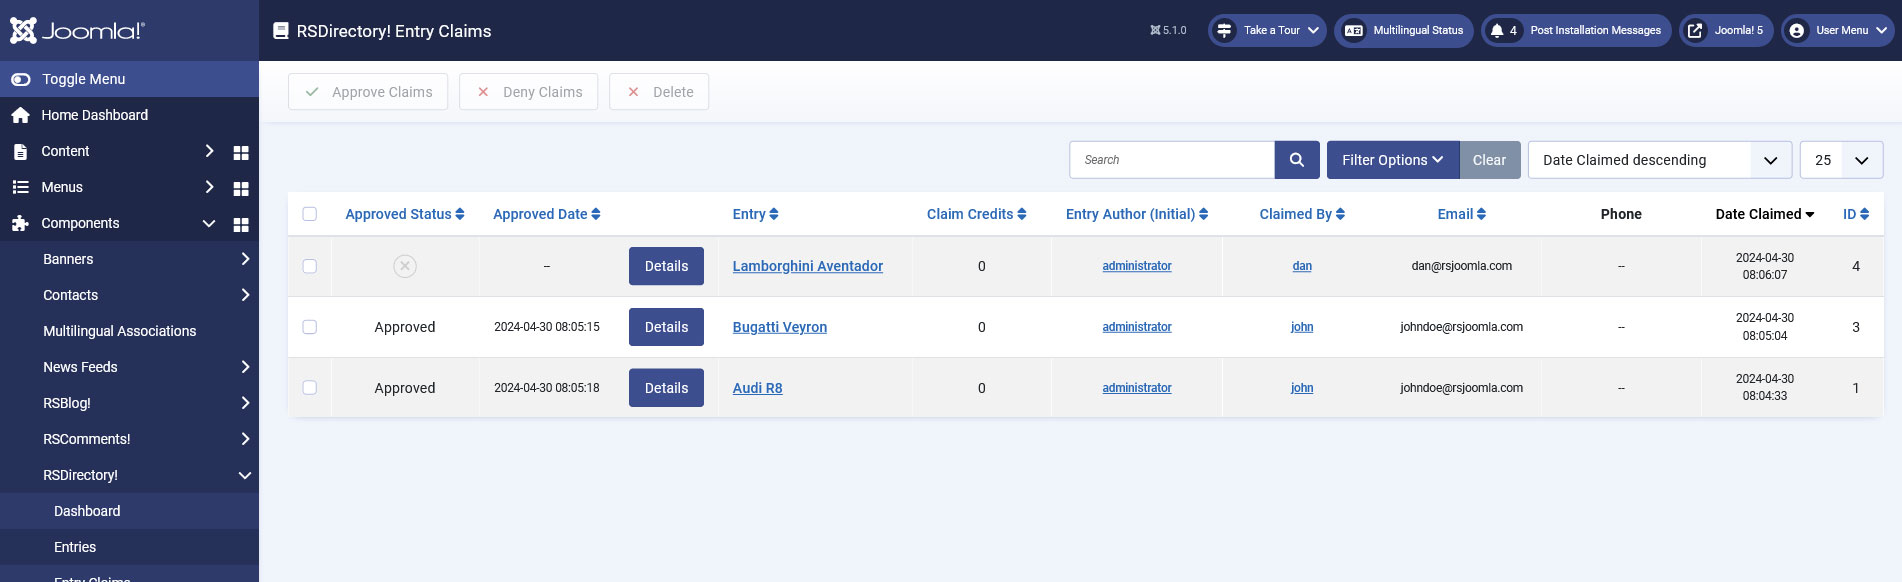
Listing information
Each entry claim is listed along with some relevant information:
- Approved Status: The entry's claim status: Approved / Pending
- Approved Status: The entry's claim approval date
- Entry: The claimed entry
- Claim Credis: The amount of credits needed for the entry to be claimed
- Entry Author (Initial): The initial entry author before claiming
- Claimed By: The user who claims the entry
- Email: The email of the user who claims the entry
- Phone: The phone of the user who claims the entry
- Date Claimed: The date when the entry has been claimed. Format: YYYY-MM-DD
- ID: The entry's internal id
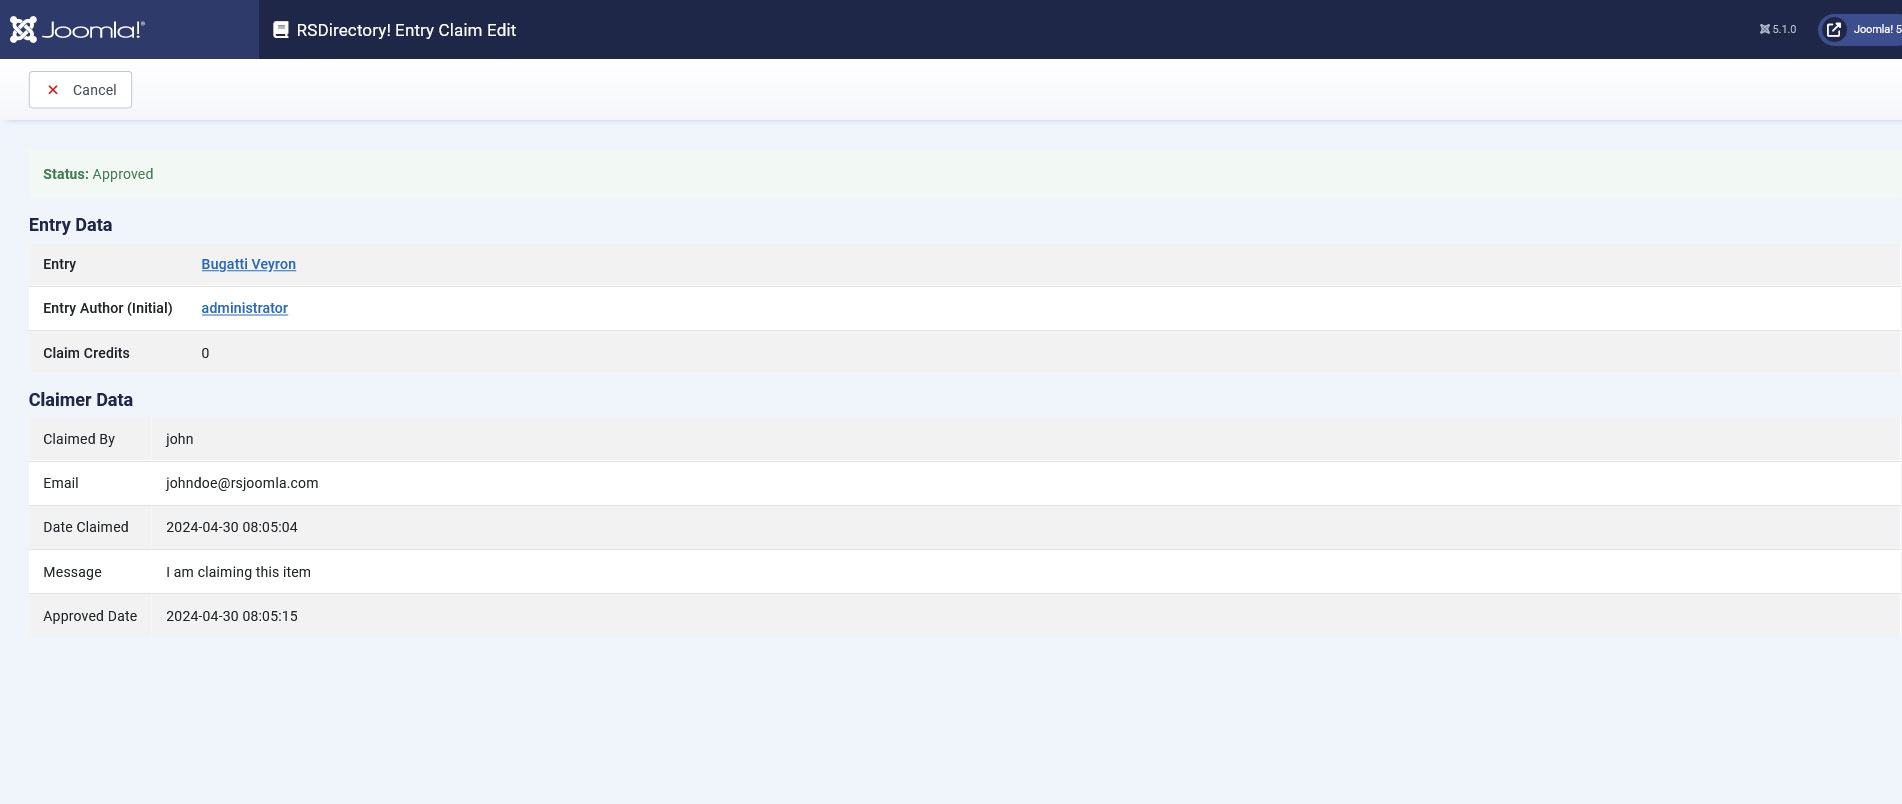
To access the Claimed Entry details page, click on its dedicated button. Here we will see:
Entry Data
- Entry: The entry's claim status: Approved / Pending
- Entry Author (Initial): The entry's claim approval date
- Claim Credis: The claimed entry
Claimer Data
- Claimed By: The claimer's name
- Email: The claimer's email address
- Date Claimed: The date of entry's claim
- Message: The message received from the claimer
- Approved Date: The approval date of the claim
How to use this functionality?
Here are the steps that you need to take in order to enable this functionality:
Step 1:
Head to Components > RSDirectory! > Users section and enable the "Allow claim a listing" permissions for the Super User that owns the entry.
Step 2:
Log in using the Super user account in question and head to RSDirectory! > Entries section and enable the "Mark as can be claimed" from "Claim Listing" column for the entries that can be claimed.
Step 3:
Go to Components > RSDirectory! > Groups > select the user group that can claim entries in the frontend area > switch to Admin tab > set to "Yes" the "Can claim available entries".
Step 4:
After the above-mentioned steps are covered, the user that belongs to the user group that has "Can claim available entries" permissions will see a "Claim Listing" button, when accessing the entry's details page. After clicking on this button and completing the form from the popup window, he/she will claim the entry. If "Claim Credis" is configured, the user needs to have that number of credits on his/her account to be able to claim the entry. If the user does not have enough credits, a link to the "Buy Credits" page will be displayed, informing about how many more credits are needed in order to claim the entry.
Step 5:
Head to Components > RSDirectory! > Entry Claims and "Approve" or "Deny" the entry claim.
Configure the emails
There are three types of emails that can be configured:
One for the entry owner(Super User account) - this email can be configured from Components > RSDirectory! > Forms > select your form > Claim Listing tab
Two email notifications that can be configured to be sent to the user that claimed the listing from Components > RSDirectory! > Email Messages:
- one will be sent "On entry claim approval"
- the other one will be sent "On entry claim denial"
3 persons found this article helpful.