Entries
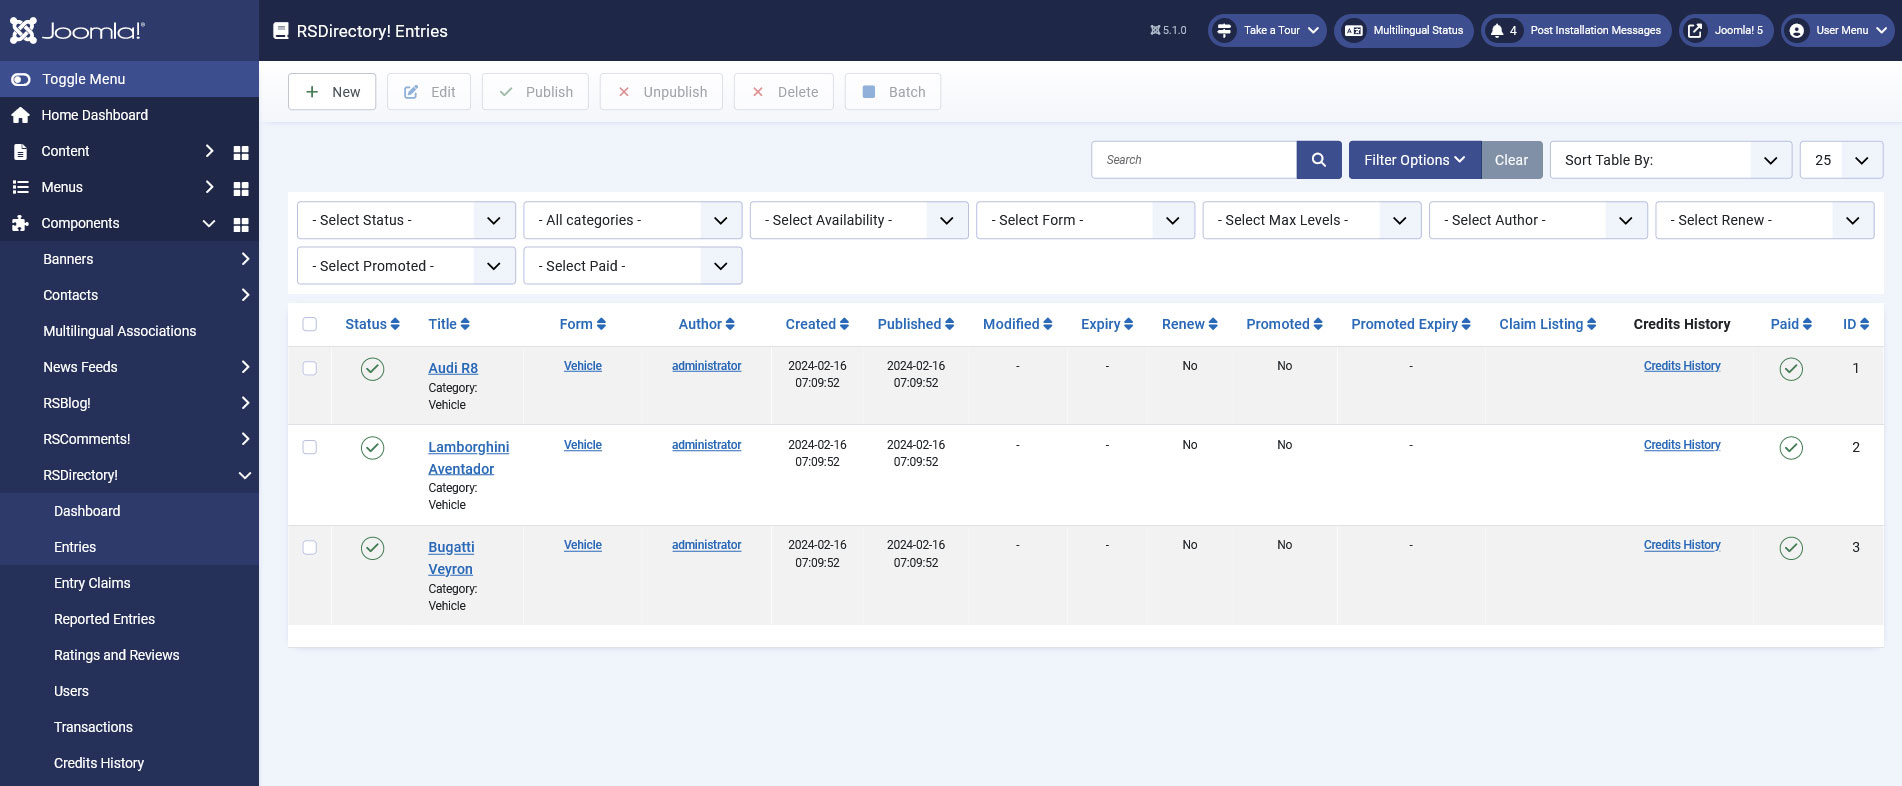
The Entries tab houses a listing of all directory entries, whether they were added from the website's backend or frontend areas. It offers the possibility to perform some basic operations with the listed items, as well as filtering them based on a fair number of criteria.
To access this tab, please head to Components >> RSDirectory >> Entries.
Listing information
Each entry is listed along with some relevant information:
- Status: The entry's status: Published / Unpublished
- Title: The entry's title
- Form: The form used to submit the entry
- Author: The name of the user who has submitted the entry
- Created: The date the entry was created on. Format: YYYY-MM-DD
- Published: The date the entry was published on. Format: YYYY-MM-DD
- Modified: The date the entry was last modified. Format: YYYY-MM-DD
- Expiry: The date the entry will expire on. Format: YYYY-MM-DD
- Renew: Displays whether the entry will / will not be automatically republished after it's publishing period had expired
- Promoted: Displays whether the entry is being promoted or not
- Credits History: Hyperlink for viewing credits history for that particular entry
- Paid: Entry paid status
- ID: The entry's internal id
Note: Changing the entry status from "Paid" to "Unpaid" will unpublish the entry, thus leaving the entry's owner to spend/re-spend credits to publish it.
Exporting Entries can be done by clicking on Filter Options > select a form from the '- Select Form -' dropdown. After the page is refreshed, an Export button will show up in the toolbar allowing you to export the entries in CSV format.
Filtering and ordering options
You can filter entries by the same criteria listed above: status, title, category, form, author, date created, date published, date modified, expiry date, promoted, renew, paid and id.
Entries can be ordered ascending or descending, and you can choose how many items to display per page.
If you want to search your entries based on a certain submitted value from one of your custom fields, you can use the following syntax within the top search input:
field:exact_field_name:value
For example:
field:Gearbox:Automatic
Note:
- you'll need to use the exact field name, not the field caption.
- you can only search for one single custom field value at a time.
Batch processing entries
Ver. 1.3.0 introduced the possibility to batch process entries. You can move or copy entries to another category or associate them with a different user account.
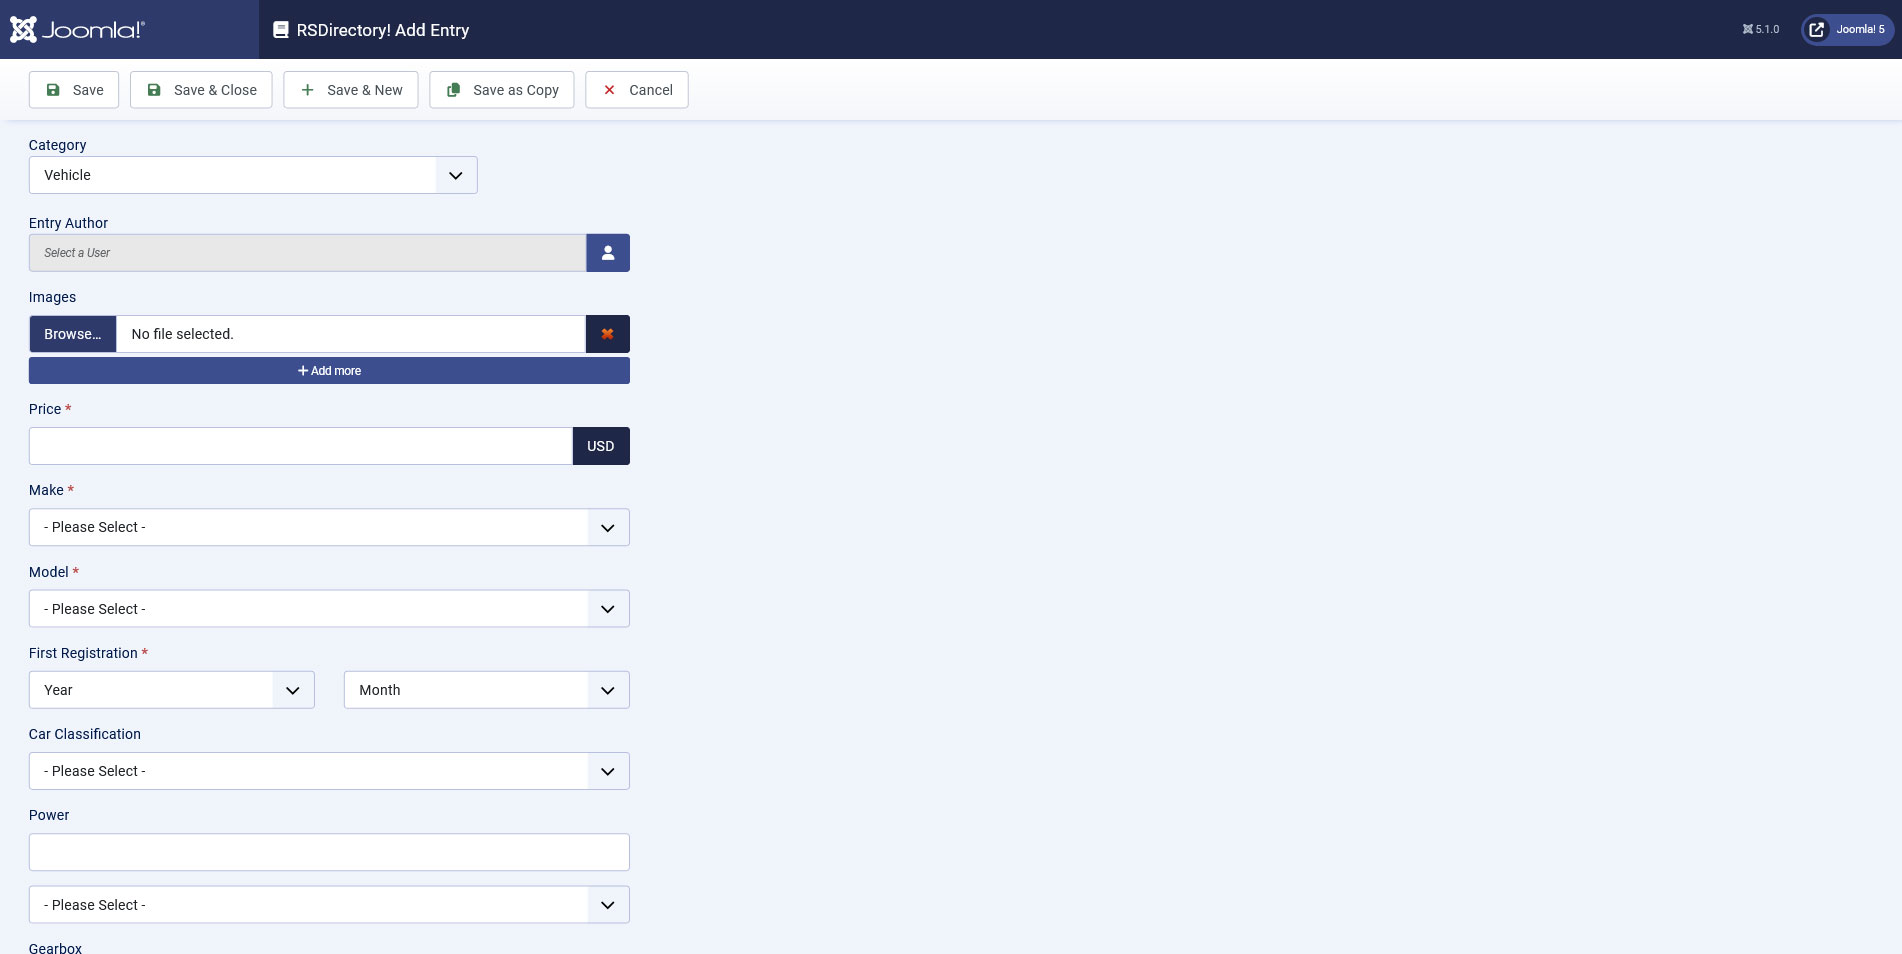
Creating a new entry
The Entries tab also offers the possibility to add a new entry. This is done by clicking on the New button located at the top of the screen. The user will be presented with a pop-up in which he will need to select the category to which the entry will belong. Then, all fields available in the form associated with the selected category will be editable. The default form fields are the following:
- Entry Author: The backend user will be able to select the entry's author from the default Joomla! User Manager listing.
- Title: The entry's title.
- Price: The entry's price.
- Publishing period: Select a publishing period for the entry.
- Automatically republish the entry after expiration.: Check this option to have the entry automatically republished after it expires.
- Description: The entry's description. The default Joomla! editor will be used.
- Small Subtitle: Will be displayed beneath the entry's title in the frontend, after Big subtitle.
- Big Subtitle: Will be displayed beneath the entry's title in the frontend.
- Images: You can upload one or more images that will be displayed in the frontend. Adding more images is done by clicking on the Add more button associated with this field.
- Promoted: Set whether the entry will be promoted or not.
- Published: Set whether the entry is published or not.
- Paid: Set whether the entry is paid or not.
- Charge credits:Set whether credits are charged or not.
- Can be claimed:Set whether the entry can be claimed or not.
- Claim Credits:Set the amount of credits needed to be charged upon claiming this entry.
17 persons found this article helpful.