RSBlog! Facebook Integration - create your own Facebook application
Recently, Facebook has changed the way their API works. To keep up with these new changes, below you will find the necessary steps you need to take in order to connect RSBlog! with your Facebook Pages.
Step 1
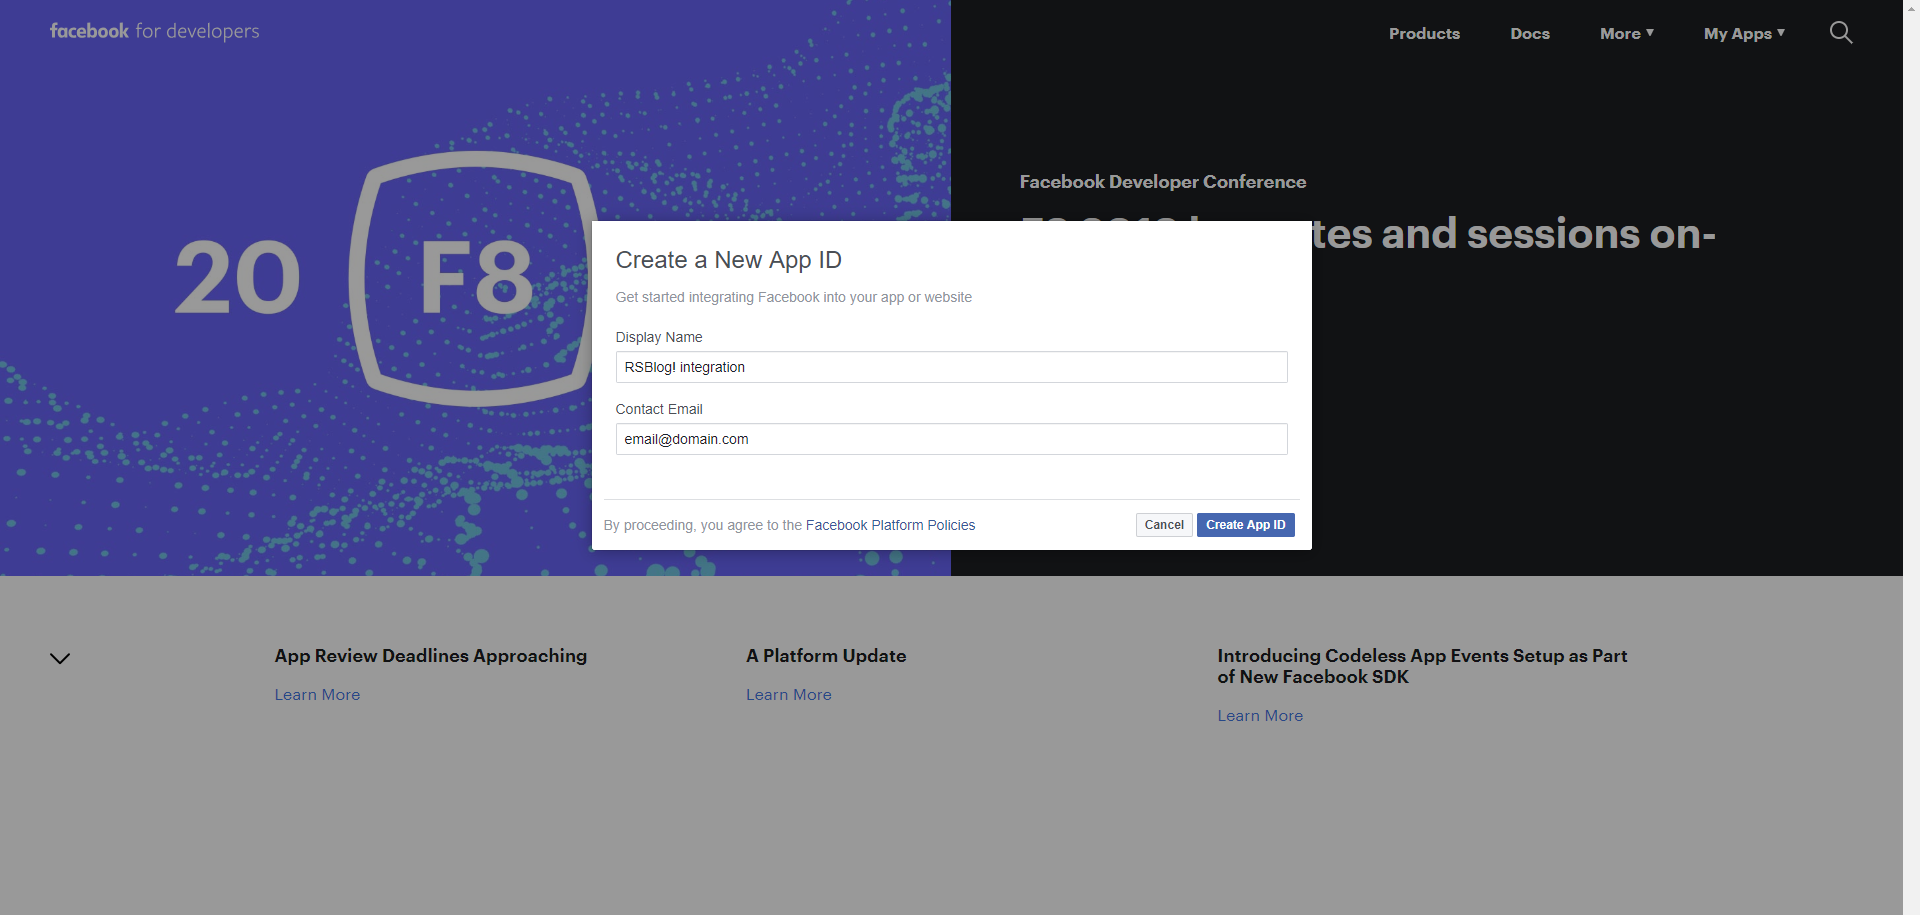
Go to Facebook Developers Console and click on the 'My apps' button, a popup window will be displayed. You'll need to Create a New App then under 'Facebook Login - setup' section choose Web.
In order not to submit a review, the app status needs to be OFF - In development, thus only you as owner (or your test users/app admins) can use the integration. If you want to make your app public (note that it will become available to everyone), you'll need to submit an App Review to Facebook.
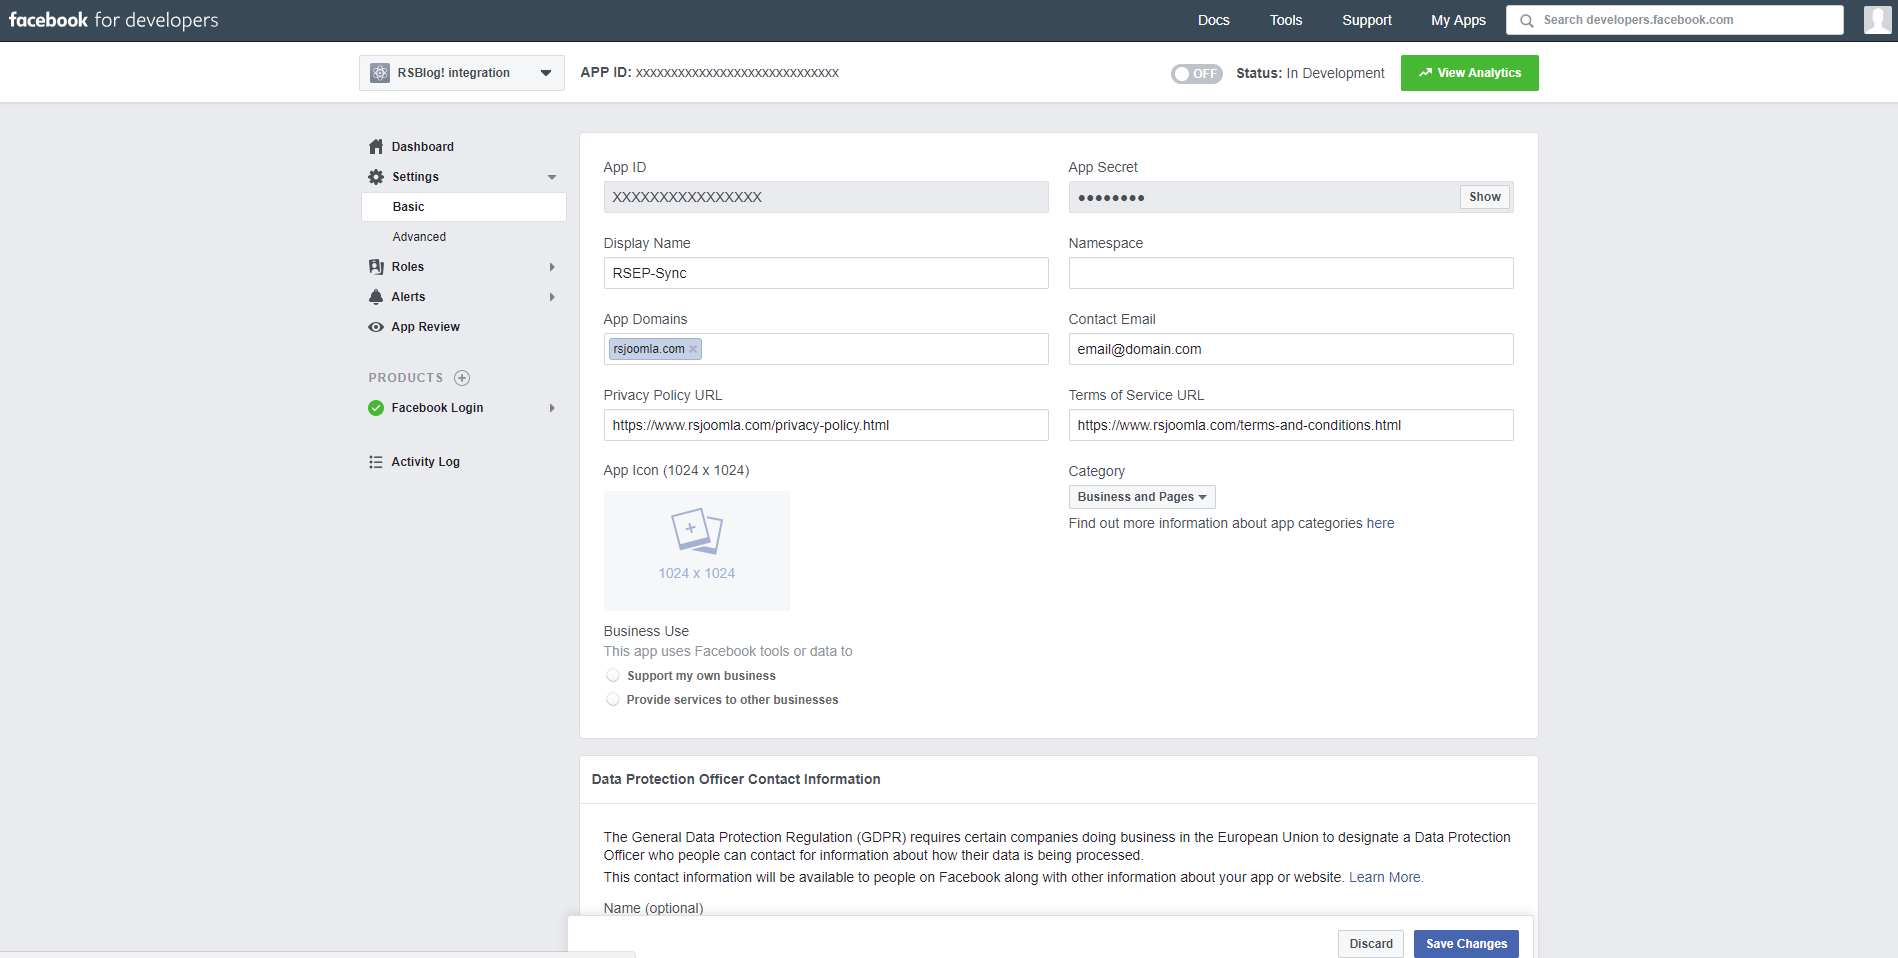
Step 2.
Go to Settings > Basic and complete the following fields:
- - App Domains: This should be the domain where RSBlog! is hosted (eg. domain.com - no https://www. needed)
- - Privacy Policy: you will need to add here you website's Privacy Policy full URL
- - Terms of Service URL: you will need to add here you website's Terms and Conditions full URL
- - Choose a Category
In the same area you will find the followings:
- - App ID
- - App Secret
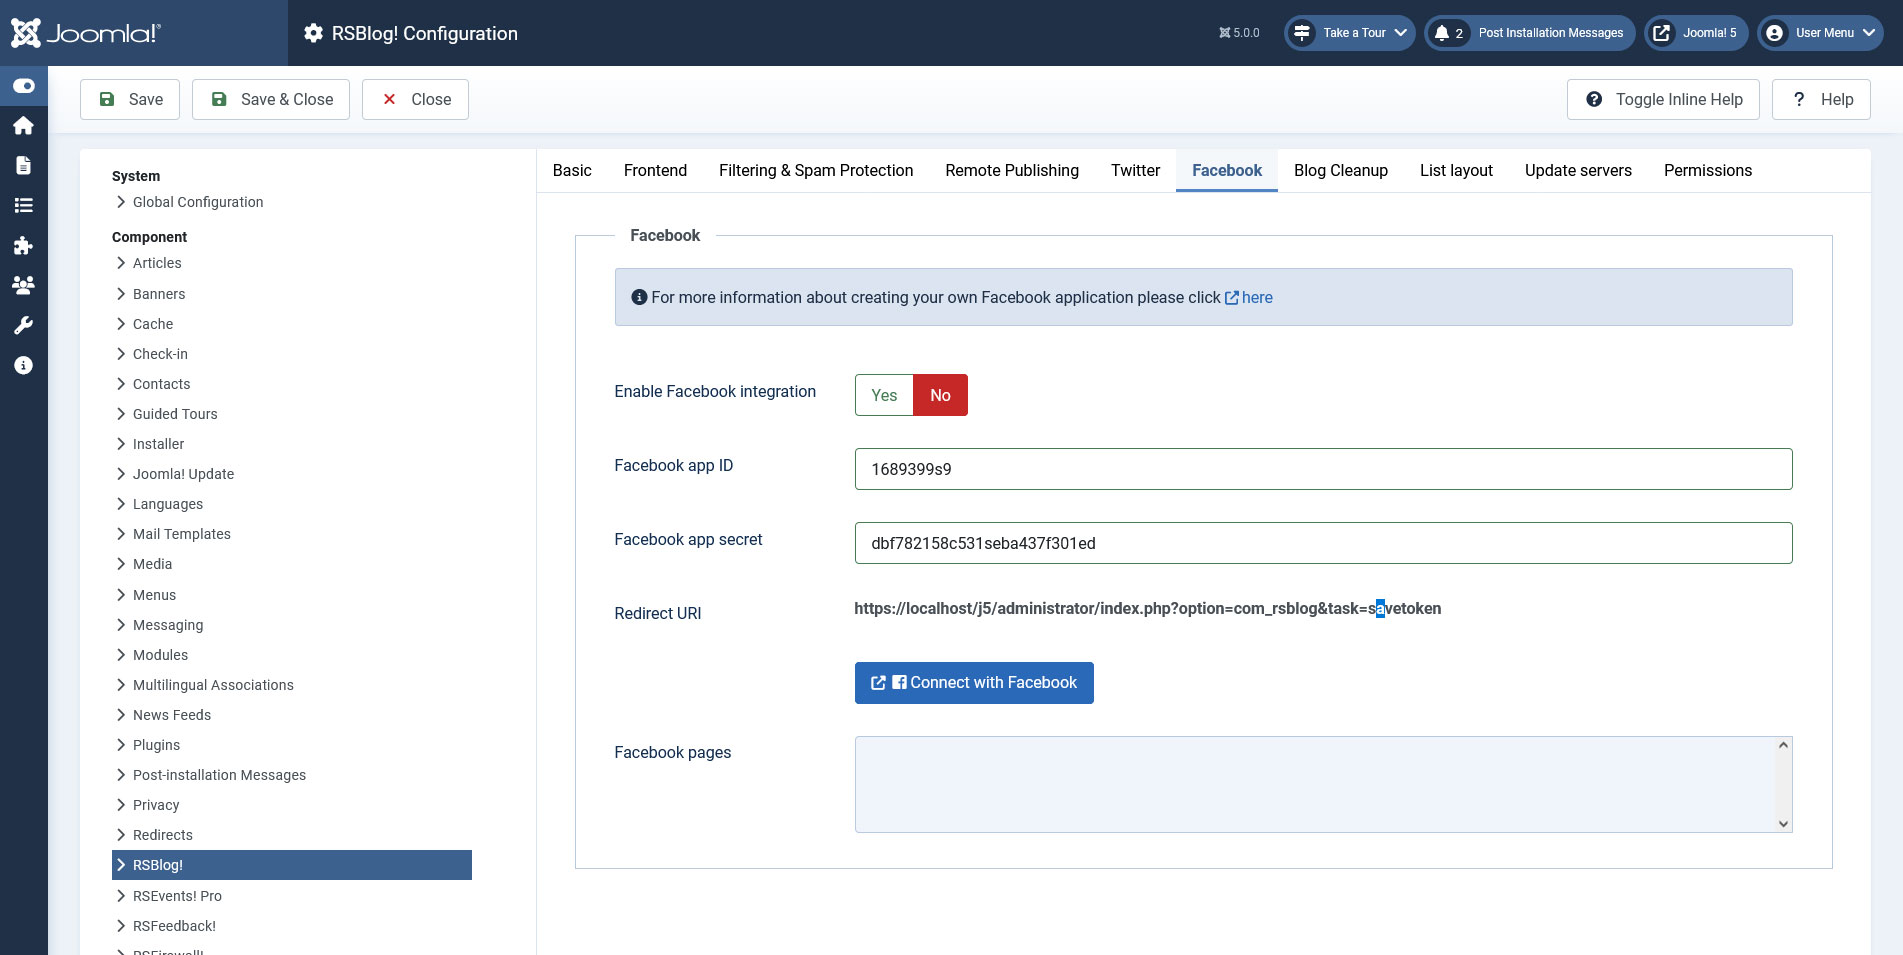
You will need to copy these options and input them in this path:
Components > RSBlog! > Dashboard > here, click the top Options button > FacebookBesides enabling the integration, ensure that you save your configuration afterwards using the top Save button.
Step 3
Back to the Facebook developers area, go to Settings > Advanced and make sure the following option is enabled:
Allow API Access to App Settings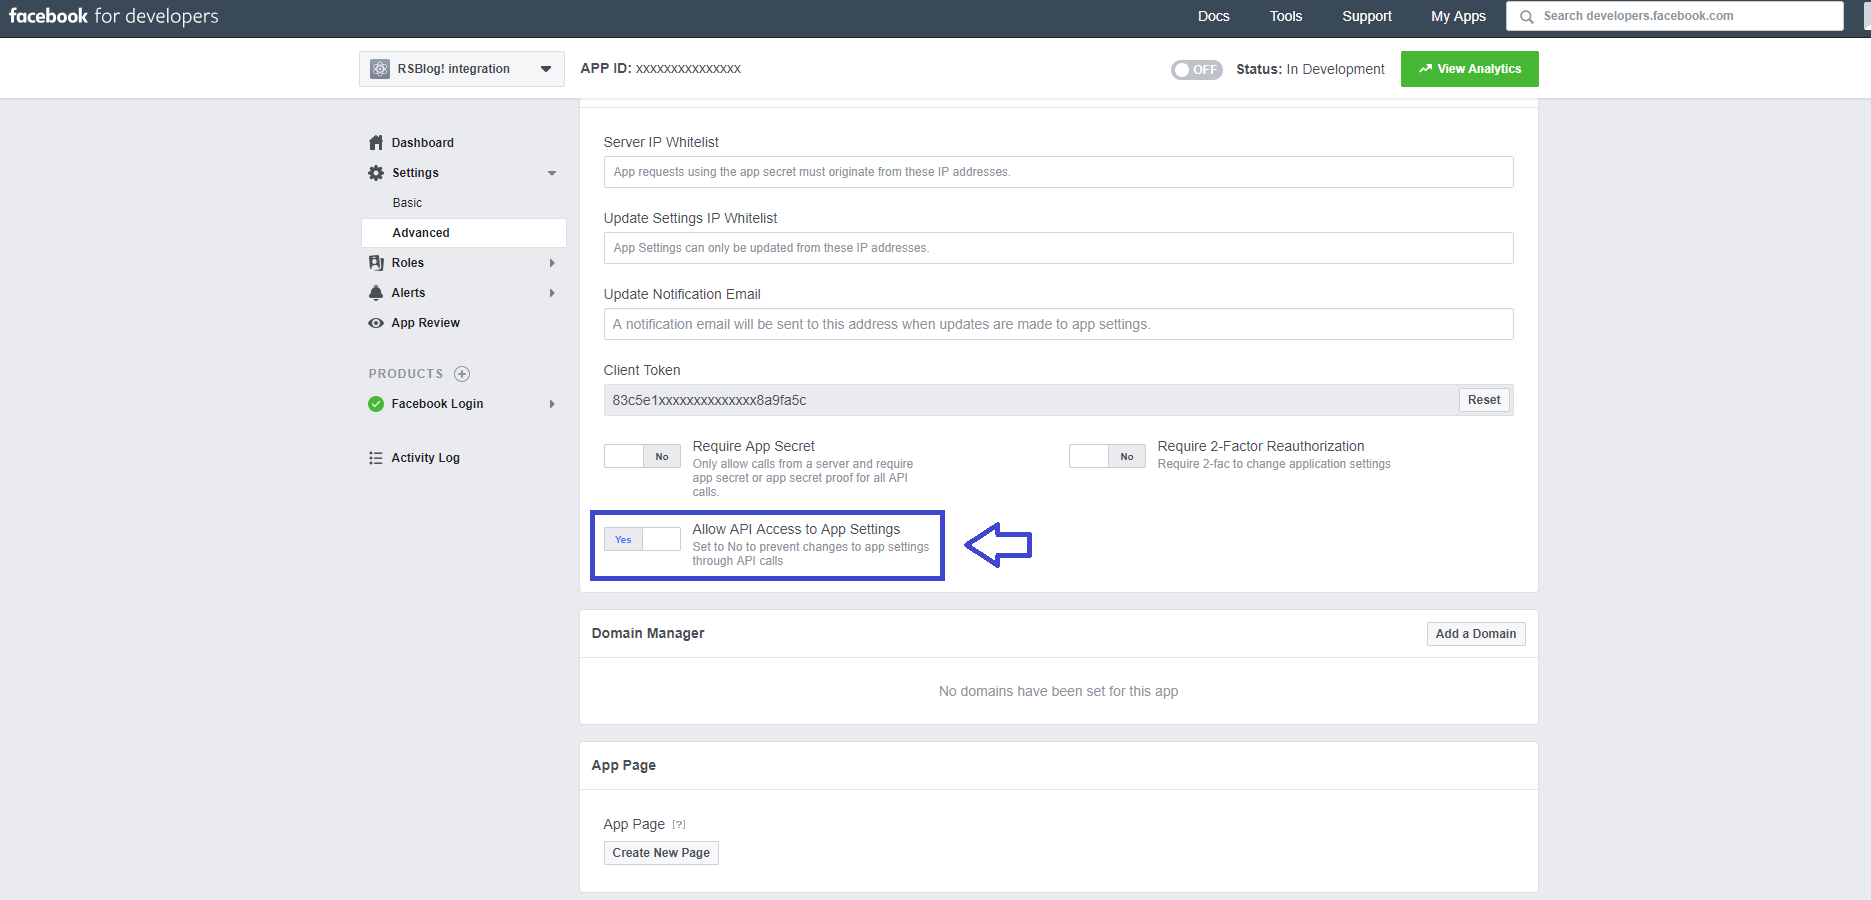
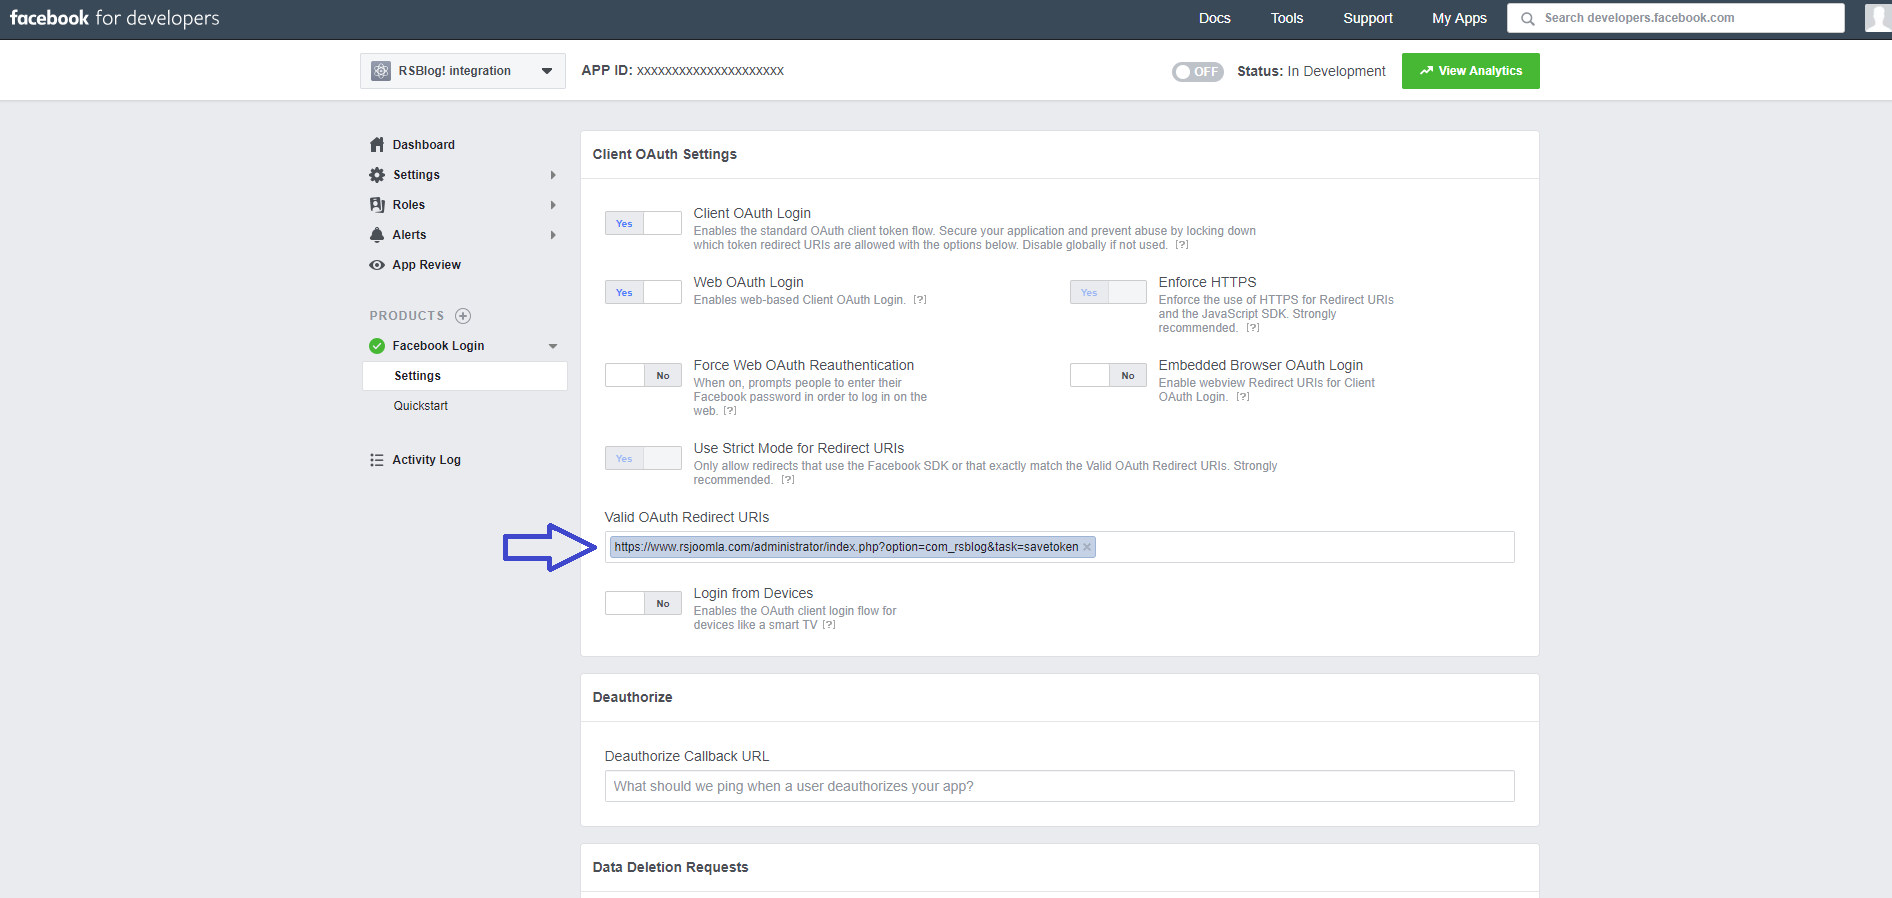
Step 4
Go to Products > Facebook Login > Settings > add the link below within the 'Valid OAuth Redirect URIs:' section and replace 'your_website_here' with your actual domain (https required) - you will find this path under 'Components > RSBlog! > Dashboard > top Options button > Facebook' area:
https://your_website_here/administrator/index.php?option=com_rsblog&task=savetoken
Please note that the URL must have the https:// protocol
Step 5
After setting all the steps from the above, go to Components > RSBlog! > Dashboard > top Options button > Facebook and click the Connect with Facebook button. If your setup is correct, after being redirected back to your website you'll encounter a successful message.
You can then select your pages (you'll need to normally have administrator privileges on these pages to be able to post on them) by clicking within the input from the "Facebook pages" textbox. After choosing the desired pages, save your configuration (top Save button).
API Limitations
This Facebook Application will post only to the pages that you have administrator privileges (based on the account that you've made the connection). This will not work on your Facebook profile page.
Posting to Facebook
After the integration is configured a new option will be available when creating a new blog post in the Social interaction tab: Post to Facebook. Just set this to Yes in order to publish the post on Facebook pages.
Remote Publishing
RSBlog! Remote Publishing feature can also post to your Facebook pages. From its configuration simply enable the "Post to Facebook" option.
10 persons found this article helpful.