RSBlog! Twitter Integration - create your own Twitter application
This guide will explain how to connect RSBlog! with Twitter so you can add your blog posts to your Twitter page as well.
Steps
- Go to https://developer.twitter.com/en/apps and log in if necessary.
- Click the "Create an app" button and fill out their Apps submit form (you'll need to have such an approved developer account if you haven't done this yet in order to be able to create apps).
- Afterwards, you should be redirected to Create an app page, or access https://developer.twitter.com/en/apps where you can click the "Create an app" button if you aren't redirected.
- For the App details, you'll need to fill out:
- App name: the name of your app (e.g. RSBlog!).
- Application description: some description like "Application used to post twitts using RSBlog!".
- Website URL: add your website (e.g. https://www.rsjoomla.com).
- Check the "Enable Sign in with Twitter" checkbox.
- Add the following URL matching your website within the "Callback URLs" field:
- https://www.myWebsiteName.org/administrator/index.php
- Tell us how this app will be used: include a more detailed description for your app.
- Click the Create button and agree to their policy/terms.
- Your app will be created and you'll be able to access further details for your app.

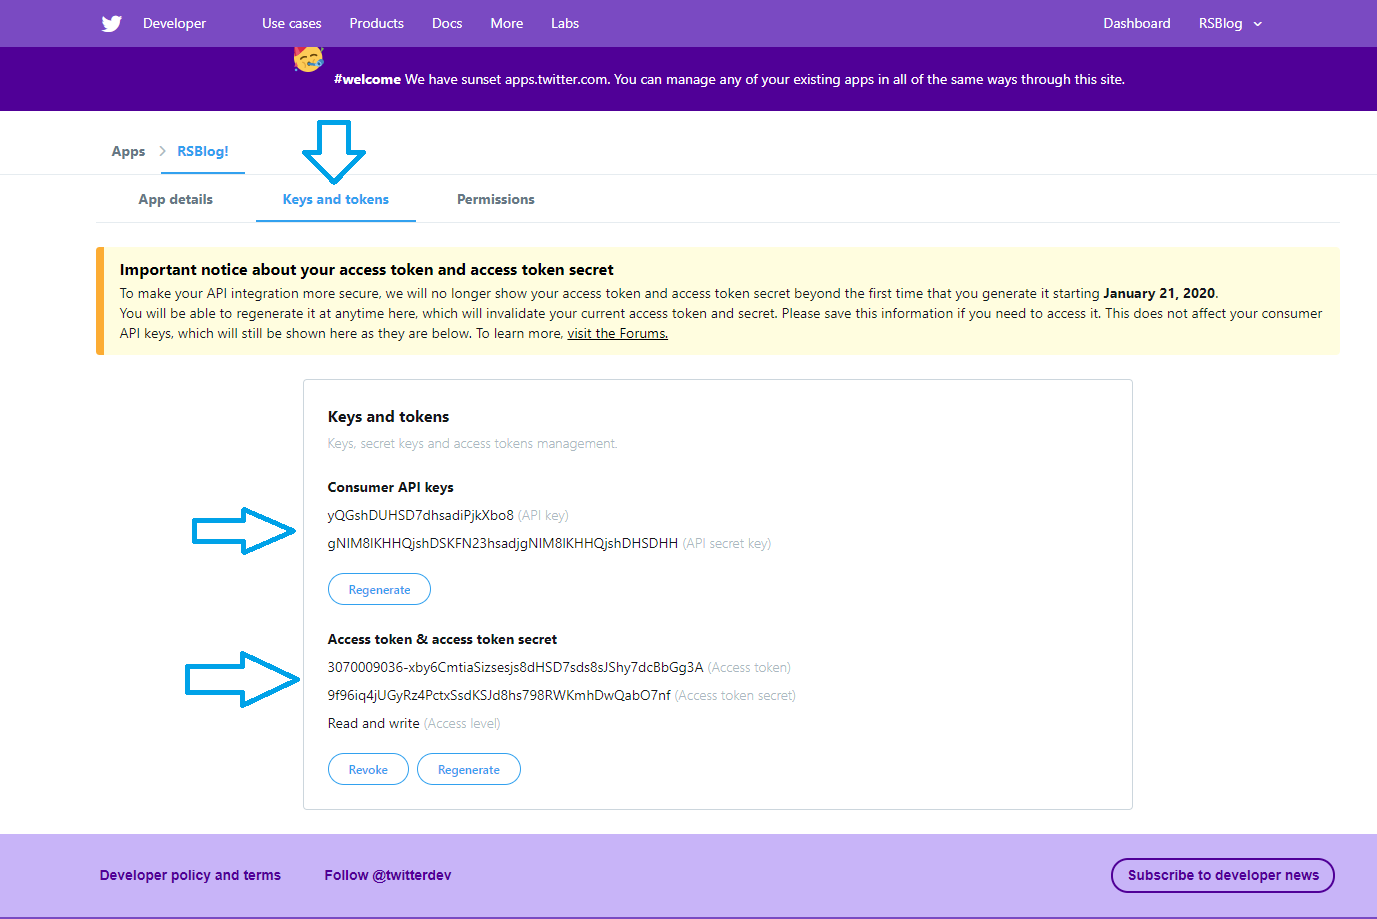
- Access the "Keys and tokens" tab.
- From the "Access token & access token secret" click the Create button.
- You should now have all 4 keys required for this integration, 2 API keys and 2 oauth tokens. These are the details you'll need to include in RSBlog!.
- You're now done with configuring your Twitter app, head to RSBlog!.
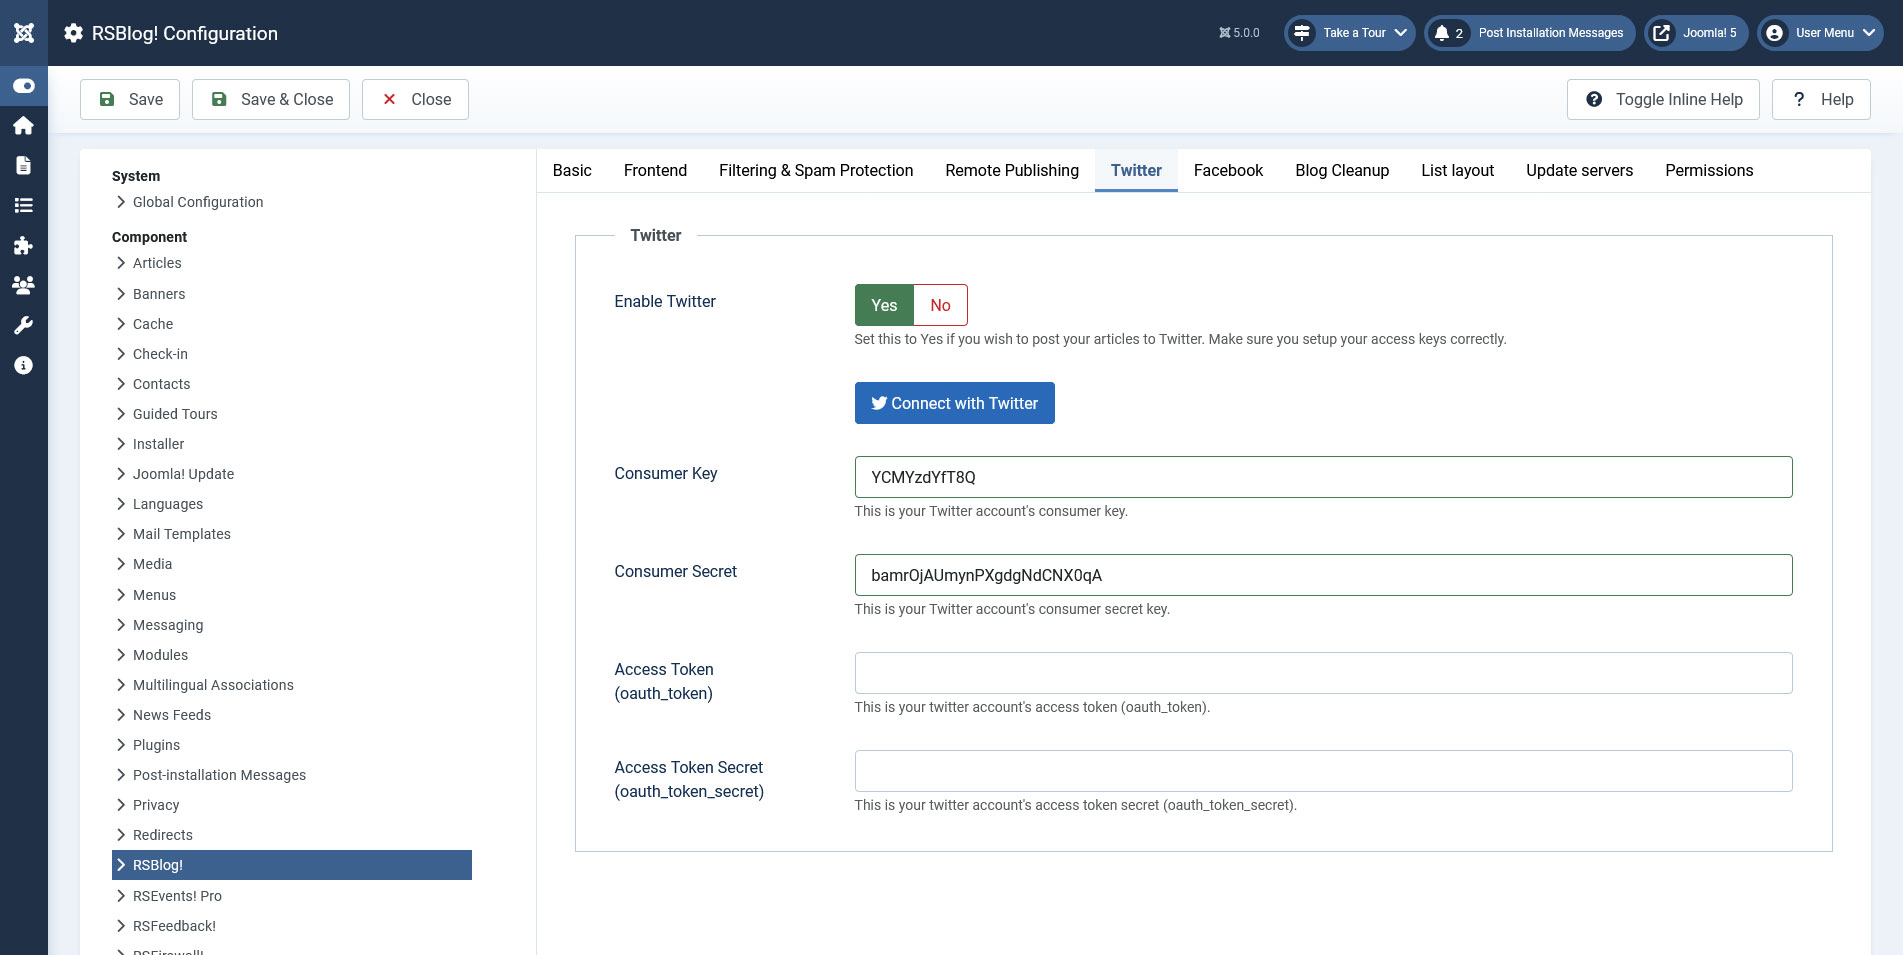
- From RSBlog!:
- Add these 4 keys via RSBlog! accordingly; backend > Components > RSBlog! > Dashboard > top Options button > Twitter (ensure that you're properly copying and pasting these without trail/leading spaces).
- Set the "Enable Twitter" option to "Yes".
- Click the top "Save" button so that your configuration is firstly saved.
- After the page refreshes, click the "Connect with Twitter" button.
- You'll then be redirected to Twitter where you'll have to authorize this app.
- Click the "Authorize app" button and wait until you are redirected back to your website.
- A message should then be encountered on your website "The Twitter configuration has been successfully setup!" implying the connection with Twitter has been successfully done.
Important: Ensure you have a SSL implementation on your website for this to work and that when specifying both URLs in your App details, you include them with https
Posting to Twitter
After the integration is configured a new option will be available when creating a new blog post in the Social interaction tab: Post to Twitter. Just set this to Yes and Save your settings in order to publish the post on Twitter.
One person found this article helpful.