Adjusting the component's look and feel
Though RSEvents!Pro comes with a well organized display, there may be times when you would like to improve / adjust the look and feel of a certain area. The RSJoomla! team thought this through and designed RSEvents!Pro in such a way that almost every view can be adjusted via template overrides.
Template overrides offer tremendous flexibility in terms of content look and feel. Basically you can control any aspect - HTML output and CSS, without affecting the component's update process (changes to the source code would have been lost if an update occurred). As a drawback, this method requires a basic understanding of PHP, HTML and CSS.
How to create a template override
First you will need to navigate to System > Templates > Site Templates in Joomla! admin panel, then select the Cassiopeia Details and Files item.
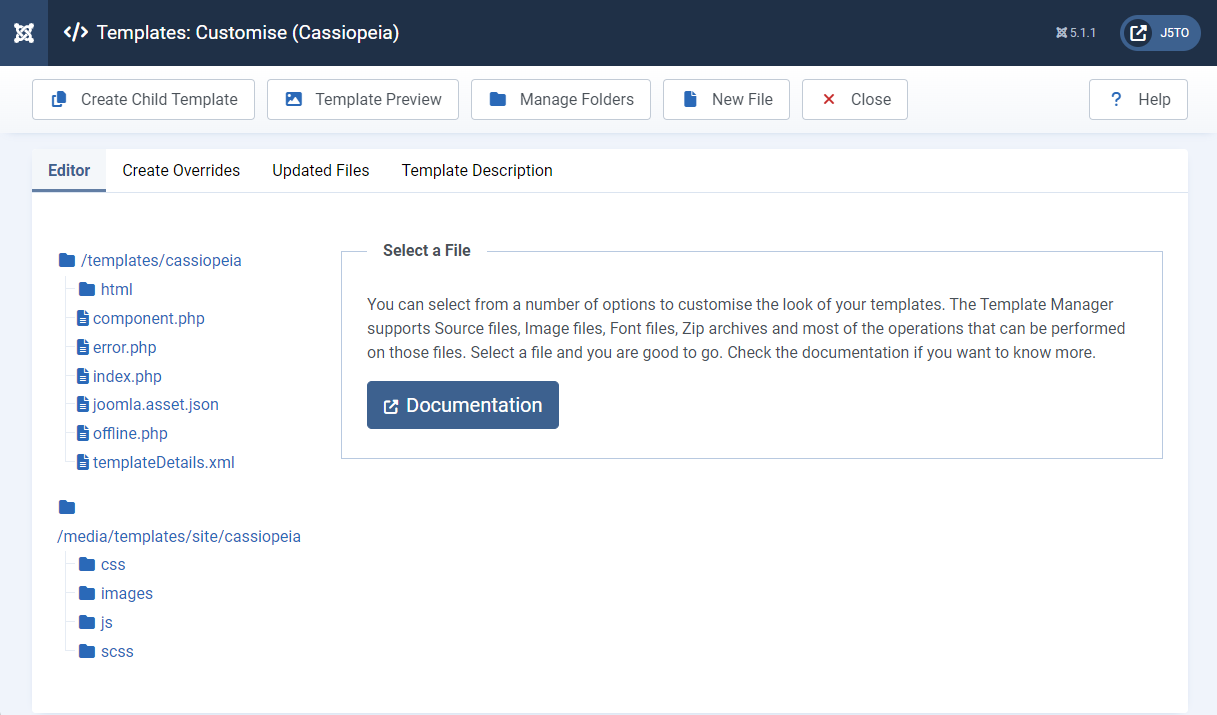
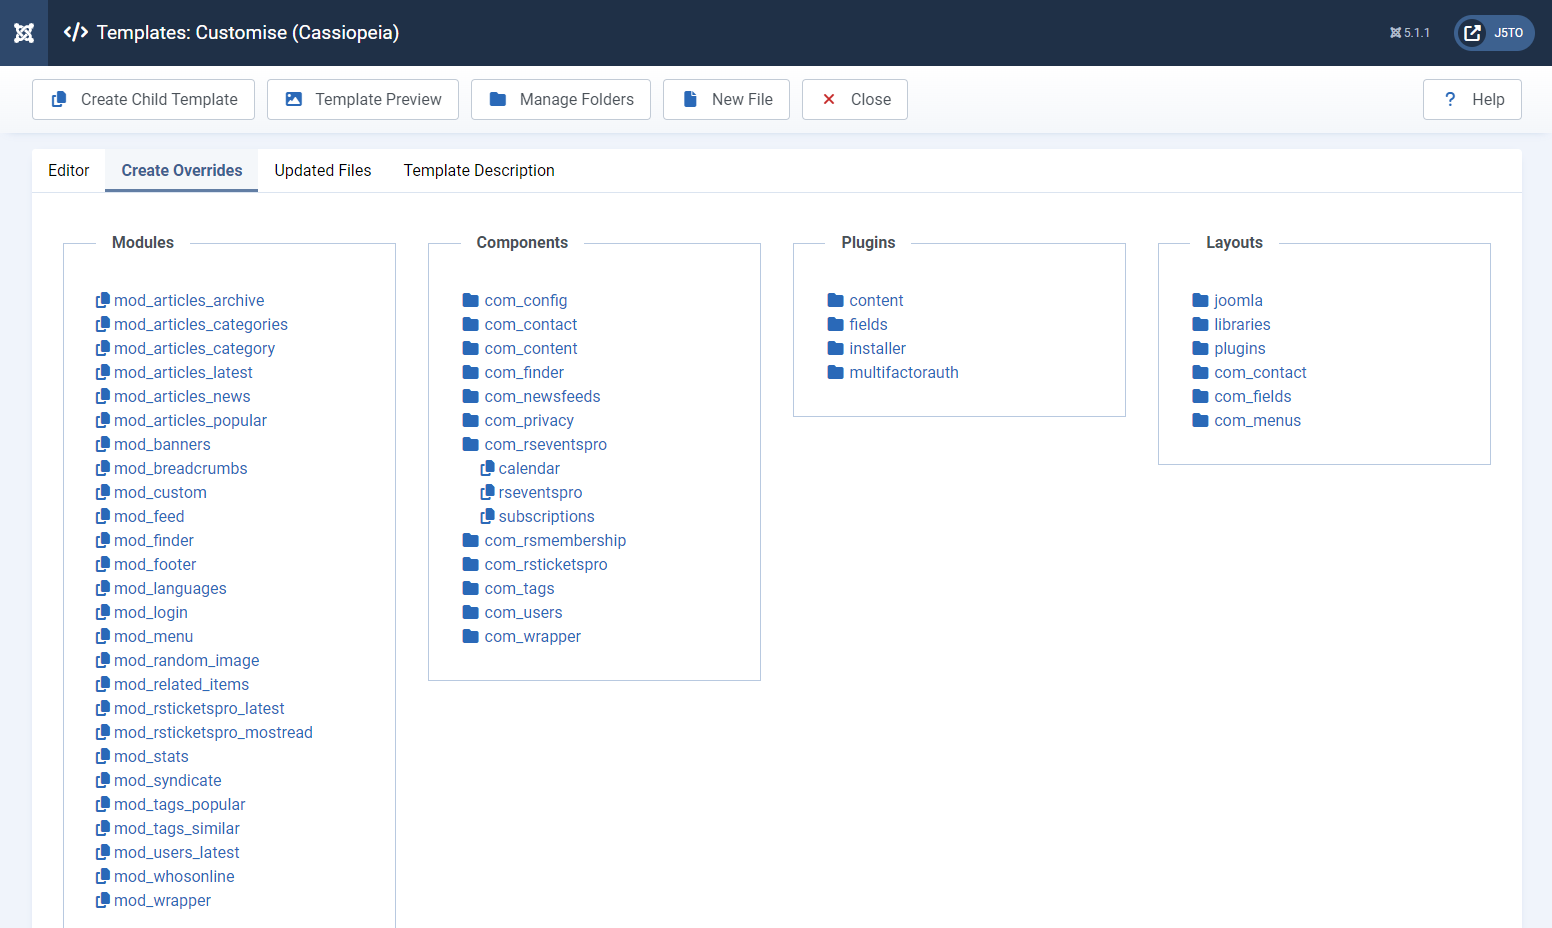
Next you will need to switch to the "Create Overrides" tab and in the "Components" section select the component and section you want to create an override for.
- The Calendar page menu item - calendar
- The Events listing pages menu item - rseventspro
- The Subscriptions pages menu item - subscriptions
After the selection, the correct folder tree will be created in your templates "html" folder and you can start editing the file through the "Editor" section. We will add a simple header to the calendar page mentioning this is an override.
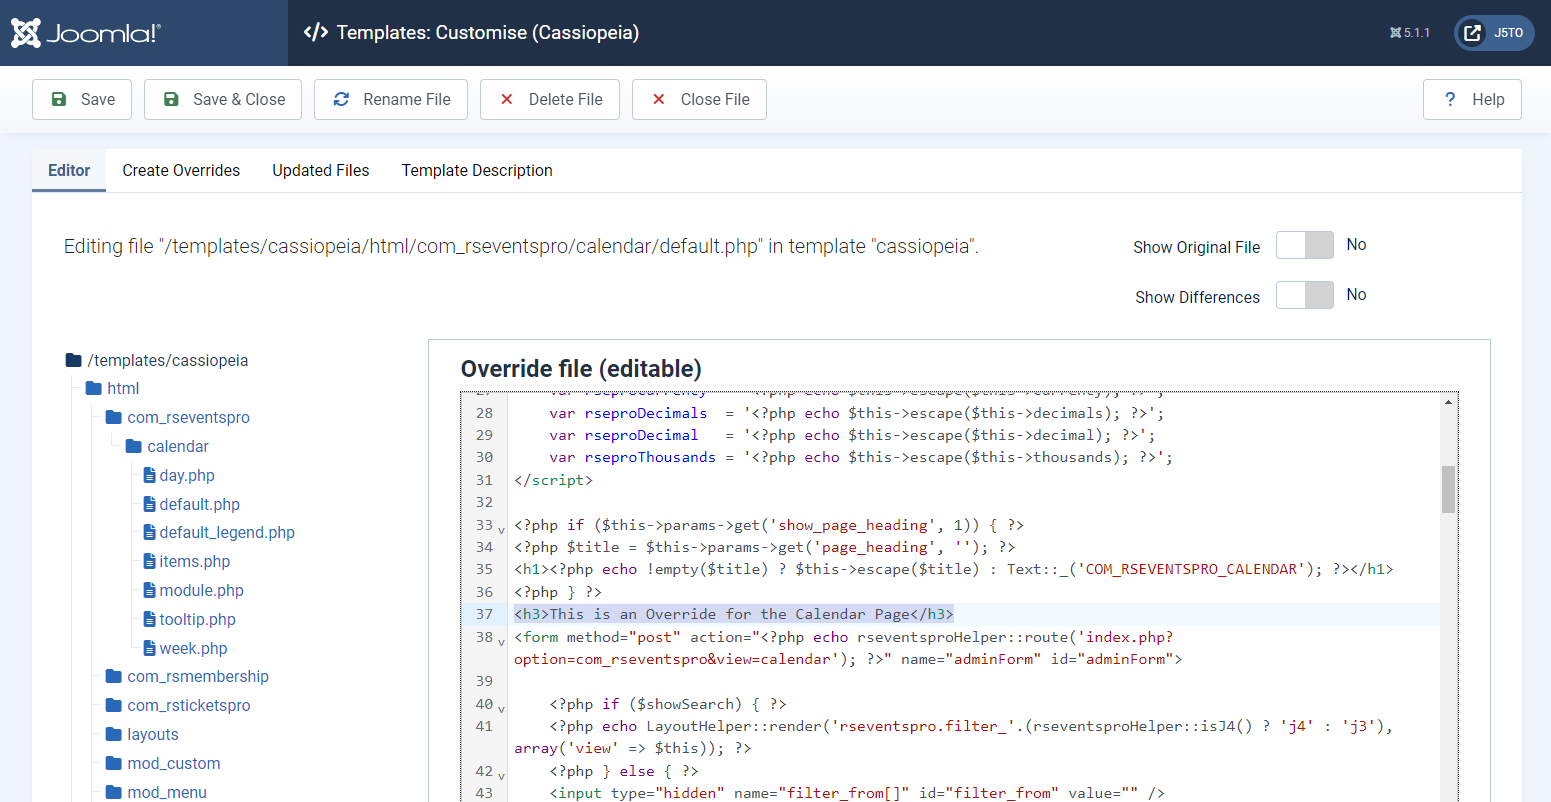
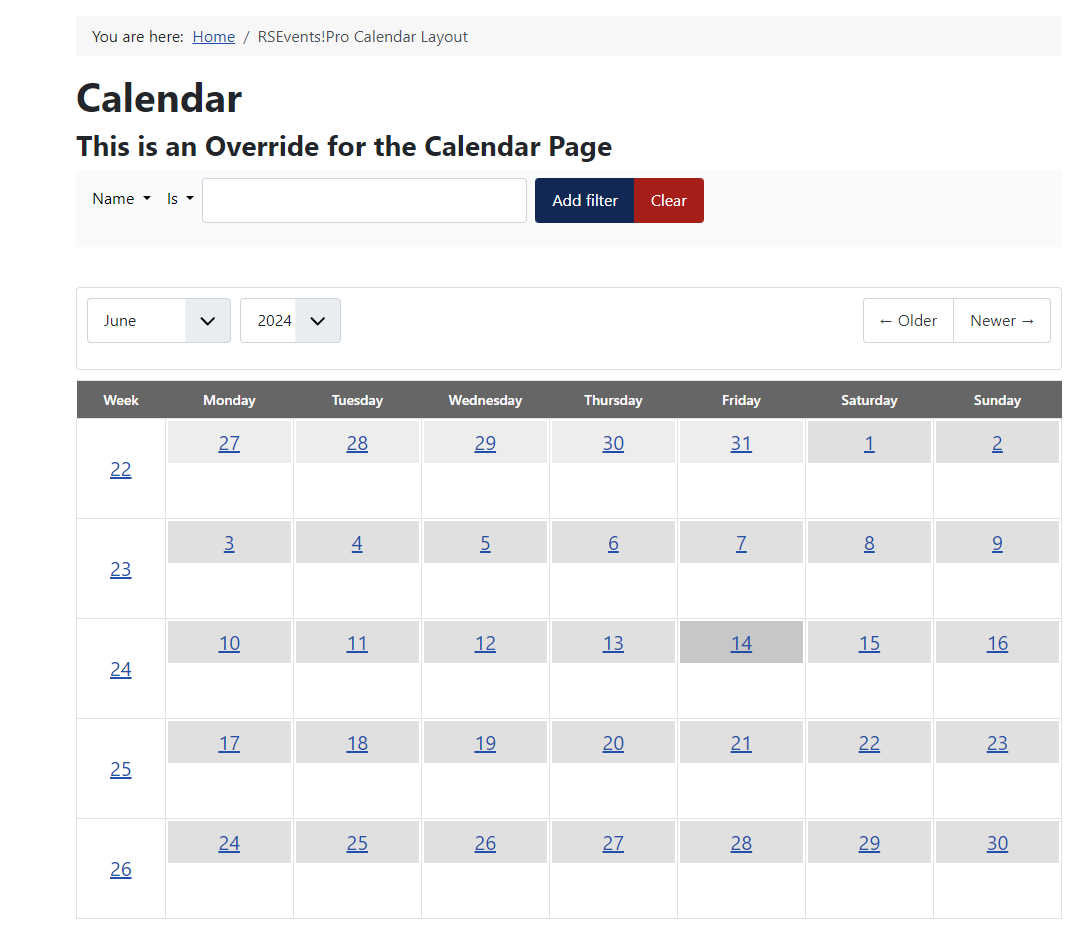
After adding the header and saving your changes, just access the calendar page in the front-end to see the modifications.
22 persons found this article helpful.