
763 reviews
1,420,245 downloads
If you use RSForm!Pro, please post a rating and a review at the Joomla! Extensions Directory
RATE IT NOW
FAQ
Even if your subscription expires, you will still be able to use the component, the component's functionality is not affected by your subscription's status.
The only restrictions applied are the fact that you are no longer eligible to extension related downloads( updates, plugins, modules, component downloads) and you will no longer receive customer support for your registered domain(s).
Yes. You can upgrade your subscription from Single Site to Multi-site just by paying the difference. This upgrade is available for subscriptions of the same type, meaning you can only upgrade your 12 months single site subscription to a 12 months multi-site one. When upgrading, the subscription period will not be extended, you will benefit from the advantages of the multi site subscription for the remainder of your current subscription.
Yes. The component can be installed on any domains you want, but support will be provided for 1 domain of your choice. The domain can be changed up to a maximum of 3 times. Don't forget, once the domain is changed, you will get new licence code.
All our extensions are listed under the GNU/GPL license, thus once you purchase and download an extension you will have full access to the source code. You are free to edit or modify this according to your needs, but don't forget that all source code changes are lost when an update is performed.
Yes! A 30% discount when renewing 12 months multi-site subscriptions (this discount is applied automatically).
Discounts are not cumulative. You can't have more than one discount for a subscription.
What can you do with RSForm! Pro

Create GDPR ready forms
The component offers all the necessary features to quickly and easily build GDPR compliant forms. You can find a detailed description of the GDPR standard in our blog.

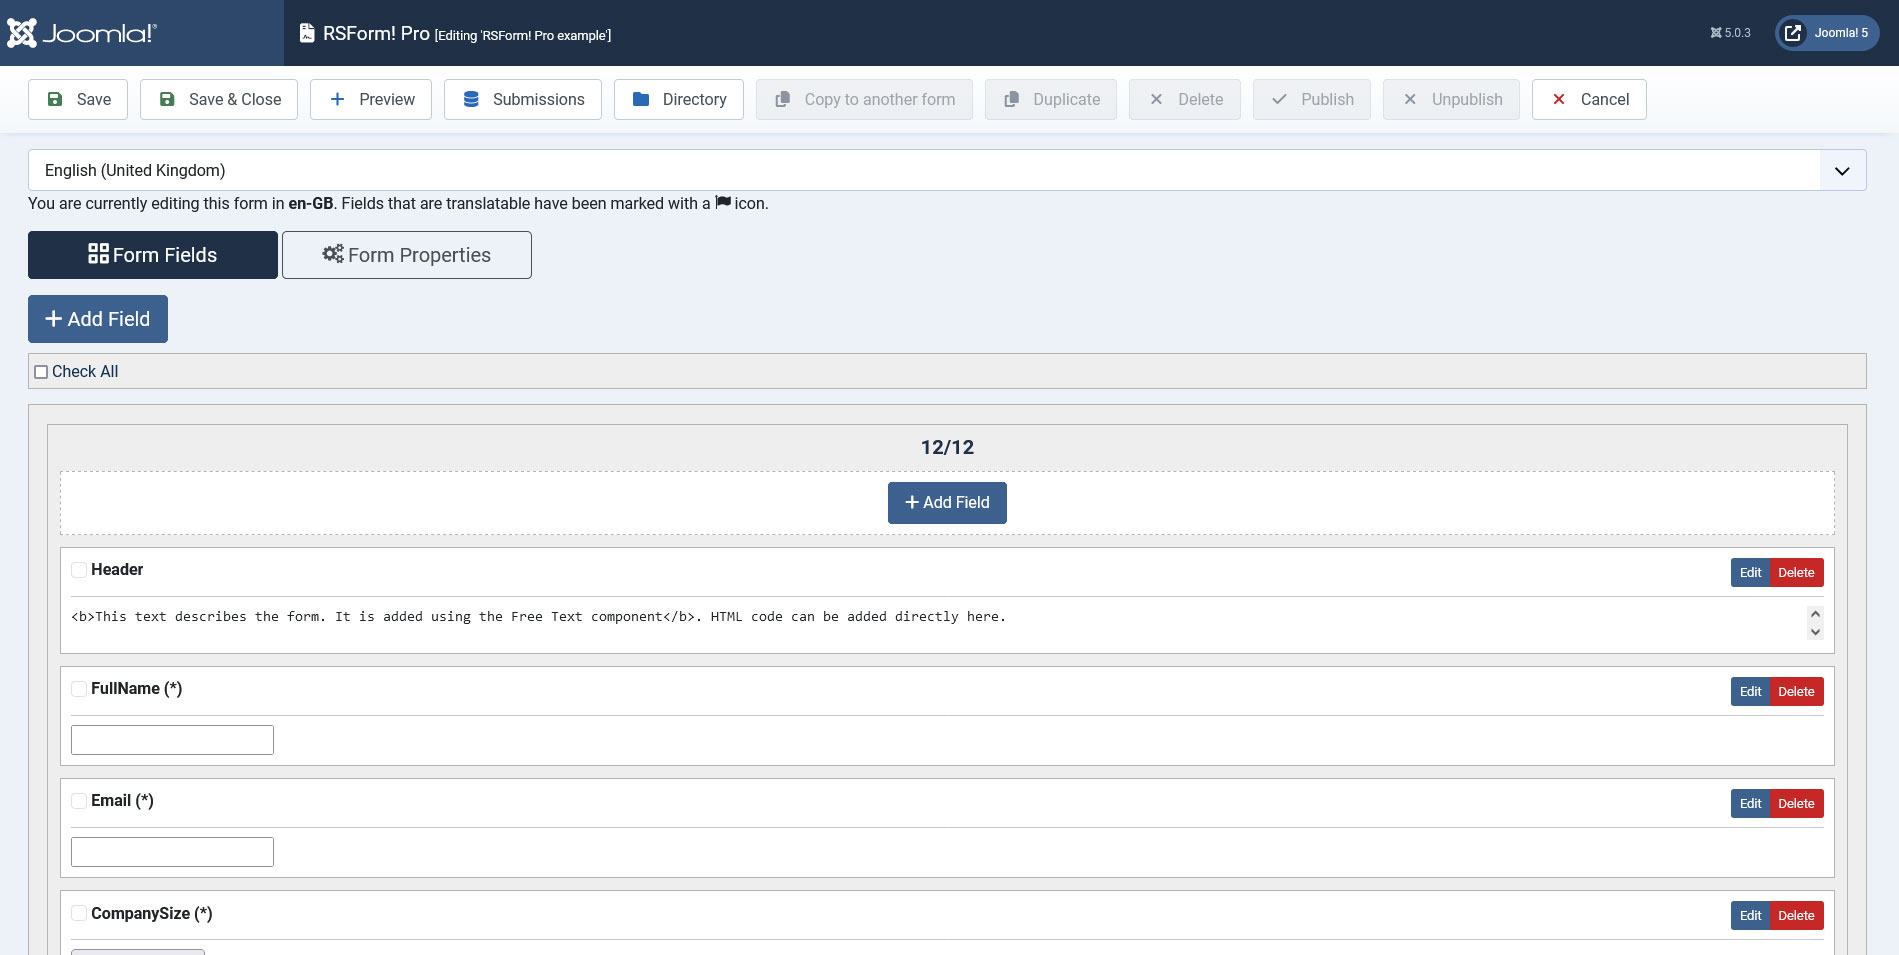
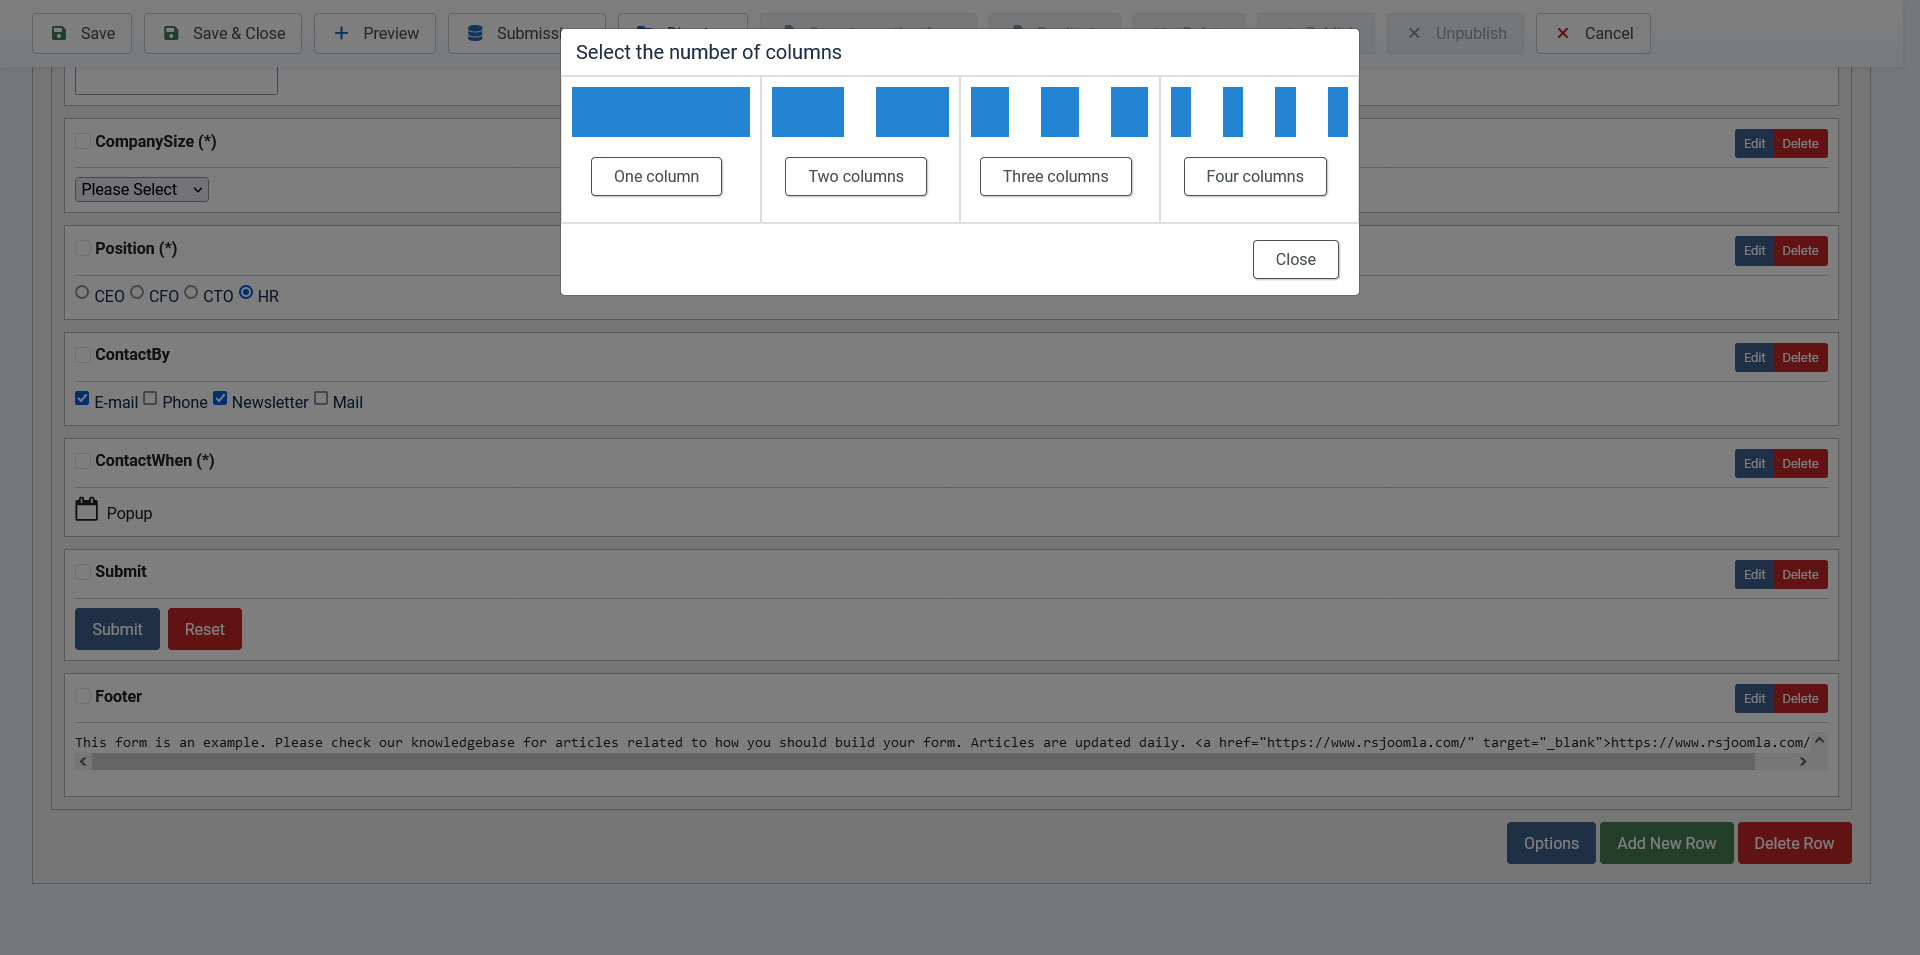
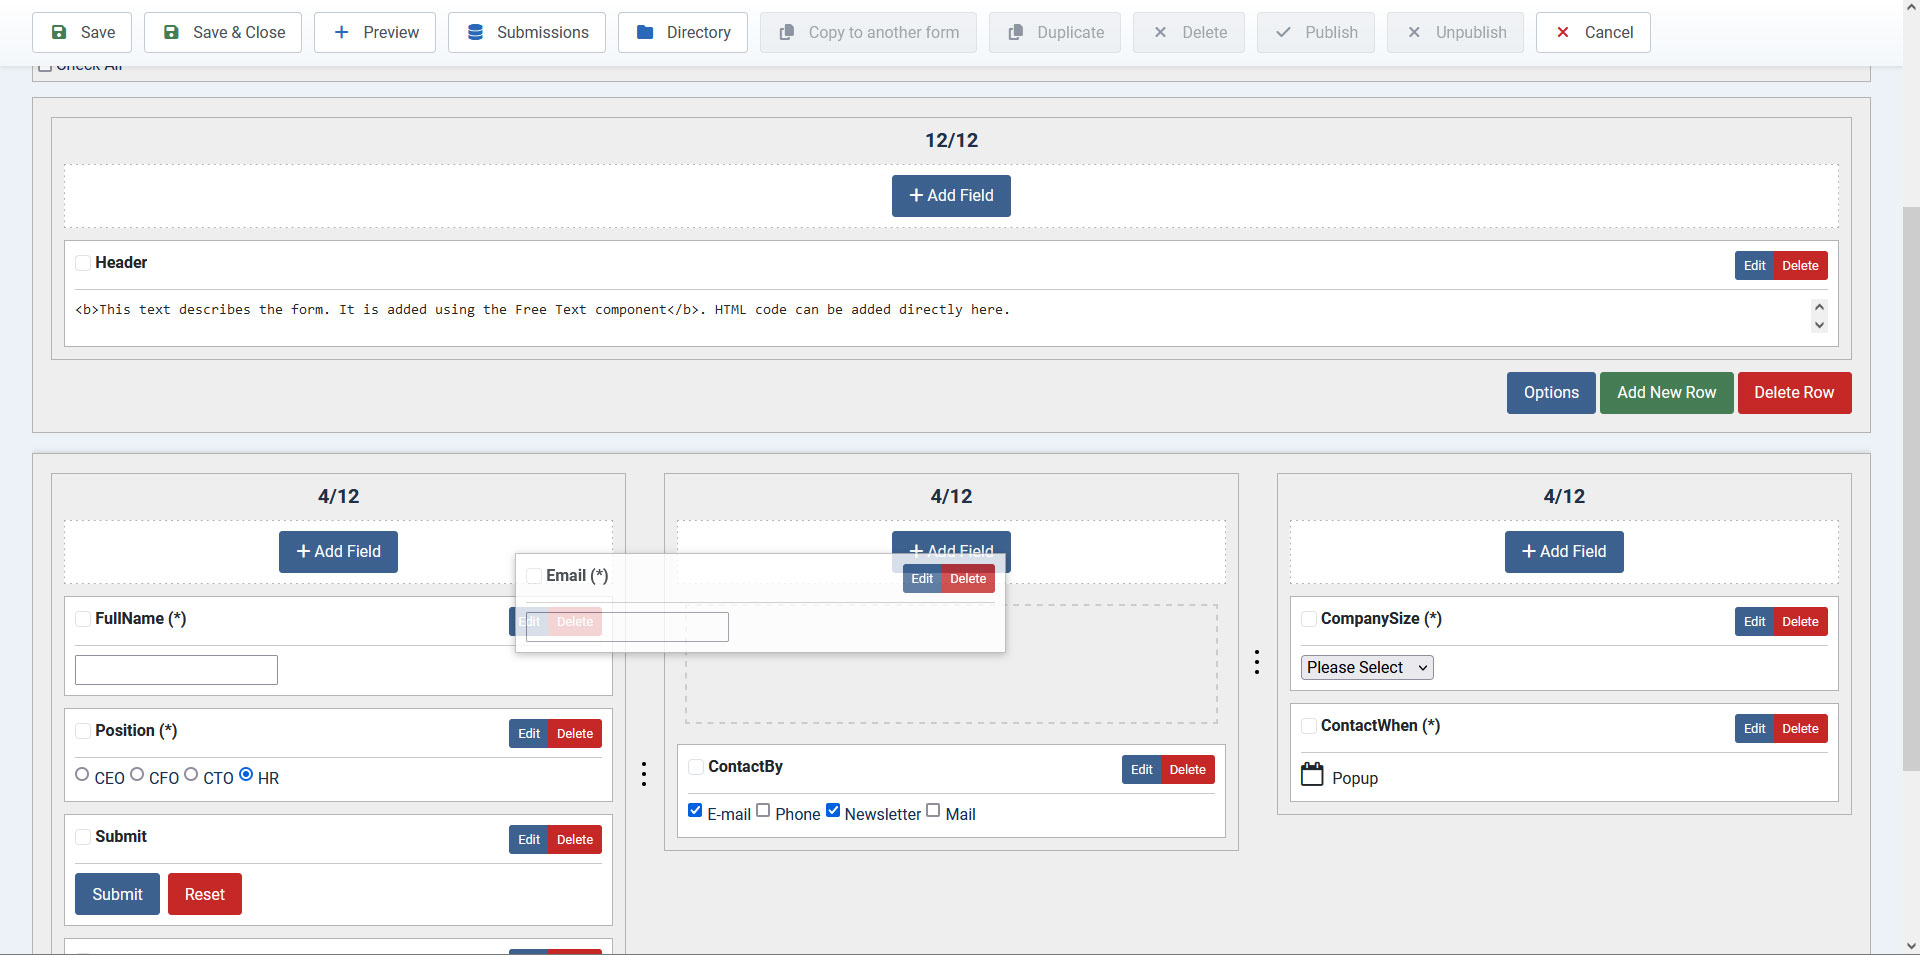
Built-in Grid System
You can control the form layout using a grid system interface without needing to manually write code. A simple drag and drop functionality is all that is needed to move fields in a different order, align multiple fields on the same row or control the width of each field from a specific row. You can also move multiple fields at once with the help of the cut & paste functionality.

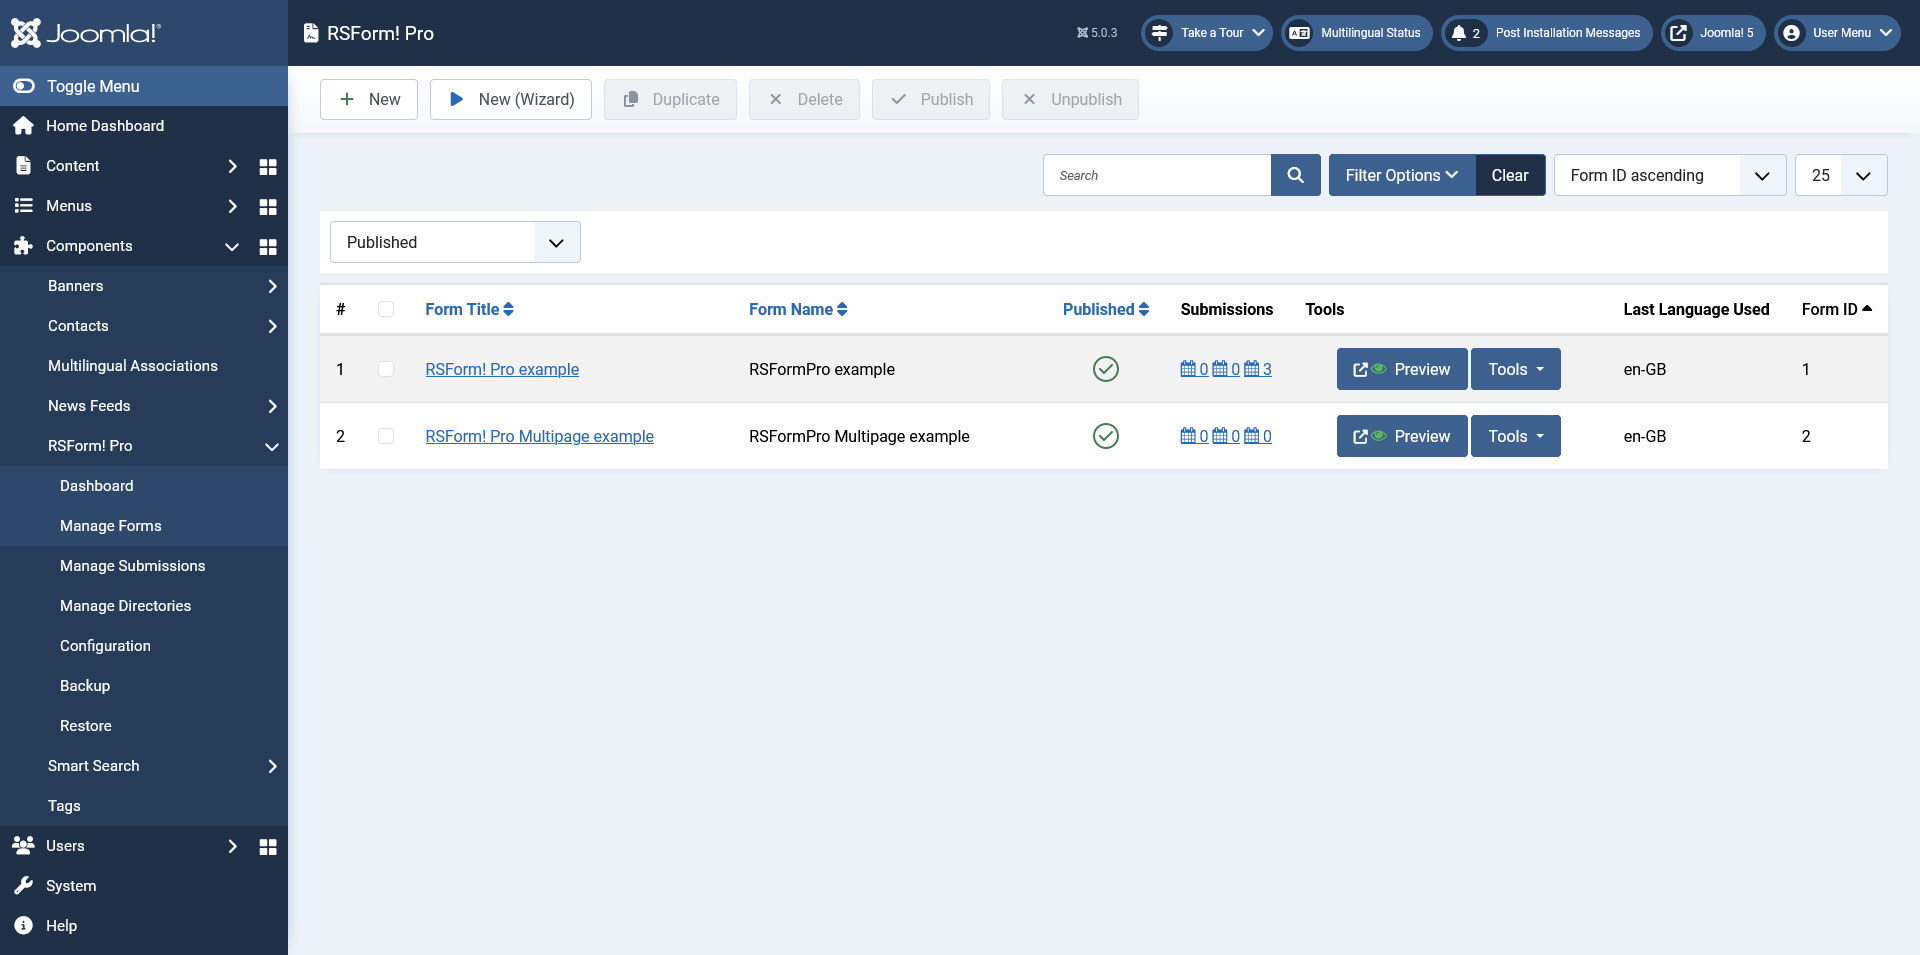
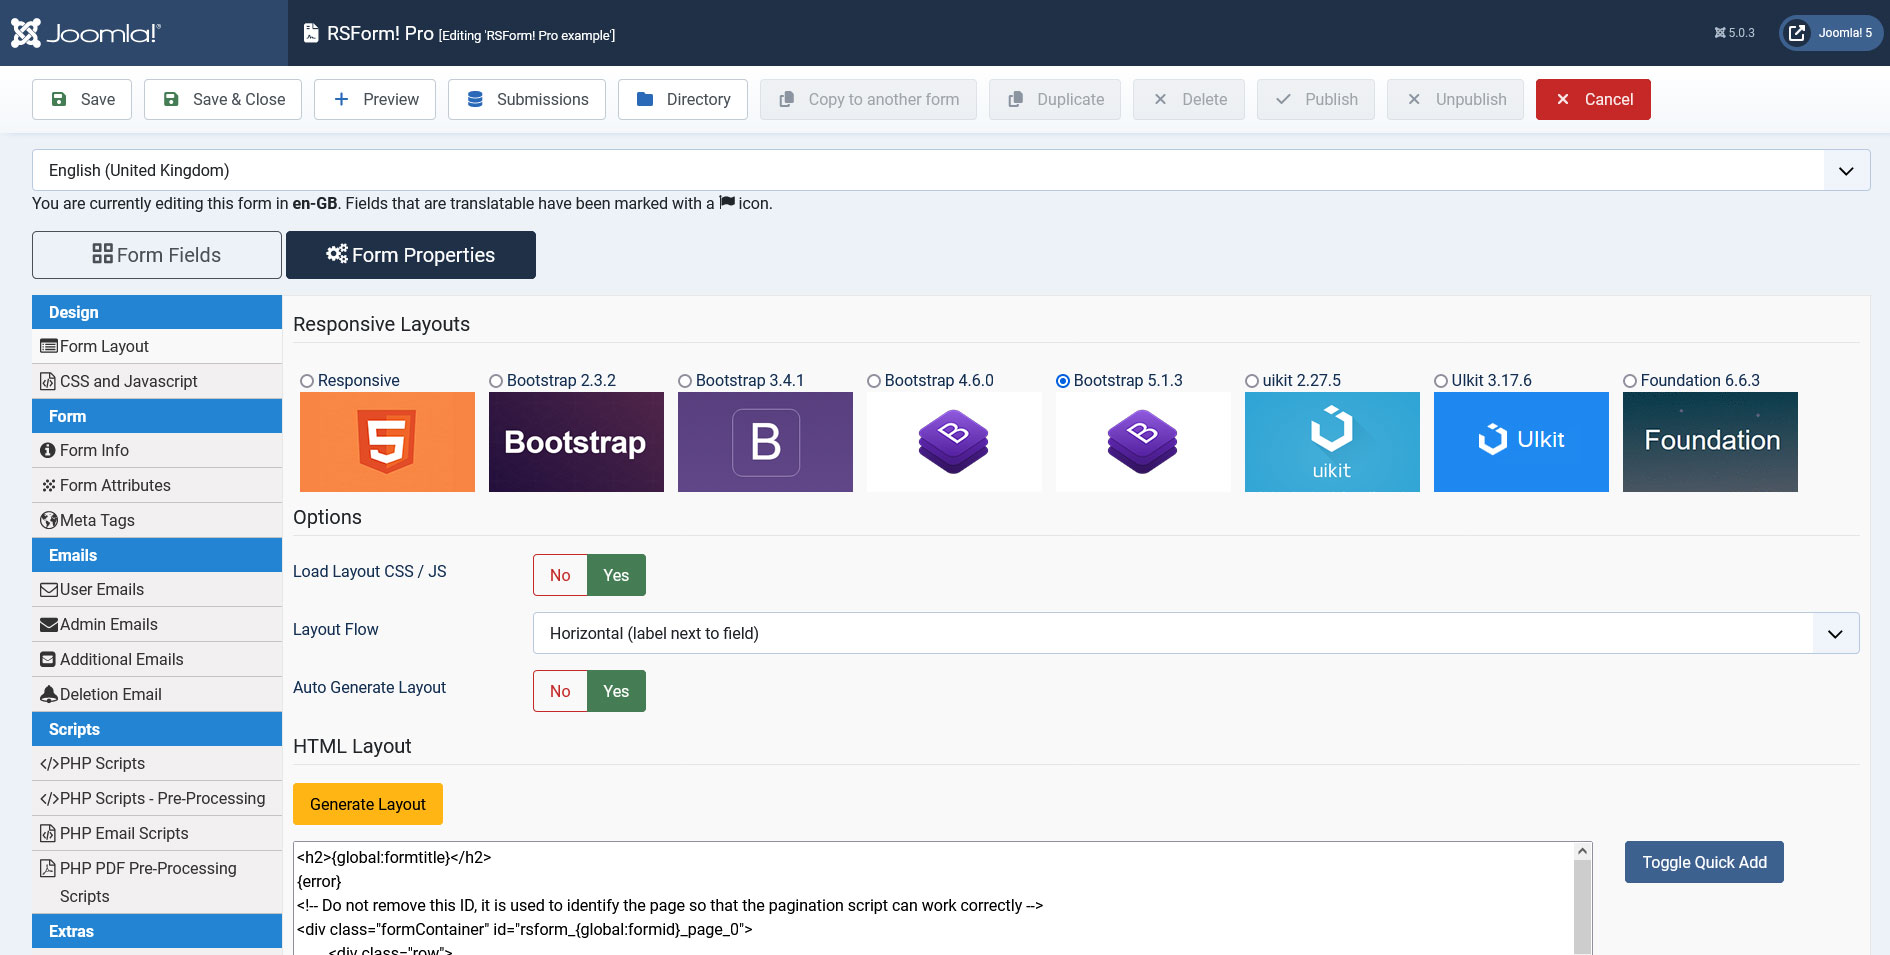
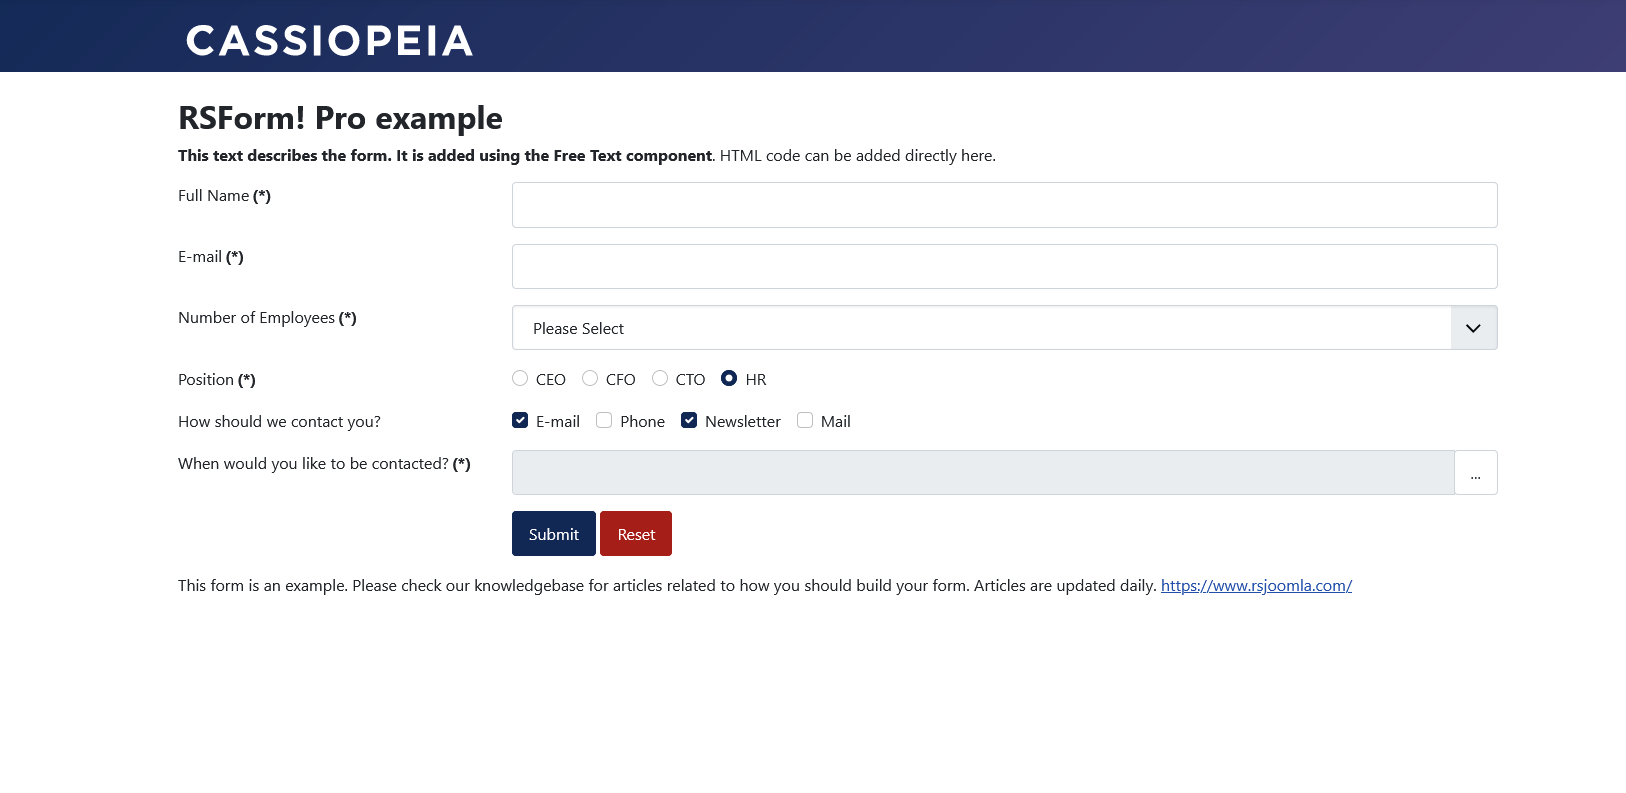
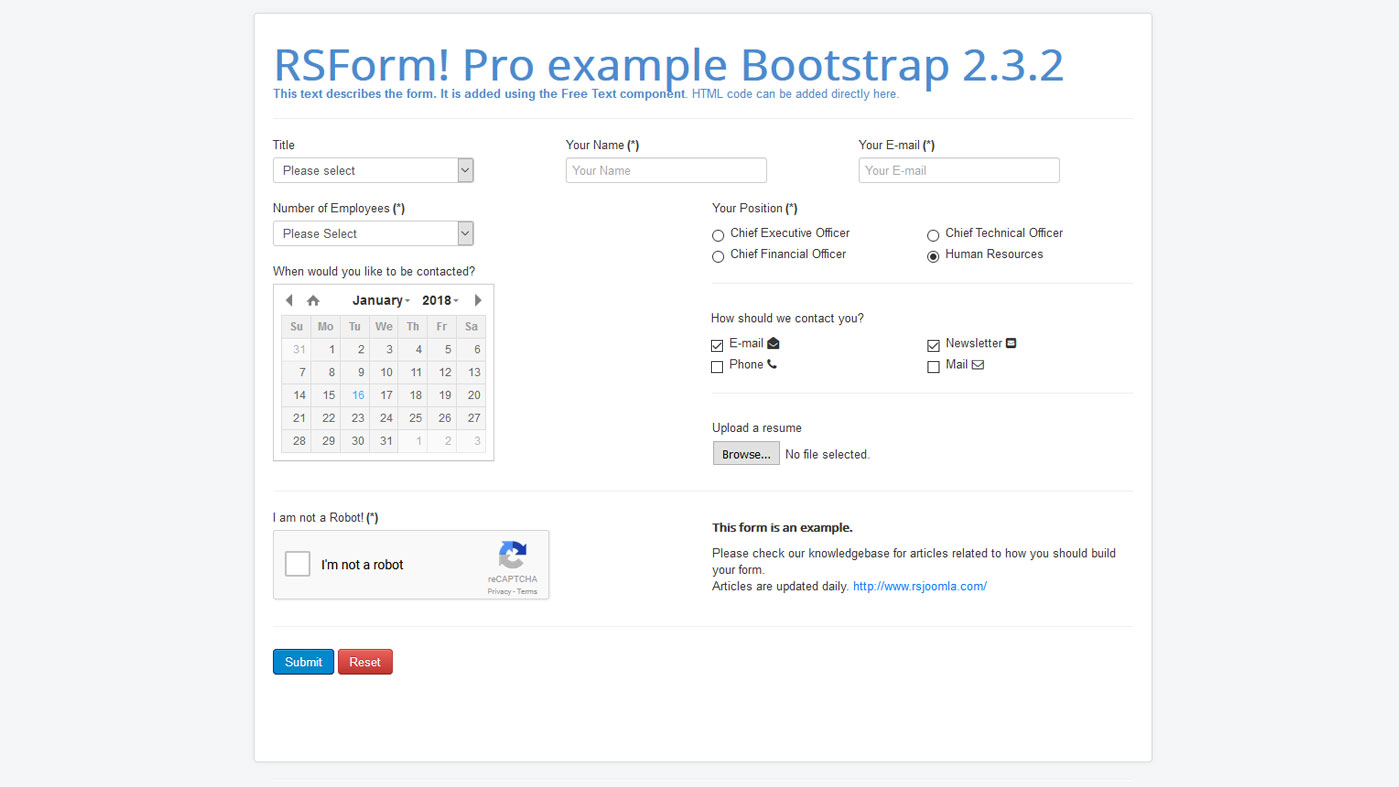
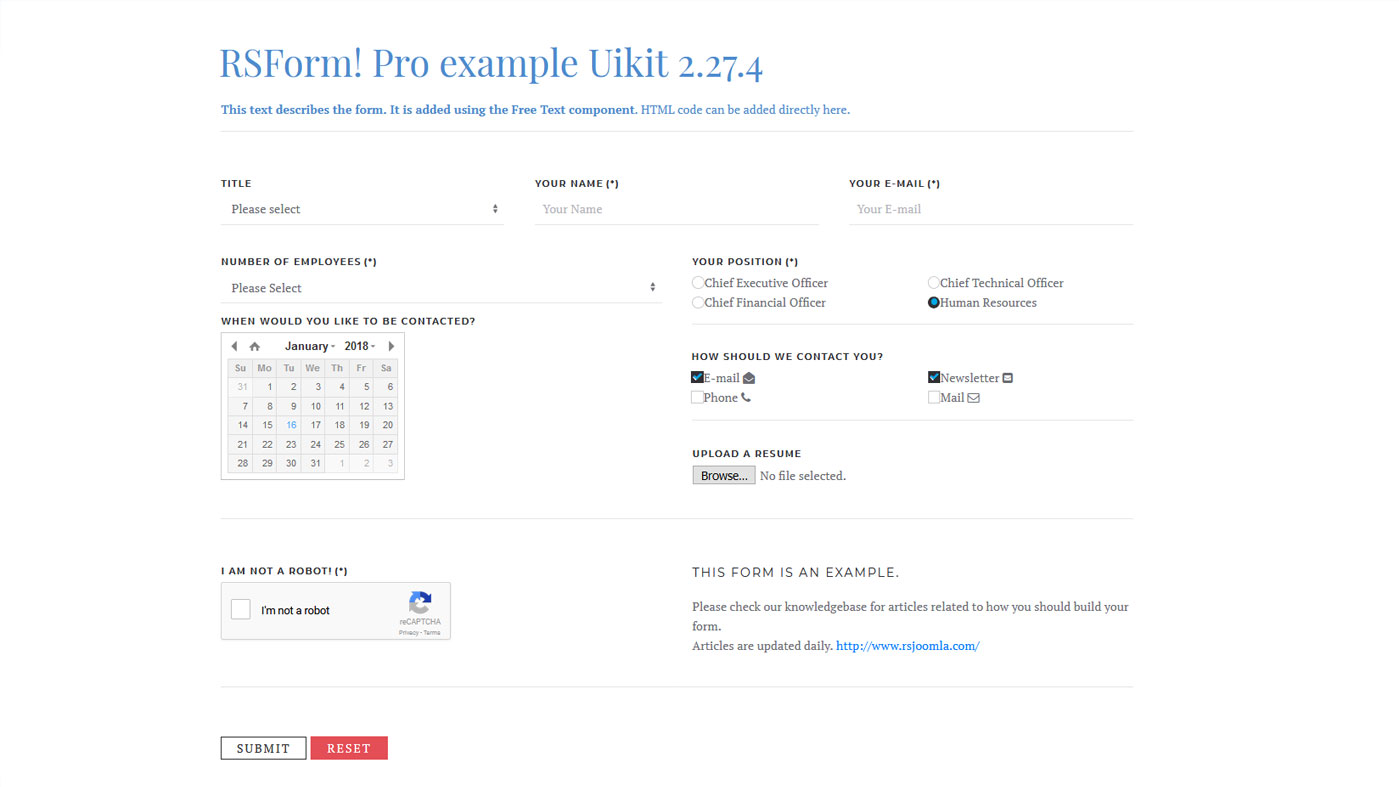
Add professional looking forms to your website
Your forms can be designed to fit any website! RSForm!Pro includes even 3 predefined themes to get you started. The available layouts offer you the possibility to display the information just the way you want it.

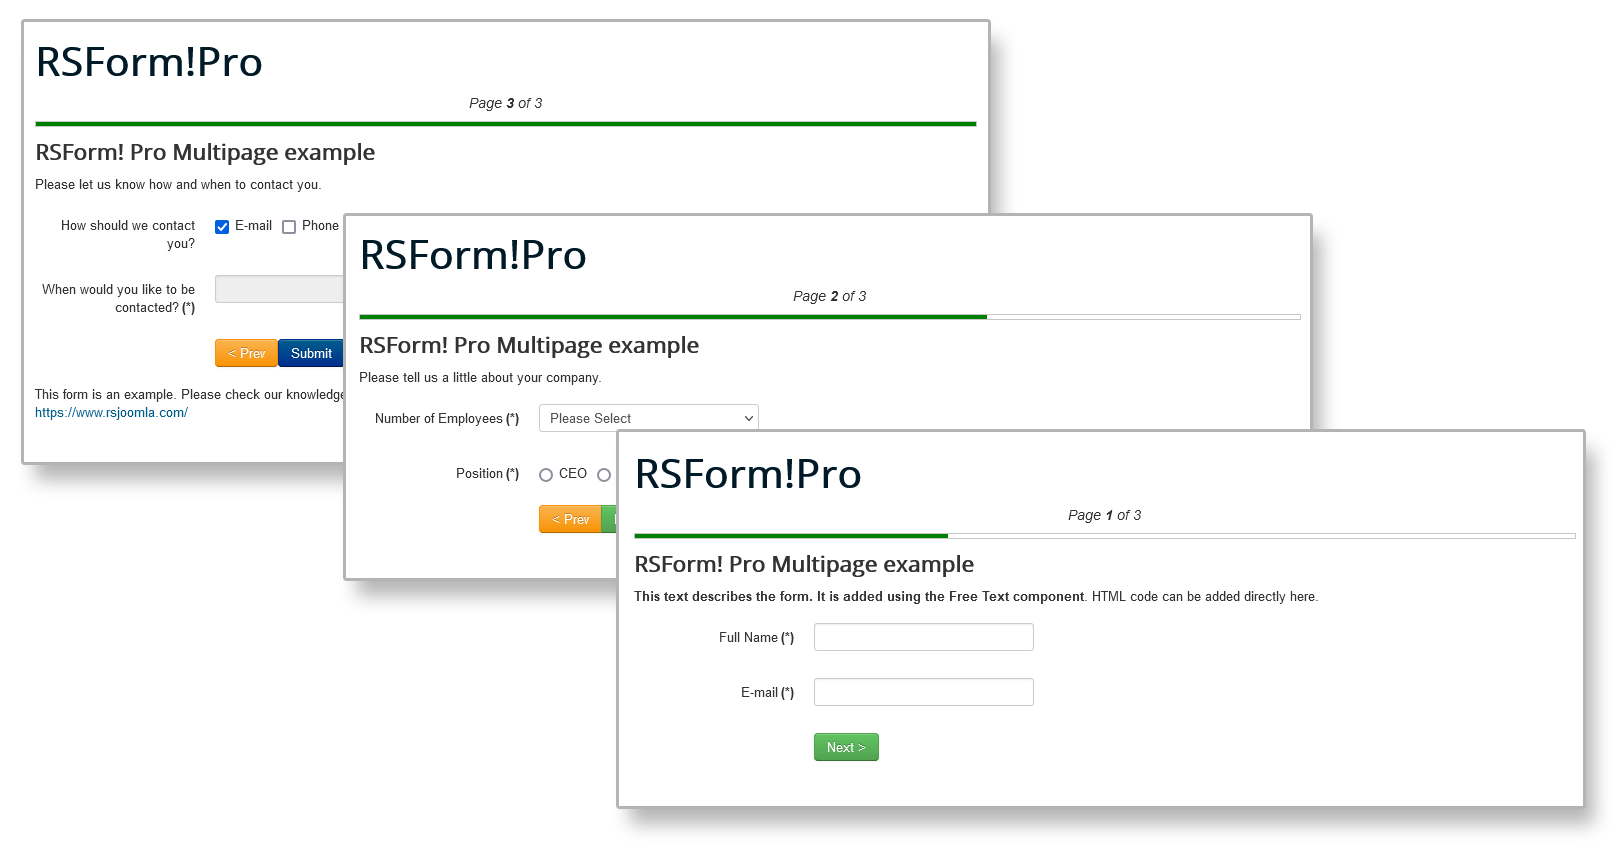
Create multi-page forms with ease
Break down your form in pages or sections and increase your conversion rate while keeping the same amount of information. Users will be able to go back and forth through the pages allowing them to correct information. You can also validate pages on the fly with AJAX so that your users can't get to the next page unless they fill in the required fields.

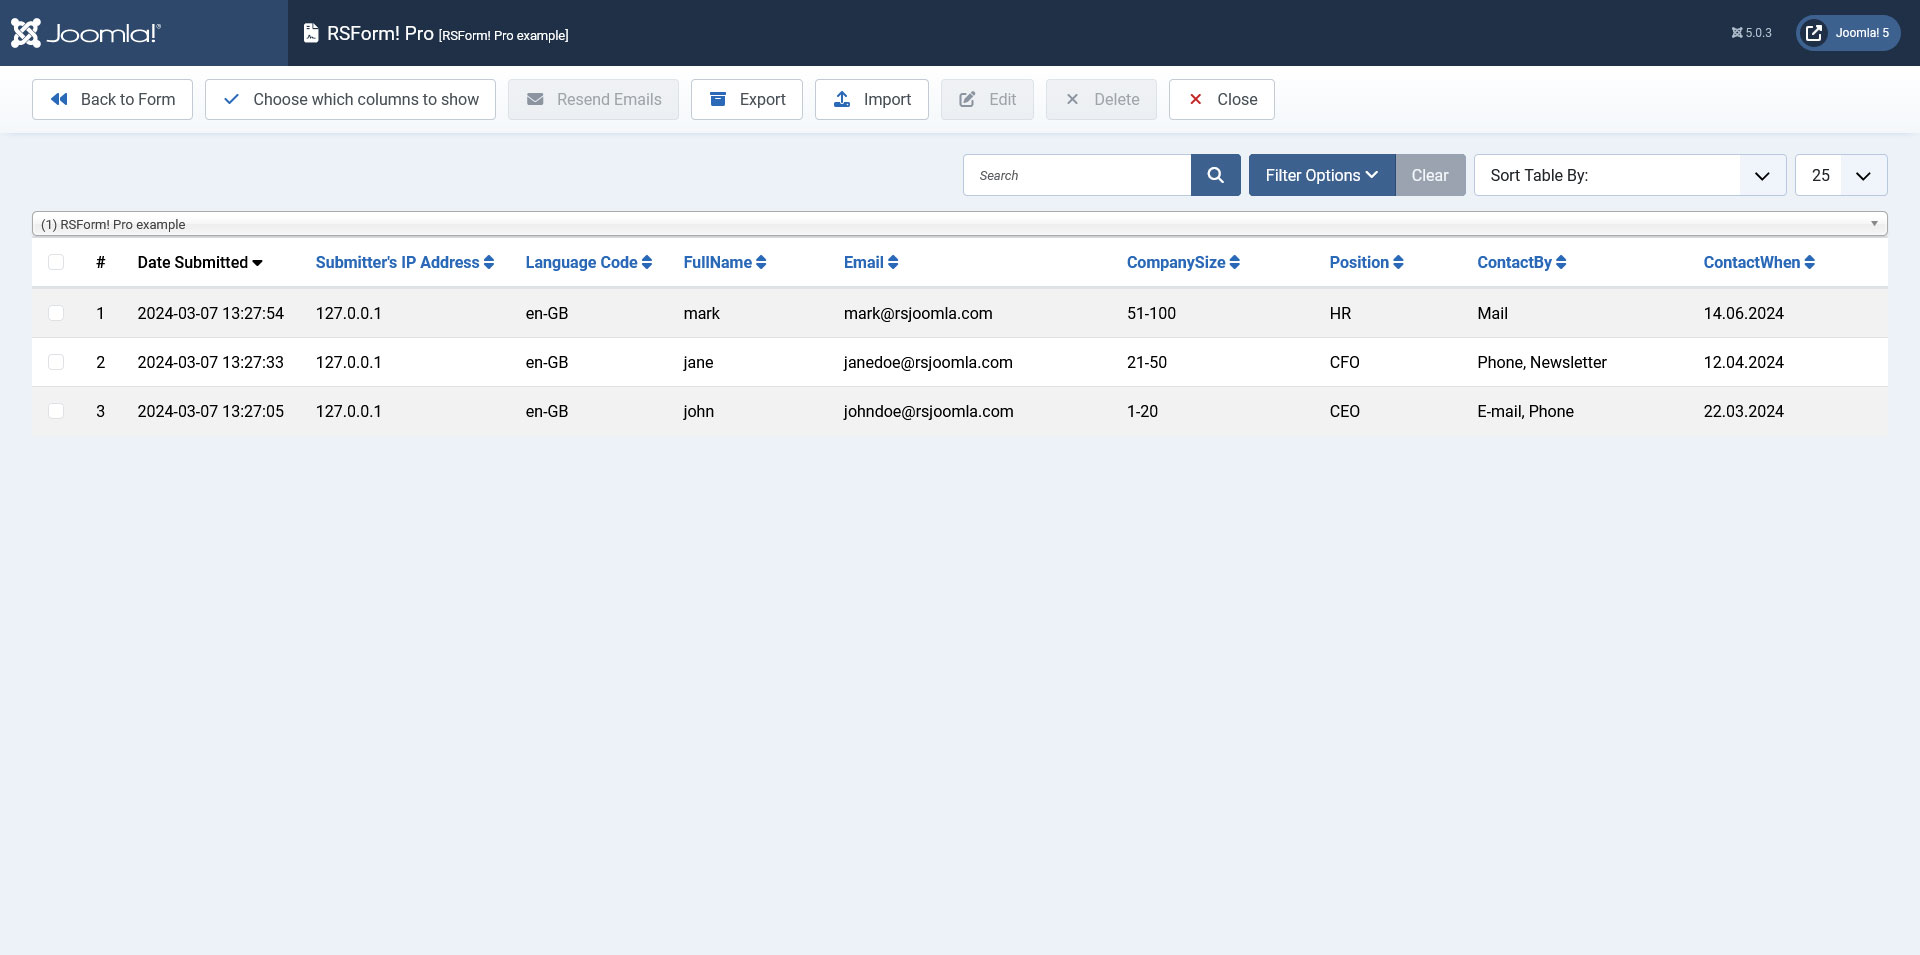
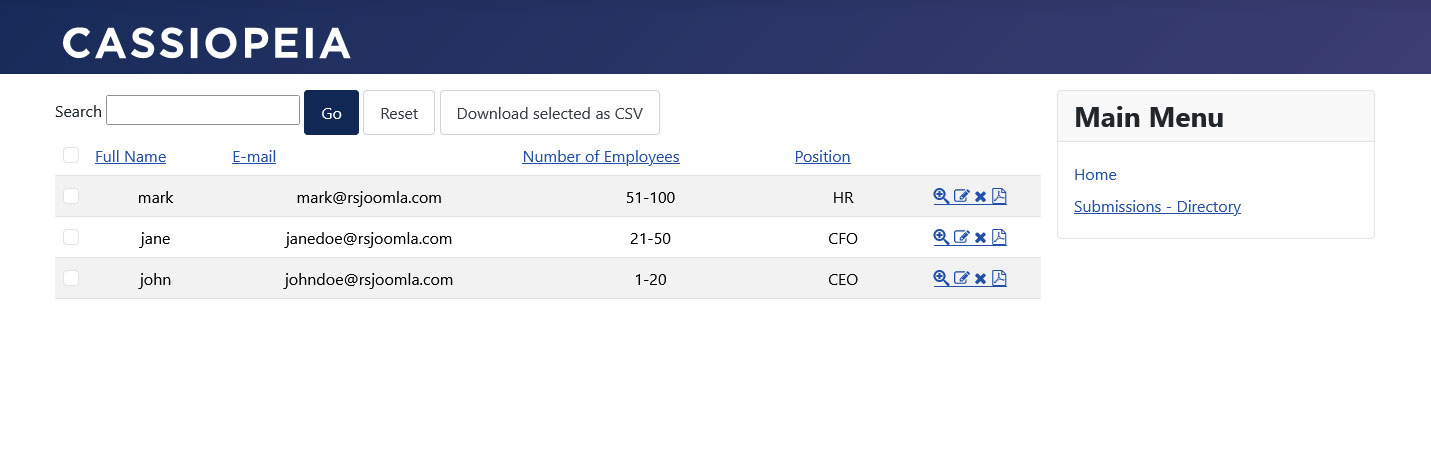
Export information in CSV, Excel, XML and PDF
The submitted information can be exported into many popular file formats: CSV, XLS and XML. Submissions can also be individually converted into PDF files.

Protect yourself from spambots
RSForm! Pro features two built-in image CAPTCHA challenges which your visitors will have to fill in in order to prove they are human, as well as an invisible CAPTCHA. This effectively stops spambots from submitting your forms with junk and spam links. The world leading antispam protection software ReCAPTCHA can be integrated as well using the RSForm! Pro - ReCAPTCHA Plugin.

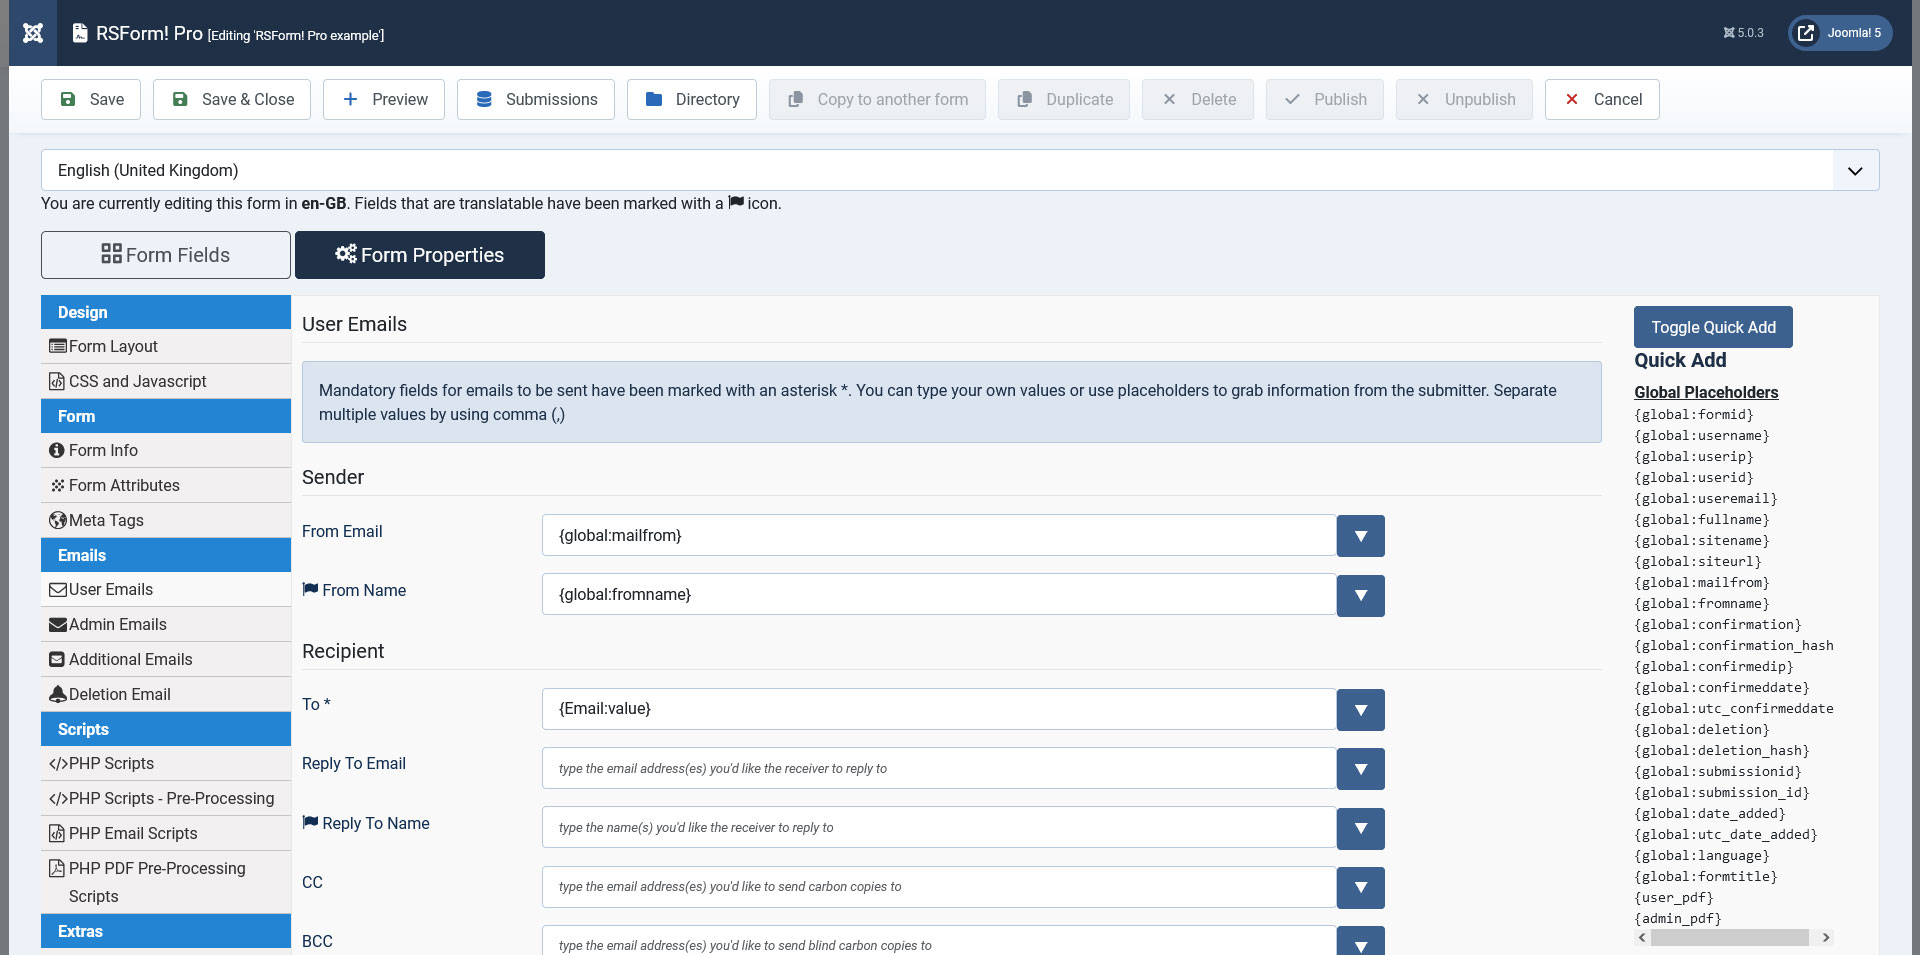
Build multi-language forms without duplicating information
Creating multi-language forms can sometimes be a burden - duplicating all of the fields and translating them is both time consuming and it also hinders future updates of the form. RSForm! Pro detects your installed languages and offers the option to translate the form on the fly - you just select the language you would like to translate your form in and type in the translations.

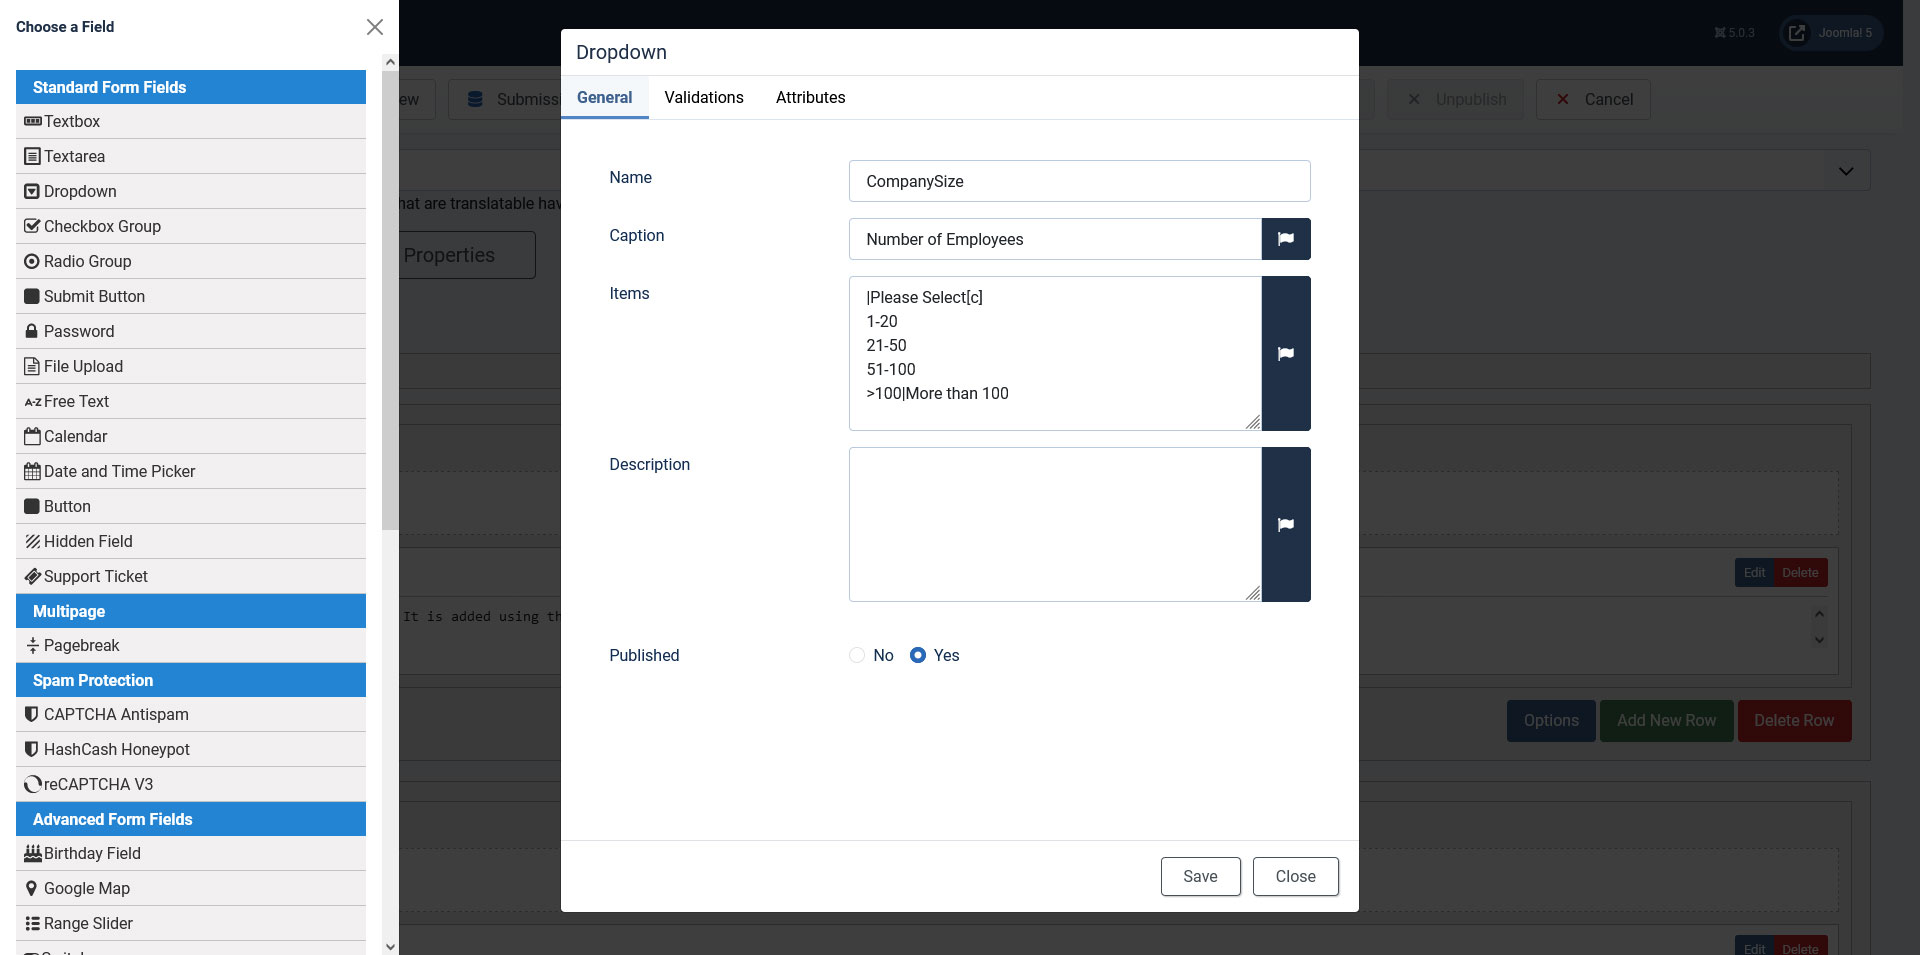
Validate information with the built-in validation rules
Guide your users into correctly completing the form fields with the help of validation rules - show a message next to each field explaining why the validation has failed and point them in the right direction. Choose if a field is mandatory or not. You can check for valid email addresses, alphanumeric characters, numeric values or passwords. You can also add custom character sets to these validations so you can check for a correctly formatted number format, such as "4.99".

Cross-browser compatibility
RSForm!Pro has been fully tested with all of the leading Web Browsers on the market. The XHTML layouts available offer increased flexibility and allow you to override any CSS setting. RSForm!Pro uses as little as JavaScript as possible in order to prevent your users from having difficulties in submitting your forms.

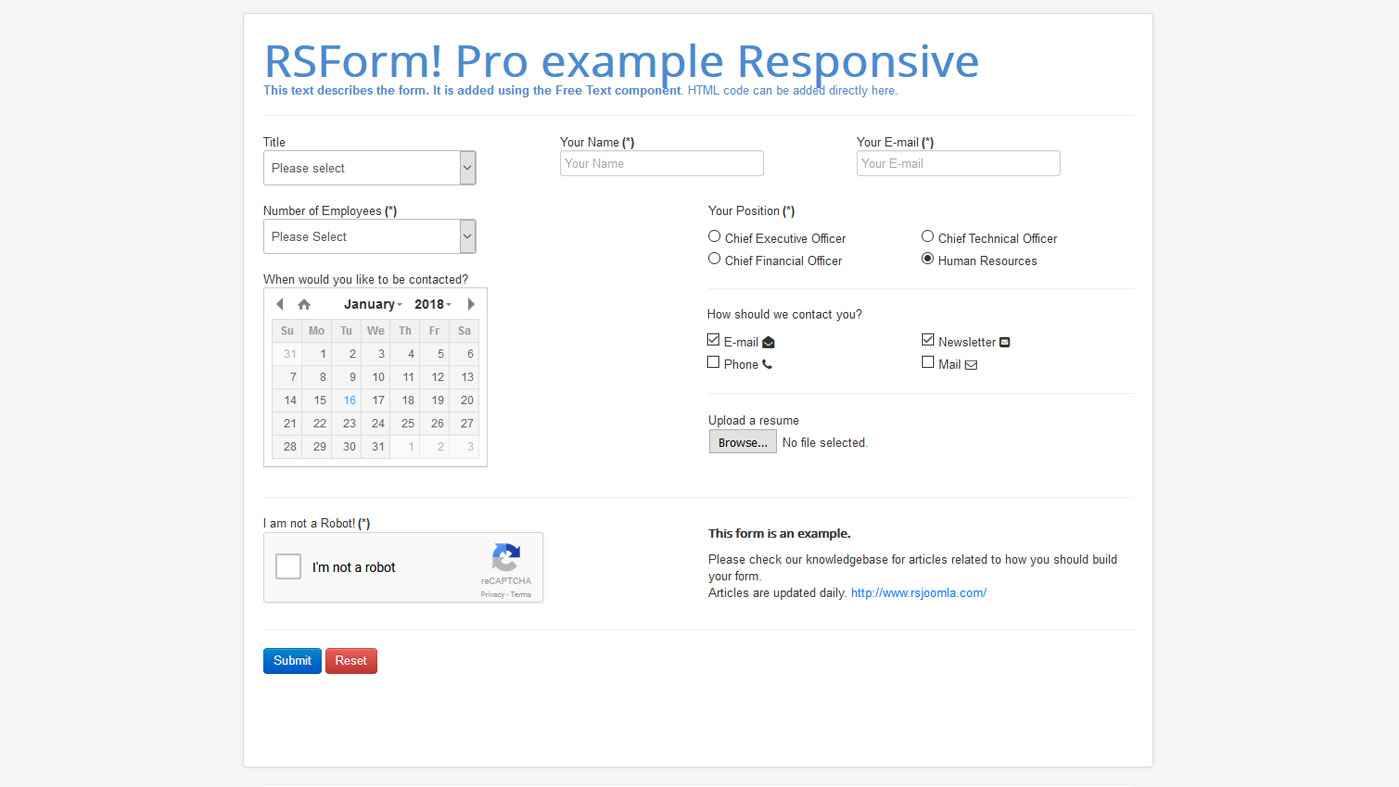
Responsive
RSForm!Pro has been adapted to fit responsive environments. This layout was designed using Bootstrap functionality and you can adapt it for all the devices that might visit your website.
Screenshots


Integrations


From the Blog

Celebrate Freedom with Exclusive RSJoomla! Discounts
Celebrate Independence Day with exclusive RSJoomla! deals! Save big on our premium Joomla! extensions and templates and give your website the tools it deserves.

Celebrating 19 RSJoomla! Years
RSJoomla! turns 19 this year! 19 years ago, we started building Joomla! extensions with one goal in mind: creating tools that make website building easier. Since then, a lot has changed, but one thing stayed the same: your support keeps us going. Whether you’ve been with us for years or just recently joined the RSJoomla! community, thank you for being part of this journey.

Don’t Miss Out: Limited Time RSJoomla! Easter Discounts
Easter has arrived, and with it comes a basket full of savings from RSJoomla!
Available Language Packs:
Arabic Brazilian Portuguese Bulgarian Chinese Czech Danish Dutch Finnish French German Greek Italian Japanese Norwegian Polish Portuguese Romanian Russian Spanish Swedish Turkish UK English
We only release our extensions in English. All other language packs are donated by the community. Please note that not all translations may be complete, up to date or correct.
Technical Specifications
Important!
Please make sure you are running the latest versions of Joomla!. Our extensions are developed and tested to work only with the latest versions of Joomla!
The minimum requirements to run RSForm!Pro are:
- Joomla! 3.10
- PHP 5.5
- MySQL 5.7 You must ensure that you have MySQL, XML and zlib functionality enabled within your PHP installation. Also please make sure that you have enabled the GD and FreeType libraries in order for CAPTCHA to work. fsockopen is also required for reCAPTCHA, Salesforce and MailChimp plugins.
We recommend:
- Joomla! latest version
- PHP 8
- MySQL 5.7 / 8 / MariaDB 10