Forms
Each RSDirectory! category requires that you assign a form to it. Whenever you add a new entry to a category, the form assigned to that category will be used as the entry submission form. All forms are created based on previously defined fields.
To access the forms management tab, head to Components >> RSDirectory! >> Forms.
Listing
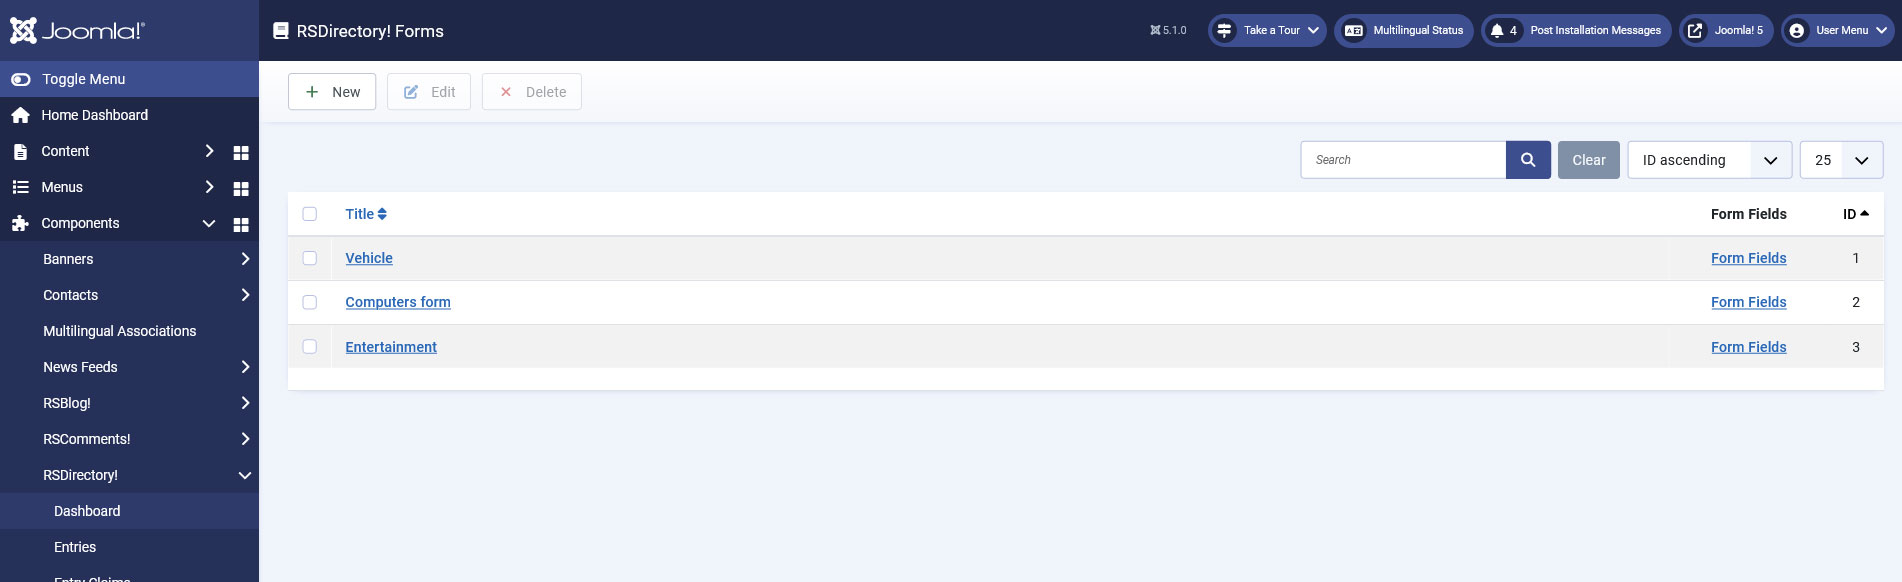
You will first be presented with a listing of all available forms. The following information will be displayed:
- Title: The form's title
- Form Fields: A shortcut to the fields area having the corresponding form selected in the left dropdown field;
- ID: The form's internal, unique ID
Add / edit a form
To add a new form, please click on the New button to the top of the screen. The form creation options are split into 6 tabs:
General
You need to provide the form's Title here.
Form fields
In this tab, all available form fields will be listed. You can select which ones you wish to have assigned to your current form.

Layouts
The component offers a large number of frontend layout configuration options. They are all further grouped into 4 sections for better identification:
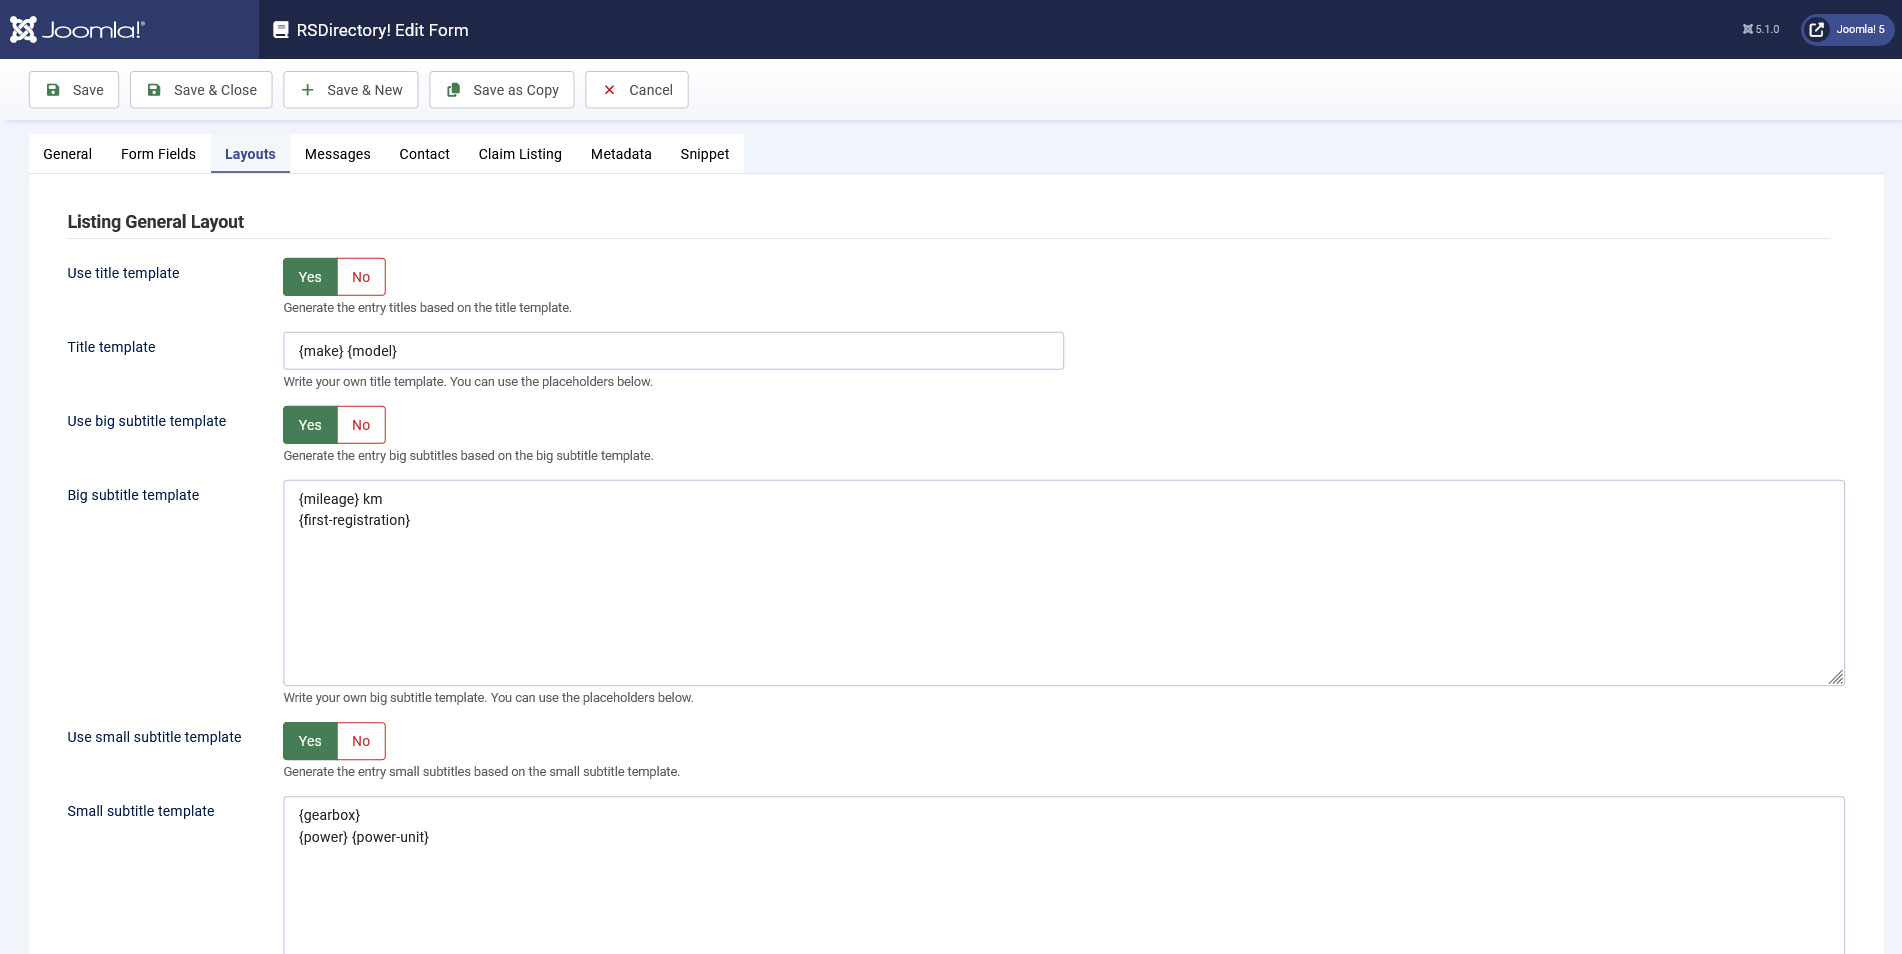
Listing General Layout
- Use title template: Generate the entry titles based on the title template
- Use big subtitle template: If set to Yes, a textarea will be added, Big subtitle template, where you can add some placeholders (which will be listed below), along with any text. The big subtitle will be generated based on this template
- Use small subtitle template: If set to Yes, a textarea will be added, Small subtitle template, where you can add some placeholders (which will be listed below), along with any text. The small subtitle will be generated based on this template
- Use description template: If set to Yes, a textarea will be added, Description template, where you can add some placeholders (which will be listed below), along with any text. The entry's description will be generated based on this template
In order to have these templates applied on existing entries you'll need to use the Regenerate Titles tool.
Important: If you're migrating your website from Joomla! 3 to Joomla! 4, and you have custom HTML code in the Big subtitle template, Small subtitle template or Description template, you will also need to adjust the HTML code according to the Bootstrap version (Bootstrap 2.3.2 on Joomla! 3 and Bootstrap 5 on Joomla! 4).
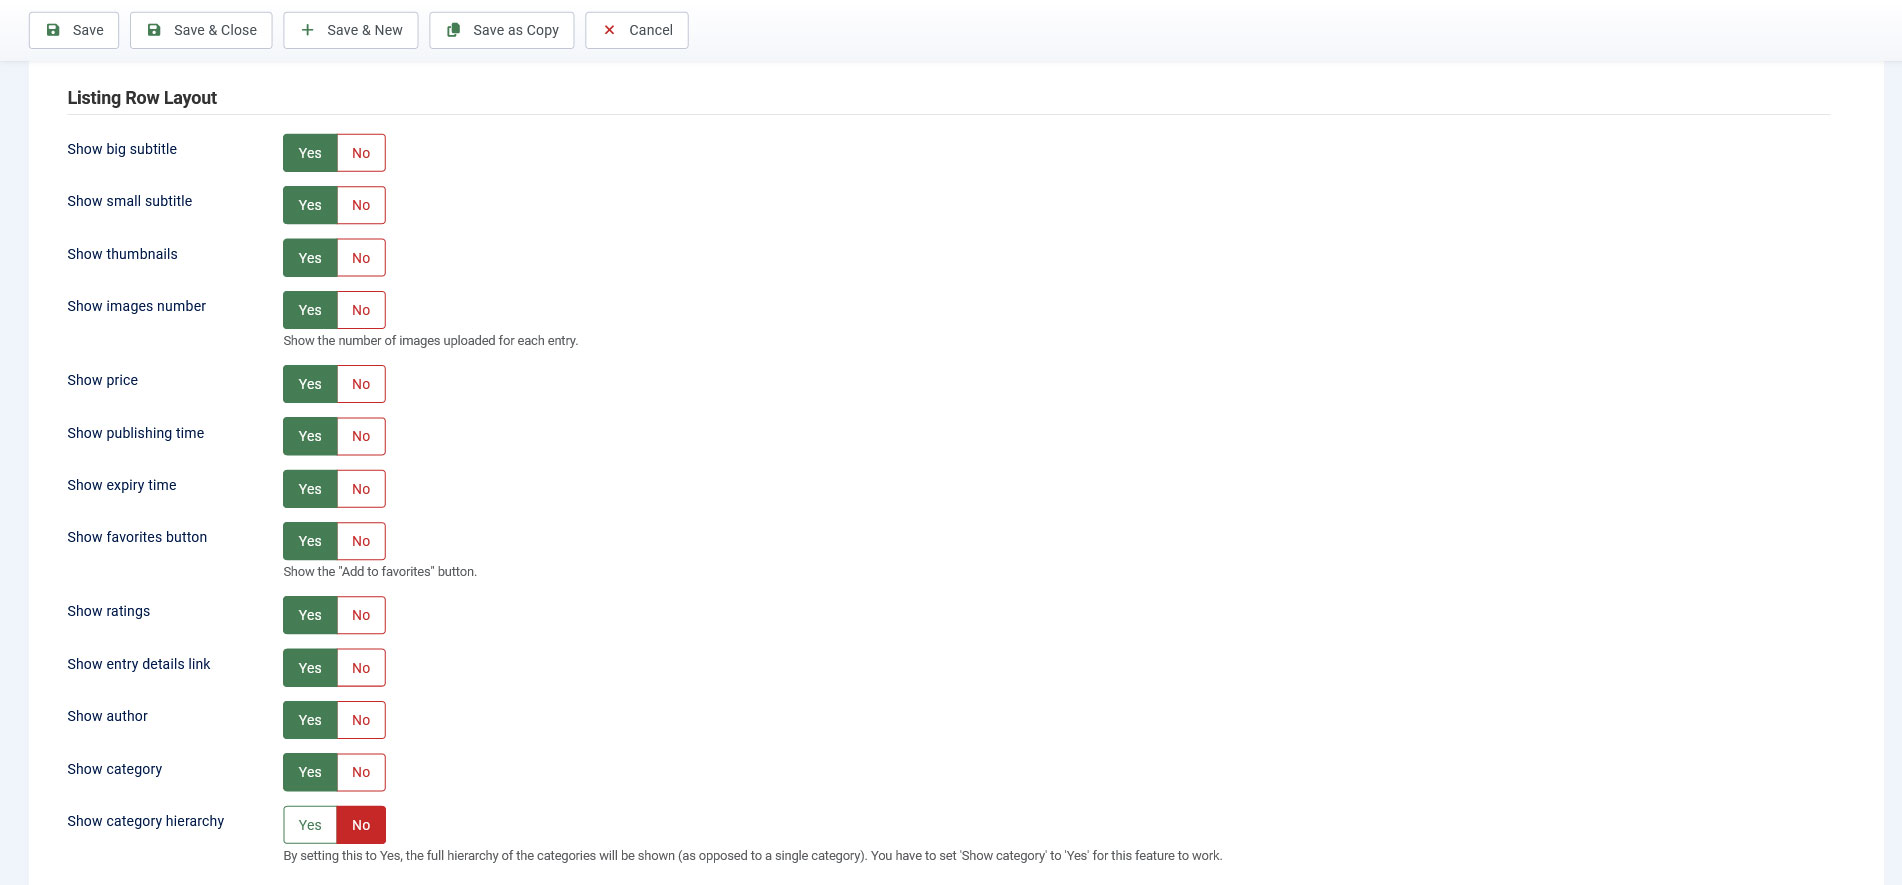
Listing Row Layout
These options will apply to the general entry listing.
- Show big subtitle: Display the big subtitle
- Show small subtitle: Display the small subtitle
- Show thumbnails: Choose whether to display thumbnails or not
- Show images number: Show the number of images uploaded for each entry
- Show price: Show the entry's price
- Show publishing time: Show when the entry was published
- Show expiry time: Show when the entry expires
- Show favorites button: Show the Add to favourites button
- Show ratings: Display the ratings given to the entry
- Show entry details link: Display a link to the entry's details layout
- Show author: Show the entry's author
- Show category: Display the category the entry is associated with
- Show category hierarchy: By setting this to Yes the full hierarchy of the categories will be shown. You will have to set "Show category" to yes in order this feature to work.
Listing Row Minimum Layout
These options will apply to the minimum entry listing.
- Show big subtitle: Display the big subtitle
- Show small subtitle: Display the small subtitle
- Show price: Show the entry's price
- Show publishing time: Show when the entry was published
- Show expiry time: Show when the entry expires
- Show ratings: Display the ratings given to the entry
- Show author: Show the entry's author
- Show category: Display the category the entry is associated with

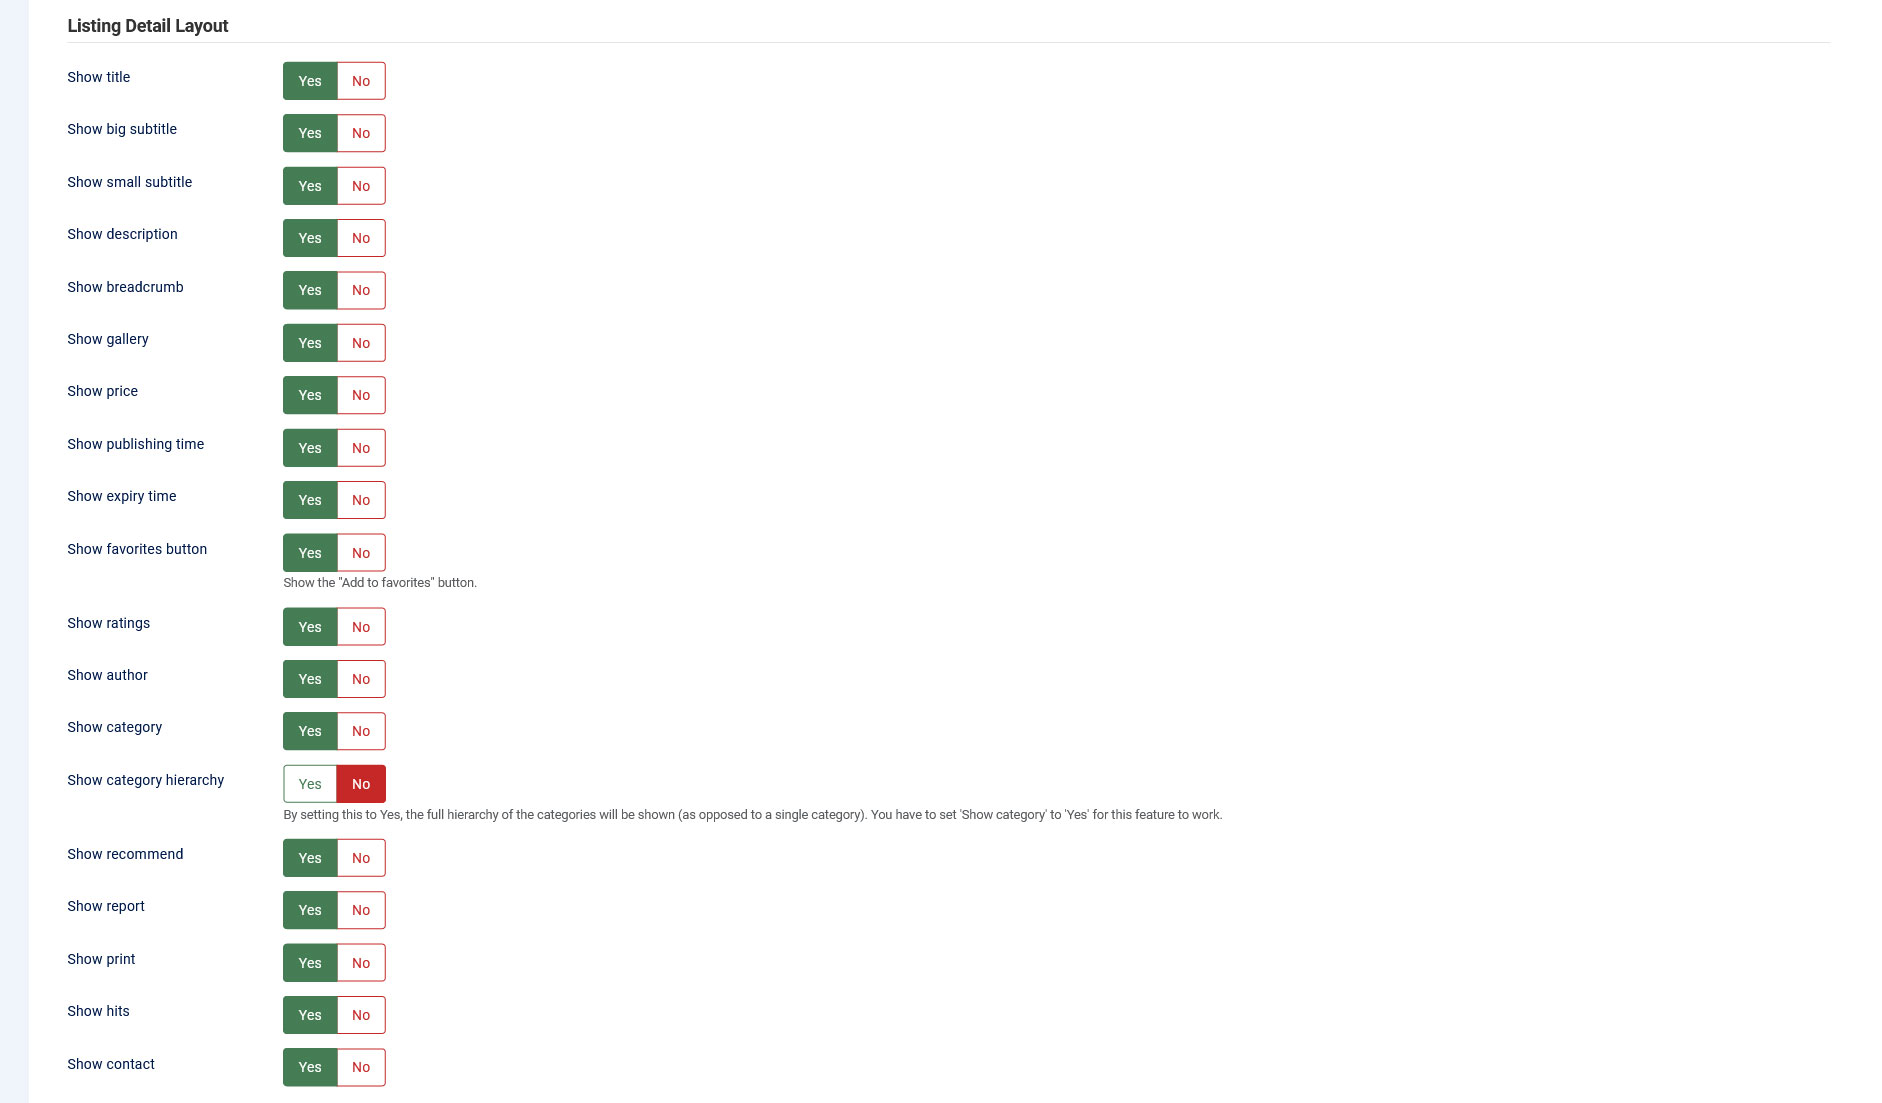
Listing Detail Layout
These options will apply to each entry's details listing.
- Show title: Display the entry's title
- Show big subtitle: Display the entry's big subtitle
- Show small subtitle: Display the entry's small subtitle
- Show description: Display the entry's description
- Show breadcrumb: Display a navigation history
- Show gallery: Show the entry's images
- Show price: Display the entry's price
- Show publishing time: Display the publishing time
- Show expiry time: Display the expiry time
- Show favorites button: Show an Add to favourites button
- Show ratings: Show the ratings given to the entry
- Show author: Display the entry's author
- Show category: Display the category the entry was assigned to
- Show category hierarchy: By setting this to Yes the full hierarchy of the categories will be shown. You will have to set "Show category" to yes in order this feature to work.
- Show recommend: Adds Facebook and Twitter share buttons
- Show report: Adds a Report Entry button
- Show print: Adds a Print button
- Show hits: Displays the number of times the entry was viewed
Listing Detail Custom Fields
- Group custom fields: Generate the table and group custom fields by this number. According to the display direction this is either the maximum number of columns or rows.
- Display direction: Display the custom fields according to this direction.

Note: RSDirectory! includes the possibility to set up conditional placeholders for any of the text areas present in this tab.
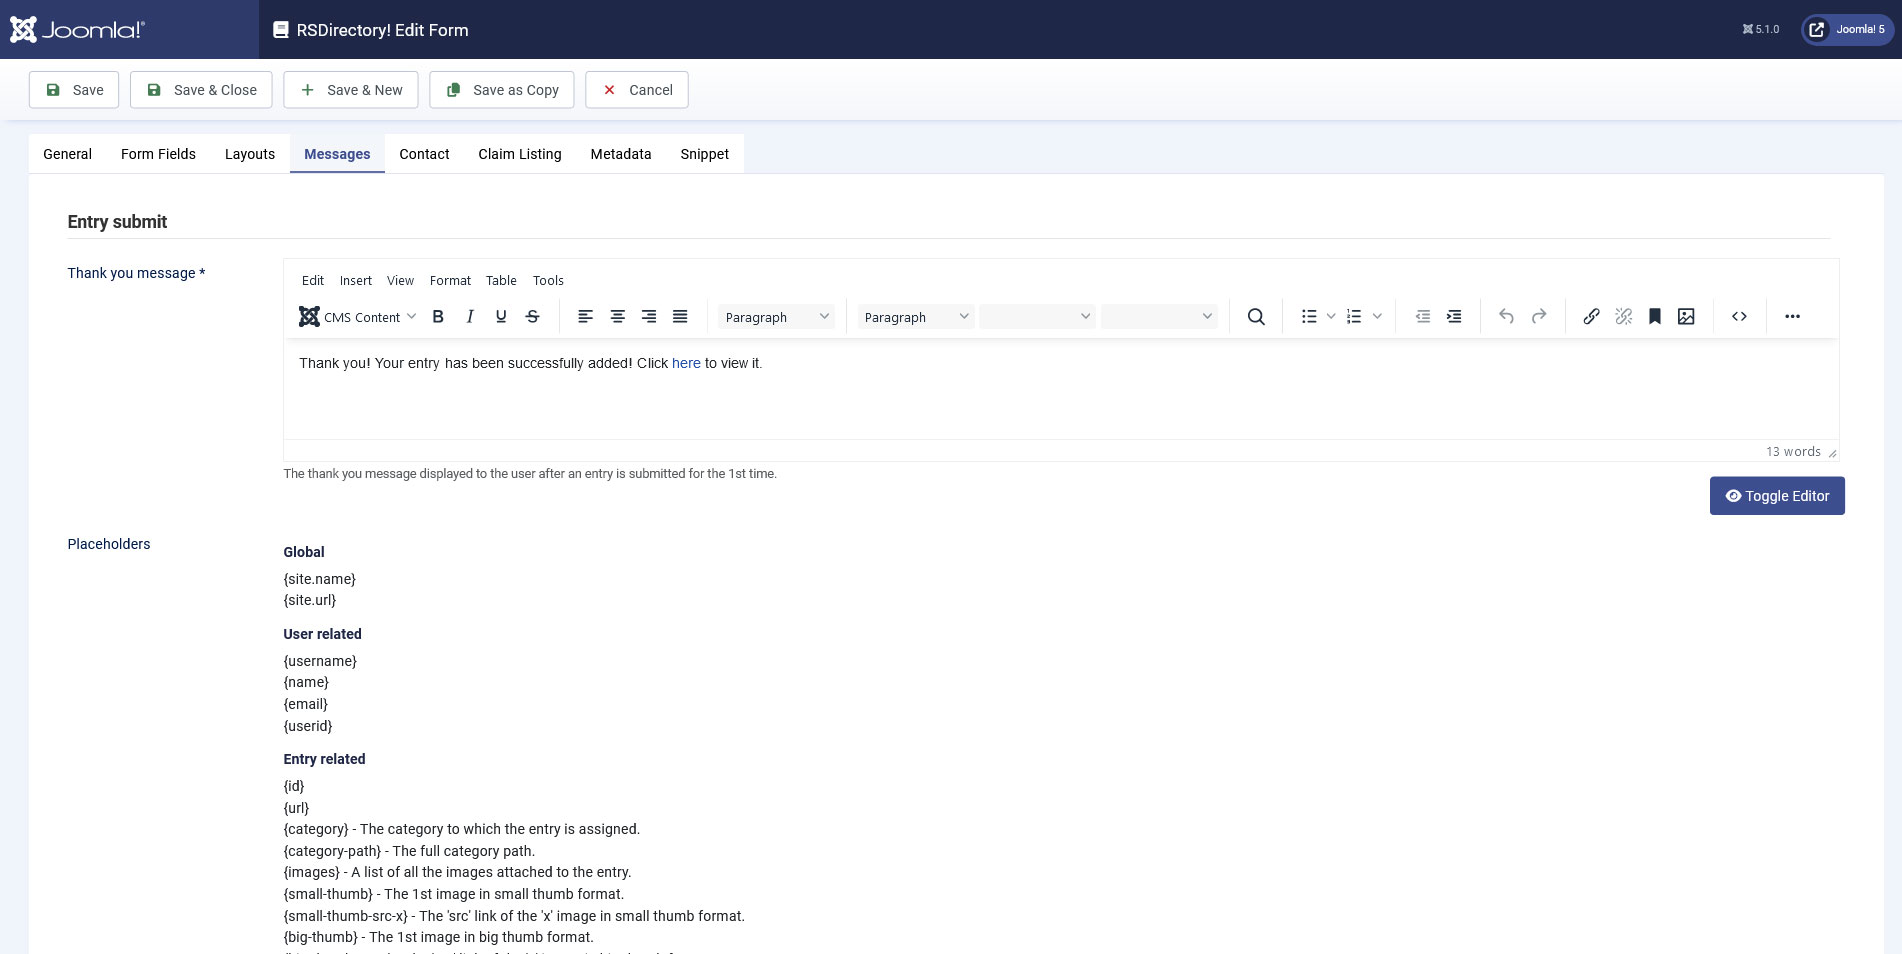
Messages
In this tab you can define a Thank you message that will be displayed when an entry is submitted for the first time. The following Placeholders can be used:
Global placeholders
- {site.name} Returns the site name as set up in System >> Global Configuration >> Site >> Site Name field
- {site.url} Returns the website's URL in the http://www.website.com form
User related placeholders
- {username} Returns the username associated with the account the entry was posted from
- {name} Returns the name associated with the account the entry was posted from
- {email} Returns the email address associated with the account the entry was posted from
- {userid} Returns the ID of the account the entry was posted from
Credits related placeholders
- {credits-remaining}: The amount of remaining credits
- {credits-spent}: The total amount of credits the entry author spent
Entry related placeholders
- {id}: The entry's internal ID
- {url}: The URL to the entry's page
- {category}: The category to which the entry is assigned
- {category-path}: The full category path
- {images}: A list of all the images attached to the entry
- {small-thumb}: The 1st image in small thumb format
- {small-thumb-src-x}: The 'src' link of the 'x' image in small thumb format (replace X with 0 implying first image, 1 the second and so on)
- {big-thumb}: The 1st image in big thumb format
- {big-thumb-src-x}: The 'src' link of the 'x' image in big thumb format
- {normal-thumb}: The 1st image in normal thumb format
- {normal-thumb-src-x}: The 'src' link of the 'x' image in normal thumb format
- {publishing-date}: The entry publishing date formatted according to the configuration
- {publishing-period}: The entry publishing period.
- {expiry-date}: The entry expiry date formatted according to the configuration
- {title}: The entry's title
- {big-subtitle}: The entry's big subtitle
- {small-subtitle}: The entry's small subtitle
- {price}: The price that was set for the entry
- {price-value}: The price value that was set for the entry
- {description}: The entry's description
- {activation-url}: The entry's activation URL
Entry related - custom fields
Placeholders for all available custom fields will be automatically generated based on the fields' internal names.
Note: RSDirectory! includes the possibility to set up conditional placeholders for the Thank you message.
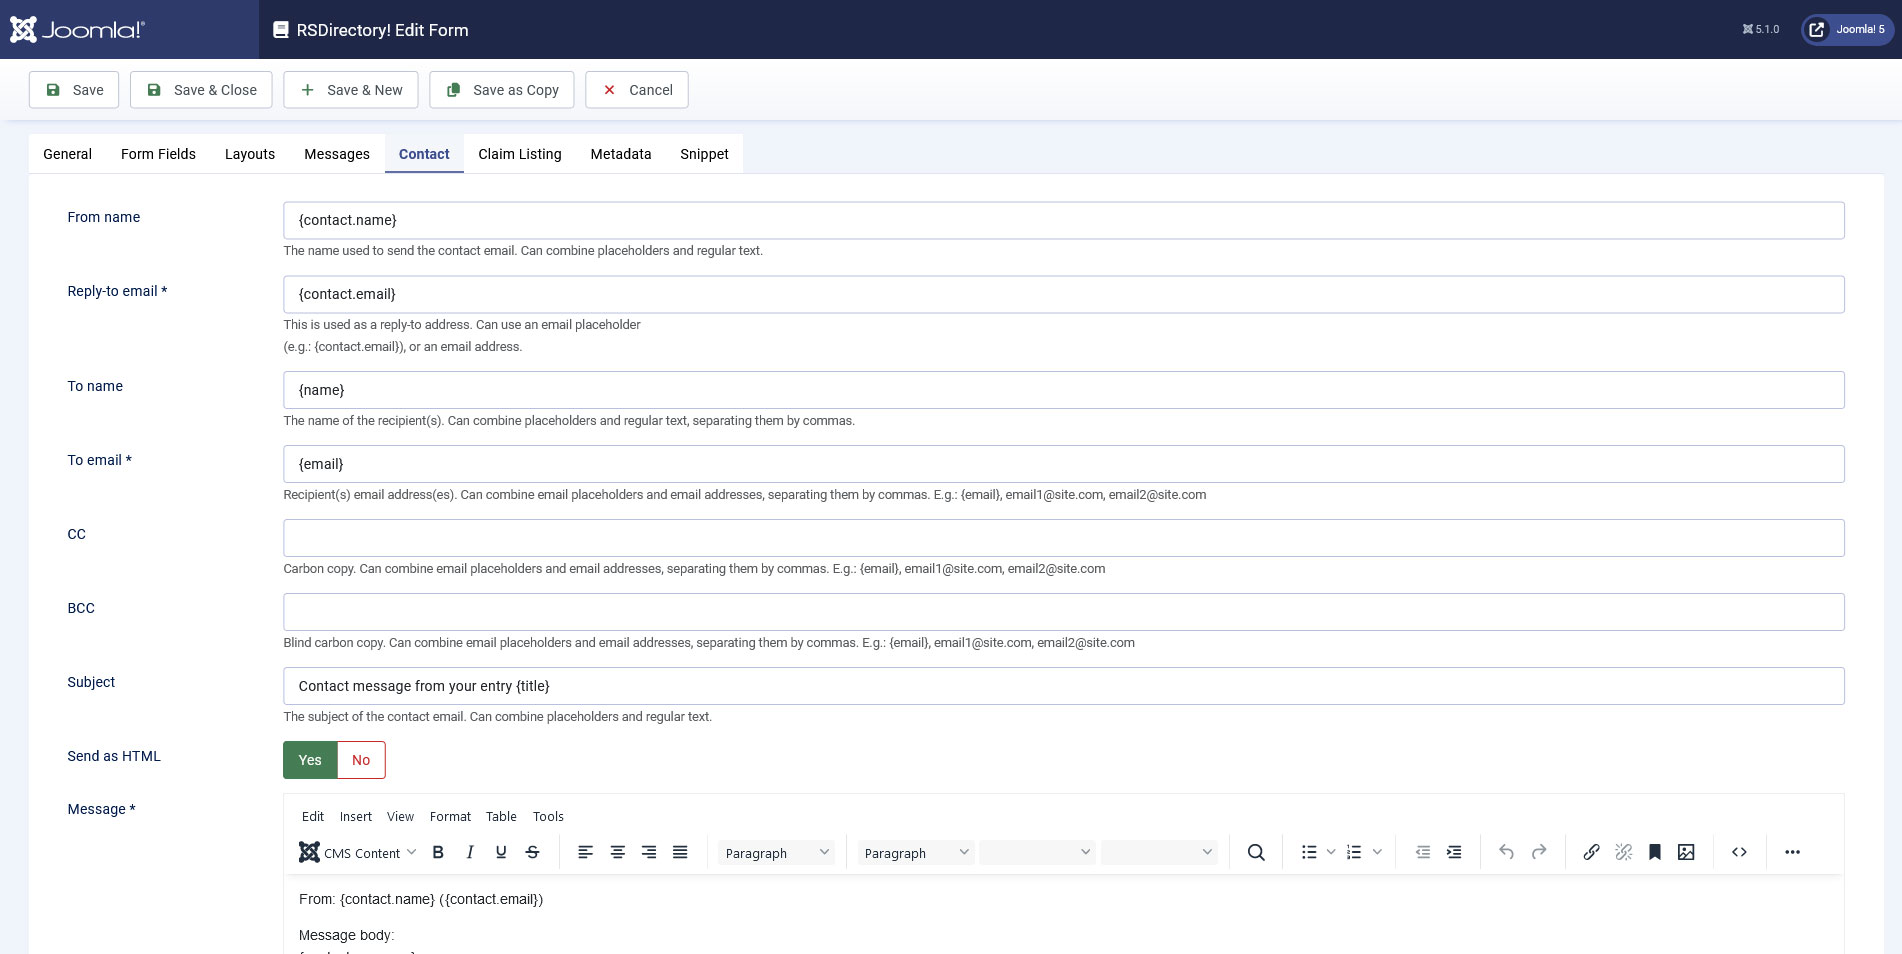
Contact
In this tab you can configure the message that will be sent to the entry owners when the viewers wish to contact them. It can be fully customized through the use of contact form, global, user, credits and entry - related placeholders, as well as entry - related custom fields that are automatically generated for each form.
Contact form related placeholders
- {contact.name}: The name of the person contacting the entry owner
- {contact.email}: The email of the person contacting the entry owner
- {contact.message}: The message submitted by the person contacting the entry owner
The rest of the available placeholders are the same as explained above, in the Messages tab.
Note: RSDirectory! includes the possibility to set up conditional placeholders for this tab's fields, as well for the Claim Listing tab.
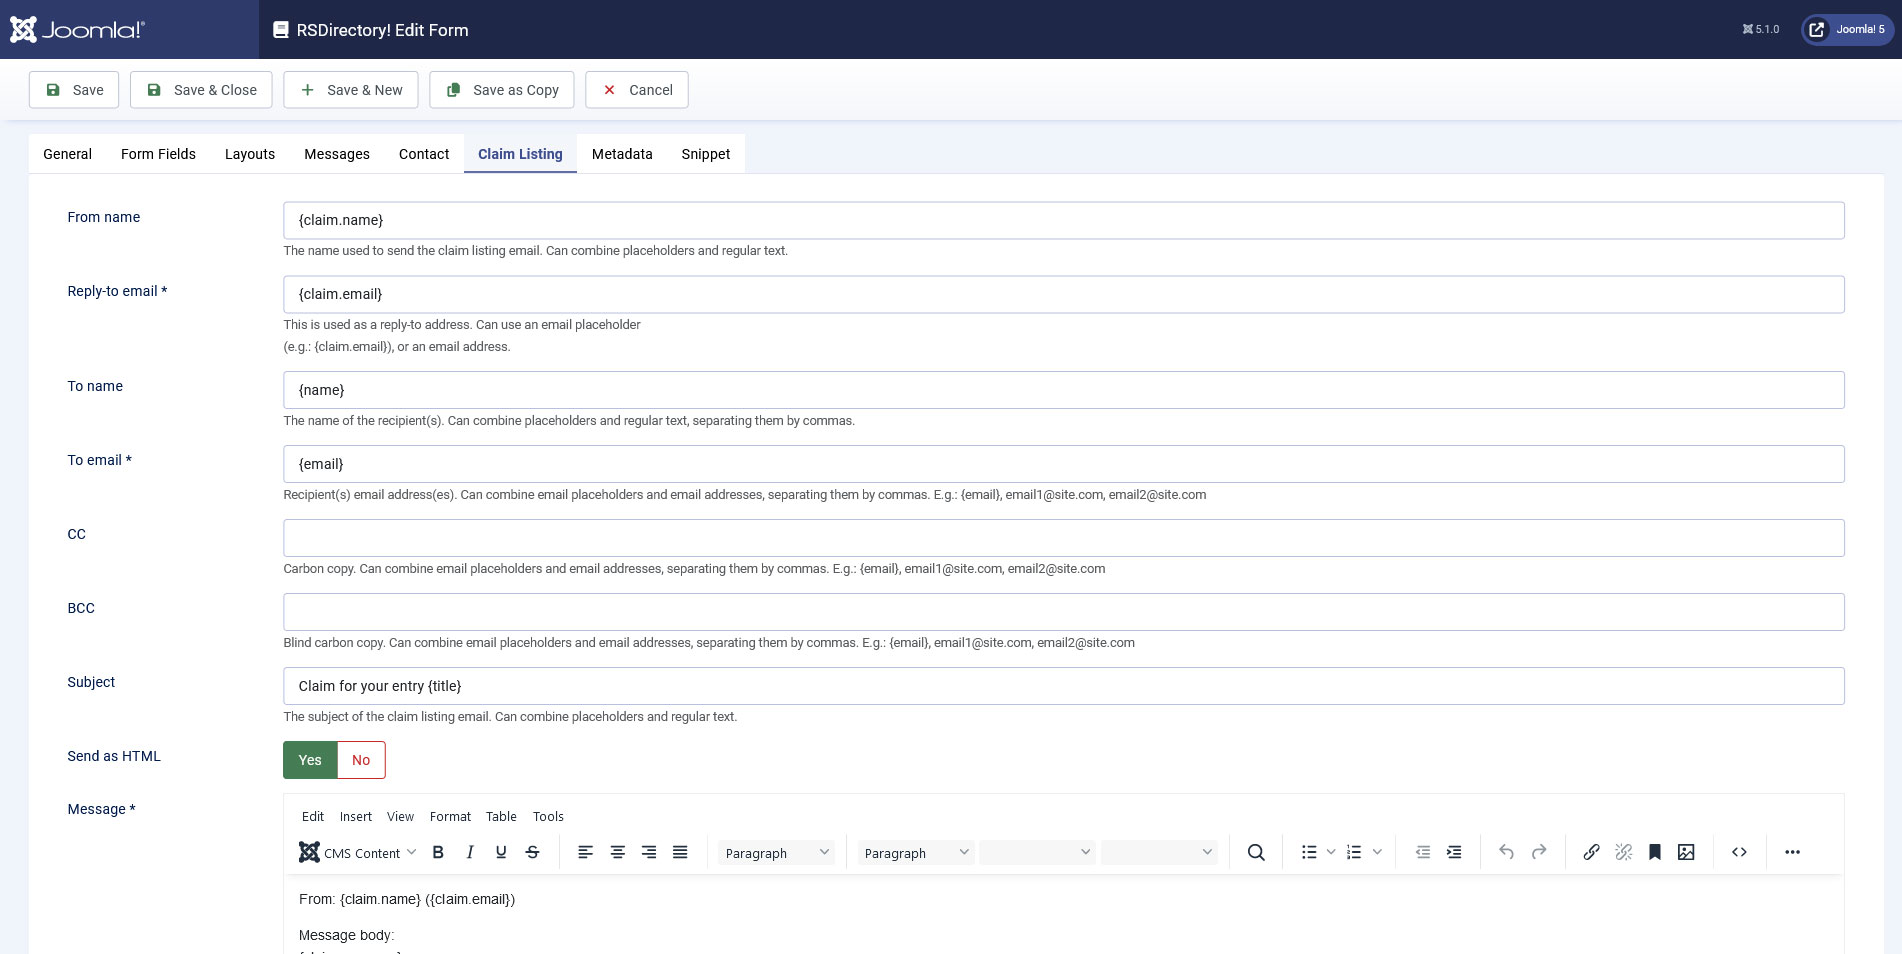
Claim Listing
In this tab you can configure the message that will be sent to the entry owners when the entries are being claimed. It can be fully customized through the use of claim listing form related placeholders, global, user and entry - related placeholders, as well as entry - related custom fields that are automatically generated for each form.
Claim Listing related placeholders
- {claim.name}: The name of the person claiming the entry
- {claim.email}: The email of the person claiming the entry
- {contact.message}: The message submitted by the person claiming the entry
The rest of the available placeholders are the same as explained above, in the Messages tab.
Metadata
In this tab you can configure the metadata templates for your entries. It can be customized through the following options:
- Title - add the entry meta title, you can also use placeholders. If you leave this empty the entry title will be used.
- Keywords - the entry meta keywords, you can also use placeholders.
- Description - Add the entry meta description, you can use placeholders.
- Extra Custom Tags - Add the entry extra custom tags (like meta og:type tags), you can use placeholders.
The following Placeholders can be used:
Global placeholders
- {site.name} Returns the site name as set up in System >> Global Configuration >> Site >> Site Name field
- {site.url} Returns the website's URL in the http://www.website.com form
User related placeholders
- {username} Returns the username associated with the account the entry was posted from
- {name} Returns the name associated with the account the entry was posted from
- {email} Returns the email address associated with the account the entry was posted from
- {userid} Returns the ID of the account the entry was posted from
Credits related placeholders
- {credits-remaining}: The amount of remaining credits
- {credits-spent}: The total amount of credits the entry author spent
Entry related placeholders
- {id}: The entry's internal ID
- {url}: The URL to the entry's page
- {category}: The category to which the entry is assigned
- {category-path}: The full category path
- {images}: A list of all the images attached to the entry
- {small-thumb}: The 1st image in small thumb format
- {small-thumb-src-x}: The 'src' link of the 'x' image in small thumb format (replace X with 0 implying first image, 1 the second and so on)
- {big-thumb}: The 1st image in big thumb format
- {big-thumb-src-x}: The 'src' link of the 'x' image in big thumb format
- {normal-thumb}: The 1st image in normal thumb format
- {normal-thumb-src-x}: The 'src' link of the 'x' image in normal thumb format
- {publishing-date}: The entry publishing date formatted according to the configuration
- {publishing-period}: The entry publishing period.
- {expiry-date}: The entry expiry date formatted according to the configuration
- {title}: The entry's title
- {big-subtitle}: The entry's big subtitle
- {small-subtitle}: The entry's small subtitle
- {price}: The price that was set for the entry
- {description}: The entry's description
- {activation-url}: The entry's activation URL

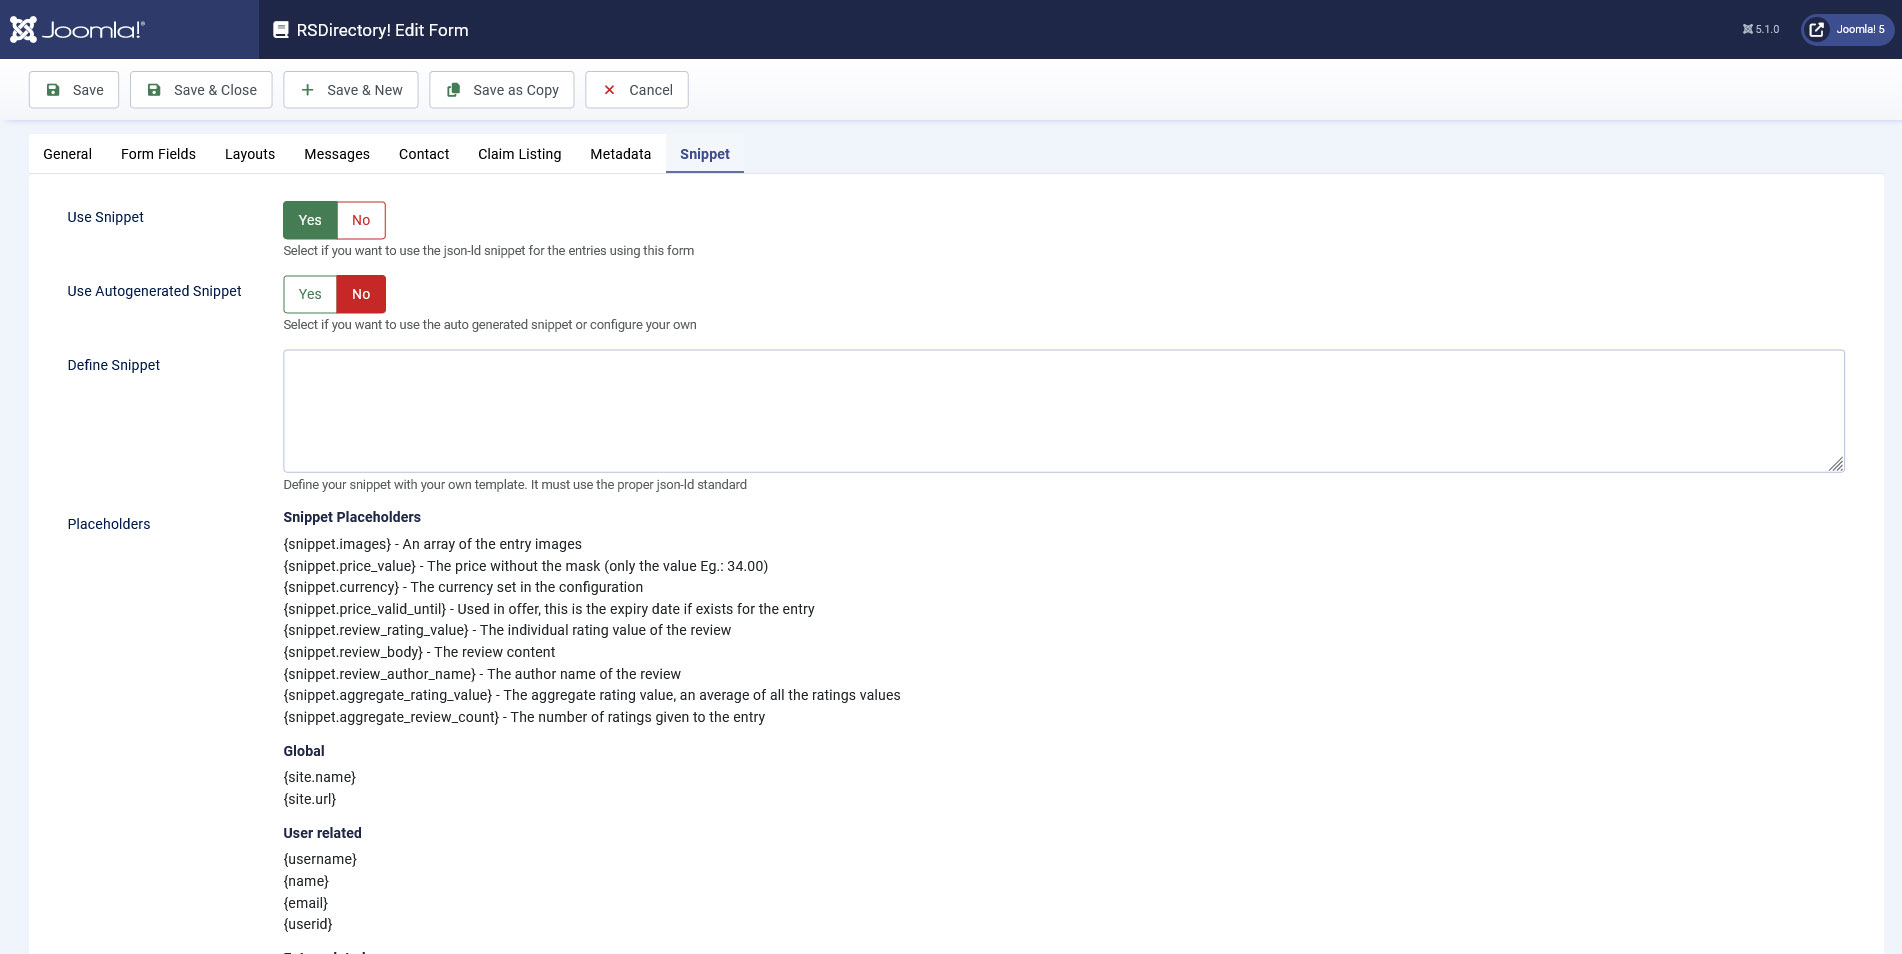
Snippet
- Use Snippet: Yes / No. Select if you want to use the json-ld snippet for the entries using this form.
- Use Autogenerated Snippet: Yes / No. Select if you want to use the auto generated snippet or configure your own.
- Define Snippet: Define your snippet with your own template. It must use the proper json-ld standard.
- SKU Placeholder: If you enter a placeholder here, the value of the placeholder will be used to generate the SKU property.
- Select Global Identifier Type: Select what Global Identifier to use: None / MPN / ISBN / Gtin8 / Gtin13 / Gtin14.
- Offers Item Condition: Set a placeholder for the Item Condition.
- Offers Availability: Set a placeholder for the Item Availability.
The following Placeholders can be used:
Snippet placeholders
- {snippet.images} - Returns an array of the entry images
- {snippet.price_value} - Returns the price without the mask (only the value Eg.: 34.00)
- {snippet.currency} - Returns the currency set in the configuration
- {snippet.price_valid_until} - Used in offer, this is the expiry date if exists for the entry
- {snippet.review_rating_value} - Returns the individual rating value of the review
- {snippet.review_body} - Returns the review content
- {snippet.review_author_name} - Returns the author name of the review
- {snippet.aggregate_rating_value} - Returns the aggregate rating value, an average of all the ratings values
- {snippet.aggregate_review_count} - Returns the number of ratings given to the entry
Global placeholders
- {site.name} Returns the site name as set up in System >> Global Configuration >> Site >> Site Name field
- {site.url} Returns the website's URL in the http://www.website.com form
User related placeholders
- {username} Returns the username associated with the account the entry was posted from
- {name} Returns the name associated with the account the entry was posted from
- {email} Returns the email address associated with the account the entry was posted from
- {userid} Returns the ID of the account the entry was posted from
Entry related placeholders
- {id}: The entry's internal ID
- {url}: The URL to the entry's page
- {category}: The category to which the entry is assigned
- {category-path}: The full category path
- {images}: A list of all the images attached to the entry
- {small-thumb}: The 1st image in small thumb format
- {big-thumb}: The 1st image in big thumb format
- {normal-thumb}: The 1st image in normal thumb format
- {publishing-date}: The entry publishing date formatted according to the configuration
- {publishing-period}: The entry publishing period.
- {expiry-date}: The entry expiry date formatted according to the configuration
- {title}: The entry's title
- {big-subtitle}: The entry's big subtitle
- {small-subtitle}: The entry's small subtitle
- {price}: The price that was set for the entry
- {description}: The entry's description
- {activation-url}
4 persons found this article helpful.