
Ep. 51: How to configure the user and the admin email in RSForm!Pro
RSForm!Pro allows you to send custom emails (user and admin emails) upon the form submission.
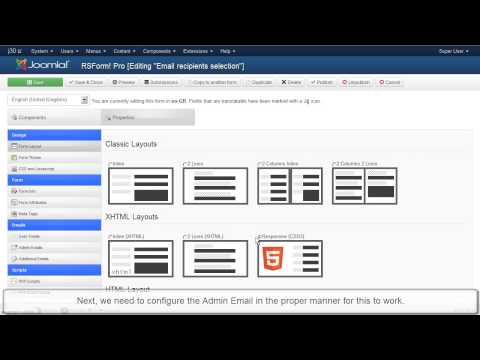
These two types of email are configured separately in the "Manage forms" area >> Properties, in two corresponding tabs ("User Emails" and "Admin Emails").
This video tutorial explains how to configure the user and the admin email.
We have created a Joomla! form with 5 components: 2 textboxes for the fullname and email, a textarea for the message and a radio group with 2 options "Yes" and "No"(users are receiving a file attachement if this option is set to "Yes").
In the last part of the tutorial, we've included a custom PHP code in the "Email scripts" tab, that allows you to send the user email with a file attachment.
Step 1: User email configuration:
These emails are sent to the user, after the form submission.
- 1. "From": this is the sender email.
e.g. you will send user emails on behalf of the site administrator. - 2. "From Name": this is the sender name/company.
e.g. the site administrator name/company. - 3. "Reply to": if the user that submitted the form wants to reply, this is where his email is sent.
- 4. "To" : users that will receive emails from administrators.
- 5. "Subject": Add the email subject.
- 6. "Attach file" : RSForm!Pro has a built-in option to send email attachments.
Step 2: Admin email configuration:
These emails are sent to the site administrator, after the form submission.
- 1. "From": this is the sender email.
e.g. the admin will receive emails with the submission details. - 2. "From Name": this is the sender name.
- 3. "Reply to": Add the reply email.
- 4. "To" : this is the admin email where the message should be sent.
- 5. "Subject": :Add the email subject.
- 6. "Attach file" : RSForm!Pro has a built-in option to send email attachments.
Step 3: Email placeholders
You can personalize the user and the admin message with global or specific form placeholders.
Global placeholders
The global placeholders are used for general user details as username, id, email, full name, IP, date name. Emails can also include placeholders for the sitename and URL.
The global placeholder syntax is: {global:placeholder_name}
e.g. {global:username}
- 1. {global:username}: If the user is registered to your Joomla website, his username will appear when using this placeholder.
- 2. {global:userid}: If the user is registered to your Joomla website, his user id will appear when using this placeholder.
- 3. {global:useremail}: If the user is registered to your Joomla website, his email will appear when using this placeholder.
- 4. {global:fullname}: If the user is registered to your Joomla website, his fullname will appear when using this placeholder.
- 5. {global:userip}: The IP of the user that submitted the form.
- 6. {global:date_added}: The date the user submitted the form.
- 7. {global:sitename}: The name of your site, as defined in your Joomla configuration.
- 8. {global:siteurl}: The URL of your site.
Form specific placeholders:
RSForm!Pro automatically generates the specific placeholders based on the form components.
The placeholders can be easily added by clicking the "Toggle Quick Add" located on the right side or by simply clicking the email field.
Step 4: Email scripts
The "Email scripts" tab allows you to customize the user and the admin email before they are sent.
In our example, we've used a script which allows you to attach a configured file to the user email, if the radio group option is set to "Yes".
- if($_POST['form']['Attach File'] == 'Yes')
$userEmail['files'][] = JPATH_SITE.'/images/cancel.png';
Video Tutorials Categories
- All Videos 104
- RSBlog! 4
- RSBooking! 0
- RSComments! 2
- RSContact! 1
- RSDirectory! 4
- RSEvents!Pro 5
- RSFeedback! 2
- RSFiles! 6
- RSFinder! 1
- RSFirewall! 8
- RSFirewall! for WordPress 0
- RSForm! 1
- RSForm!Pro 26
- RSMail! 5
- RSMediaGallery! 1
- RSMembership! 14
- RSPageBuilder! 0
- RSSearch! 2
- RSSeo! 7
- RSShowcase! 0
- RSSocial! 0
- RSTickets!Pro 4
- Templates 11
Comments
Related Videos

Episode 3 : Joomla! Form inside article - RSForm!Pro
Ep. 7 - How to send e-mails to recipients listed in a...
Episode 8 : Creating forms for Joomla! with RSForm! Pro
Ep.9 - Create a multilanguage form in Joomla! with RSForm!...
Ep. 25 - How to add Paypal functionality to your Joomla!...
Ep. 32 - Using RSForm!Pro and Salesforce to create new...
Ep. 33 - Using RSForm!Pro with Mailchimp

Ep. 39: Create newsletter subscription forms with...
Ep. 40: Create custom Joomla! registration forms for your...
Ep. 52: How to translate a Joomla! form using the...
Ep. 57: RSForm!Pro Constant Contact Integration
Ep. 58: RSForm!Pro integration with Akismet
Ep. 59: How to create custom Joomla! registration forms ...
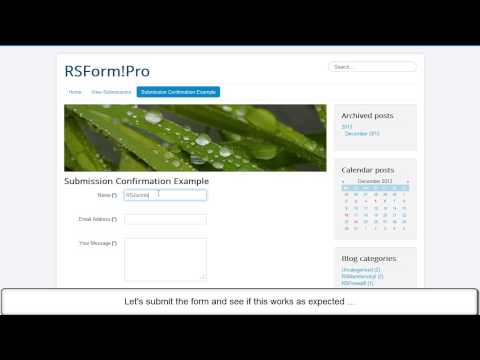
Submitting a form
Good afternoon!Tell me, please, how can I configure sending the form not to the administrator but to everyone in the Joomla user group?
Quote@Vladimir
Your next step should be to contact our customer support service for some insight on this:
Quotehttps://www.rsjoomla.com/support.html
How to generate CSV and attach to admin email
Hello, how can I do the next, I want from RSForm, after when my customer clicked on "submit" The RSFrom must generating a CSV file with data that entered my customer in the fields of form, and then this file must be attached in to admin's email. Is this possible? If yes, can tell me how, or can you demonstrate me an example. Thank you very much.
Quote@Shalan
RSForm!Pro (like most extensions) inherit the global email related settings. When using SMTP you won't be able to override the from related settings.
QuoteMask send from address using SMTP
Hi. We are using your module on a site that is already using SMTP in the global config. Even though we specify a "Sent From" email address for the User and Admin emails, the responses are still being sent from the SMTP username. Any way to mask this with the email addresses we've specified in the form? Many thanks!
Quote@dachief
You can do this via the PHP EMail scripts section:
Quotehttp://www.rsjoomla.com/support/documentation/view-article/610-php-email-scripts.html
hiding email addresses
I want to allow a person to be able to fill out an inquiry form and email it to one or more contacts as they choose - from either check-boxes or a drop-down. In either case, email addresses are exposed in the html and are open to scraping by bots. I could use icons instead but the tags store the emails as well - either case not good practice.
QuoteDo you have any plans to add a table/file that can be queried on a form-submit to dynamically fill in this sensitive info?
Thanks
values in other language in admin mails?
Hello,
QuoteI have website in two languages and also form (rsform pro) in two languages. Is it possible to send admin mail from site in A-language with captions and values in B-language?
If yes, how can I do that?
@Alastair
yes, of course. The following article provides more details:
Quotehttp://www.rsjoomla.com/support/documentation/view-article/610-php-email-scripts.html
hide the fields that are not filled in
Hi,
QuoteIs there any way that the email that gets sent out hides the fields that are not filled in?
My client wants to print each submission, but not the fields that are blank.