RSTickets!Pro Cron plugin
The RSTickets!Pro Cron plugin extends the standard RSTickets!Pro functionality by adding the possibility to transform an email into a ticket. Basically the administrator can configure an email account, and any emails received on that address can be transformed. Attachments from your email can be included on your ticket as well (this will be based on your Department Uploads settings).
To install this plugin please refer to the RSTickets!Pro installation tutorial. After the successful installation, the Cron plugin can be accessed from within the Components > RSTickets!Pro > Cron Email Parser Configuration area.
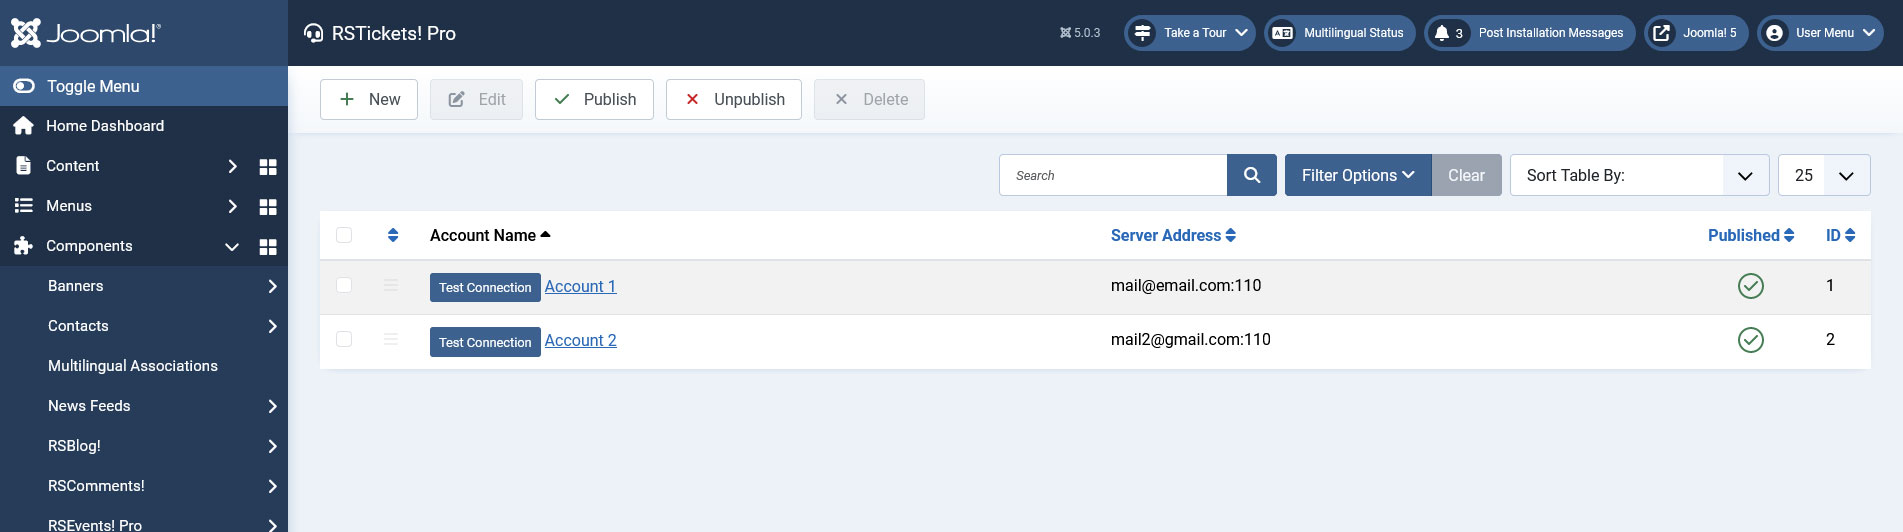
The basic Cron Email Parser configuration tab displays a list of all the current configured Crons (see image below) that are available on your installation. Yes, this is correct, RSTickets!Pro support multiple crons. A fundamental change has been implemented from its predecessor (RSTickets!). Due to use of a system plugin, now the Cron plugin will run on any page that is being accessed, no longer being chained to accessing the former RSTickts!'s Tickets or My tickets.
An alternative email option is provided in the Configuration > Tickets area that can be used to allow the user to responde to their ticket from a different email address (assuming the ticket code in question is part of the email subject).
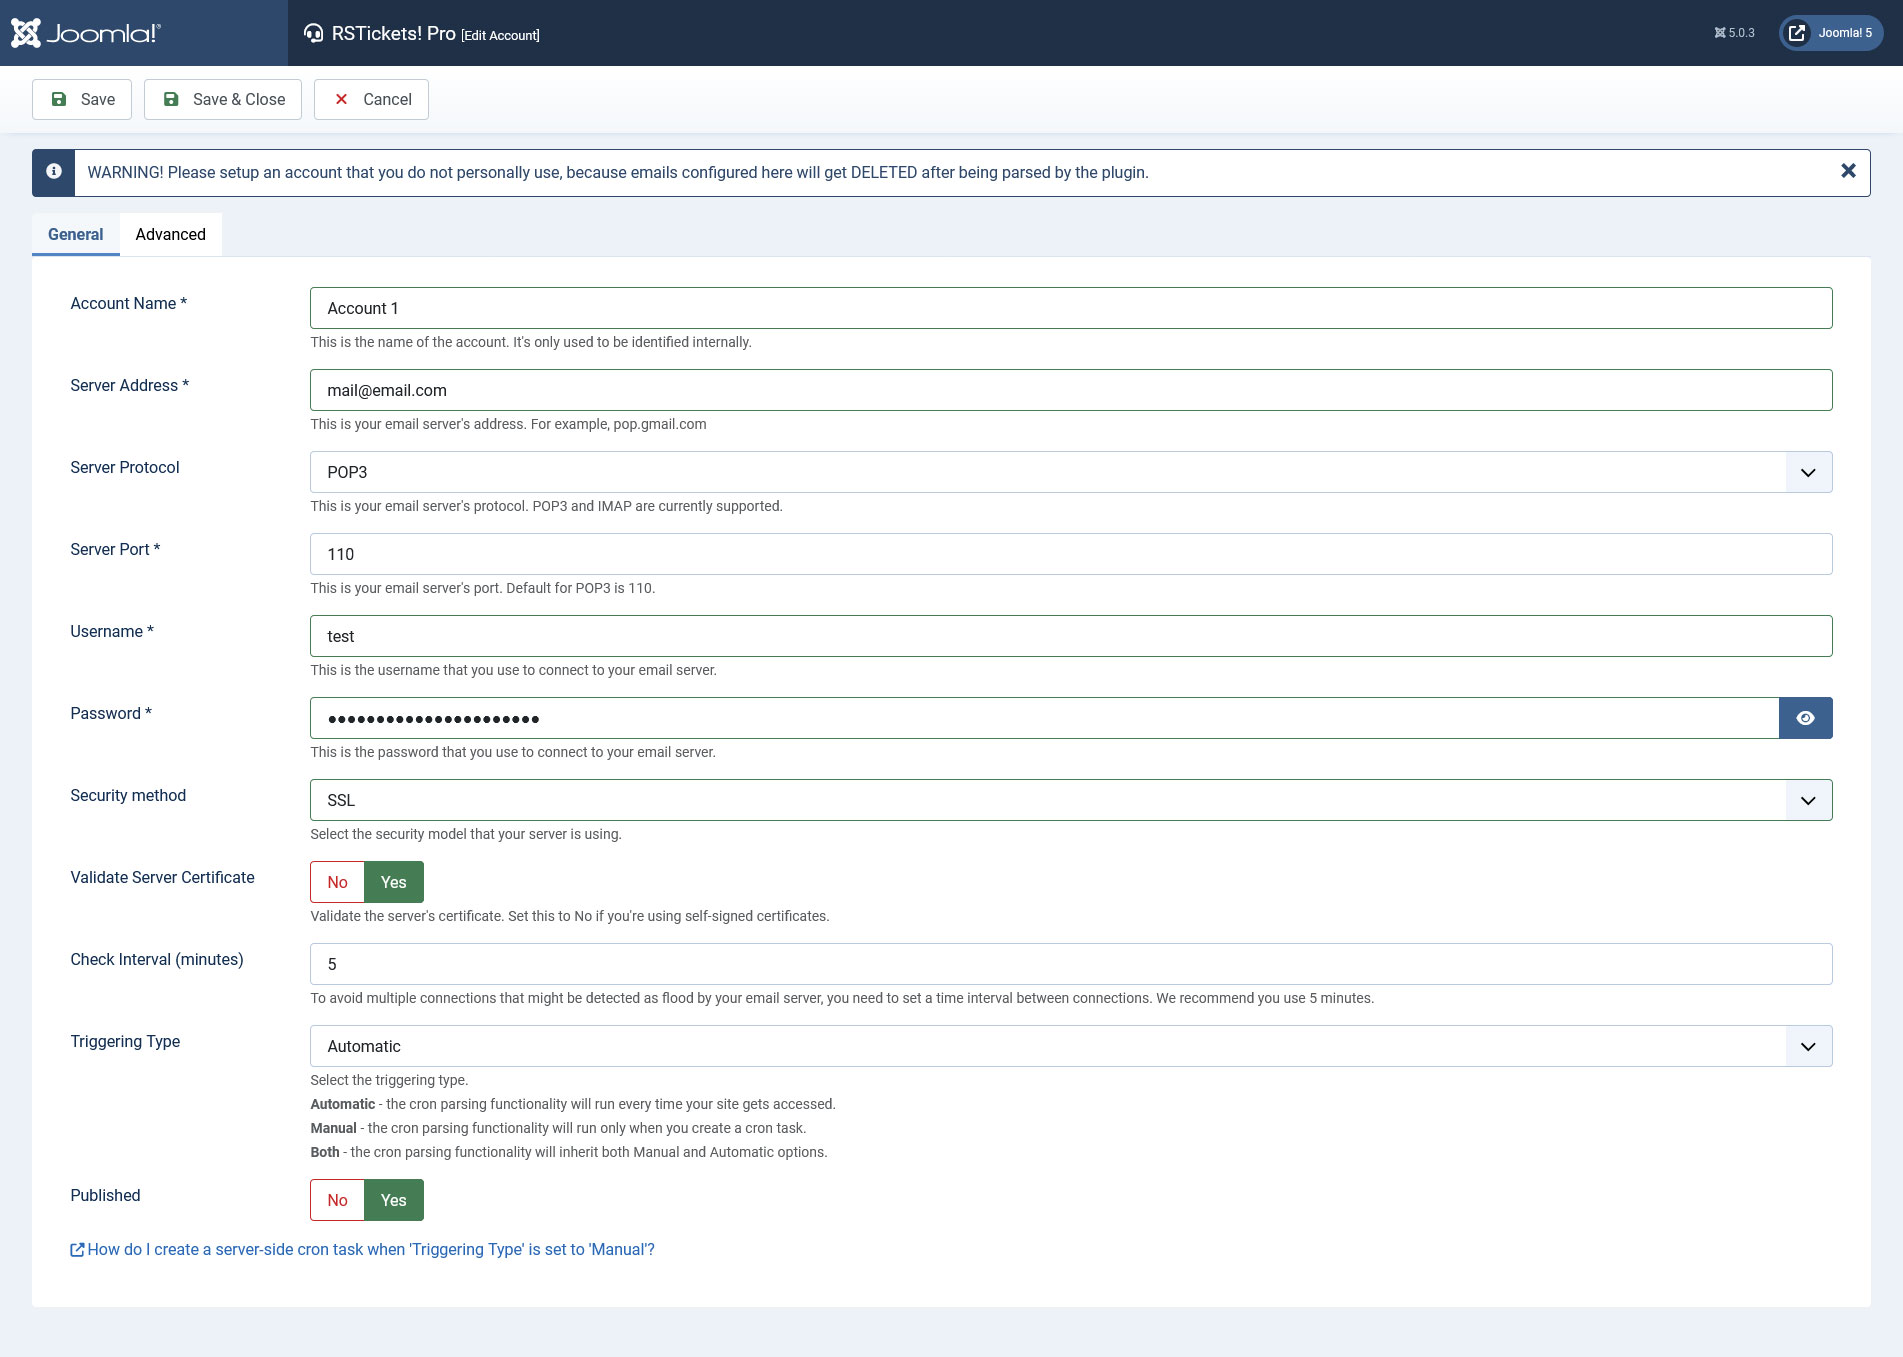
Upon clicking New or a editing a existing cron, the core cron configuration area will be displayed (see image below). This screen is divided into: General and Advanced.
General
Main configuration area:
- Account Name: the name of the cron process.
- Server Address: the email account's server address
- Server Protocol: what email protocol should be used: POP3/IMAP
- Server Port: depending on the protocol and server side settings you have to specify the port number that should be used for the connection
- Username: the username for the specified email account
- Password: the password for the specified email account
- Security method Select the security method that your server is using: SSL / TLS. SSL is a cryptographic protocol that provides security for communications over networks such as the Internet. TLS (SSL's predecessor) is a cryptographic protocol that provides security for communications over networks such as the Internet.
- Validate Server Certificate: yes / no. Validate or not the SSL/TSL server. If your server connection uses TLS or SSL you should enable this.
- Check Interval: as input it uses a numeric value. This is actually the frequency of the cron. It other words, how often should the cron check the email account for new emails. The more
- Triggering Type: Automatic / Manual / Both - set how the ticket creation process should be triggered. Automatic requires that you set up a server-side cron task. Manual means that the process will be triggered when a frontend or backend page is visited.
- Published: yes / no
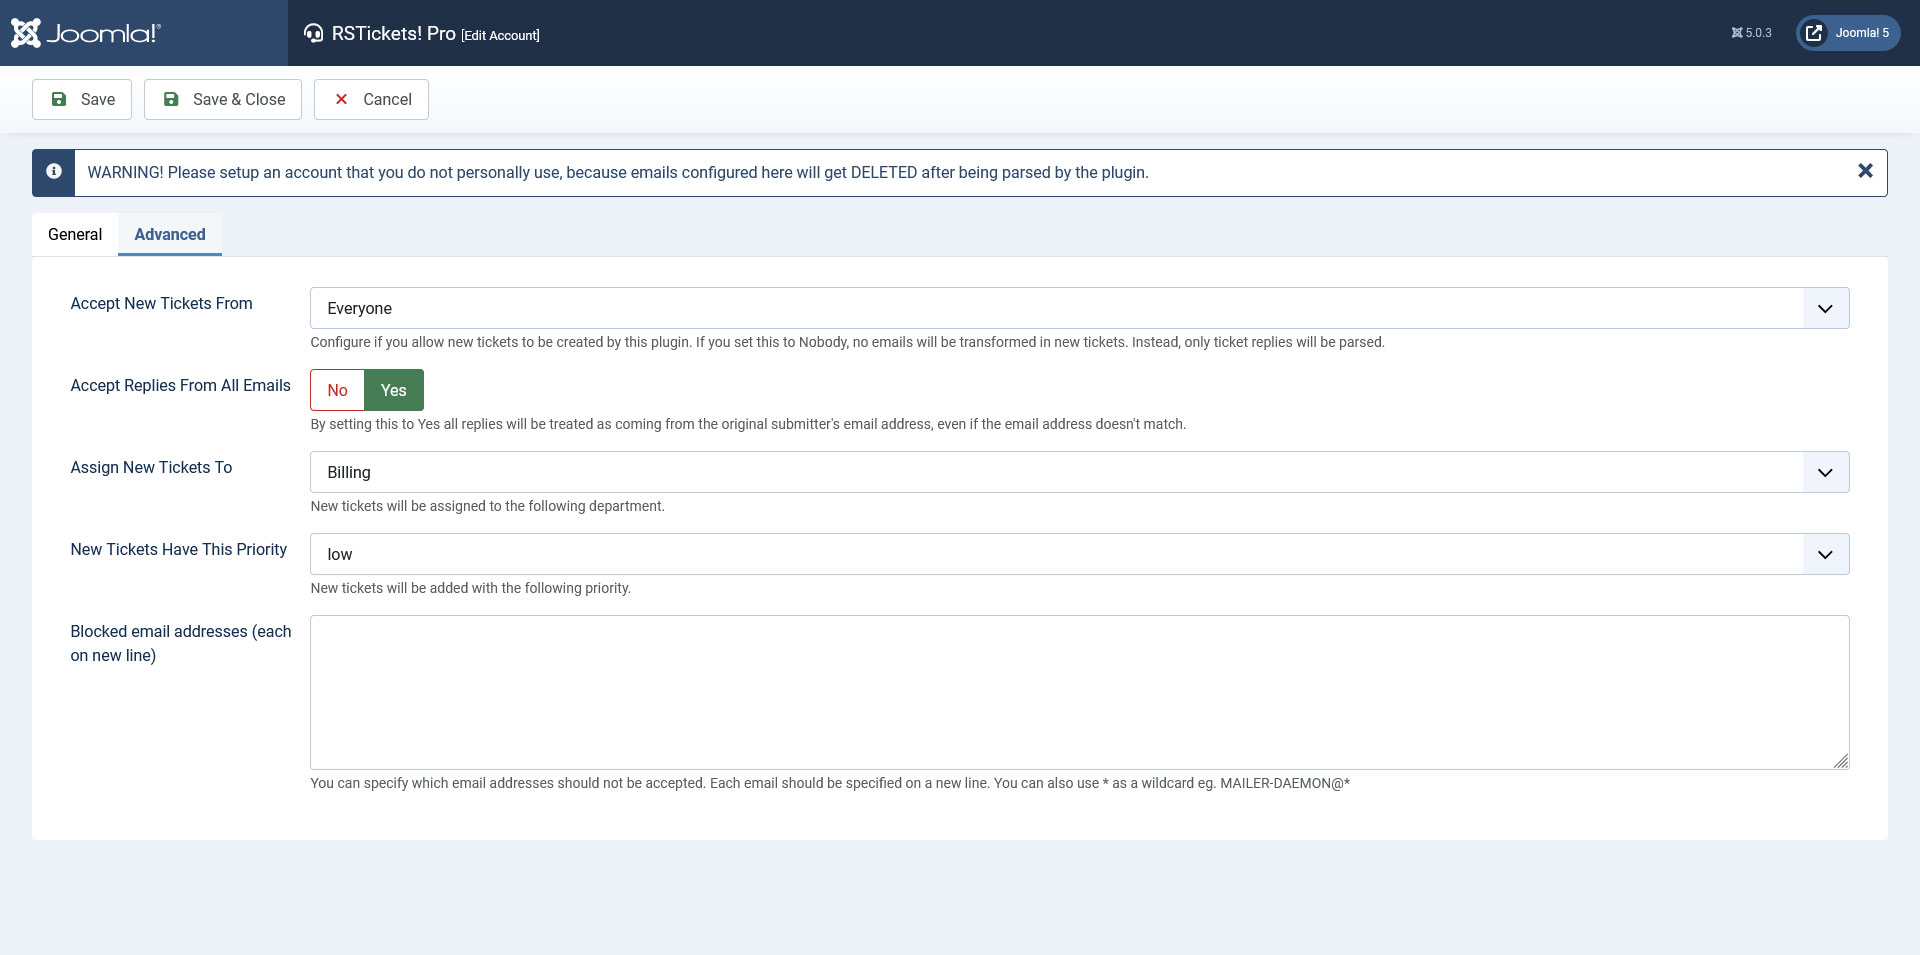
Advanced
Advanced configuration area:
- Accept New Tickets From: Nobody / Registered users / Everyone. As you can see, some restrictions can be set on what emails can be passed as tickets. This verification is based on the incoming email address
- Accept Replies From All Emails: Yes / No - By setting this to Yes all replies will be treated as coming from the original submitter's email address, even if the email address doesn't match.
- Assign New Tickets To: a list of your published departments. The tickets that arrive from the cron, can be introduced directly into a department.
- New Tickets Have This Priority: tickets that arrive from the cron will be introduced with the configured priority
- Blocked email addresses (each on new line): Specify sender email addresses that should be ignored when creating tickets from messages. The * wildcard can be used to block all emails that belong to a certain domain (e.g. *@domain.com).
Cron Email Parser Log
The Cron Email Parser Log displays the following information:
- Account Name: The account name for the Cron Email Parsers which activity is tracked.
- Date: The date of the provided activity.
- Subject: The subject of the tickets which were created by the Cron Email Parser or to which replies were added through the Cron.
- Description: The description of the actions that the Cron takes or attempted to take.
The toolbar button Delete All will delete all entries.
Note: to trigger the parser's functionality, you need to either:
- set up a server-side cron task - that will access the frontend area of your website
- or by manually accessing your website
12 persons found this article helpful.
You Should Also Read
RSTickets!Pro Report plugin HOT |
RSTickets! Pro Latest Articles Module |
RSTickets! Pro Most Read Articles Module |