Departments
The Departments tab allows an administrator to add new departments to the RSTickets!Pro installation. Departments should be considered a categorization of tickets. Unlike the Manage Tickets tab, departments can only be added from the Joomla! administrator panel.
By default, RSTickets!Pro comes with four predefined departments: Billing, Licensing, Pre Sales and Tech Support. It is to be noted that erasing a department will also delete all tickets that belong to that department.
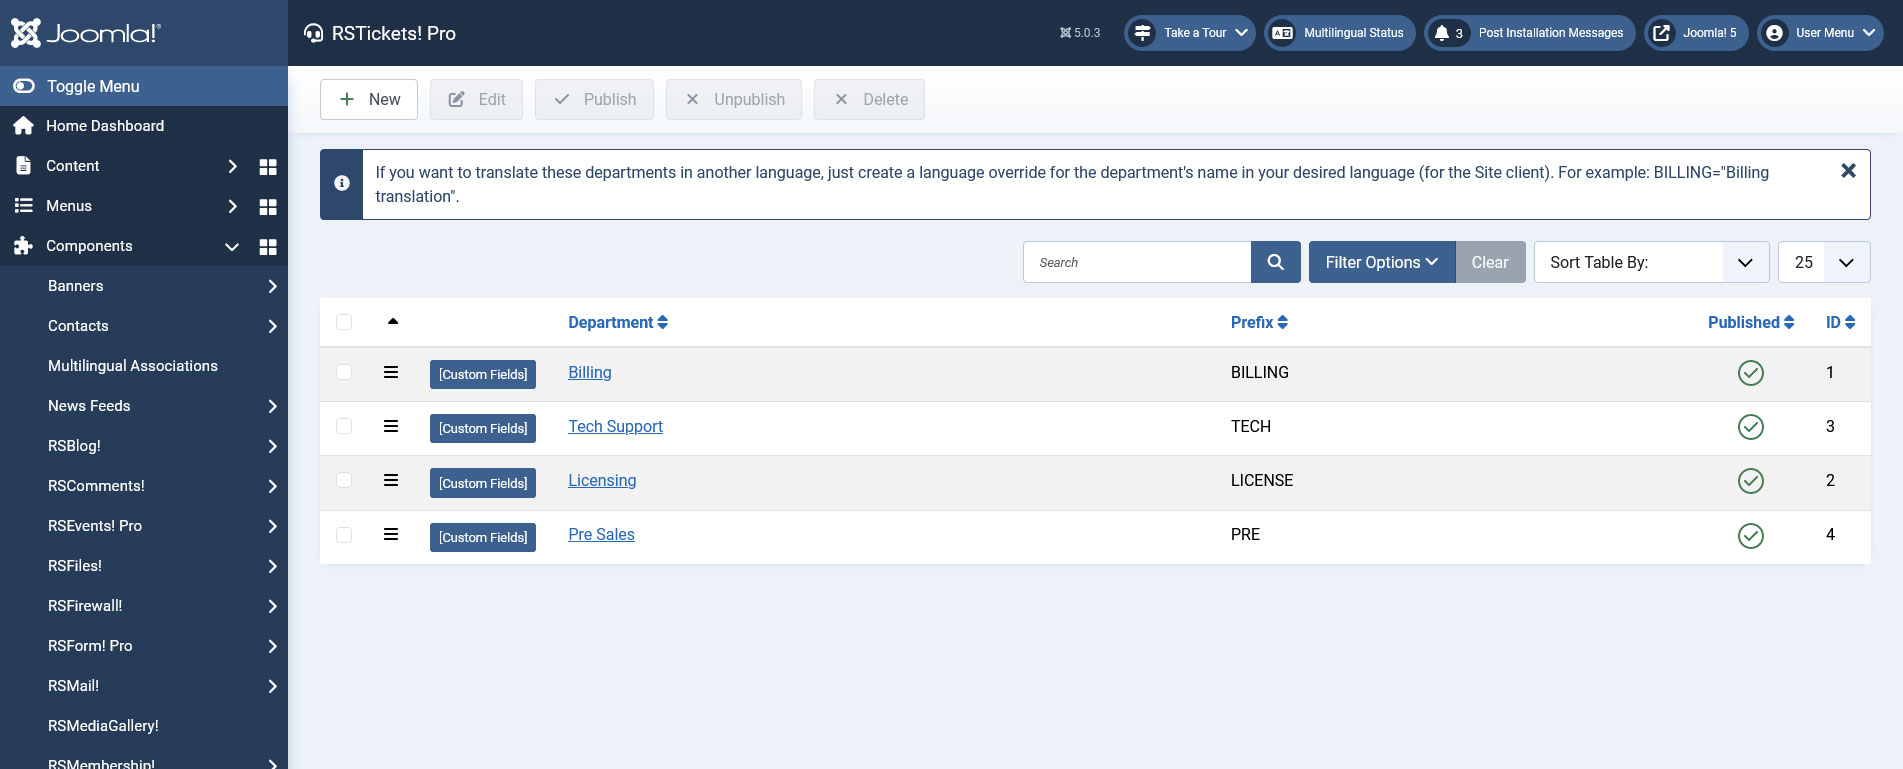
Accessing the Components > RSTickets!Pro > Departments tab will initially display a list of your current configured departments, as can be seen on the right. Editing or creating a new department will display the following tabbed structure: General, Tickets, Emails and Uploads.
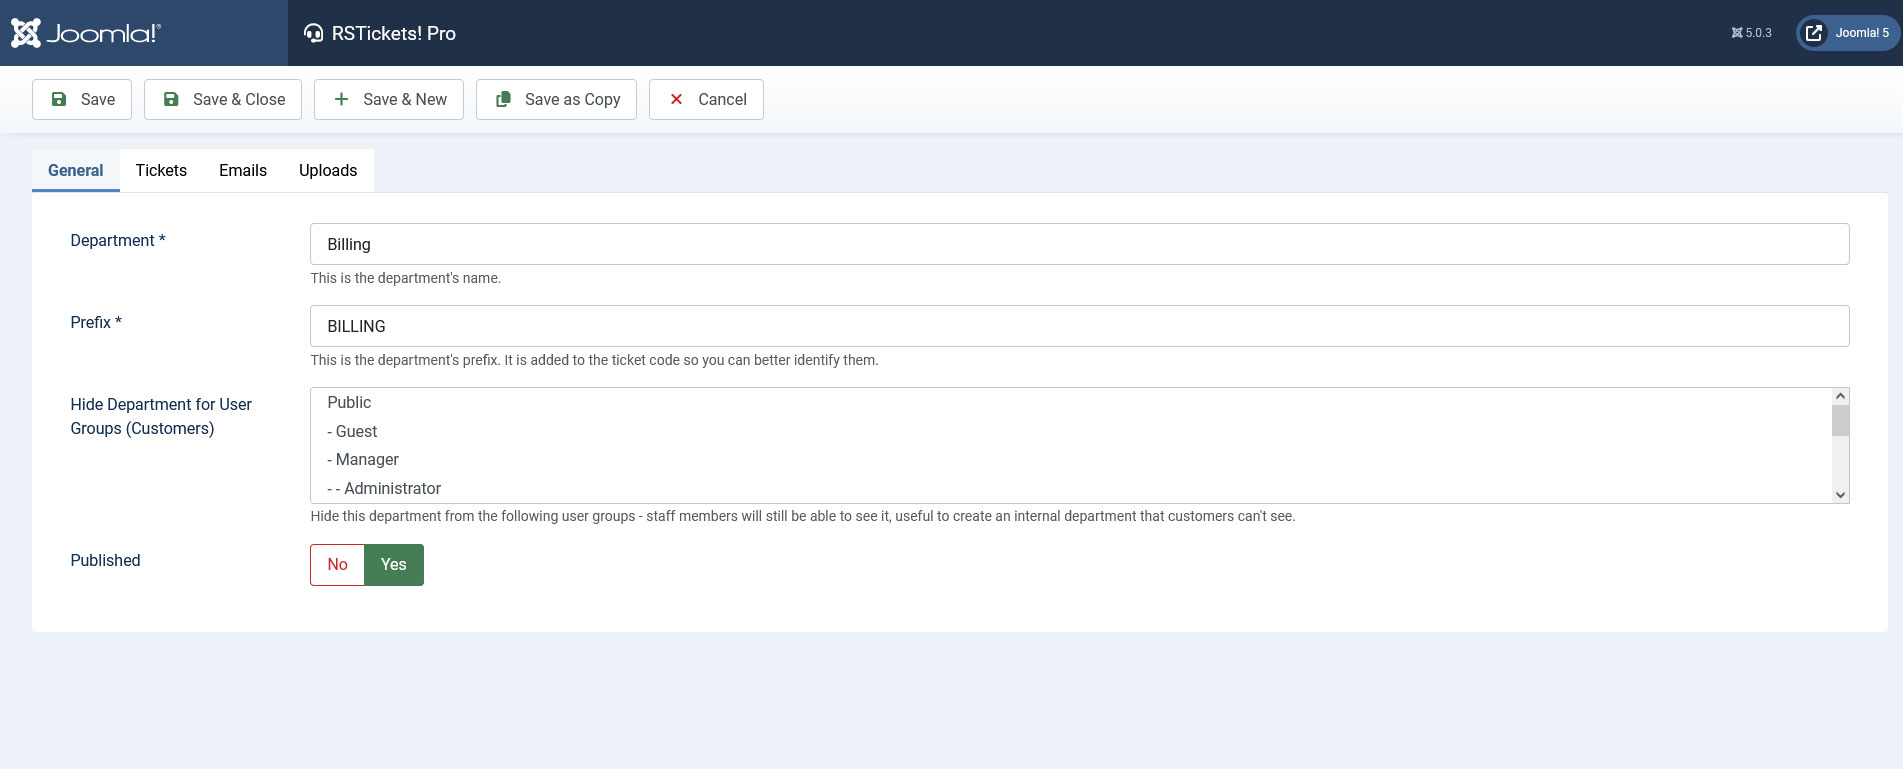
General
- Department: the department name
- Prefix: the unique ticket id will incorporate the configured department prefix
- Hide Department for User Groups (Customers): Hide this department from the following user groups - staff members will still be able to see it, useful to create an internal department that customers can't see.
- Published: Yes / No
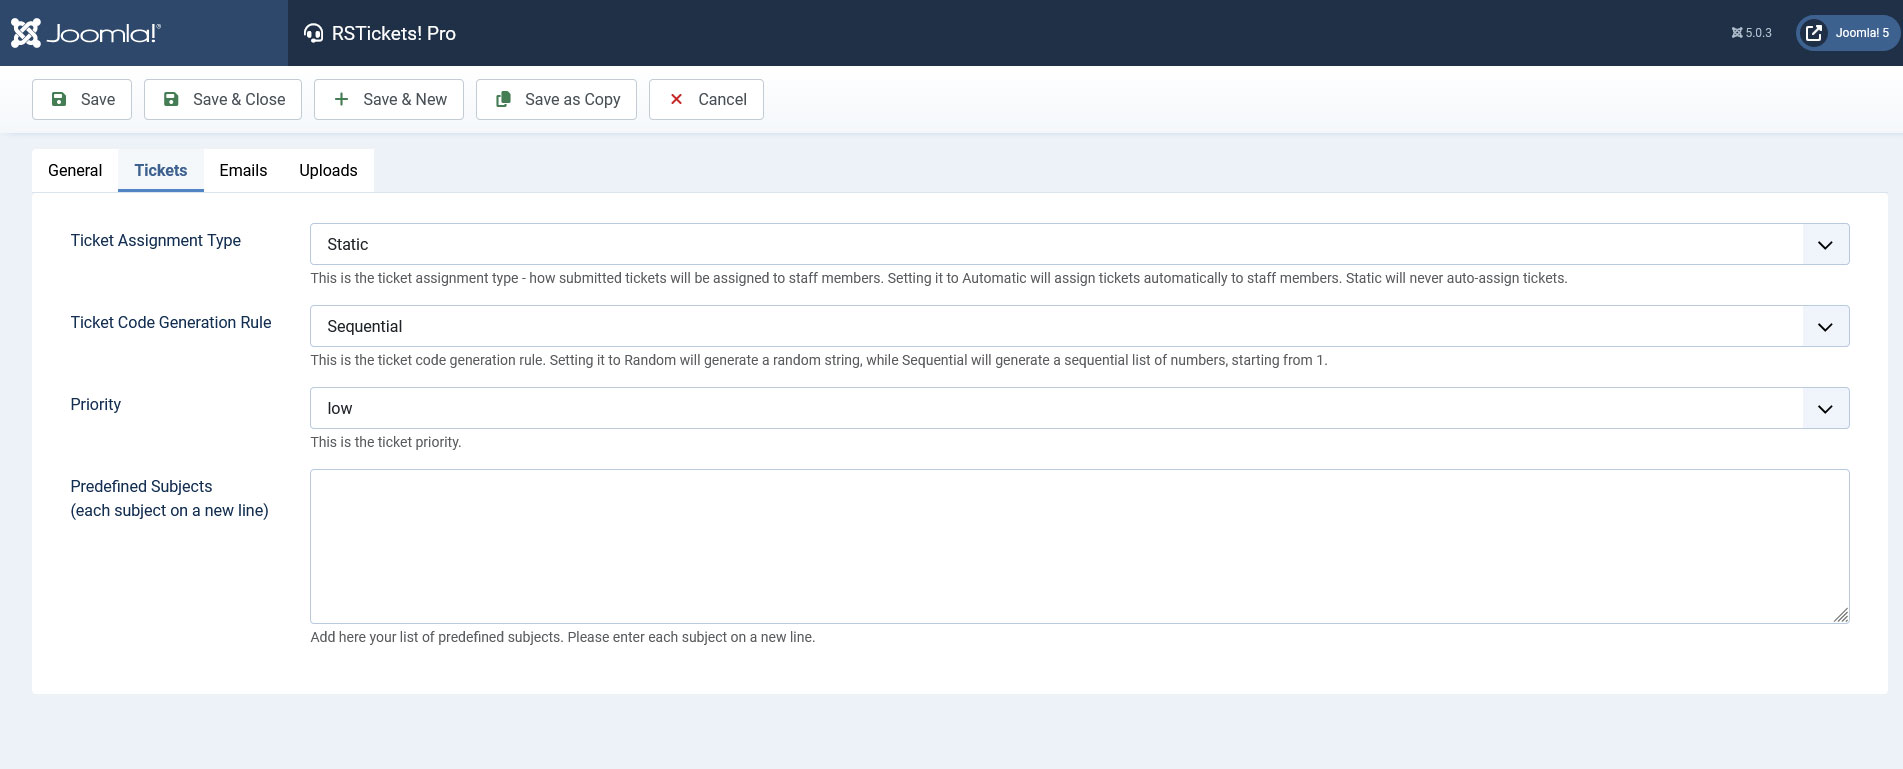
Tickets
- Ticket Assignment Type: Static/Automatic. Static assignment type implies that once a ticket has been added, this will not be assigned to anyone - it will be flagged as Unassigned. A staff member can assign it to others (if it has sufficient group permissions) or it is automatically assigned to the staff member once he/she replies to it. The Automatic assignment type option will assign the ticket to staff members that are listed for that particular department. This assignment type is load balanced, meaning that the ticket will be assigned to the staff member that has the fewest opened tickets.
- Ticket Code Generation Rule: Random/Incremental. The unique code is composed out of two parts: Department prefix and a unique sequence. This sequence can be random or incremental.
- Priority: a drop-down that will incorporate all the configured Ticket Priorities. The selected priority will be designated as default for the configured department.
- Predefined Subjects: If the predefined subject option is enabled from within the RSTickets!Pro Configuration area, here, you can specify what the subjects are (each on a new line). A predefined subject can be set as default by using the [c] tag. You can use //<code> to dynamically create the options if you return an array() or a string (each on a new line).
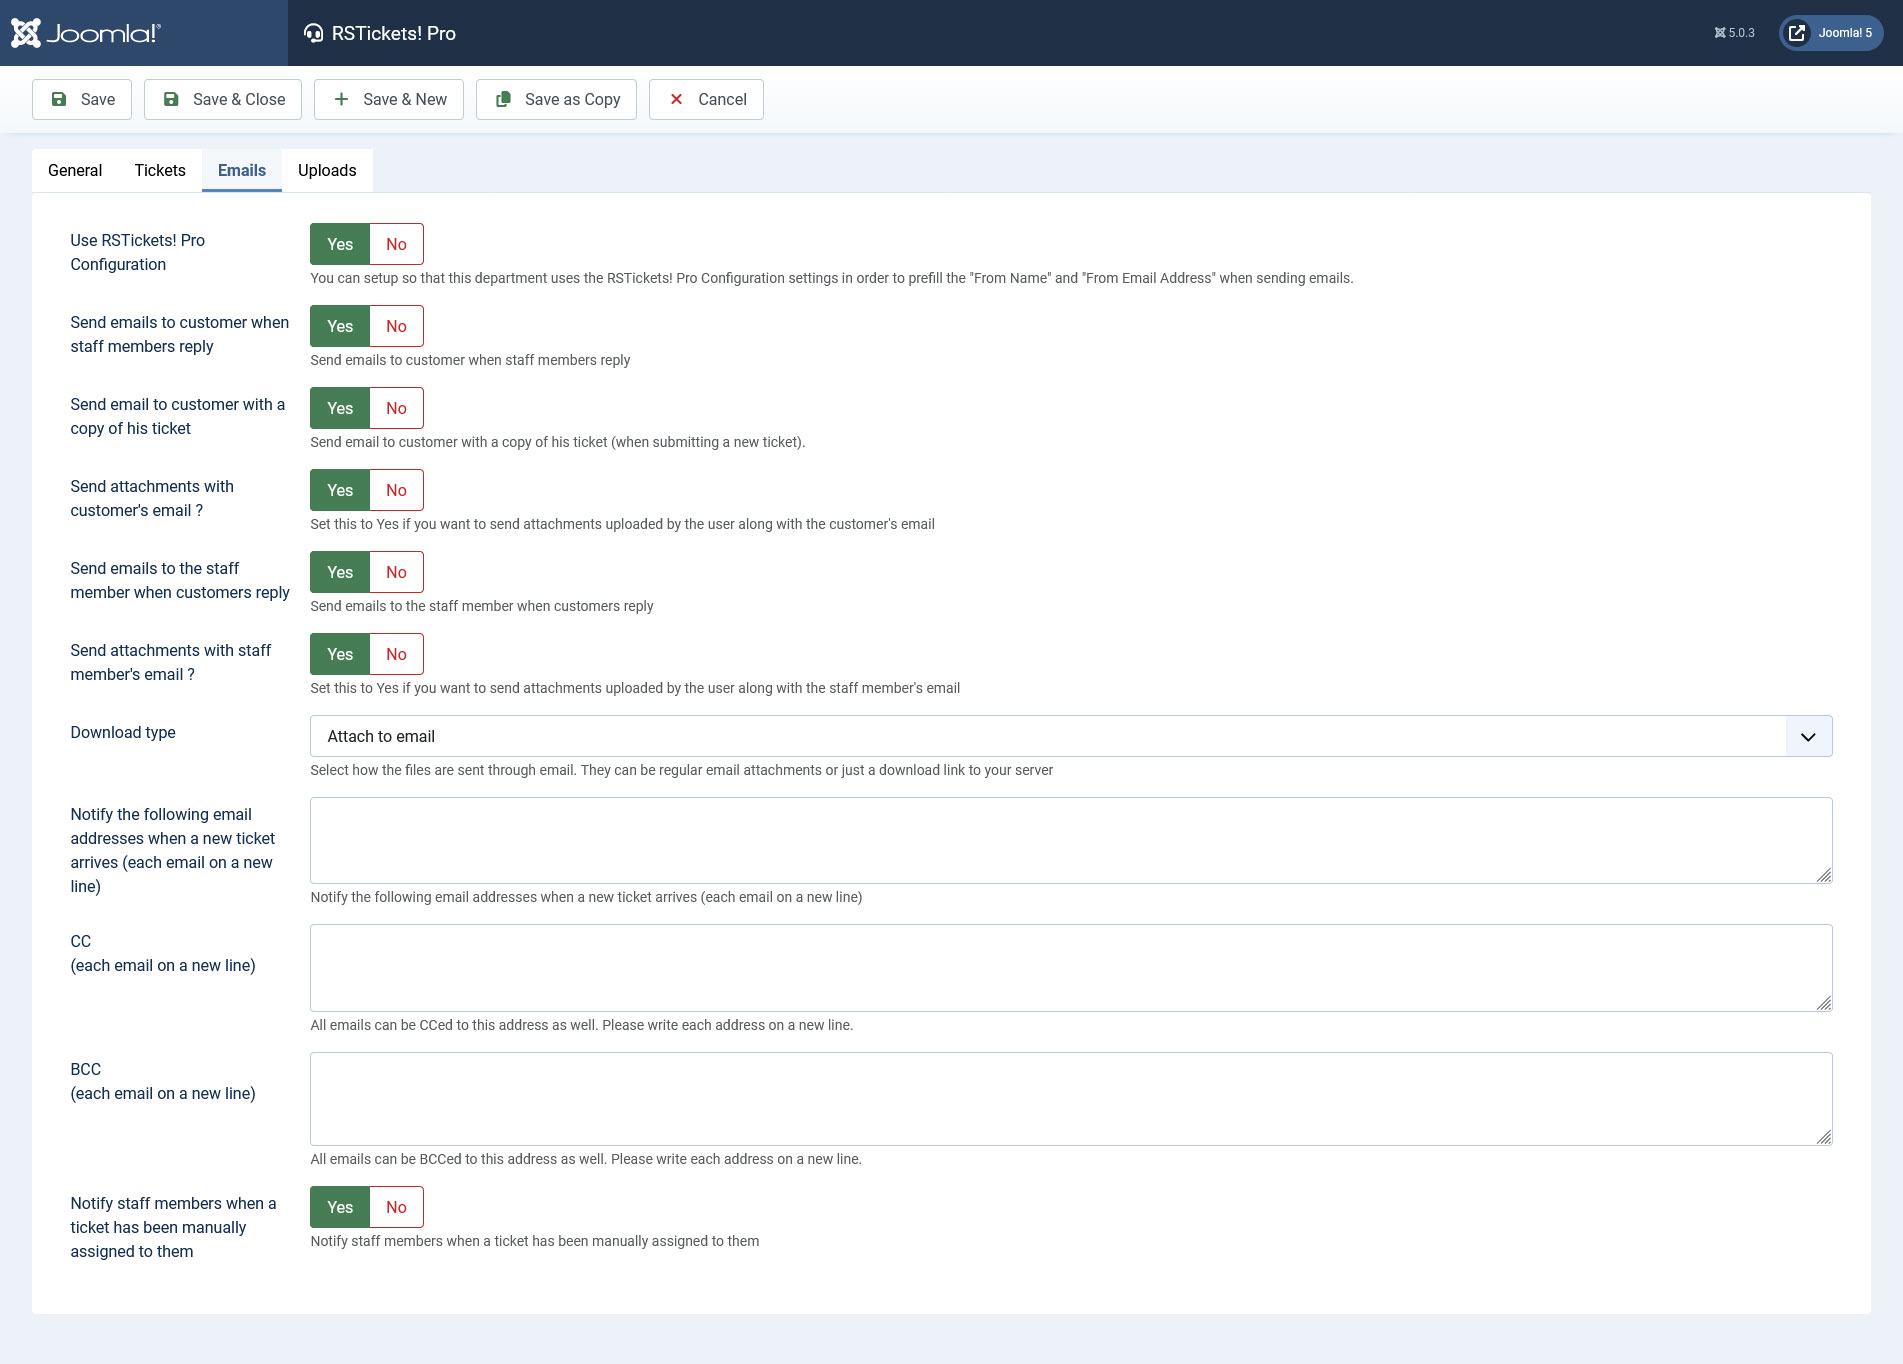
Emails
Each department has a set of emails that can be configured:
- Use RSTickets! Pro Configuration: Yes / No
- From Email Address: If you are not using the RSTickets! Pro Configuration then you will have to type the email address from which the emails are sent here.
- From Name: If you are not using the RSTickets! Pro Configuration then you will have to type the name of the sender here.
- Send emails to customer when staff members reply: Yes / No
- Send email to customer with a copy of his ticket: Yes / No
- Send attachments with customer's email: Yes / No
- Send emails to the staff member when customers reply: Yes / No
- Send attachments with staff member's email: Yes / No
- Download type: If you don't want to send email attachments, you can generate a download link
- Notify the following email addresses when a new ticket arrives - each email address on a new line
- Notify staff members when a ticket has been manually assigned to them: Yes / No
- CC: All configured emails from this tab will be delivered as CC to the specified email addresses (each on a new line)
- BCC: All configured emails from this tab will be delivered as BCC to the specified email addresses (each on a new line)
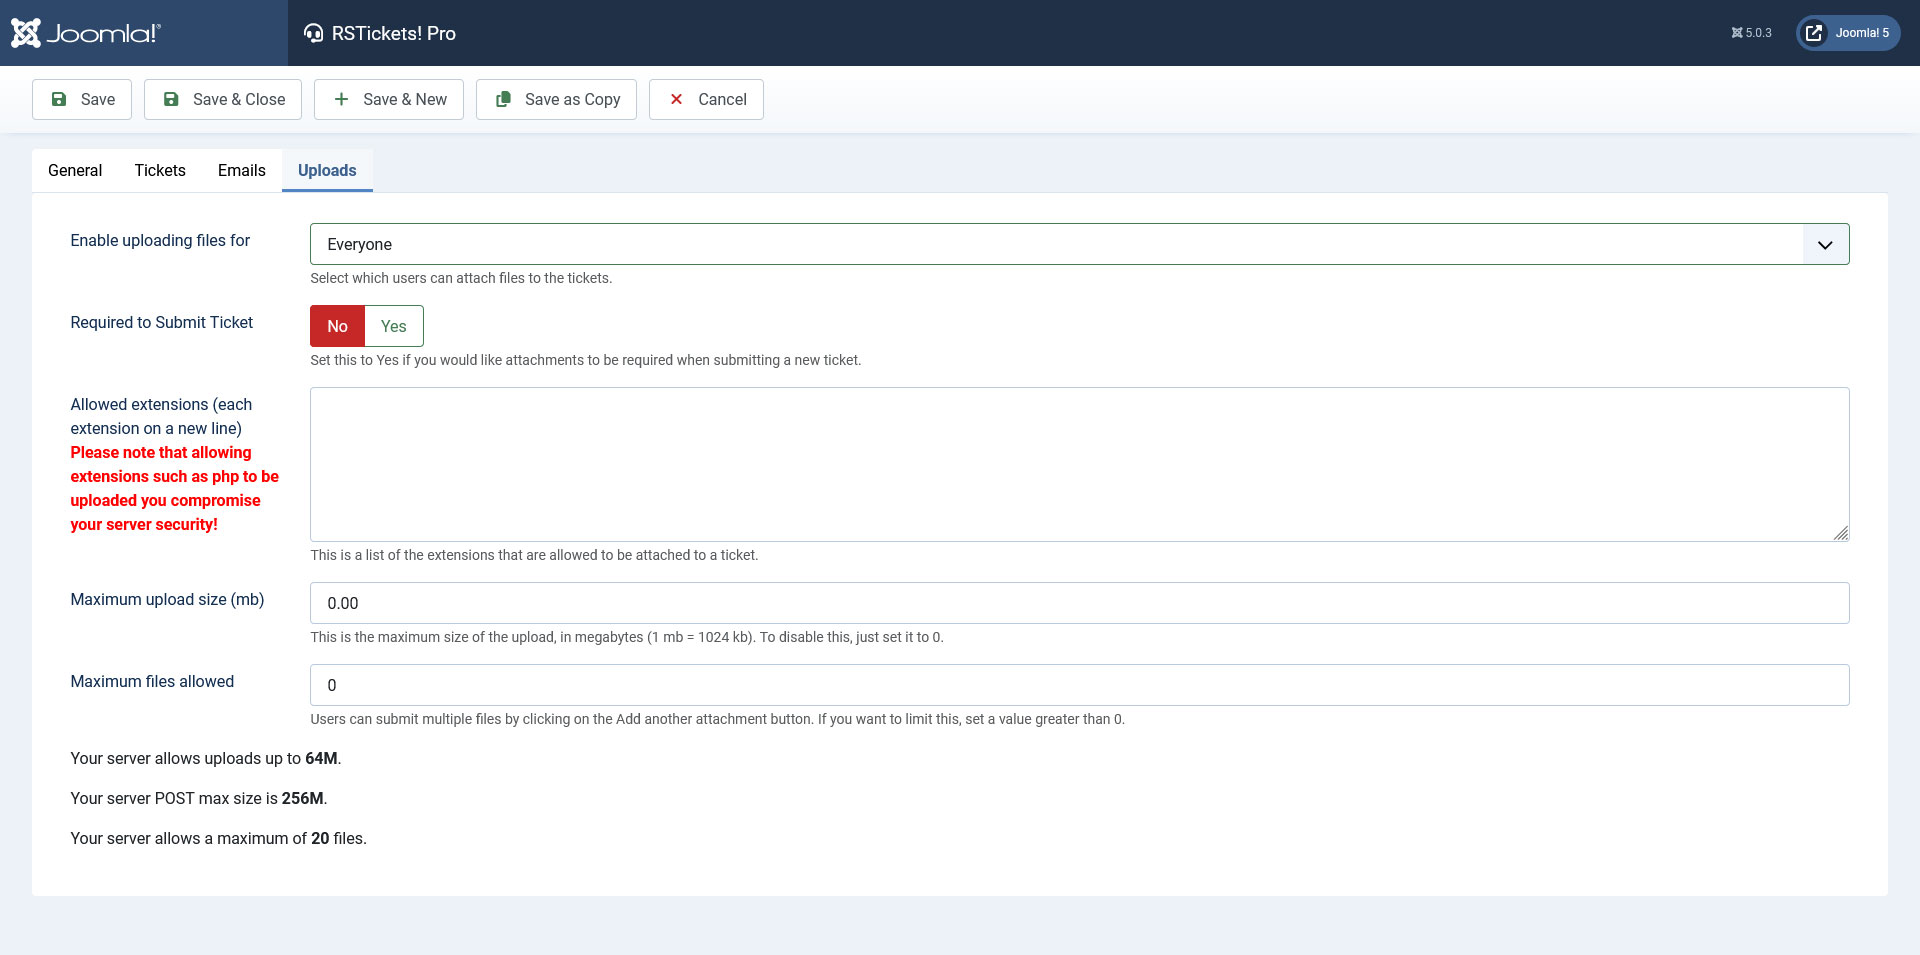
Uploads
Each department can be configured to allow attachments:
- Enable uploading files for: Everyone / Registered users / Nobody - Choose what type of users can upload files.
- Required to Submit Ticket: Yes / No - Set this to Yes if you would like attachments to be required when submitting a new ticket.
- Allowed extensions: each extension on a new line. Please note that allowing extensions such as php to be uploaded you compromise your server security
- Maximum upload size (MB): This is the maximum size of the upload, in megabytes (1 MB = 1024 kb). To disable this, just set it to 0. Information on how your hosting server has upload_max_filesize and post_max_size defined will also be displayed. These will represent the maximum values that you will be able to use.
- Maximum files allowed: Users can submit multiple files by clicking on the Add another attachment button. If you want to limit this, set a value greater than 0. Note that the upload size and maximum uploaded files can also be restricted by your hosting provider. Information on how your hosting server has max_file_uploads defined will also be displayed. This will represent the maximum number of files that your ticket submitters will be able to upload.
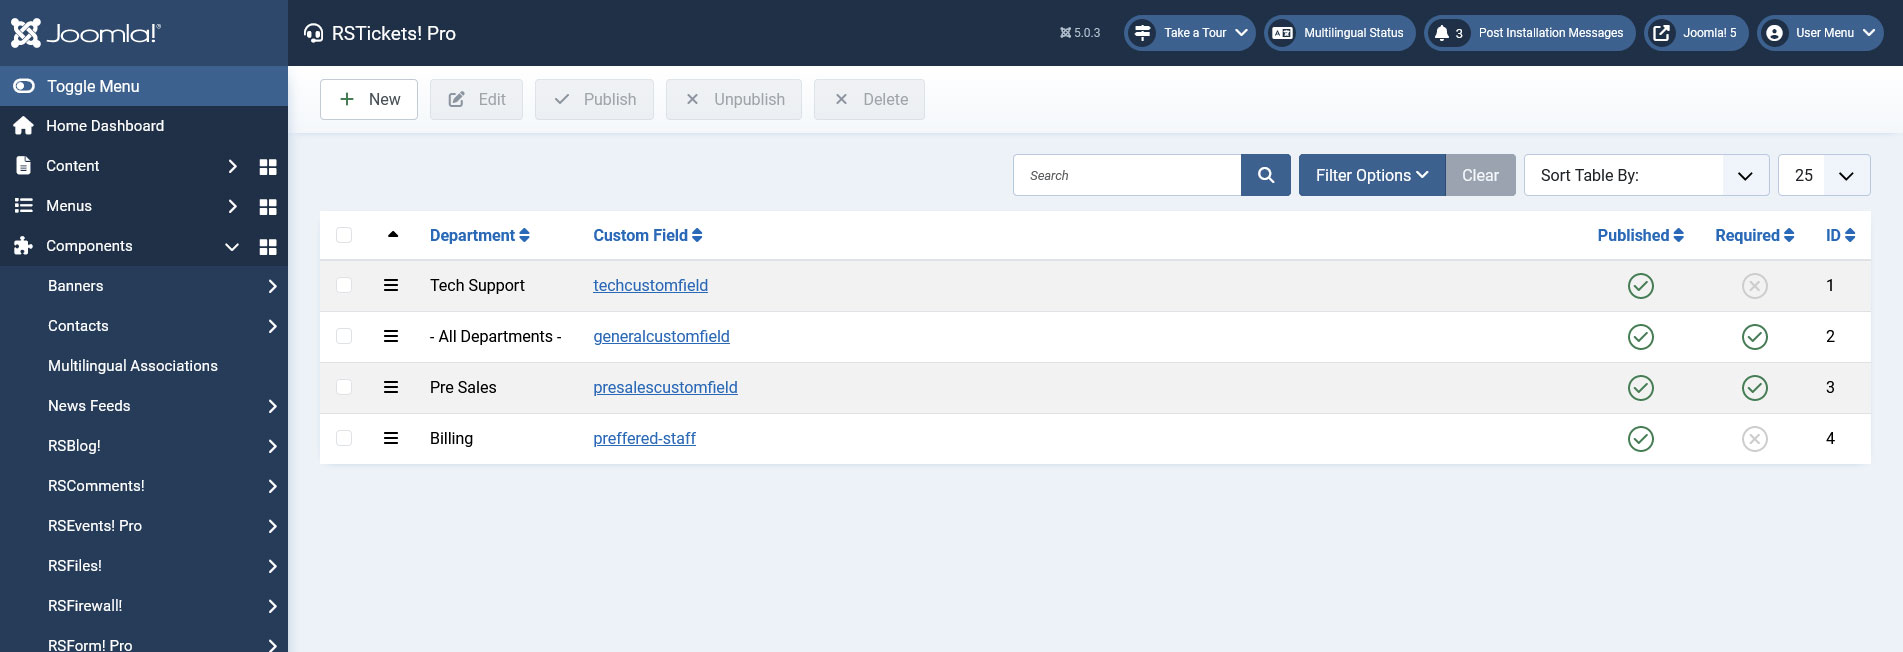
Department Custom Fields
A separate functionality that is associated with the departments listing is Custom Fields. Using this feature you can create custom fields that can be associated with any of your departments, in order to gather information that is specific for your scenario.
Apart from the standard help desk ticketing system fields (subject, message and priority), RSTickets!Pro allows the configuration of additional fields.
This can prove a handy feature since, in order to be able to resolve a ticket some specific department information may be required. Some key improvements have been made from the standard RSTickets! version - like ordering, values, Additional Attributes field and validation messages.
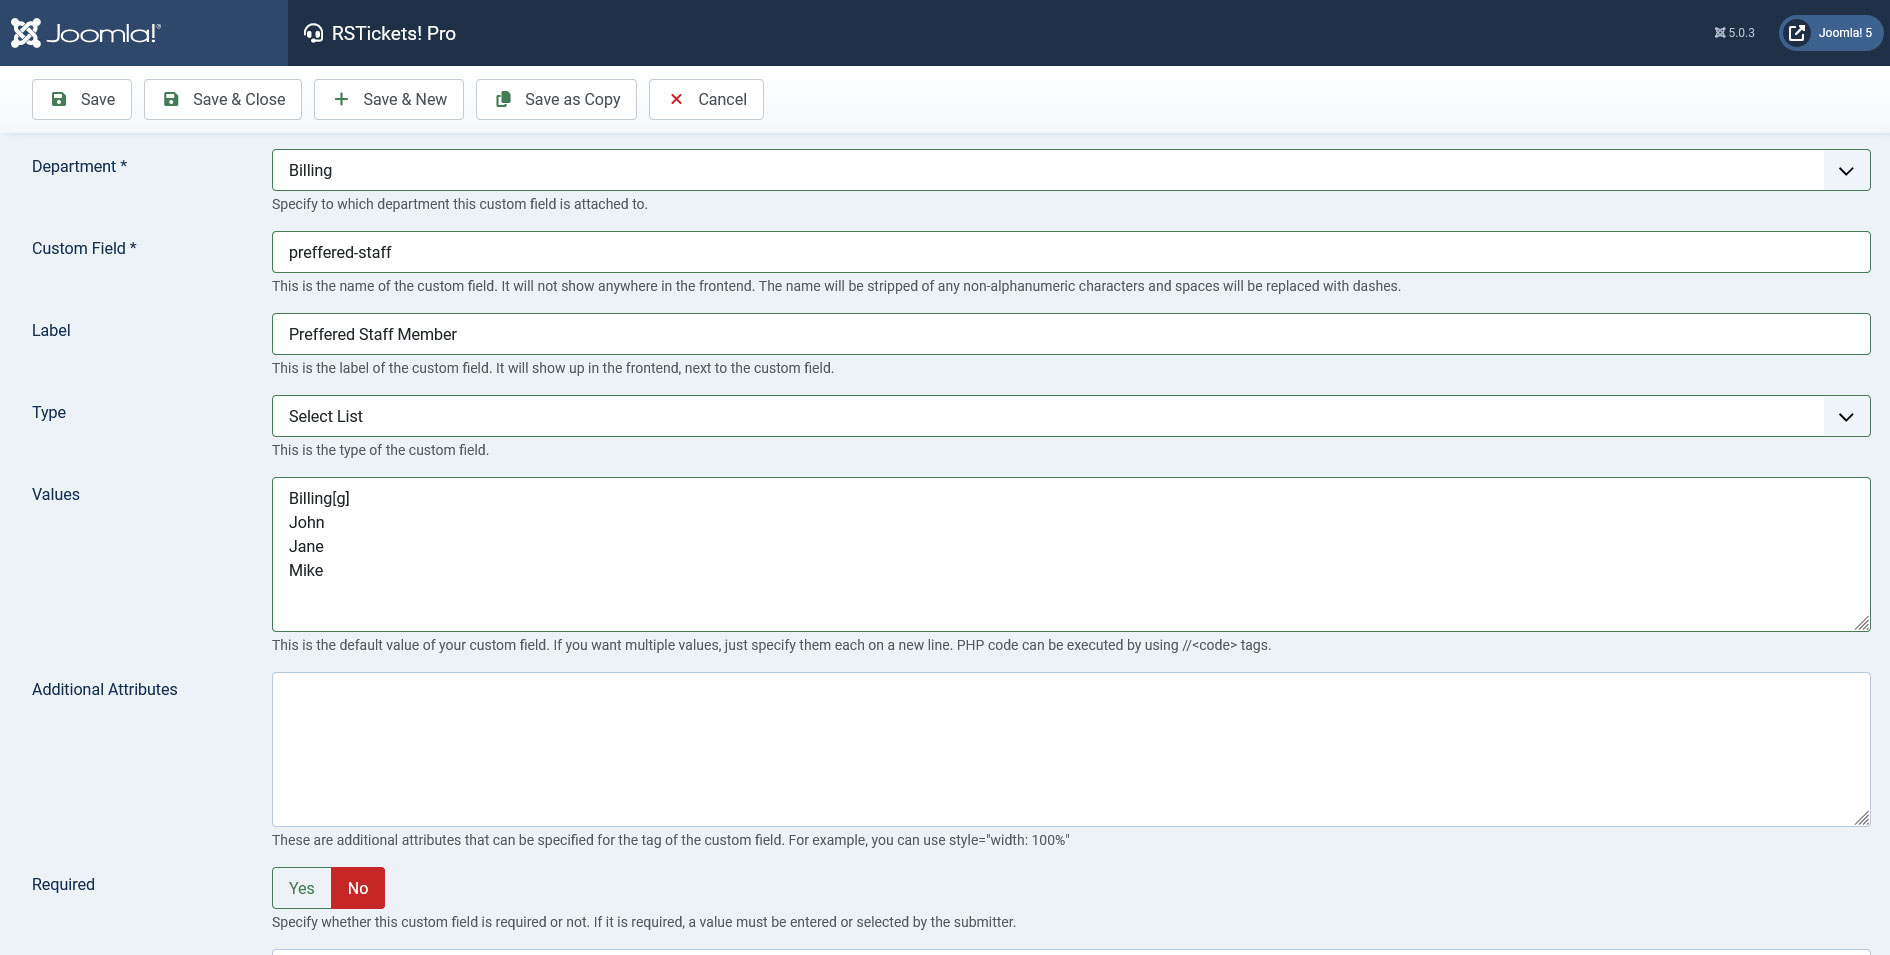
- Department: Select on which department this custom field will be visible.
- Custom Field: the id of the custom field
- Label: the label will be displayed in the front-end ticket submission form
- Type: Custom HTML, Text box, Text Area, Select list, Multiple select list, Checkbox group, Radio group, Calendar, Calendar and Time
- Values: default value, or in the case of radio and checkbox groups - the selectable items. For checkboxes, radio groups and drop-downs, you can use the value|label structure and add [g] at the right side of an item's definition to convert it into an optgroup header as shown in the image to the left.
- Additional Attributes: custom style or JavaScript triggers can be used inside this area
- Required: Yes / No
- Validation Message: in case of field validation, the configured message will be displayed
- Description: This description will appear alongside the custom field
- Published: Yes / No
You can also use scripts in the Custom Fields you have defined for your departments, an example on this topic can be found here.
If you have a multilingual site, RSTickets!Pro will allow you to add labels to your departments so these can be translated. To translate a department name, just open the RSTickets! Pro language file from /languages/ and add the department's name in uppercase. For example: BILLING=Billing translation.
18 persons found this article helpful.
You Should Also Read
Configuration HOT |
Email Messages HOT |
Manage tickets HOT |
RSTickets!Pro Menu Items HOT |
What is RSTickets!Pro ? HOT |