How to enable submission confirmation
1. Enable submission confirmation
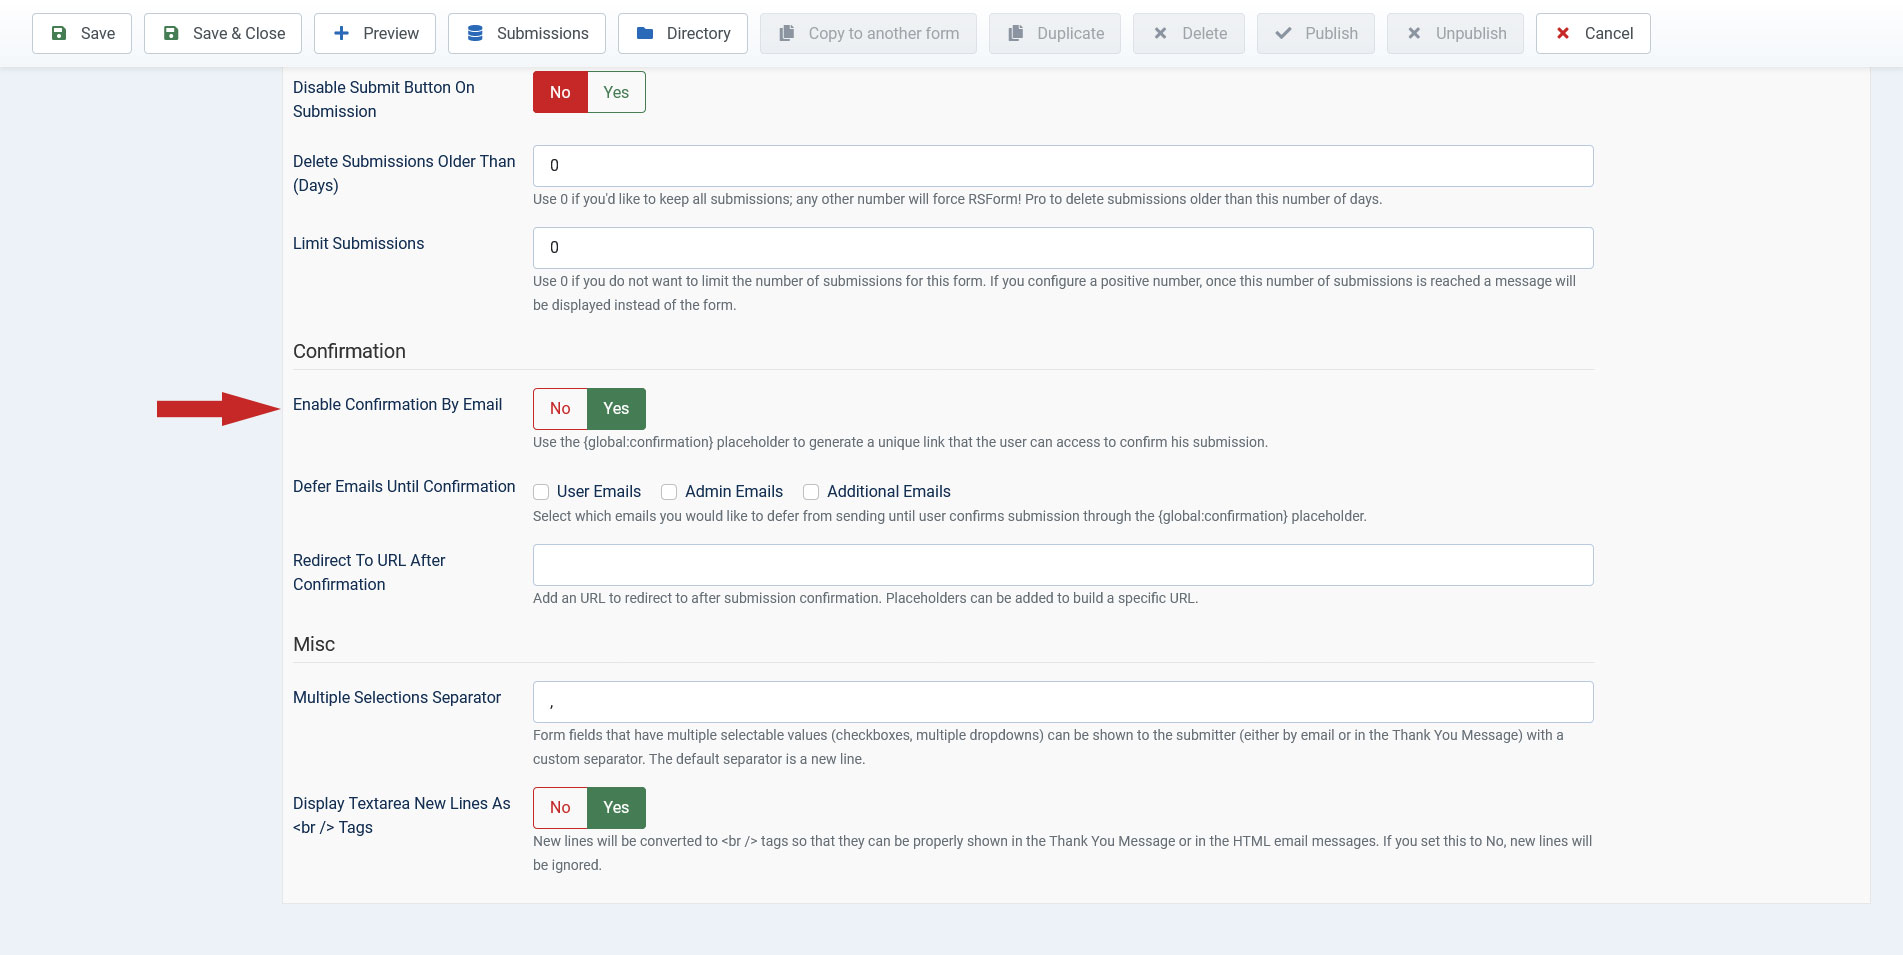
To be able to use this, the submission confirmation needs to be enabled. Head to Components > RSform!Pro > Manage forms > edit the form > Properties > Form Info and set the Enable Confirmation by Email option to Yes.
You can also Defer Emails Until Confirmation by selecting which emails you would like to defer (User Emails / Admin Emails / Additional Emails) from sending until user confirms submission through the {global:confirmation} placeholder.
After the submission is confirmed trough the link received in user email you can redirect it to the specified URL. For example: http://site.com
2. Set up the activation email
The next step is to configure the email that will be delivered to the form submitter. This needs to contain the submission confirmation link. You can practically use any of the RSform!Pro email types (Admin, User, Additional emails) but for consistency we will use the User email. The configuration is actually the same and consists in adding the confirmation URL in the email body. This URL is provided by the following placeholder: {global:confirmation}.
Having the above into consideration, head to Components > RSform!Pro > Manage forms > edit the form > Properties > User emails.
- From: the from email address
- From Name: the name of the sender
- Reply to: the email address that will be used if the receiver replies to the generated email
- To: the email address / placeholder of the submitter
- CC: CC email address
- BCC: BCC email address
- Subject: the subject of the email
- Message: clicking on the Edit email text will open a pop-up window that will allow you to edit the email body. Here you can specify anything you like, including field placeholders. Make sure that you type in the confirmation placeholder: {global:confirmation}
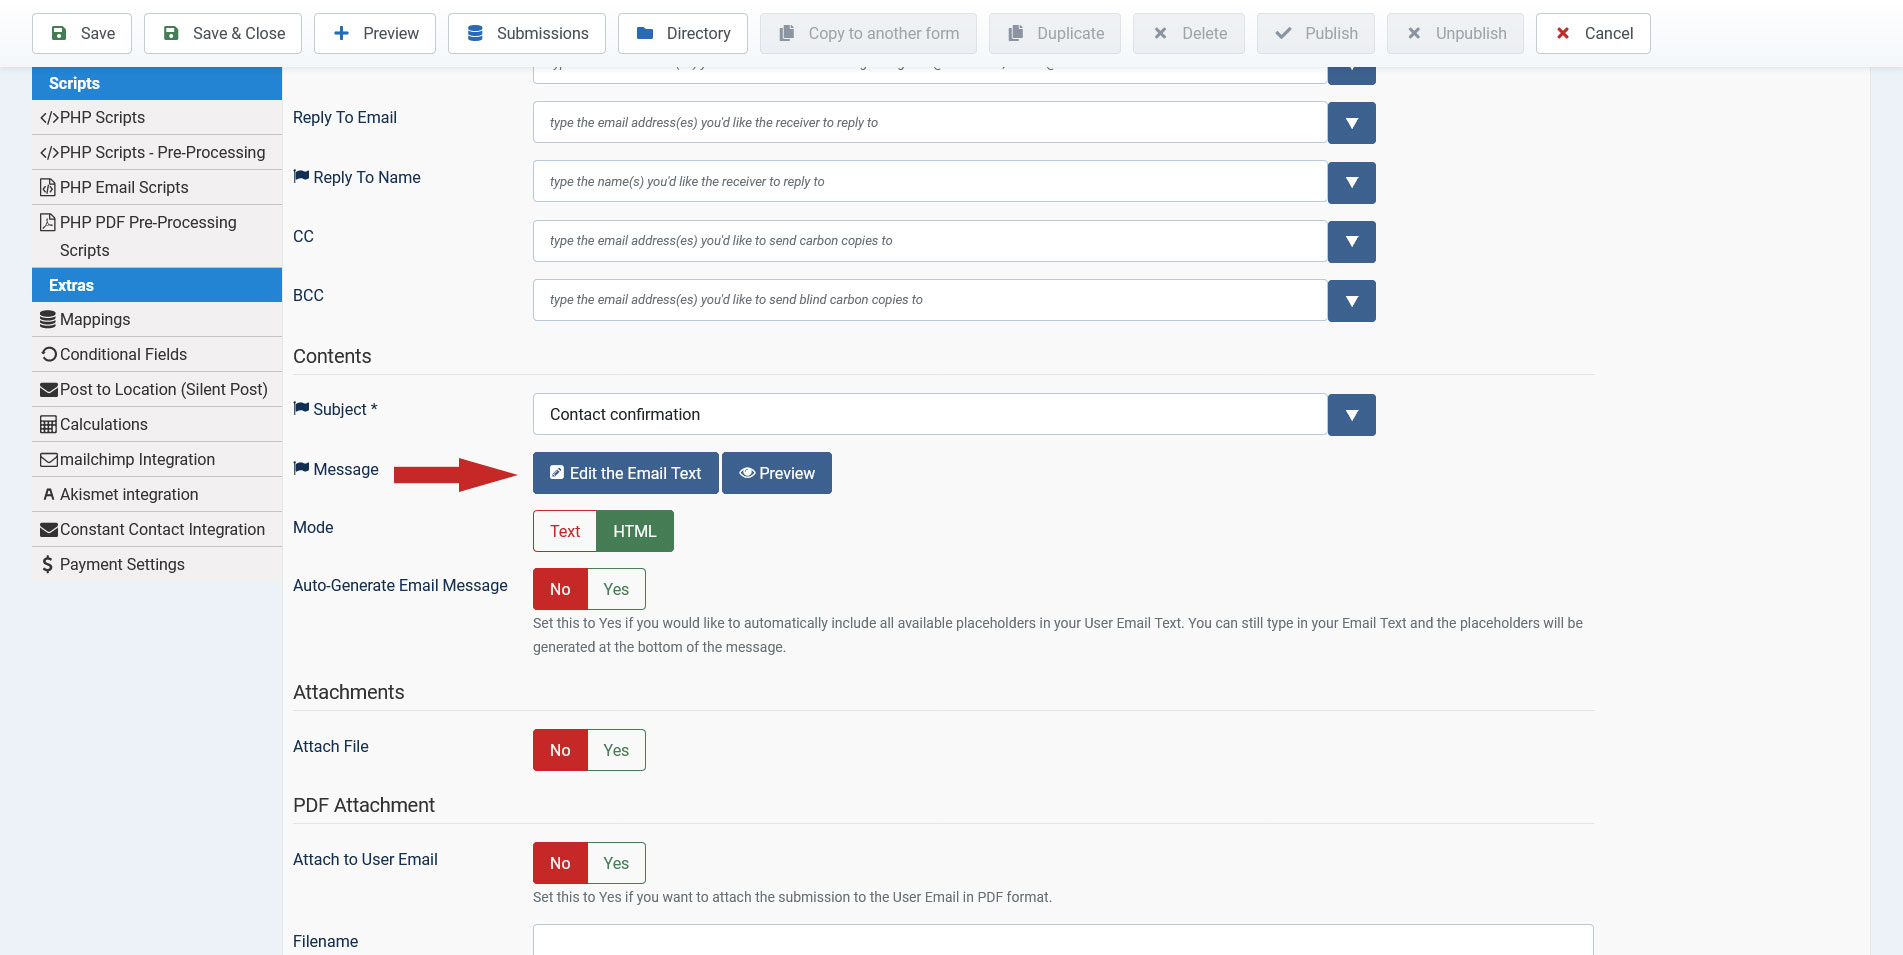
Field placeholder can be displayed upon clicking on the Toggle Quick Add button, located on the right.
From, From name, To, Subject and Message are mandatory fields. In all email configuration areas you can use field placeholders. General syntax:
- {field name:value} - will be replaced with the value filled in by the user during the submission process
- {field name:caption} - will be replaced with the field caption
3. Confirm the submission
Once the user has submitted the form, he will receive an email that contains the activation link. Clicking on it will update a RSform!Pro status field for that particular submission. The status can be displayed within the Manage Submissions area.
Video tutorials
Ep. 73: How to send form submission confirmation in RSForm!ProEp. 51: How to configure the user and the admin email in RSForm!Pro
44 persons found this article helpful.
You Should Also Read
How to add a print button in the View Submissions area HOT |
How to create a delete submission button in Manage directories |
How to modify the submission time stamp format, common format examples |