RSMail! Subscribers
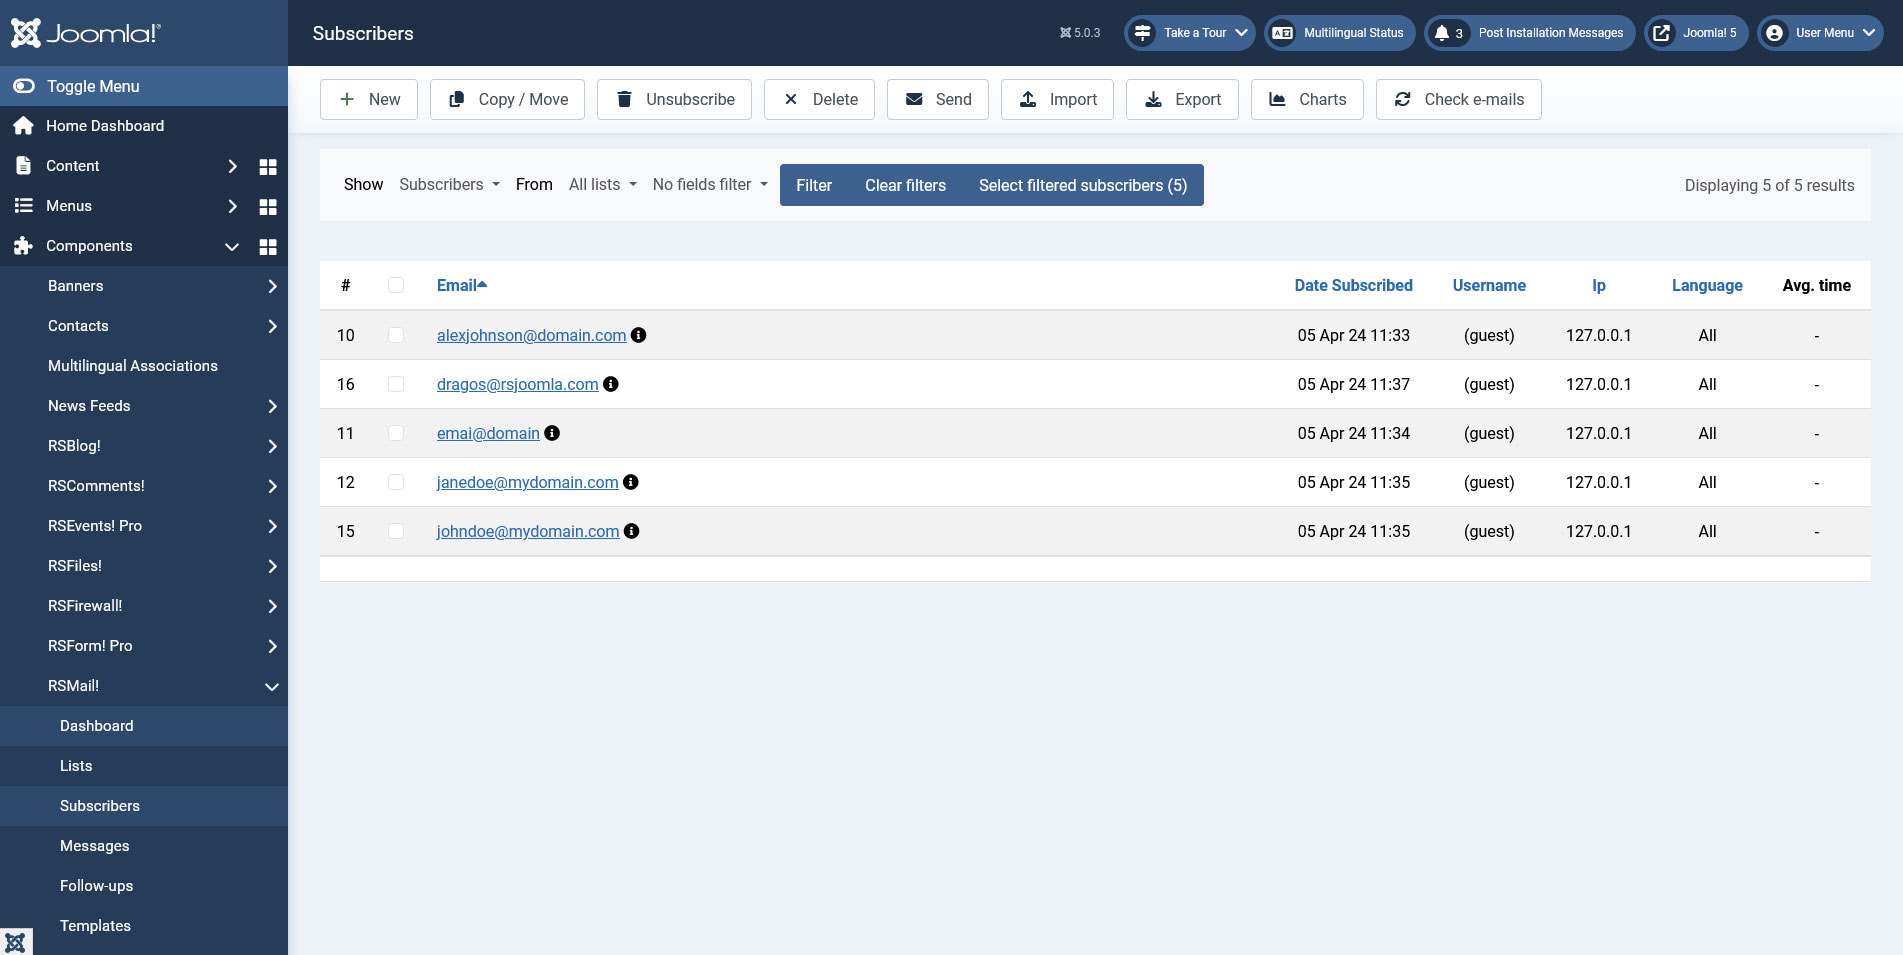
The Subscribers tab offers a general and a list-categorized view of your current subscribers with advanced filtering options. New subscribers can be manually added, imported from a CSV file, subscribed via the RSMail! module, via a RSform!Pro form or directly by filling in the default Joomla Registration form.
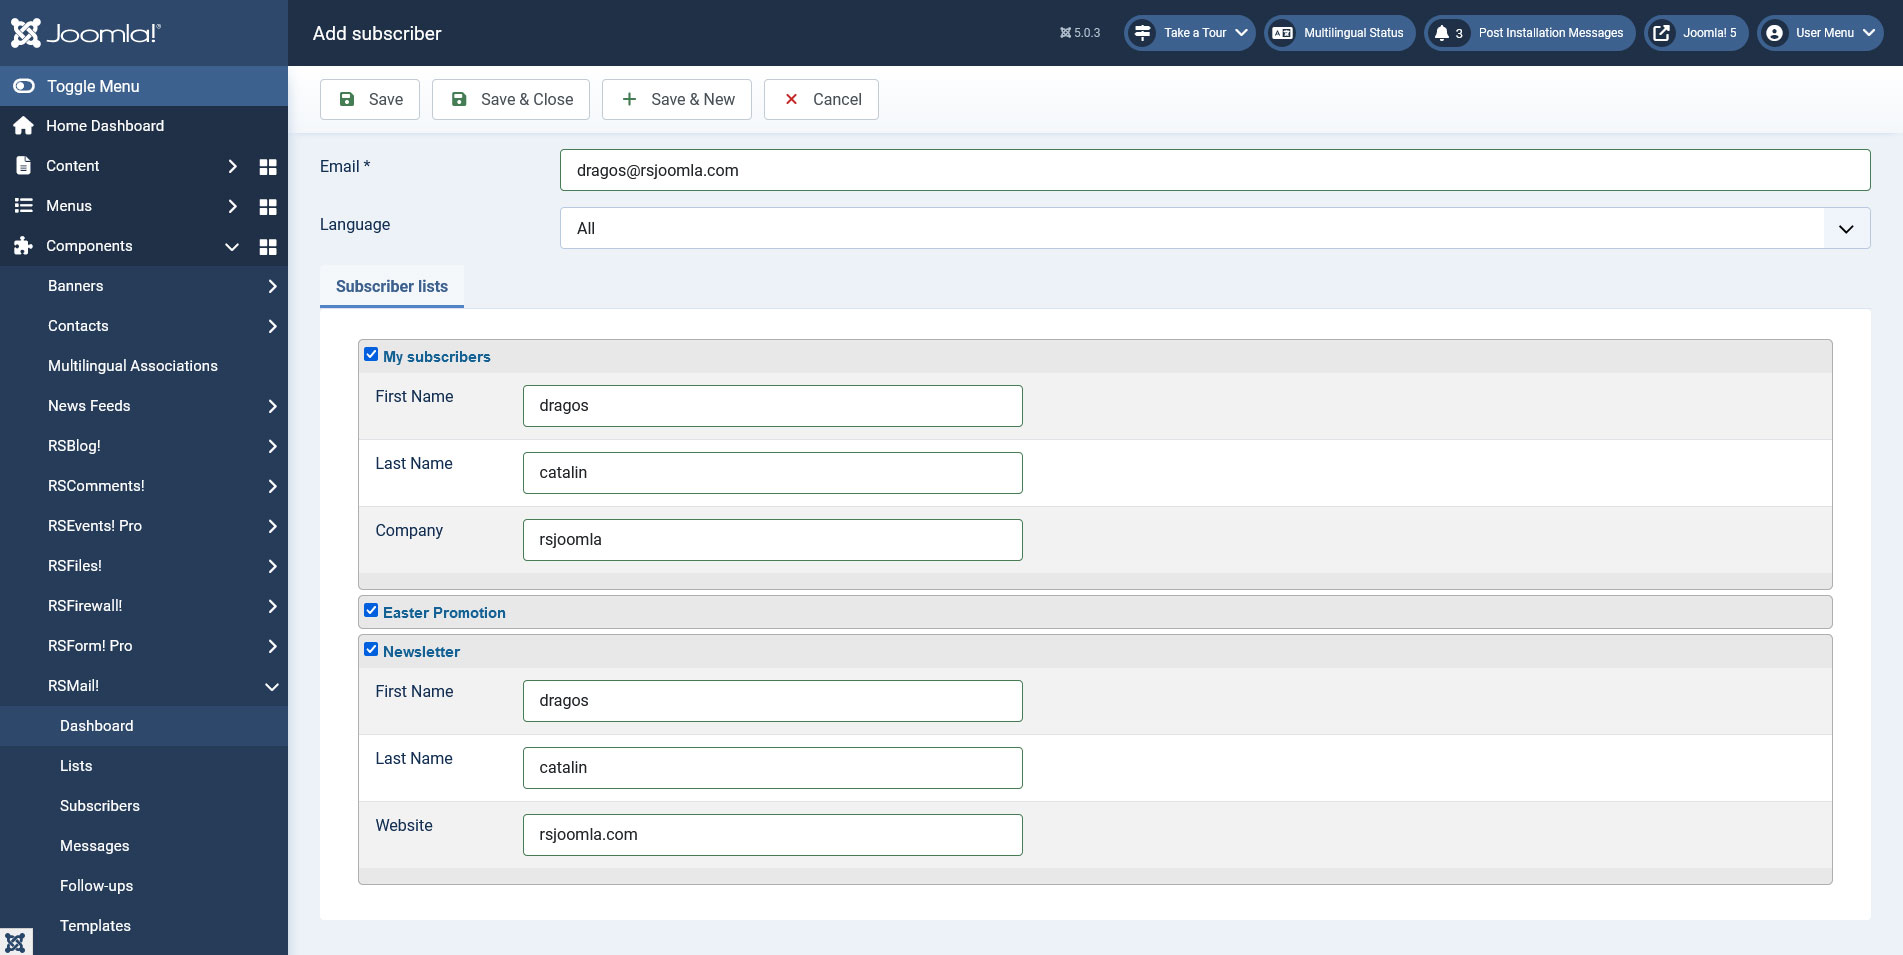
1. Manually adding a subscriber:
- the first step is to add the email
- select the list that you wish to add it (you can then copy the subscriber to other lists) and click Apply.
- upon applying the data the lists additional information will appear to be filled (if necessary).
Tip:
When manually adding/editing a subscriber you can assign it to multiple newsletter lists. Just select the list and type in the list specific information.
2. Importing from within a CSV file:
- select the list you wish to have imported with subscribers
- browse the CSV file and click Import
- a second screen appears that enables you to select what information you need (in case there is more then you need) and where to map it inside the list
- click Import. Depending on the CSV file this may take up to a few minutes.
Video tutorial:
The Subscribers view also offers a simple CSV Exporting feature - just click on the Export and all the subscribers contained in that list will be exported.3. Advanced filtering:
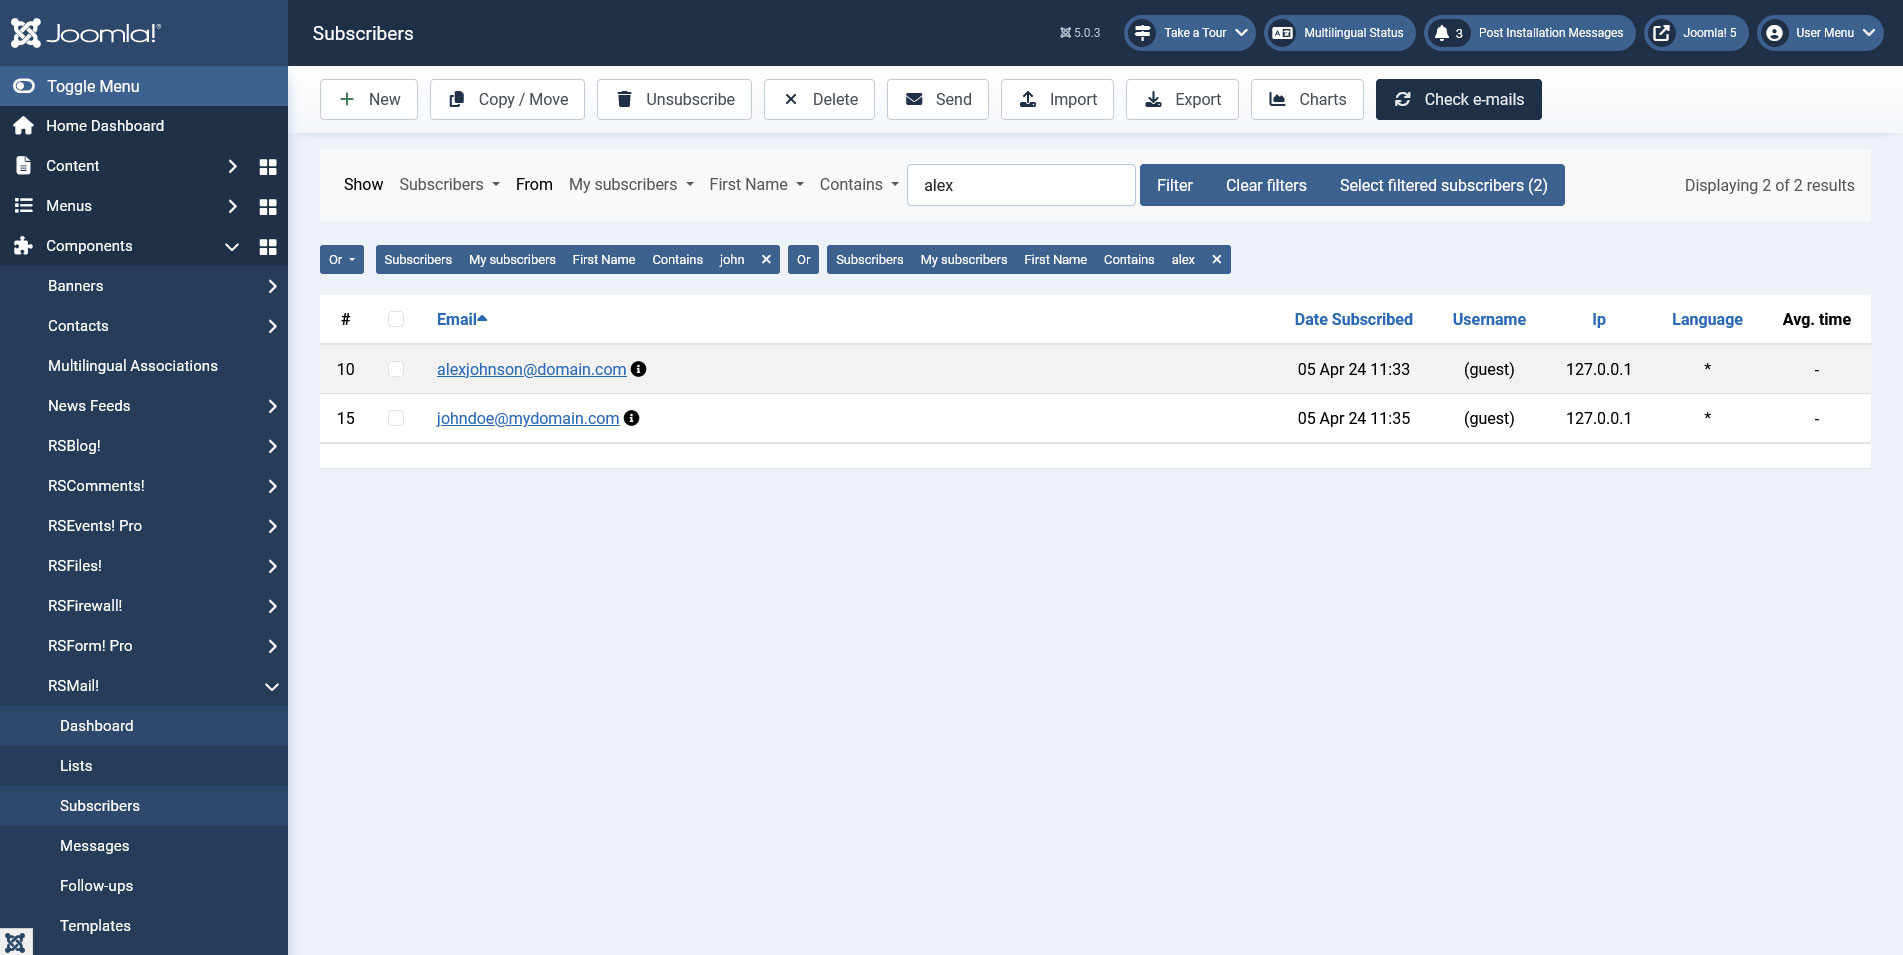
- Logic operators ("And" , "Or") are used for a more strict filtering method using multiple criteria."And" is more restrictive, used to search for results that meet all the selected filters at once, "Or" will display subscribers that meet any of the selected filters.
- You can filter anything with any condition from unsubscribers, subscribers, field that contains/or does not contain certain information.
- The "Select Filtered Subscribers" button is useful for selecting all the results (including the ones that will not show in the first page).
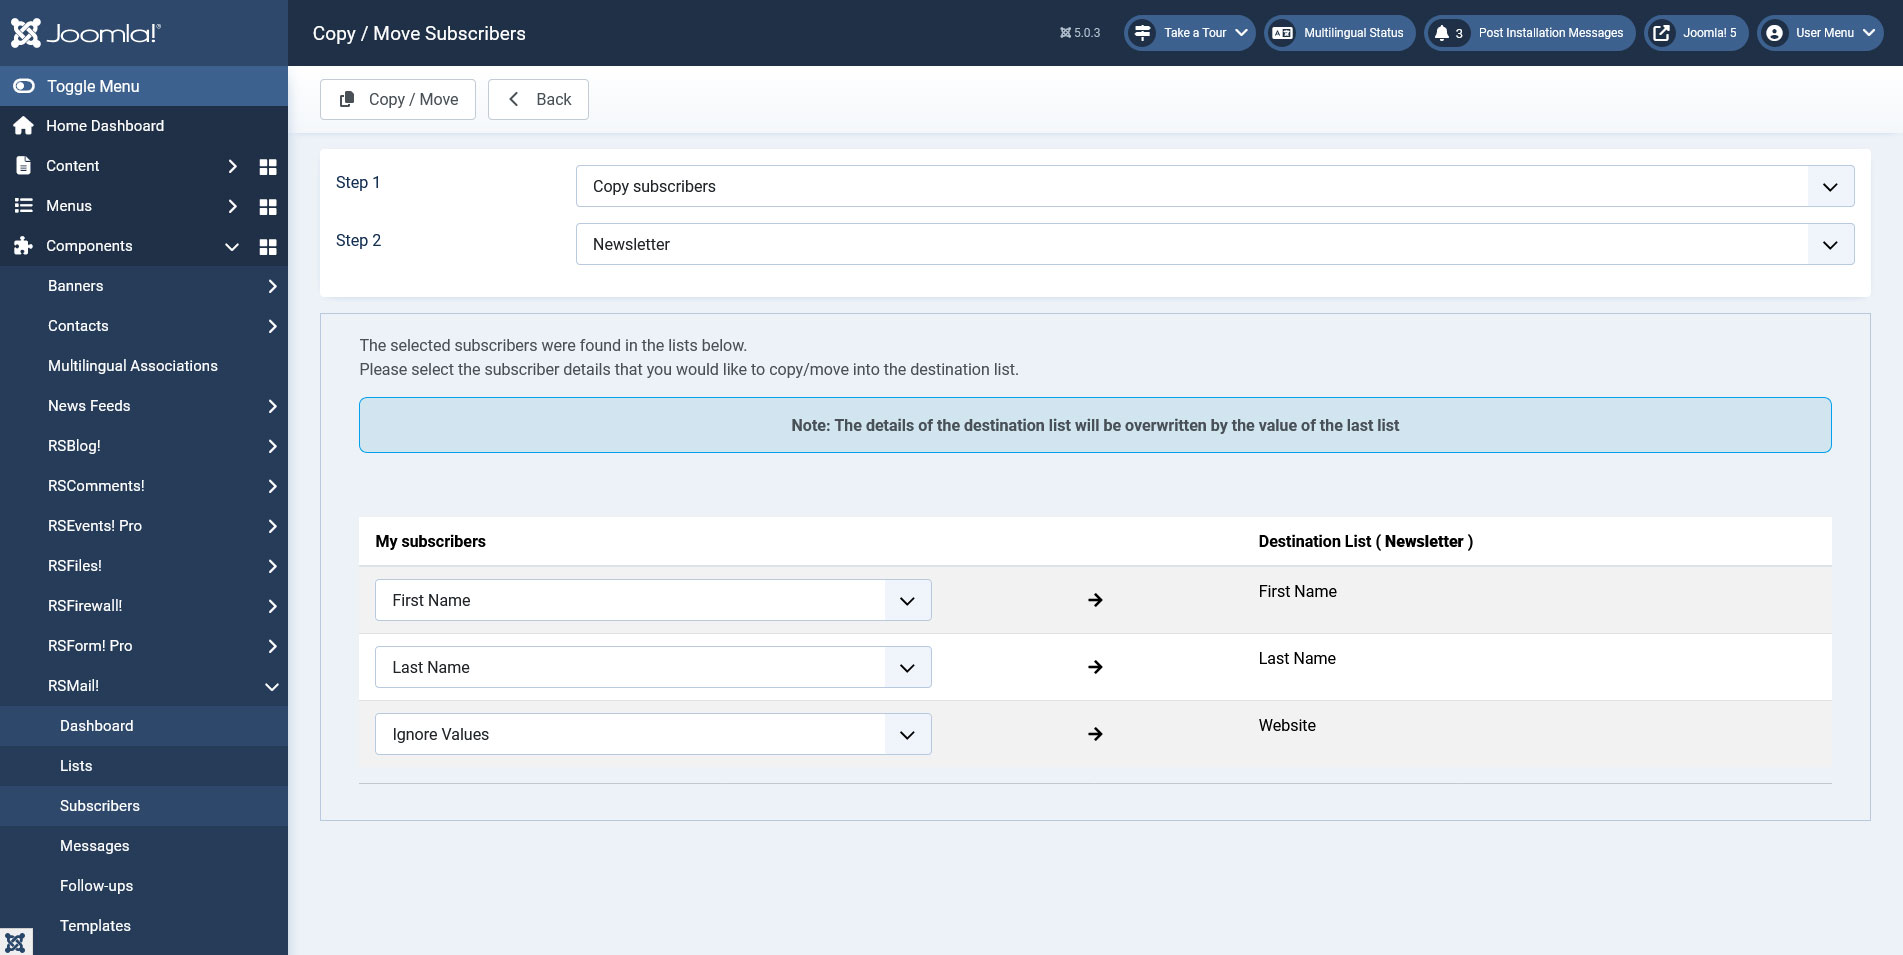
4. Move, copy and delete subscribers:
- Upon filtering, select your subscribers then press the Copy/Move button.
- Select copy or move then the destination list.
- Map the fields that you want to move or copy then click the Save button.
- Deleting subscriber(s), after selecting subscriber(s) press the Delete button, you can then choose which list(s) you want him/them removed from. By default will automatically select the list(s) that is/are part of.
5. Send message to subscriber(s):
- Select subscriber(s) then press the Send button.
- Select the message you want to be sent(you can also use a message template), then press the Send button.
- You can send the message immediately or scheduled by using a cron job.
- When you're done press the Send button again.
6. Check e-mails:
There are cases when upon importing subscribers, some invalid email addresses pass through. This option allows you to check and fix such email addresses:
- Click on the Check e-mails button.
- Afterwards, if there is the case, you will be prompted to a new screen with e-mails that needs to be fixed.
- Select the email address and either fix it or delete it.
- When you're done, you will be redirected to the Subscribers page.
2 persons found this article helpful.
You Should Also Read
RSMail! Messages HOT |
RSMail! Templates HOT |
Subscriber lists |
RSMail! Reports |