Configuration
The RSBlog! Configuration section (accessed through the "Option" button, upper-right corner) allows you to control some general component parameters. To facilitate component management, the configuration area is divided in 10 tabs:
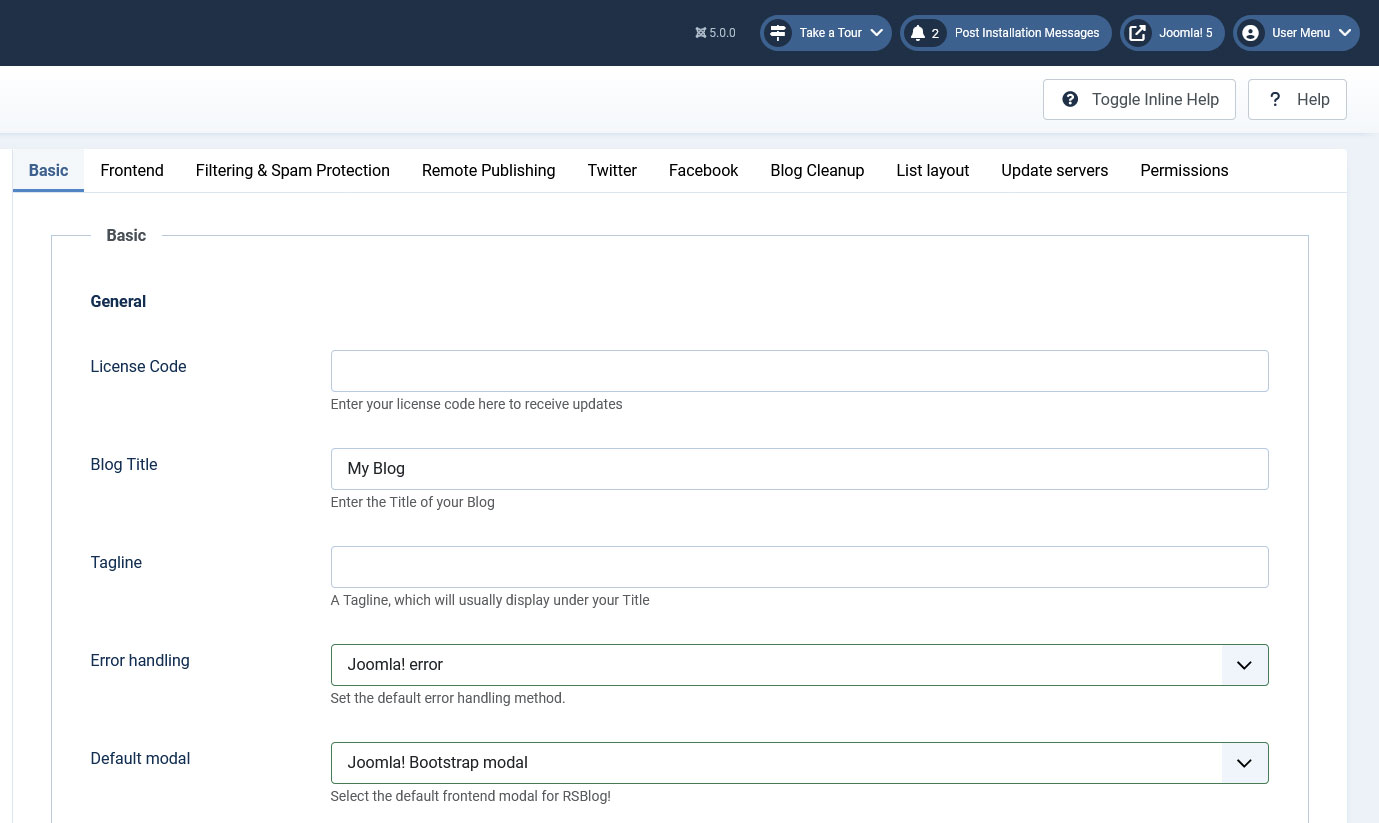
Basic
General
- License Code - the code needed in order to search for updates;
- Blog Title - the title of your blog;
- Tagline - a simple line that is usually displayed under the blog title.
- Error handling - choose the default error handling method. Available options: Redirect / Joomla! error
- Default modal - select the default modal in RSBlog!'s frontend area. Available options: Joomla! Bootstrap v2 modal / Magnific popup
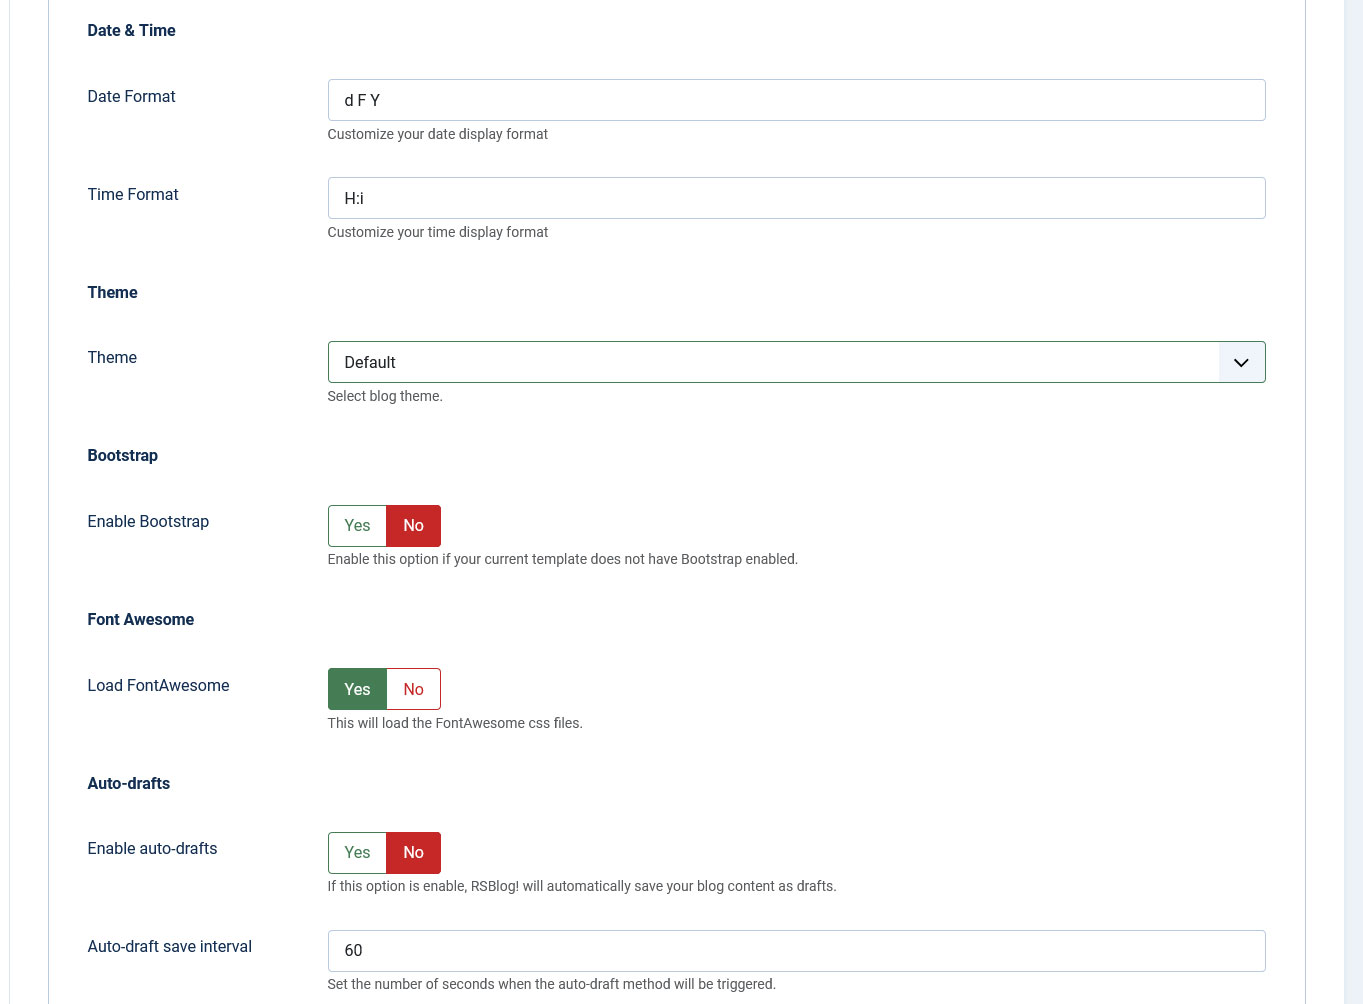
Date & Time
- Date Format - you can enter the format of your date in this field, for example: D d F Y (The component uses the standard PHP date masks);
- Time Format - you can use this field to customize your time format, for example: H:i.
Theme
- Theme - Default / Theme 1-6 - Choose one of the 7 themes available for the Blog View.
Bootstrap
- Enable Boostrap - Yes / No - set to Yes if your template does not include Bootstrap.
Font Awesome
- Load FontAwesome - Yes / No - set to Yes in order to load the FontAwesome CSS files.
Auto-drafts
- Enable auto-drafts - Yes / No - set to Yes om order to automatically save drafts at an interval specified in the field explained below;
- Auto-draft save interval - set the number of seconds after which a draft will be saved automatically.
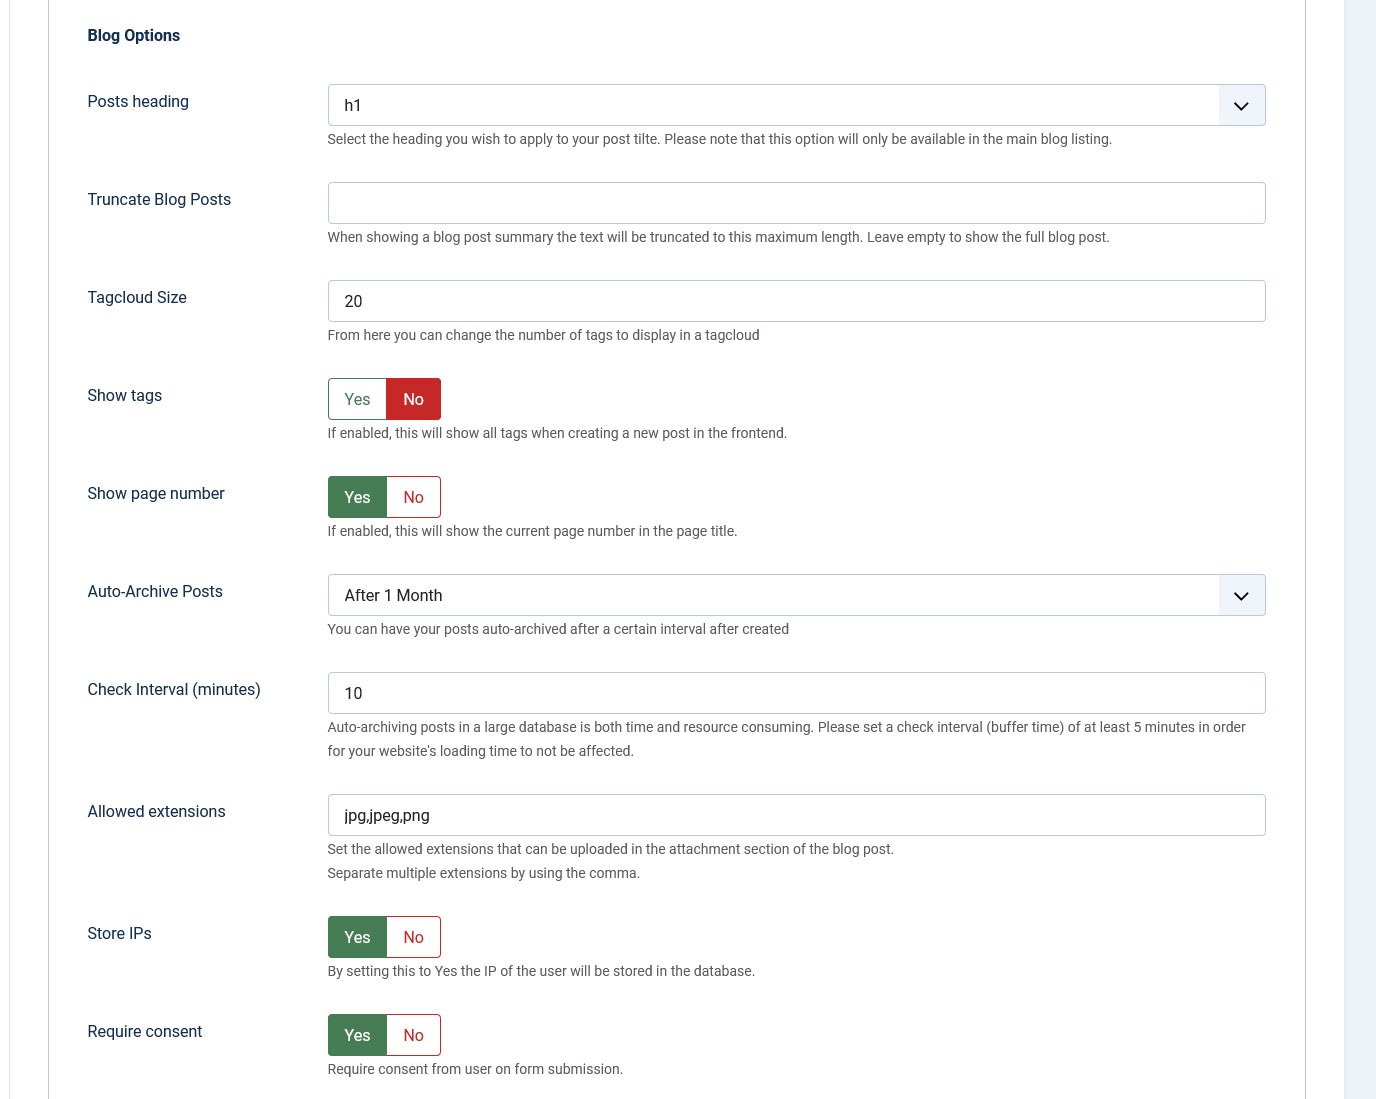
Blog Options
- Posts heading - Select the heading you wish to apply to your post tilte (only be available in the main blog listing);
- Truncate blog post - this option can be used to provide a consistent look to your blog post listings;
- Tagcloud Size - the number of tags that will be displayed within a tagcloud;
- Show tags - Yes / No - Set to Yes in order to display all available tags when adding a post in the frontend;
- Show Page number - Yes / No - Set to Yes in order to display the current page number in the page title
- Auto-Archive Posts - Never Archive / After 1 Week, 2 Weeks, 1 Month, 2 Months, 4 Months - choose the interval after which posts will get automatically archived;
- Check Interval (minutes) - works in conjunction with the Auto-Archive Posts feature explained above. Set an interval, in minutes, after which posts are re-checked for automatic archiving. Setting a small value will result in high resource consumption and will slow down your website.
- Allowed extensions - you can set the allowed extensions that can be uploaded in the attachment section of the blog post. Separate multiple extensions by using comma.
- Store IPs - you can store the user's IP in the database by setting this to Yes
- Require consent - set this to Yes in order to require consent from users on form submission.
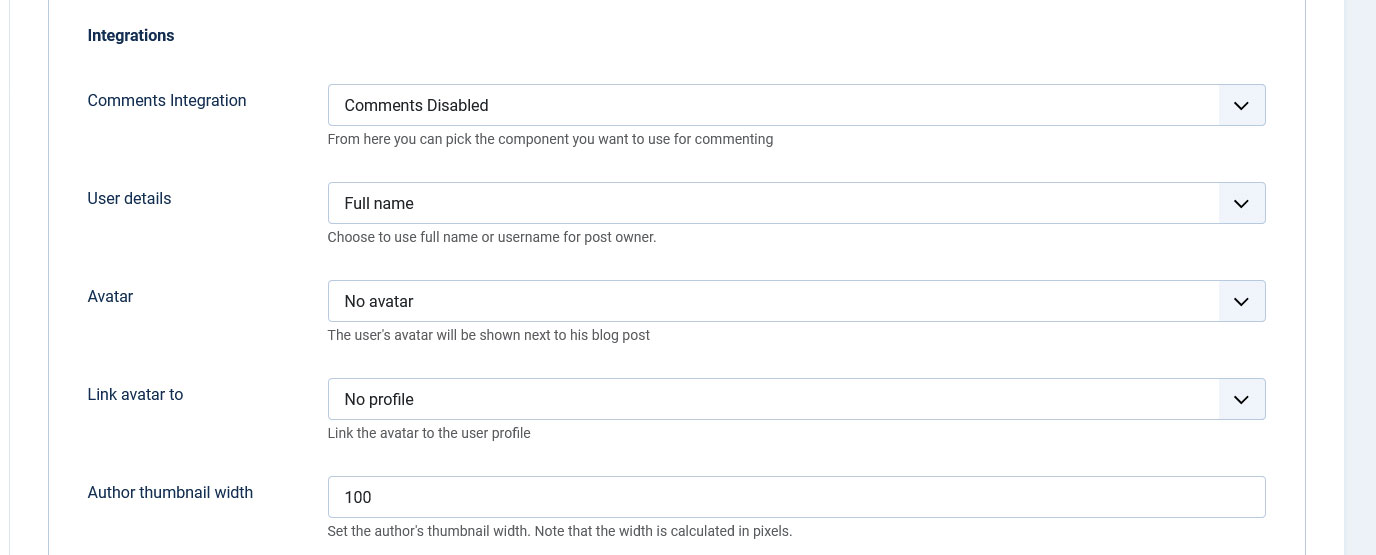
Integrations
- Comments Integration - select the commenting system you want to use for your blog. By default RSBlog! integerates with RSComments!, Facebook comments, Disqus, jComments and JomComment;
- User Details - you can choose what user information you will display for the post owner;
- Avatar - the user's avatar will be posted next to his blog post. This can be automatically imported from the following components or services: Gravatar, Community Builder, JomSocial, Fireboard, Kunena;
- Link avatar to - if existing, the avatar image can be linked to Community Builder or JomSocial profiles;
- Author thumbnail width - Set the author's thumbnail width, in pixels.
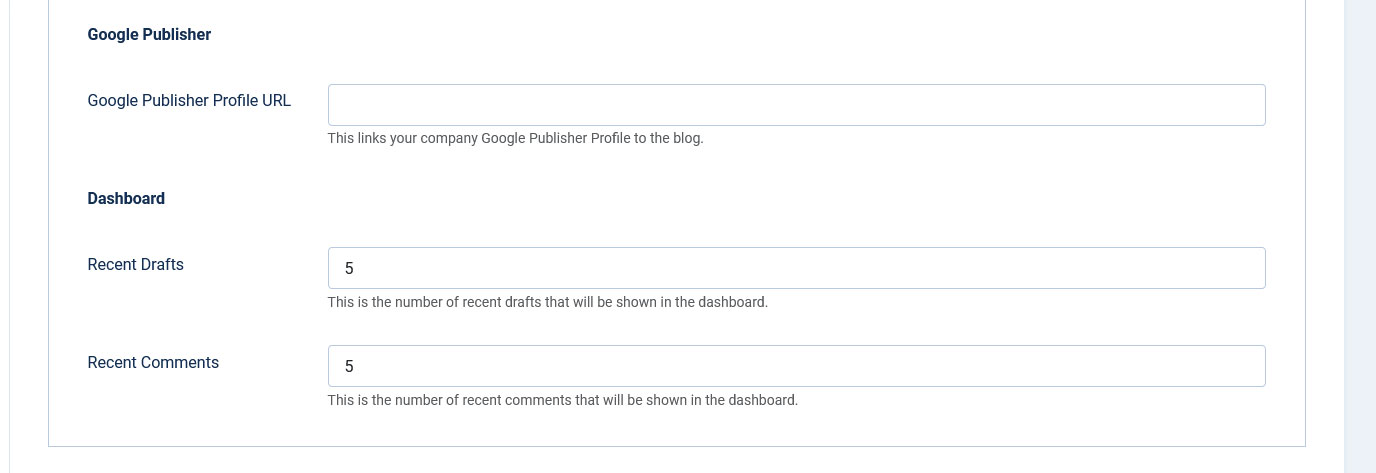
Google Publisher
- Google Publisher Profile URL - provide the link to your Google Publisher profile.
Dashboard
- Recent Drafts - the number of recent drafts that will be displayed in the dashboard;
- Recent Comments - the number of recent comments that will be displayed in the dashboard.
Frontend
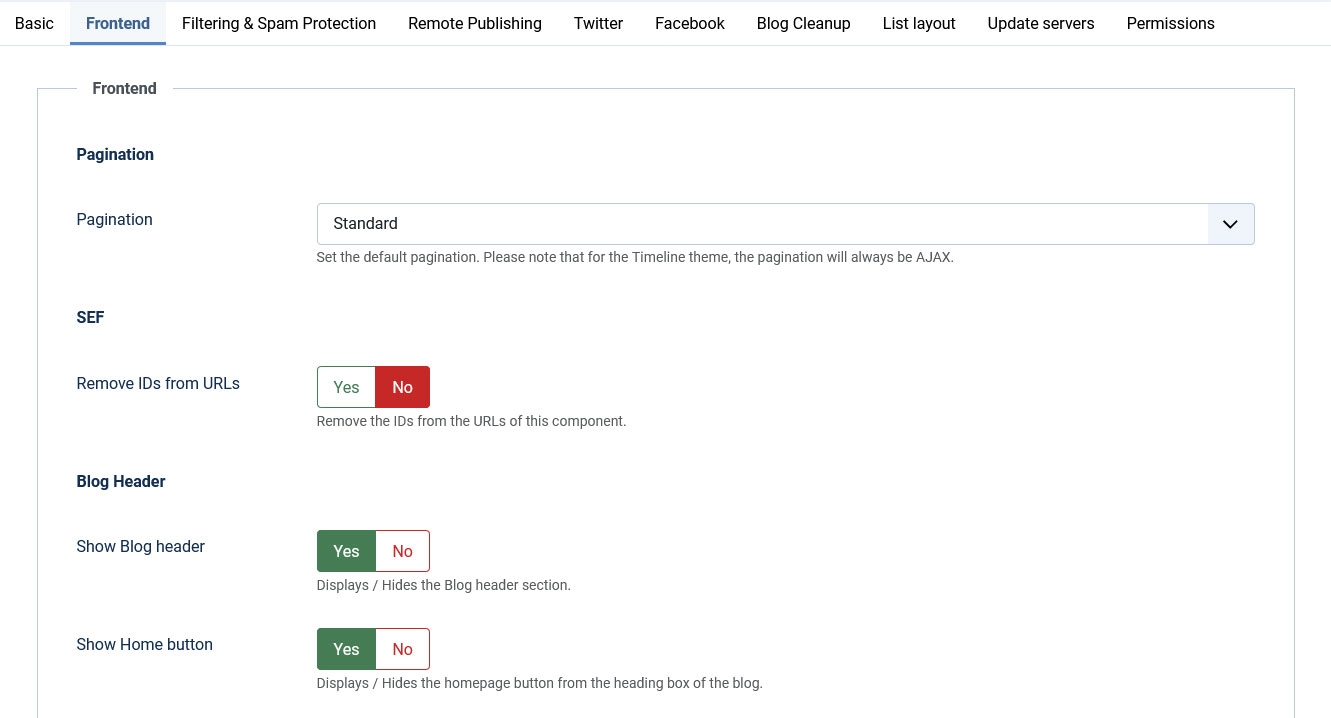
Pagination
- Pagination: Set the default pagination. Available options: Standard / Ajax. For the Timeline theme, the pagination will always be AJAX.
SEF
- Remove IDs from URLs - Yes/No; - Remove the IDs from the URLs of this component.
Blog Header
- Show Blog header - Yes/No; - Displays/Hides the Blog header section.
- Show Home button - Yes/No; - Displays/Hides the homepage button from the heading box of the blog.
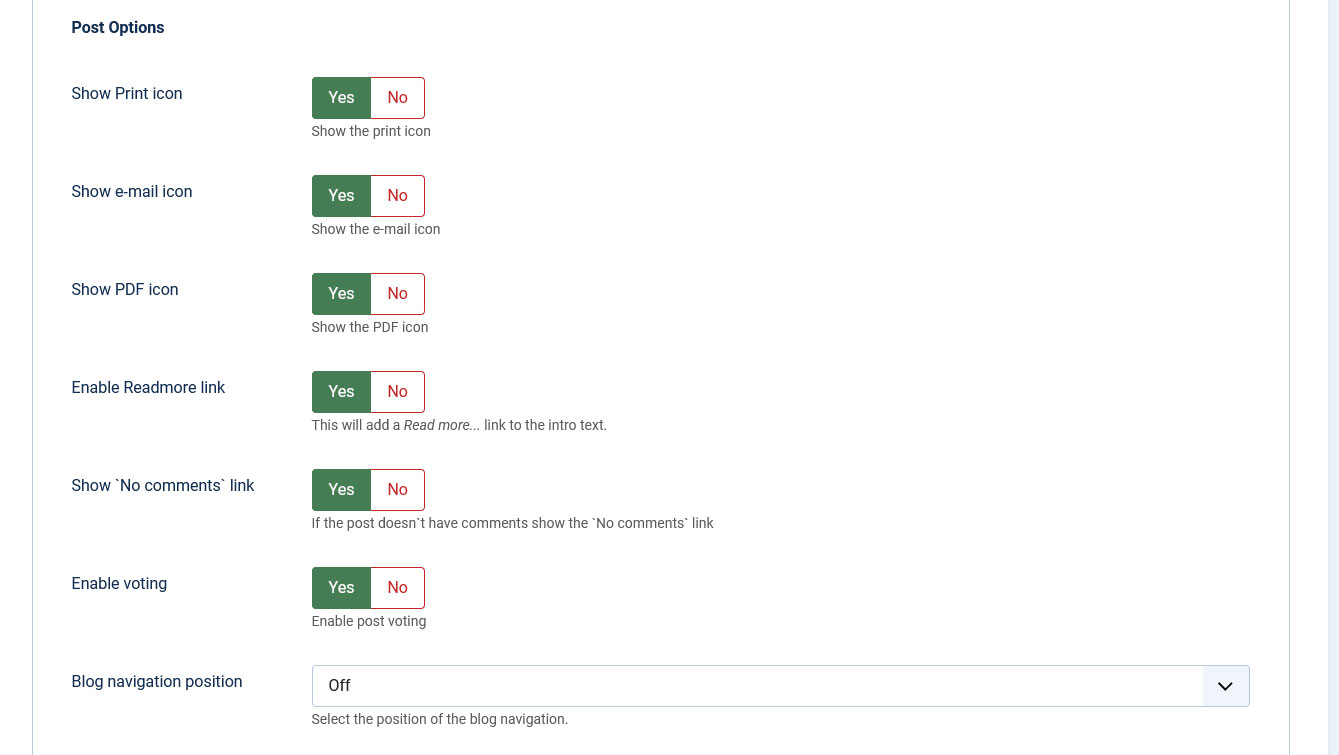
Post Options
- Show Print icon - Yes/No;
- Show e-mail icon - Yes/No;
- Show PDF icon - Yes/No;
- Enable Readmore link - this option will add a read more link to your intro text;
- Show `No comments` link - If no comments are available for a particular post, then the comments link can be disabled;
- Enable voting - If enabled, blog posts can be rated (1/5 star system);
- Blog navigation position - Off / Up / Down / Up and Down. If enabled some navigation buttons will appear when viewing the post details page.
Reports
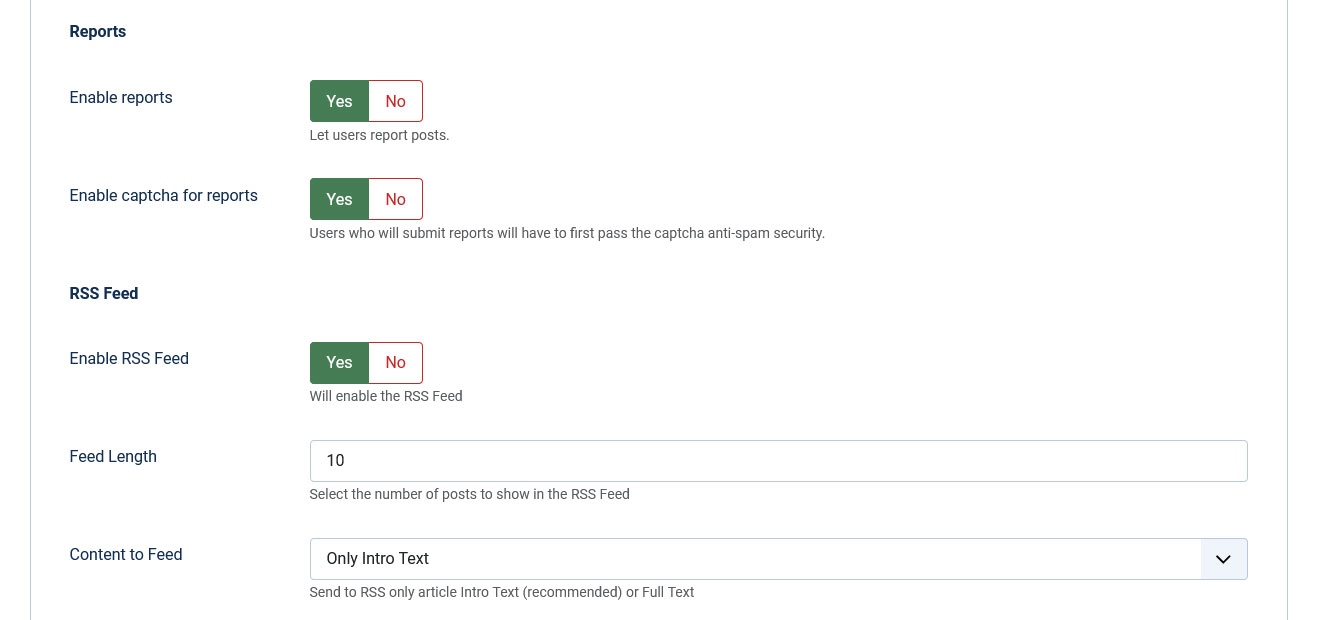
- Enable reports - Yes/No; allows users to report blog posts.
- Enable captcha for reports - Yes/No; users who submit reports will have to pass captcha security.
RSS Feed
- Enable RSS Feed - Yes/No;
- Feed Length - select the number of posts that will be displayed in the RSS Feed;
- Content to Feed - you can choose the send the full text of the post or only the intro to your RSS.
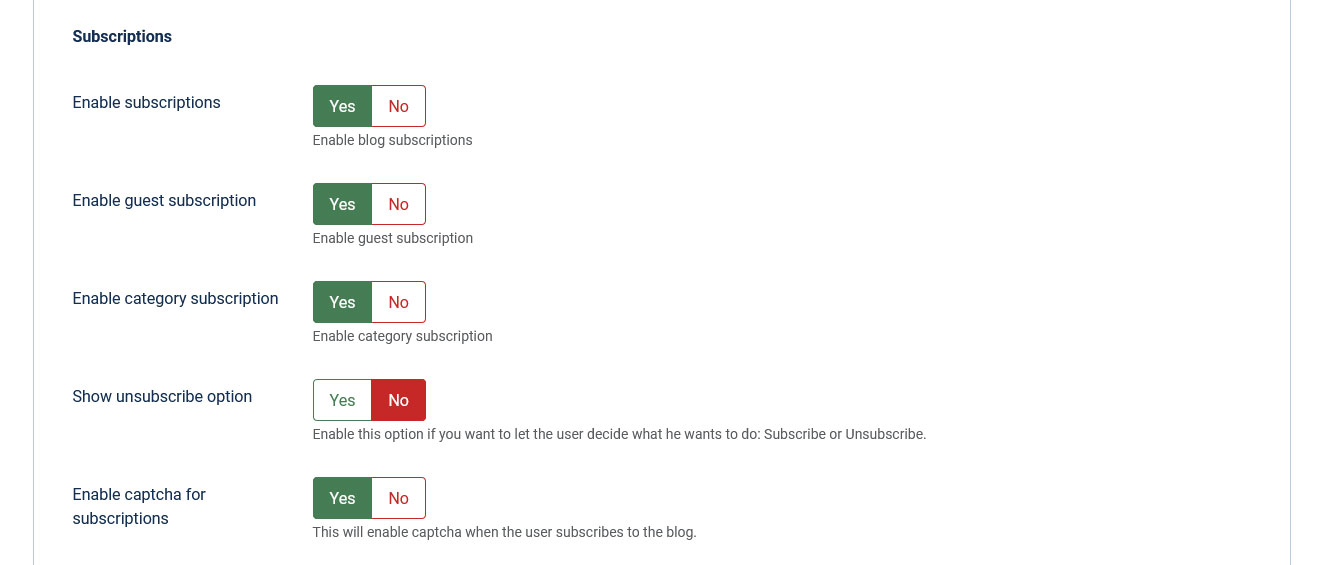
Subscriptions
- Enable subscriptions - Yes/No; RSBlog! allows users to subscribe to your blog, in order to be notified when a new post is added to your blog;
- Enable guest subscription - Yes/No; allows a non-registered user to subscribe to your blog posts;
- Enable category subscription - Yes/No; allows users to subscribe to a certain blog category;
- Show unsubscribe option - Yes/No; allows users to unsubscribe from the blog's front-end
- Enable captcha for subscriptions - Yes/No; users have to pass the captcha security before subscribing to the blog
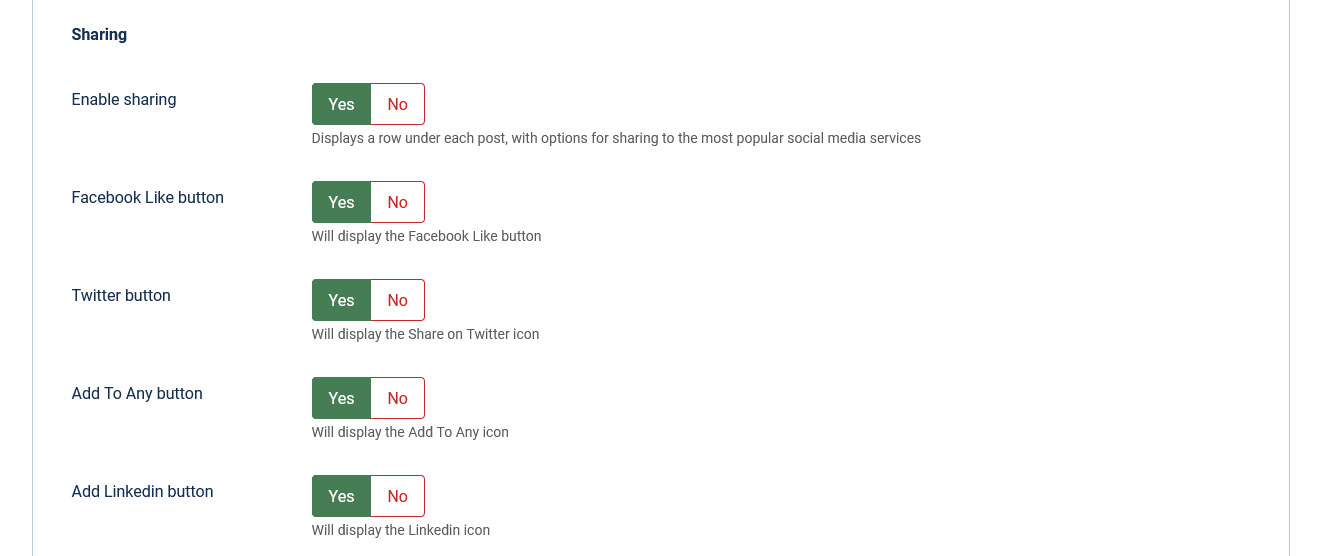
Sharing
- Enable sharing - Yes/No: enabling this option will allow you to share your post to the most popular social media services;
- Facebook Like - Yes/No: will display the Facebook like button (Facebook sharing feature is also added within this button)
- Twitter - Yes/No: will display the Twitter share icon;
- Add To Any - will display an Add to Any icon.
- Add to LinkedIn - Yes/No: will display a LinkedIn share button
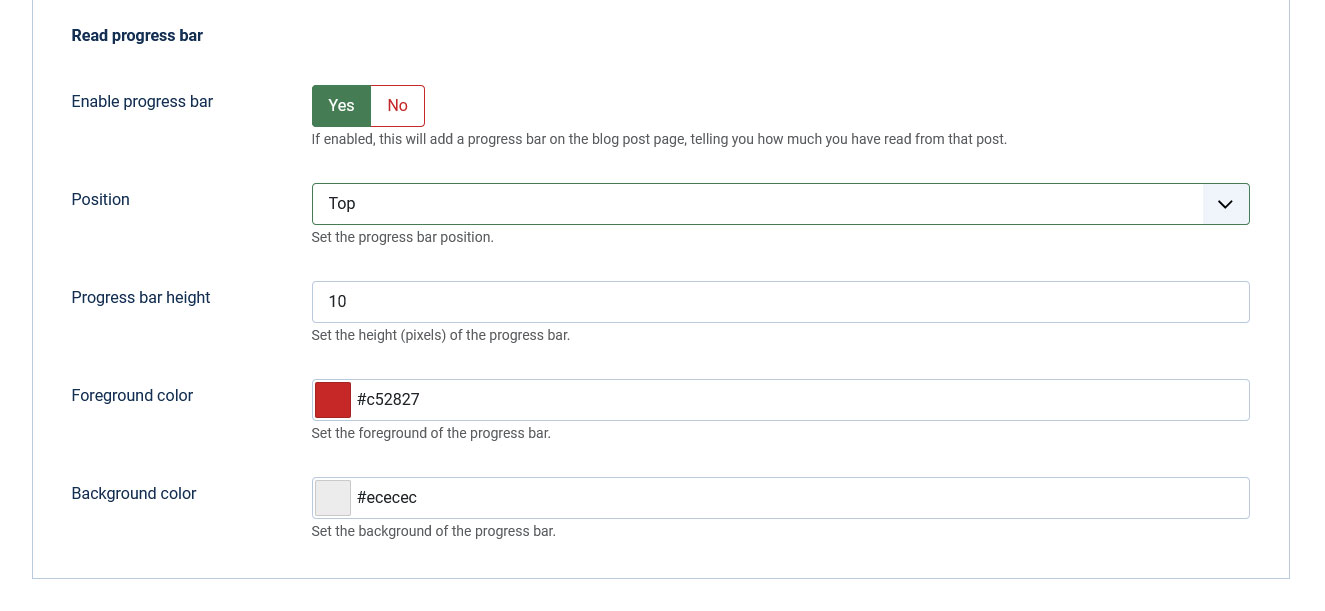
Read progress bar
- Enable progress bar - Yes/No: If enabled, this will add a progress bar on the blog post page, telling you how much you have read from that post.
- Position - Top/Bottom: Set the progress bar position;
- Progress bar height - Set the height (pixels) of the progress bar;
- Foreground color - Set the foreground of the progress bar;
- Background color - Set the foreground of the progress bar.
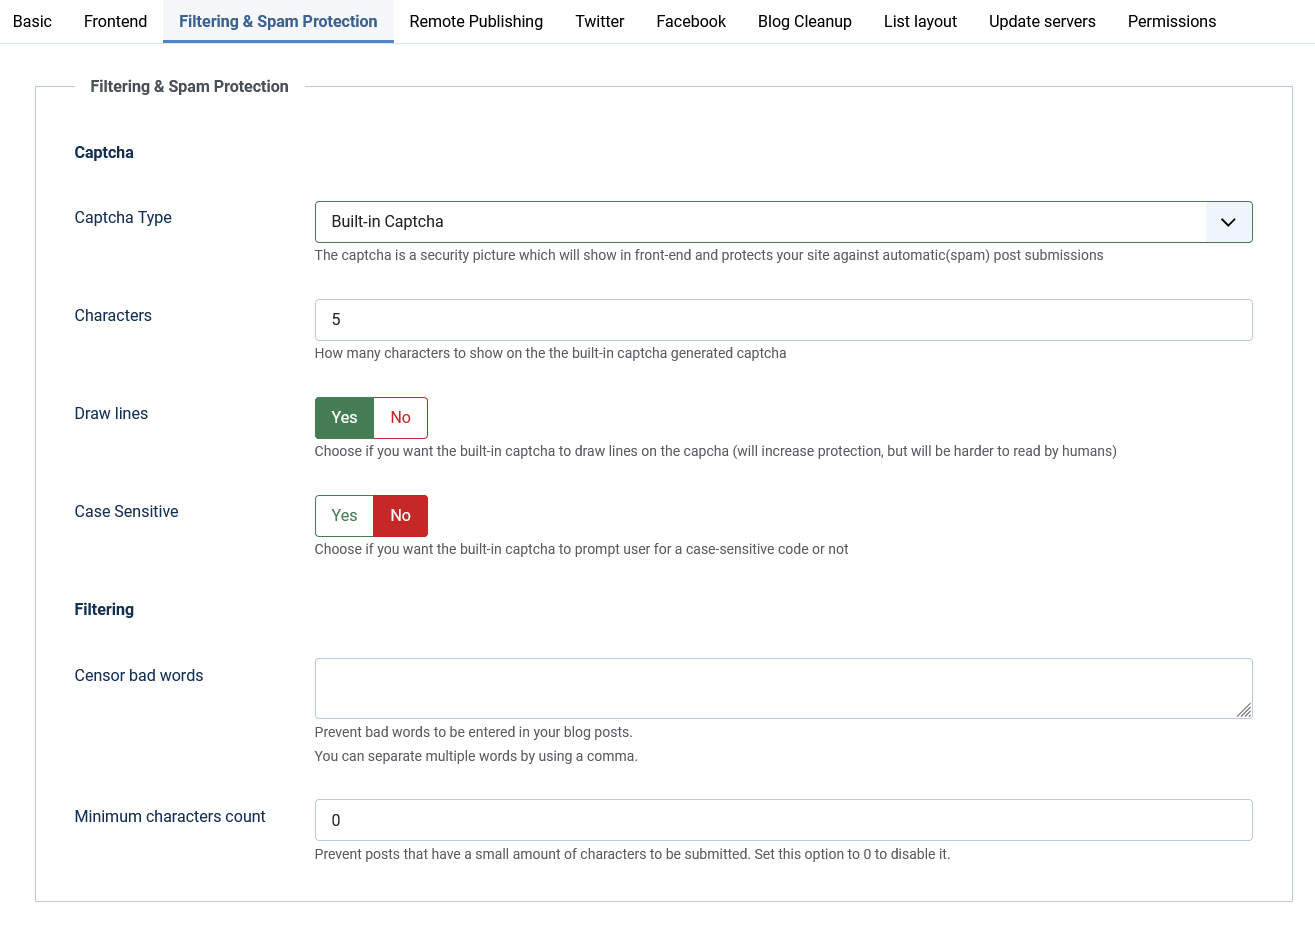
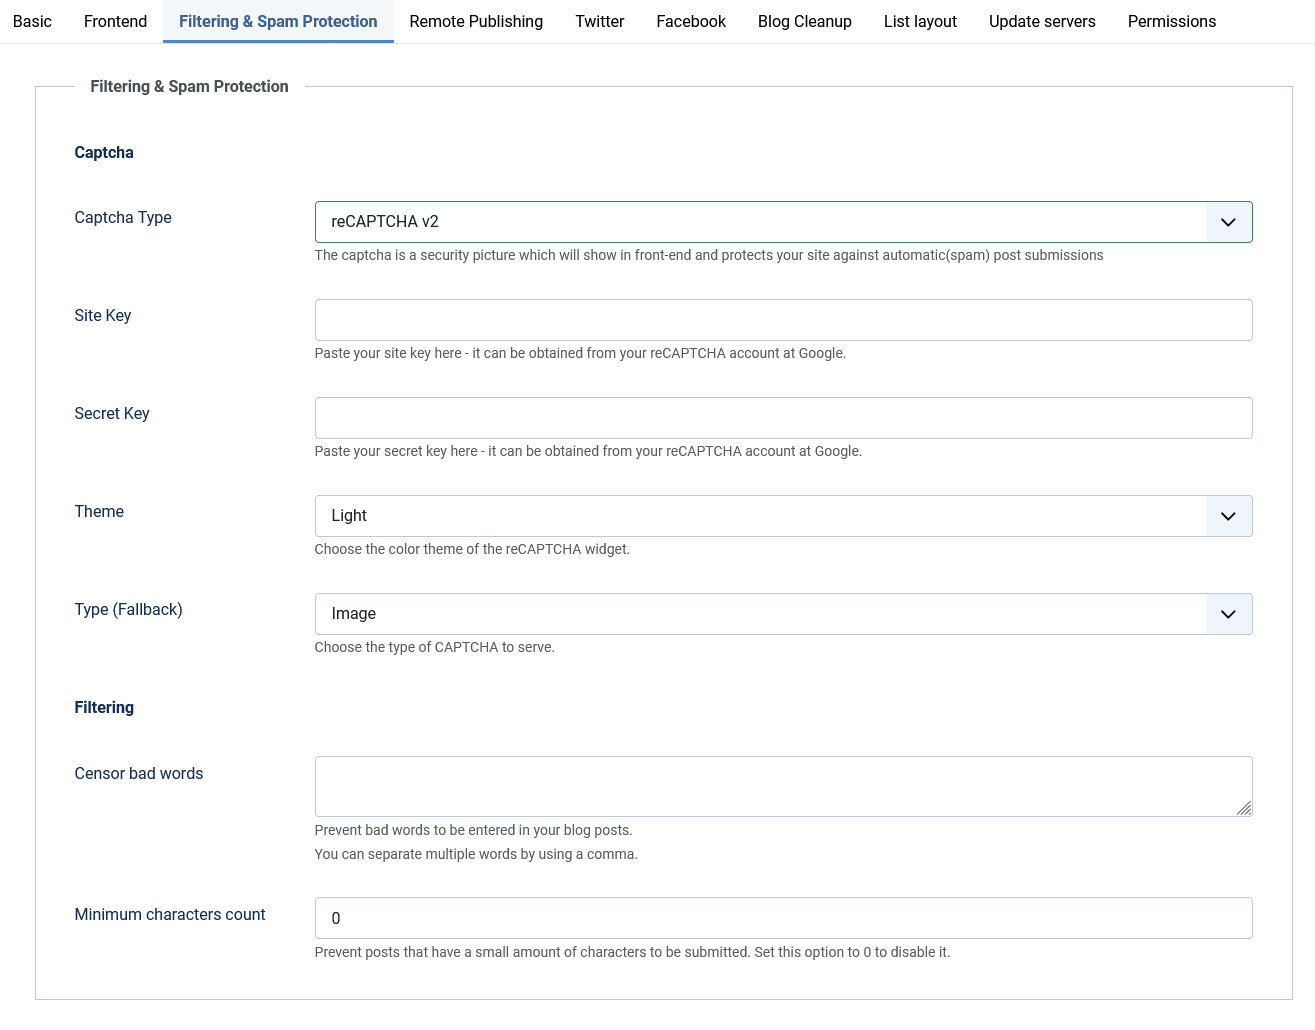
Filtering and Spam Protection
Captcha
- Captcha Type - choose the captha type that will be used;
Built-in Captcha
- Characters - the number of characters that will be generated in captcha image;
- Draw lines - for added security you can choose to generate random lines in your image;
- Case Sensitive - choose if the input of the captcha field will be case sensitive or not.
Filtering
- Censor bad words - Prevent bad words to be entered in your blog posts. Multiple words can be separated by commas
- Minimum characters count - Prevents posts that have a small amount of characters to be submitted. This option can be disabled by using the value: "0"
reCAPTCHA
- reCAPTCHA Public Key - the public key retrieved from the reCAPTCHA site;
- reCAPTCHA Private Key - the private key retrieved from the reCAPTCHA site;
- reCAPTCHA Theme - choose the theme that best integrates with your template.
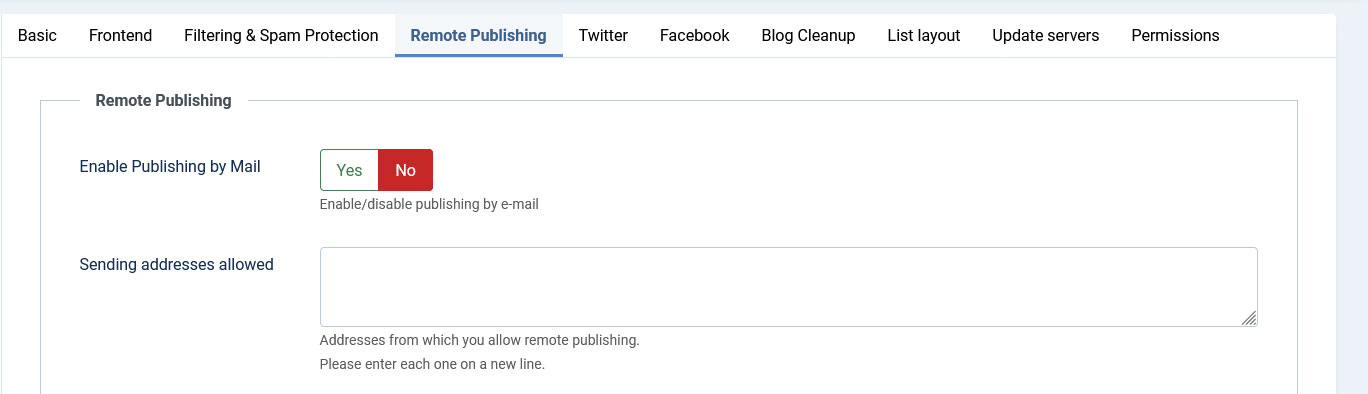
Remote Publishing
Sharing your new posts on Facebook and Twitter has never been easier, starting with Version 1.12.18 you can use the social interactions feature for remotely created post as well.
This feature allows you to create and publish blog posts, simply by sending an email to a designated email address.
- Enable Publishing by Mail - Yes/No
- Sending addresses allowed - the addresses from which you allow remote publishing (please add each address on a new line);
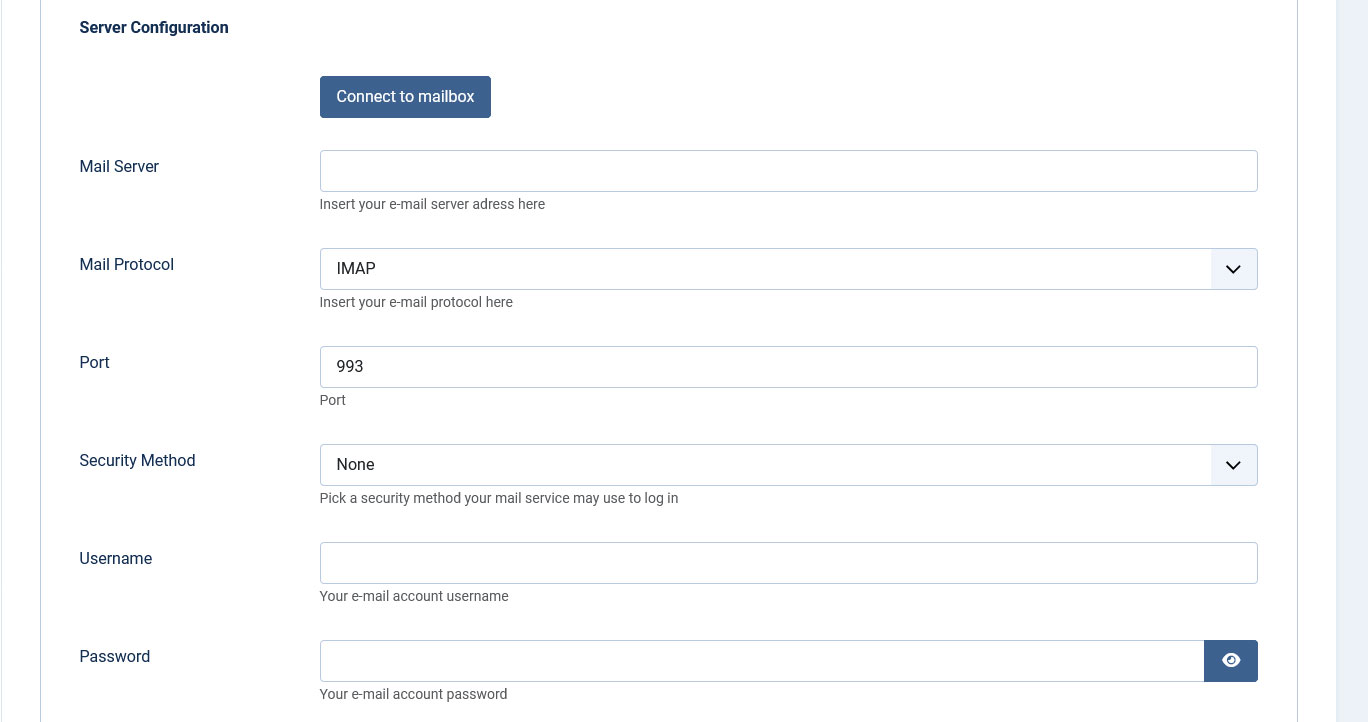
Server Configuration
- Connect to mailbox - clicking this button will test your current settings;
- Mail Server - the email server's address;
- Mail Protocol - what email protocol should be used: POP3/IMAP;
- Port - depending on the protocol and server side settings you have to specify the port number that should be used for the connection;
- Security Method - you can choose the security method your server will use;
- Self-signed Certificates - Yes/No
- Username - the username for the specified email account;
- Password - the password for the specified email account;
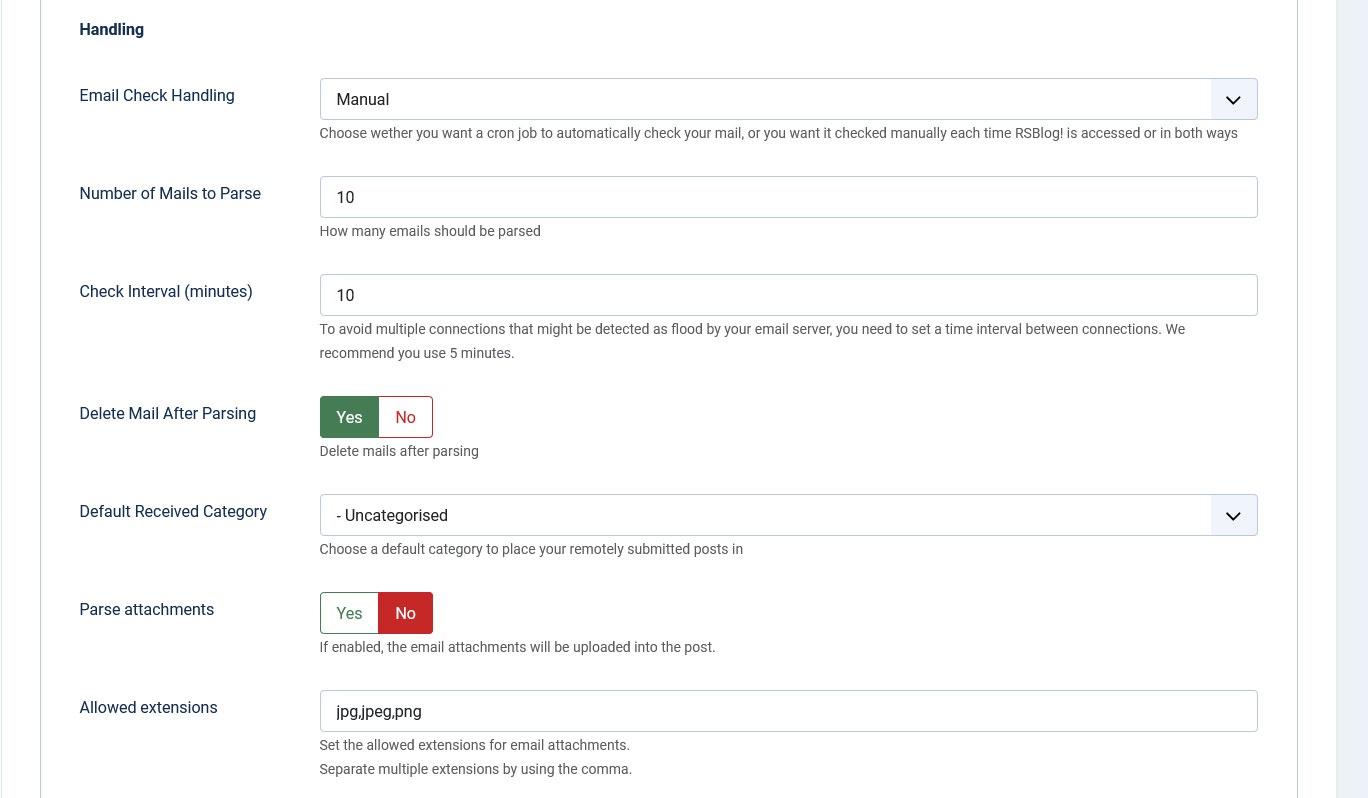
Handling
- Email Check Handling - this option allows you to choose when the cron job will be triggered: manual(when RSBlog! is accessed), automatic or both;
- Number of Mails to Parse - the number of emails that will be parsed;
- Check Interval (minutes) - To avoid multiple connections that might be detected as flood by your email server, you need to set a time interval between connections. We recommend you use 5 minutes;
- Delete Mail After Parsing Yes/No
- Default Received Category - choose the default category your remotely submitted posts will be place in.
- Parse attachments - if enabled, the email attachments will be uploaded into the post.
- Allowed extensions - set the allowed extensions for the email attachments. Separate multiple extensions by using comma.
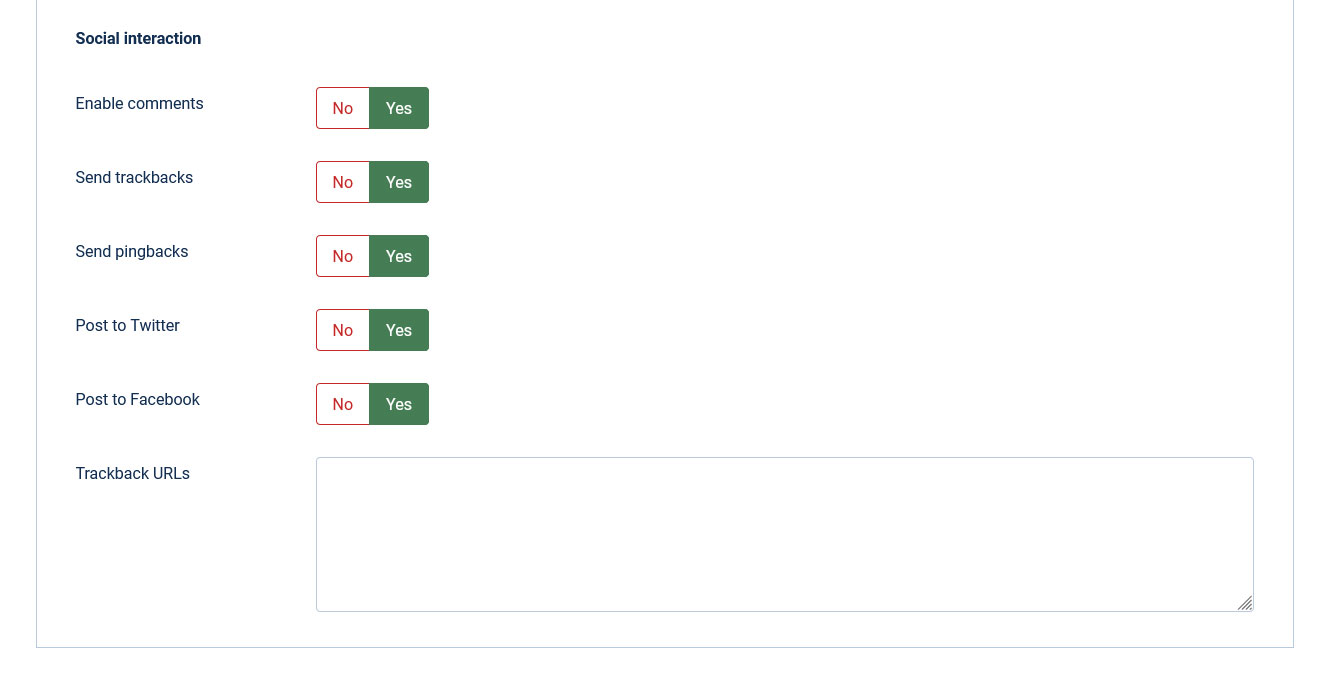
Social interaction
- Enable comments: Yes / No. Set this to Yes if you want to allow users to comment on your post.
- Send trackbacks: Yes / No.Enable this in order to notify other blogs that you have linked to their blog.
- Send pingbacks: Yes / No.Similar to the above, enable this as well to let other blogs know that you have linked to their blog.
- Post to Twitter: Yes / No. Set this to Yes to post the article to Twitter. In order for this to work you will have to properly configure your twitter settings in the Configuration tab.
- Post to Facebook: Yes / No. Enable this option if you want to post the article to Facebook. In order for this to work you will have to properly configure your twitter settings in the Configuration tab.
- Trackback URLs: Send trackbacks to one or more URLs (add each trackback on a separate row)
Categories and tags can also be assigned to a blog post that is created via the remote publishing feature. Just use the following syntax within the email subject area:
Categories: {category:category1, category2} {tags:tag1,tag2}
Tags: {tags:tag1, tag2}
Email subject example:
This is my remote post{category:category name}{tags:personal,business}
Starting with version 1.13.0 you can specify a cover picture for your blog post via email as well as adding attachments on your blog posts. In order to set a cover picture via email you can either (remember to actually attach the file(s) in question to your email):
- the actual picture file name has to contain [cover]. If your file is named catPicture.jpg and you want to use this as a cover, rename it to [cover]catPicture.jpg instead.
- or without renaming your file, you'll have to specify this within the email body using a similar syntax (whereas catPicture.jpg is the exact file name/extension of your picture): [cover:catPicture.jpg]
Your email can have multiple attachments, besides the cover picture, other attachments will be simply parsed and added as blog post attachments.
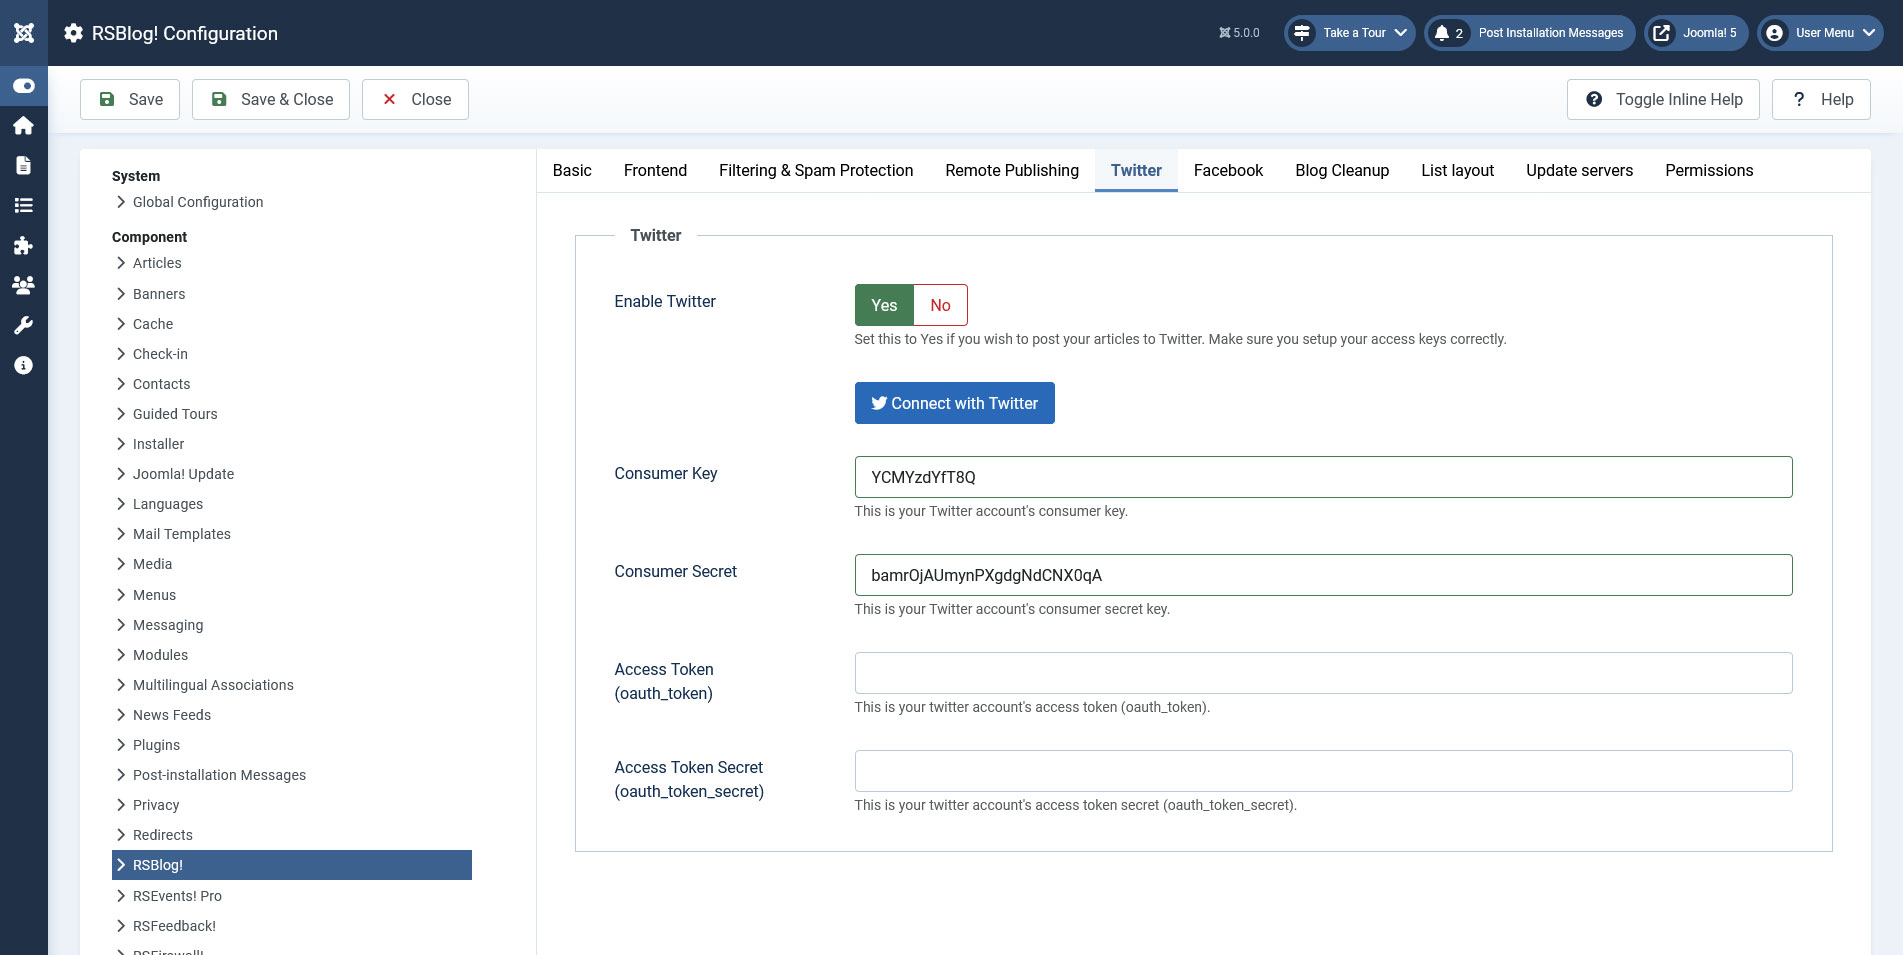
- Enable Twitter - Set this to Yes if you wish to post your articles to Twitter;
- Sign in with Twitter - Clicking this button will authorize RSBlog! on your twitter account (done after configuring the following details);
- Consumer Key - This is your Twitter account's consumer key.
- Consumer Secret - This is your Twitter account's consumer secret key.
- Access Token - This is your Twitter account's access token (oauth_token).
- Access Token Secret - This is your Twitter account's access token secret (oauth_token_secret).
- You can get all these keys from your Twitter app (if you don't have one, you'll need to create a Twitter app; for more details refer to Twitter's online documentation).
- Within your Twitter application details, you'll need to specify the Callback URL as follows:
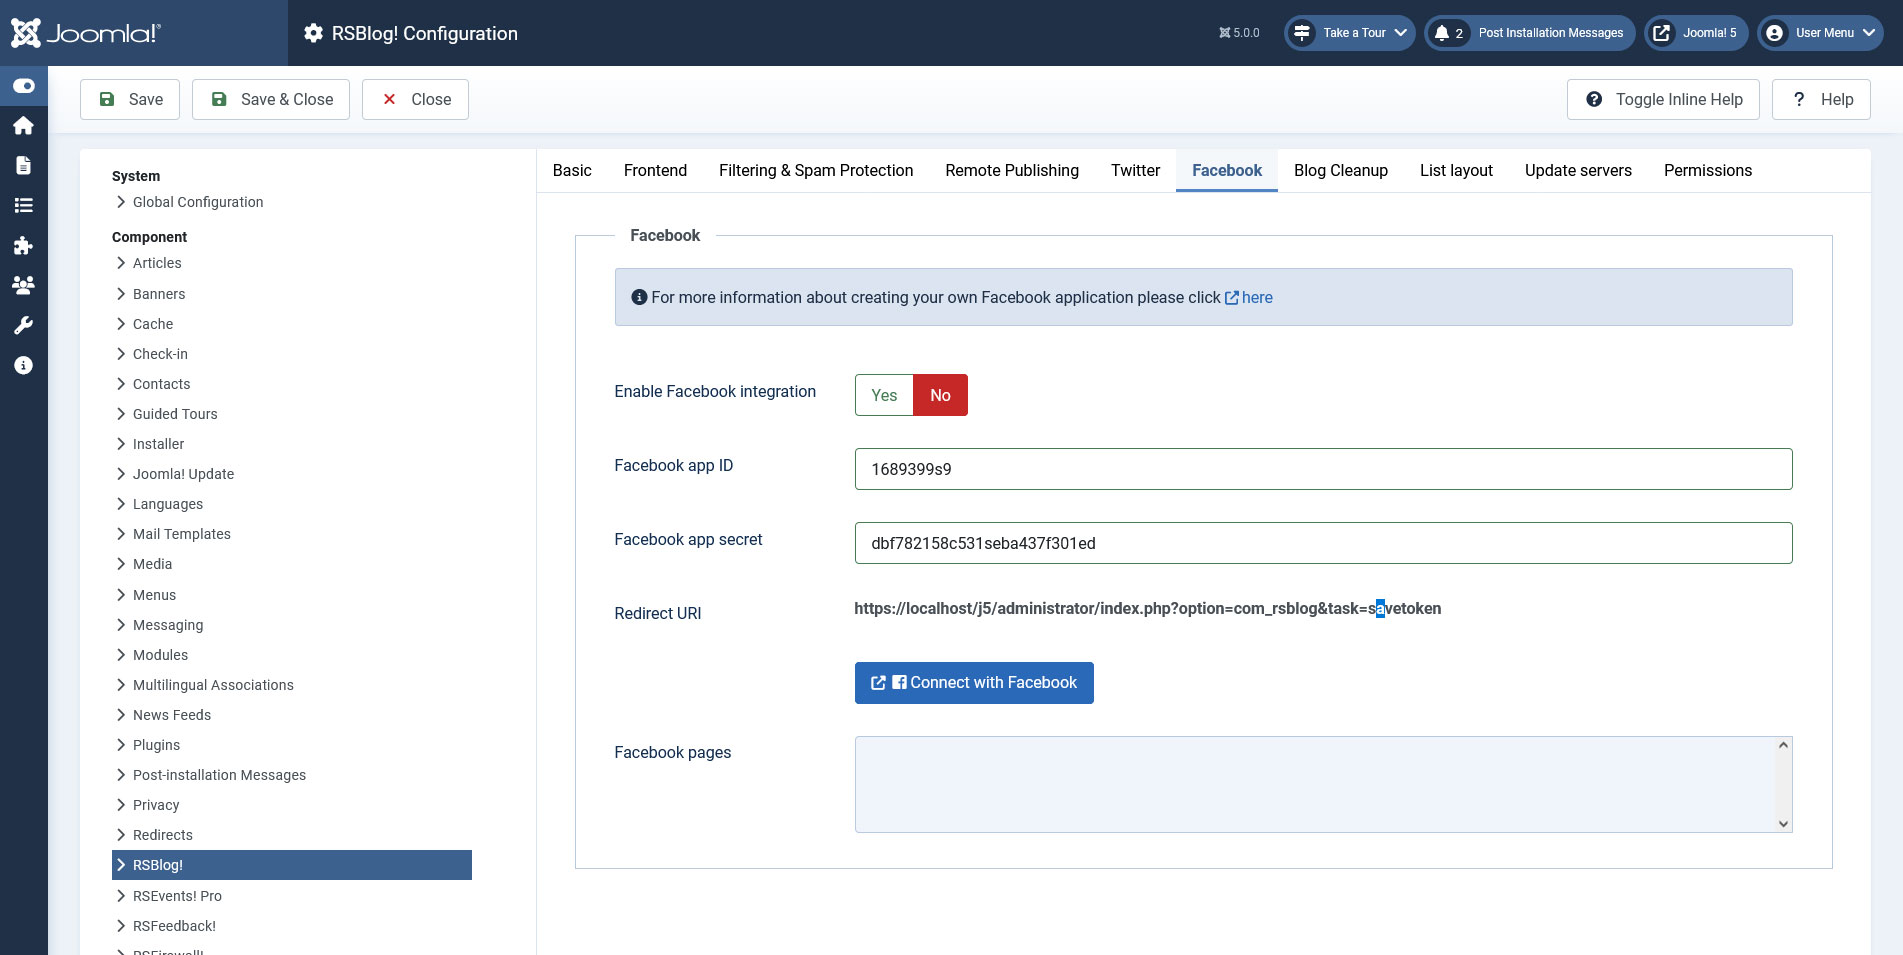
- Enable Facebook integration: - Set this to Yes if you wish to post your articles to your Facebook pages.
- Facebook app ID: - details are provided here.
- Facebook app secret: - details are provided here.
- Connect with Facebook - Clicking this button will authorize RSBlog! on your Facebook account.
- Facebook Pages - you'll be able to select the Facebook pages where you want to post after you've configured your Facebook integration.
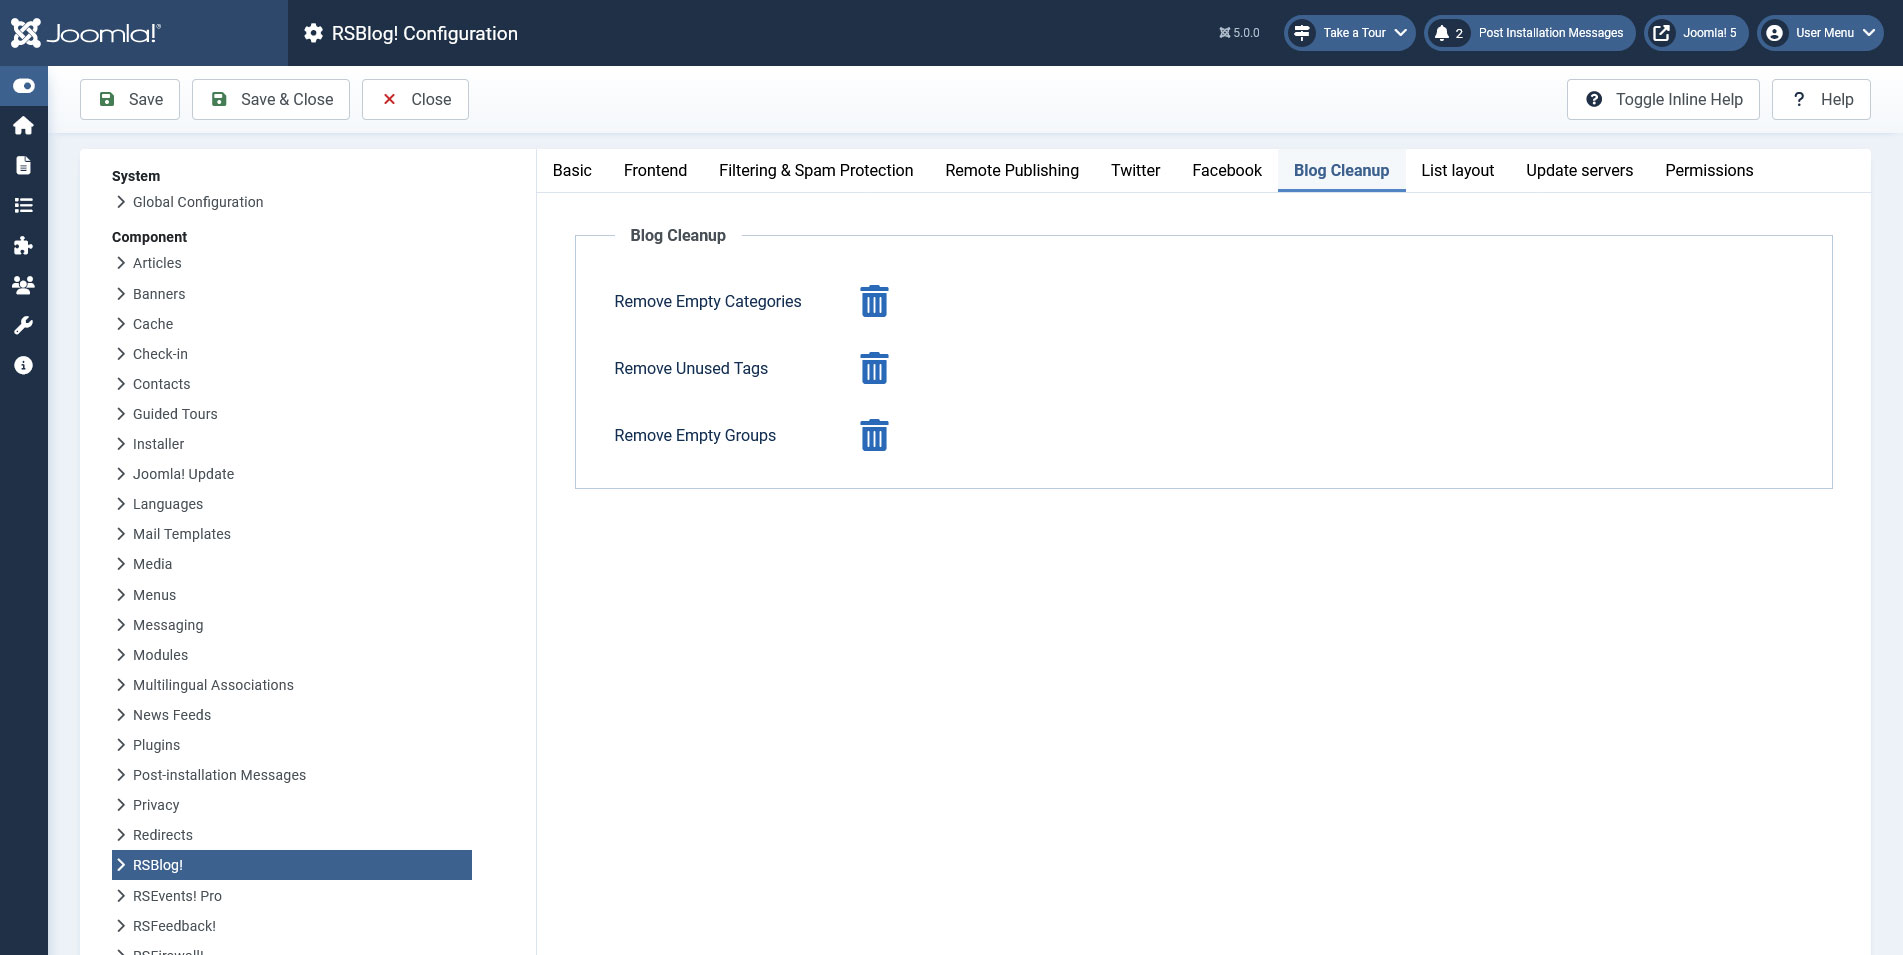
Blog Cleanup
Cleanup Tasks
- Remove Empty Categories - clicking this button will remove all categories with no posts which are not parent categories for categories with posts;
- Remove Unused Tags - clicking this button will remove all tags that are not used in any posts;
- Remove Empty Groups -clicking this button will remove all groups that have no members.
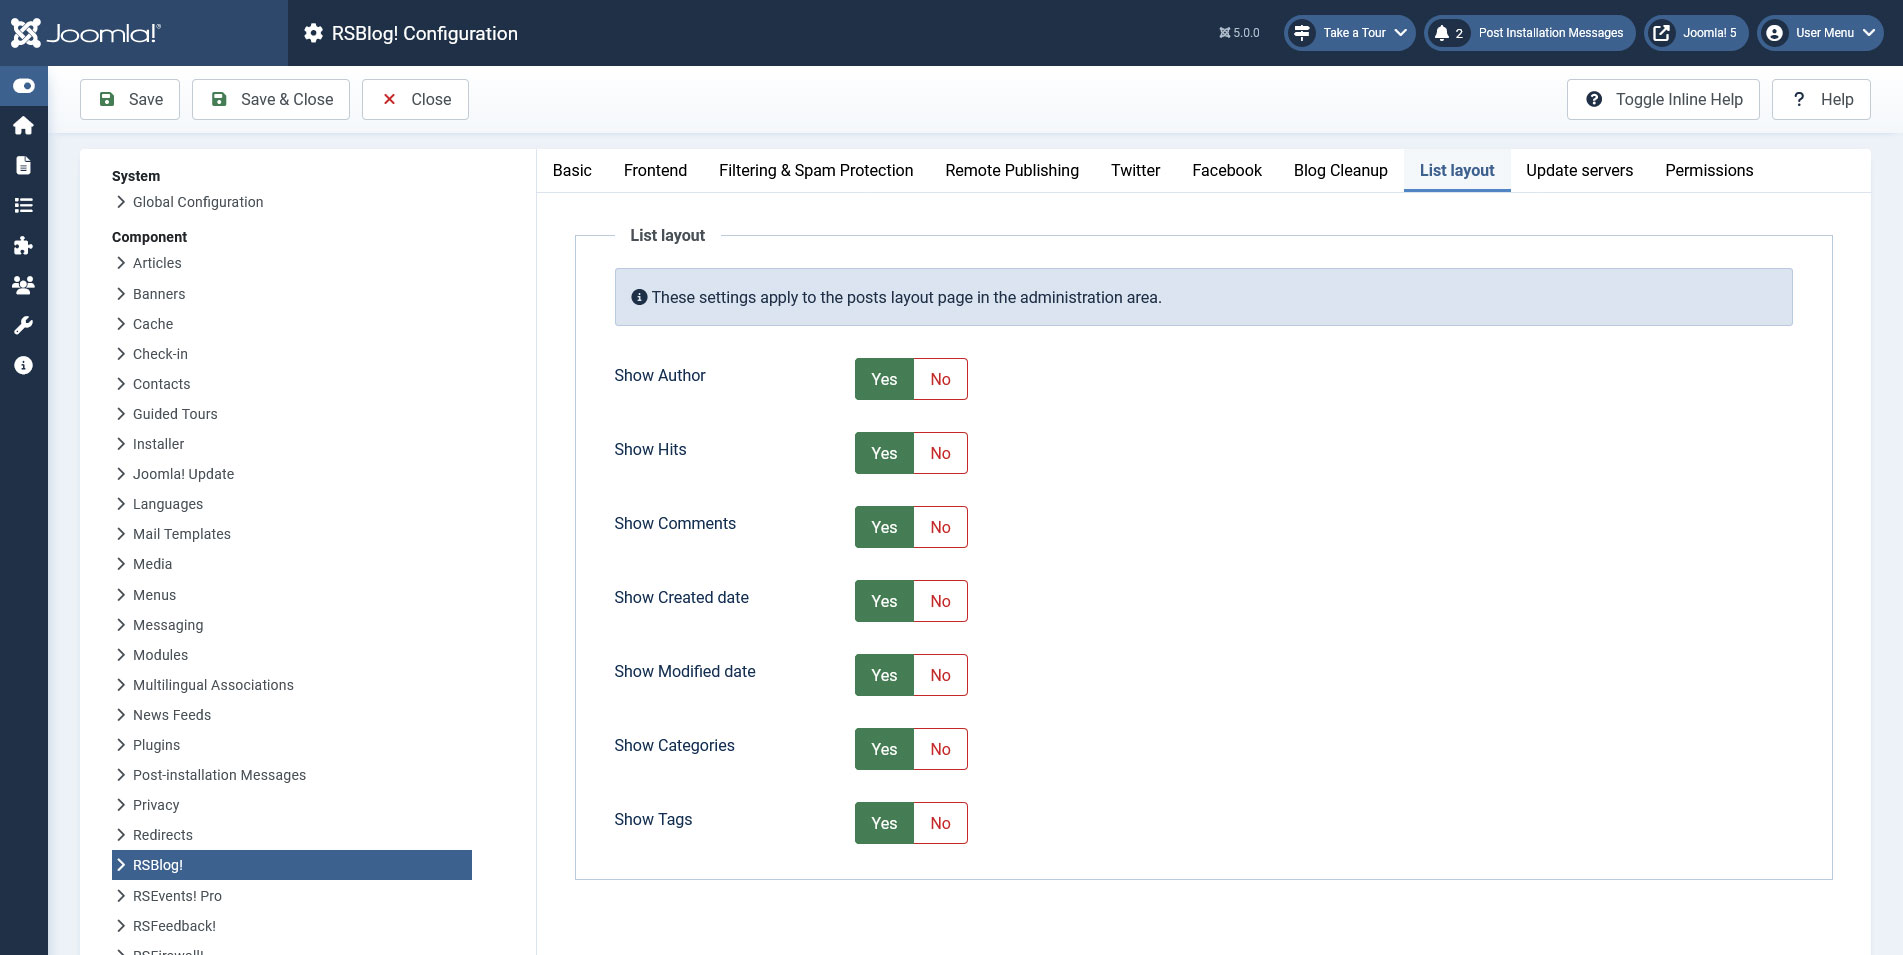
List Layout
List Layout Settings
This section will allow you to select which columns you wish to display into the main, back-end Posts area, thus you can select "yes" or "no" to the following columns: Author, Hits, Comments, Created date, Modified date, Categories, Tags.
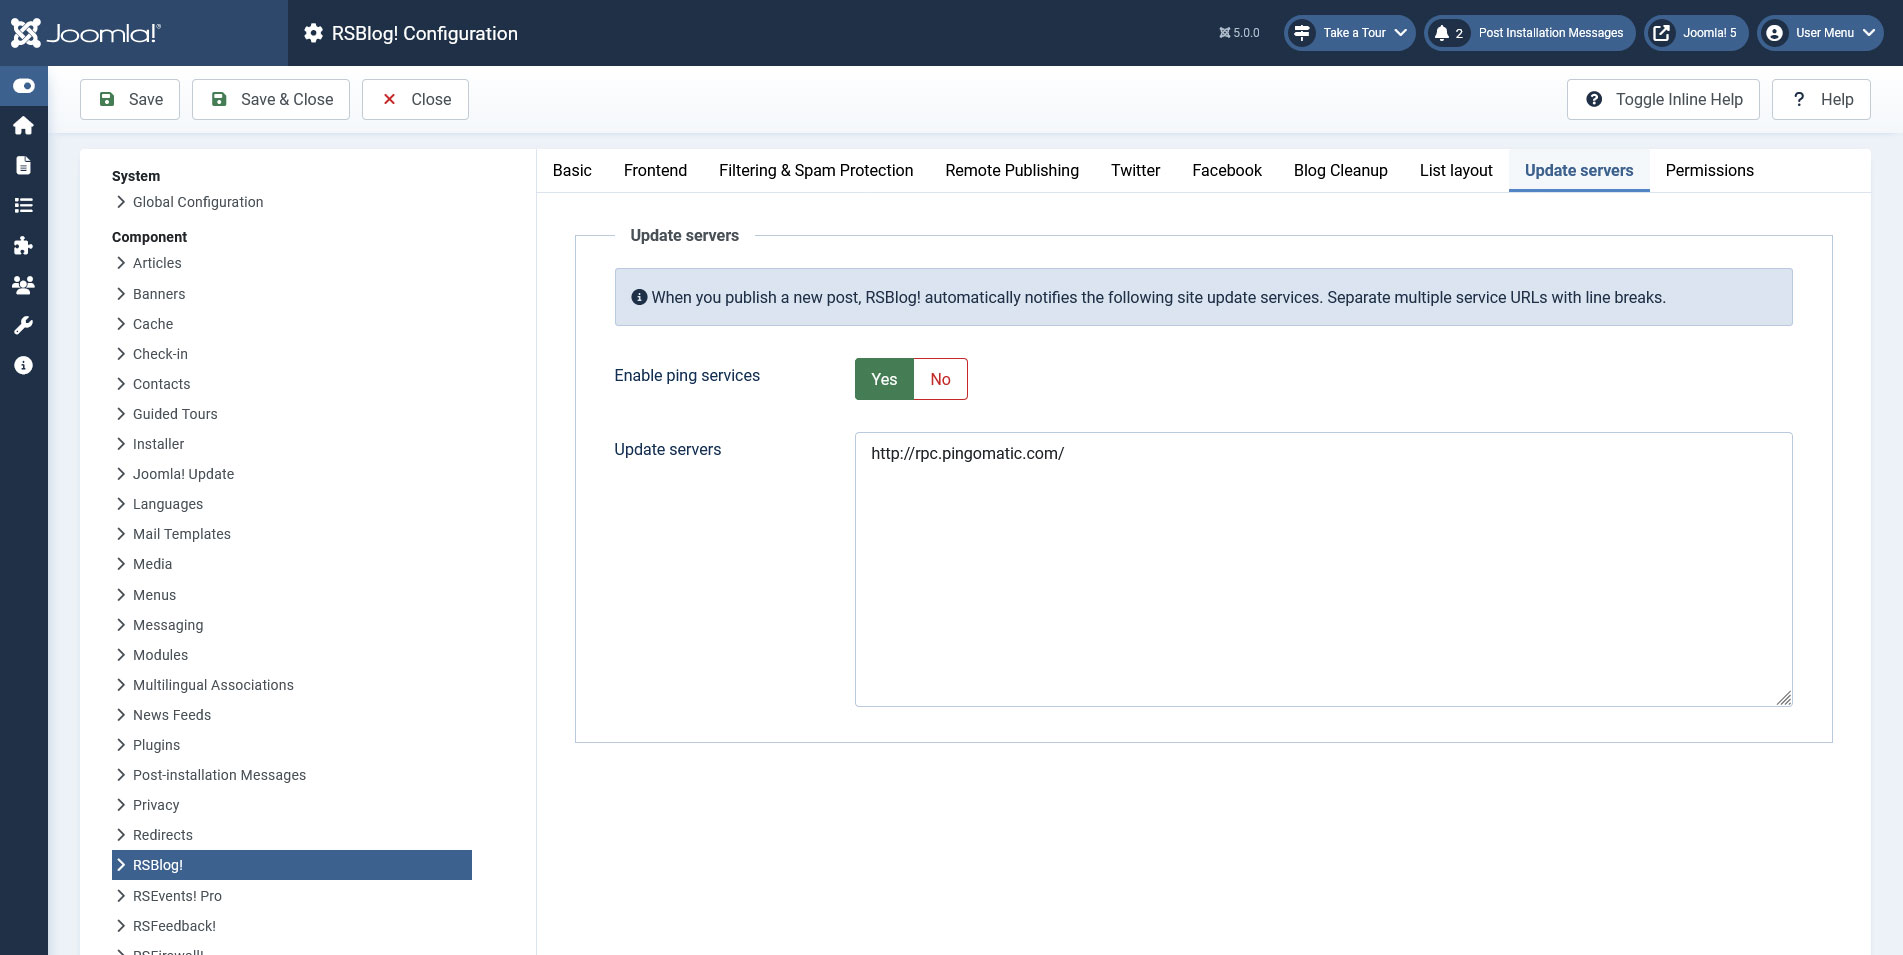
Update servers
- Enable ping services - Yes/No; enable this option if you want to ping update services after the creation of a new blog post;
- Update servers - You can insert in this text-area which sites to be notified when a new post is published
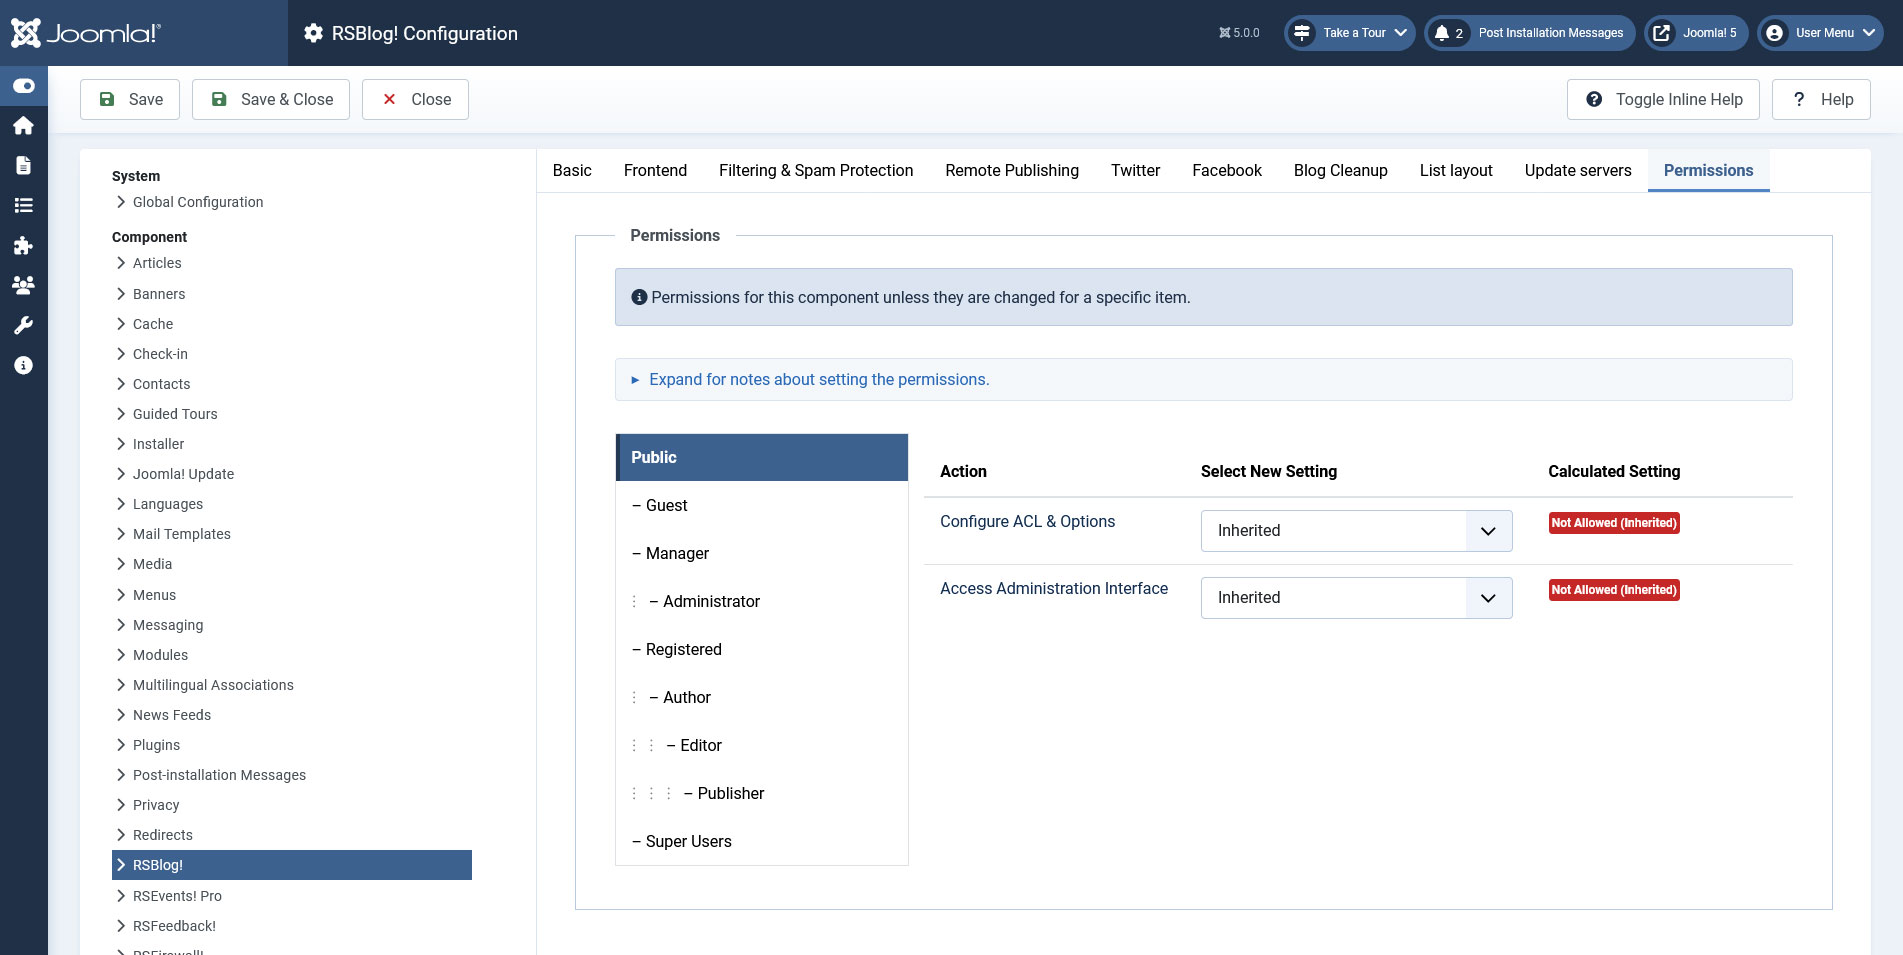
Permissions
Default Joomla! ACL user group permissions used for this component.
6 persons found this article helpful.
You Should Also Read
What does RSBlog! do? |
Dashboard |